


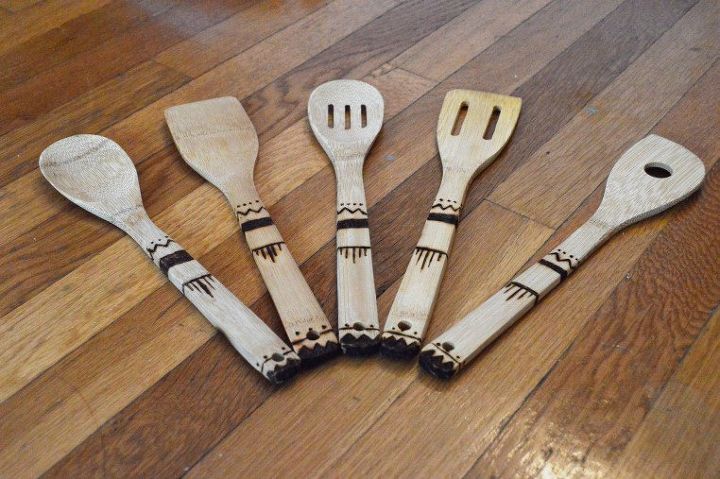
DIY Wood Burned Kitchen Utensils

Wood burning is a great way to change up any wood objects you may have. It’s very easy, but requires some patience and concentration!


Once it is hot, begin tracing over your design.
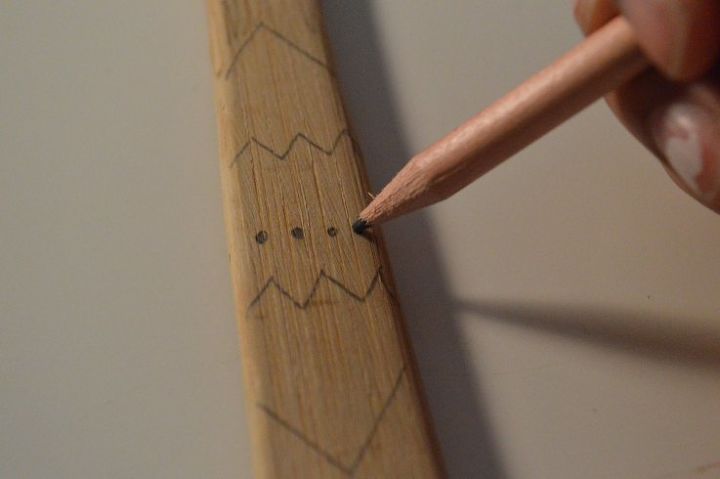
Draw your design. I started off on paper and then traced it onto the actual spoon. Don’t forget the back!

The wood burning tool should come with a variety of heads. Look at your design and see which head allows you to do the majority or all of the designs. If you need more than one head for your design, make sure the tool cool off COMPLETELY before changing the head. Screw on the head you chose and then plug in your tool for heating.
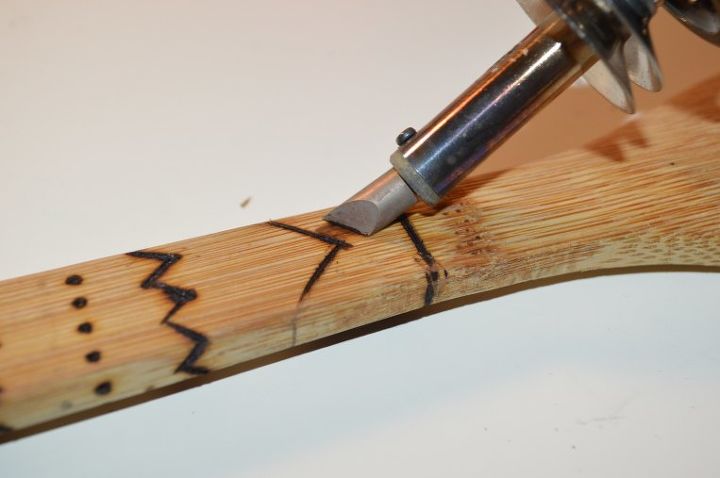
Be patient! It takes a bit of time for the wood to burn. Also, use very light pressure, if at all. Often times if you press hard, you will create an indent. If you continue to move while stuck in the indent, the tool can slip and you could get burned. Small pieces of wood ash get stuck to the tip of the tool sometimes, to fix this, let the tool sit for a minute or 2. Then blow off the ash. If you are covering a large area, go slow and don’t use pressure. Use a flat head for this and be patient! It can be a bit time consuming.
Original source: https://nitasablog.wordpress.com/2015/07/10/wood-burned-kitchen-utensils/
Comments
Join the conversation
-
Pretty clever U R ...Will have to ck into pricing and where to find one.
-
Really like this idea, thanks.


Frequently asked questions
Have a question about this project?