


Give New Life To An Old TV Armoire (By Converting It To A Desk)
Like many people, I have traded in my big box TV for a flat screen...and was left with a TV Armoire that I no longer needed, but didn't want to get rid of. After moving it from room to room, it finally ended up in my den/library (really a bedroom that I use as a den and like to call a library). And then I finally had a brain wave...I needed a desk to contain all of my office supplies, and the armoire would be perfect for that!
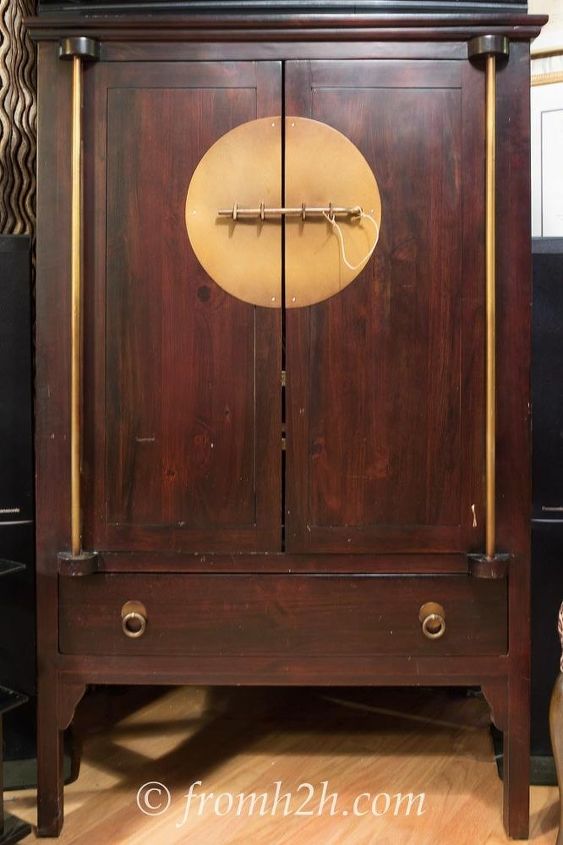
This is the outside of my armoire. I still liked the design and the gold colored trim matches the gold accents in the den.
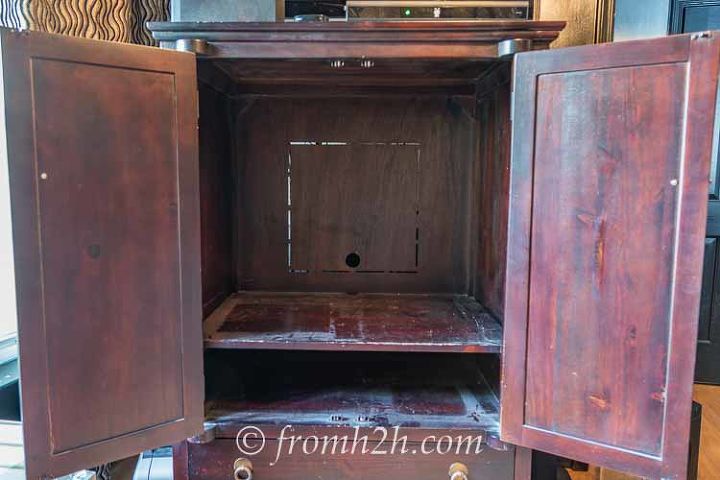
The inside needed some help. It was dark, not very pretty to look at, and didn't have enough storage for my printer, laptop, phone/iPad/iPod/kindle chargers, papers, pens, pencils, staplers and all of the other home office stuff that I use.
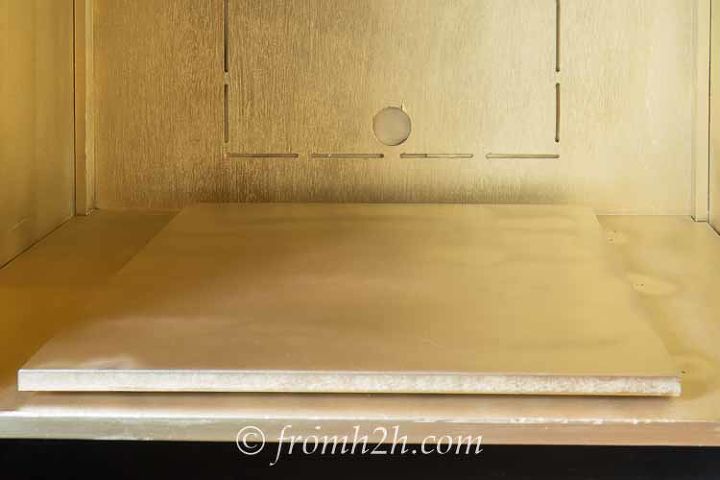
First step was to spray paint the inside gold. It matches the trim and the reflection adds extra light.

Next, I spruced up an old letter holder/bulletin board that I had hanging around by spray painting it black and stapling leopard print fabric over the bulletin board. I also installed lights inside the armoire (they are battery operated so no cords, and stick to the top with double sided tape...easiest electrical installation ever!)
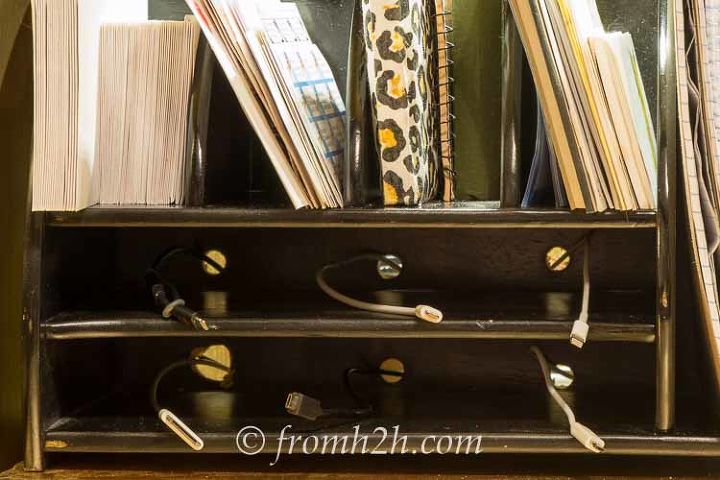
I made a "charging station" out of an old paper holder by drilling holes in the back of it. The cords for the phone/iPad/kindle/iPod chargers fit right through the holes, and the mess of cords is hidden behind it.
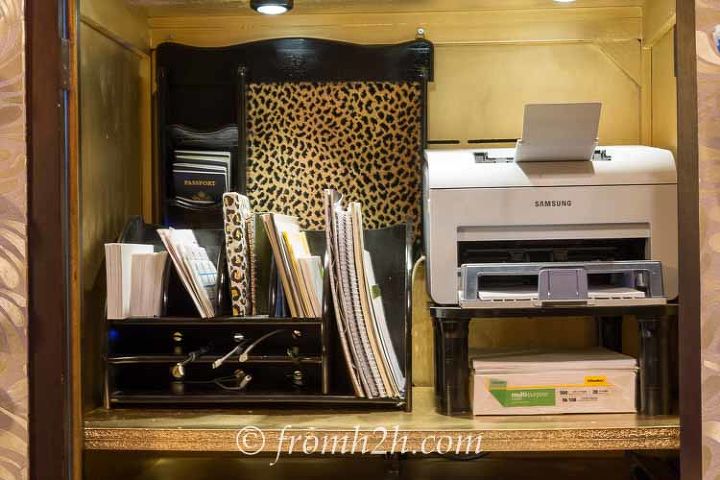
Here's what the inside looks like when fully stocked.
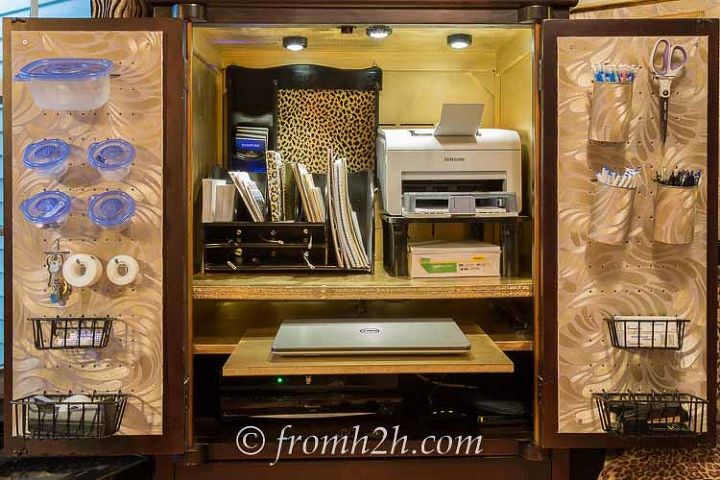
The last step was to add wallpapered pegboard to the insides of the armoire doors. This is where all of my pens, pencils, staplers and other office supplies get stored. (if you want to know more about how I made the pegboards you can go to my post: http://www.fromh2h.com/how-to-decorate-pegboard)
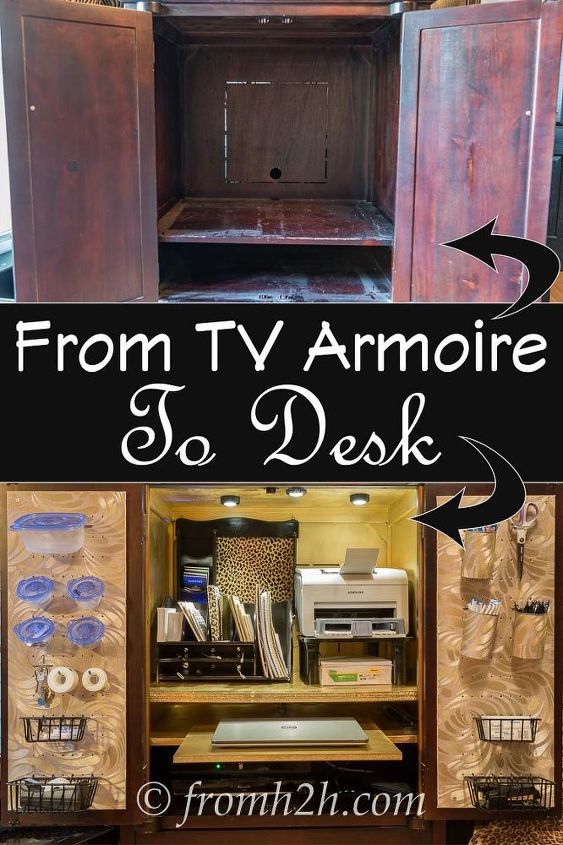
And that's how I ended up with a fully-functional office instead of a no-longer-needed TV Armoire! For all of the details on the conversion process, click the link below.

Want more details about this and other DIY projects? Check out my blog post!
Comments
Join the conversation
4 comments
-
This is rcactly what Im looking for right now. I had it pictured in that configuration, too. Thanks for sharing. Now I know what I need to do.
-
How smart!


Frequently asked questions
Have a question about this project?