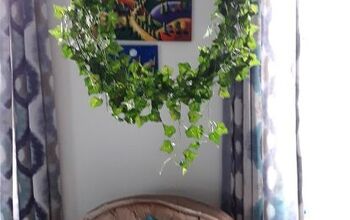
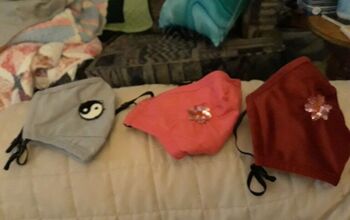
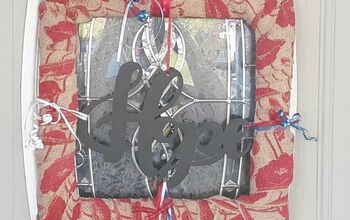
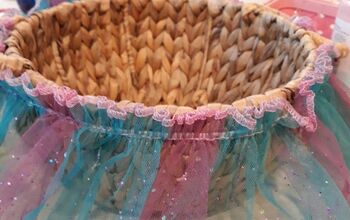
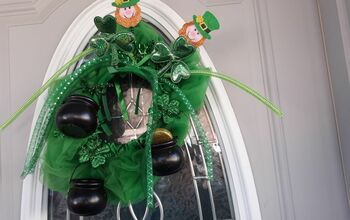
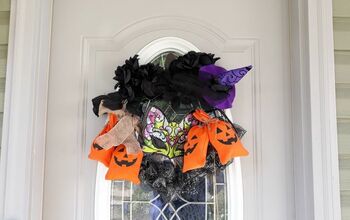
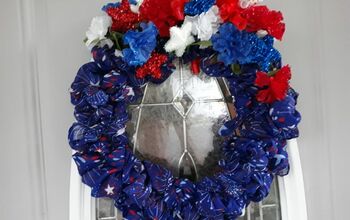
« View Post
Photos

Oops! Leave without saving?

If you leave this page, the information you have entered will not be saved!
Are you sure you want to leave this page?

Leave this page Stay on this page

Hometalk.com

  • Sign Up
  • or
  • Log In
  • Professionals
  • Community
    • All Members
    • Professionals
    • Bloggers
  • About
    • About Hometalk
    • Blog
    • FAQ
    • Guidelines
    • Resources
    • Support
    • Press
    • Contact
    • Terms of Use
    • Privacy Policy
  • Following
  • All Topics
    • Cleaning & Organization
    • Crafts
    • Design & Décor
    • DIY Projects
    • Gardening
    • Home Maintenance & Repairs
    • Outdoor Living
    • Painting
    • Remodeling
    • Repurposing & Upcycling
    See More Topics »
  • Questions
    • All Questions
    • Open Questions
    • Unanswered Questions
  • Clips
Post & Ask
Join Now Log In

Hometalk is where people share and help with everything home & garden

Cynthia H

Pittston, PA
2 Followers 8Likes
  • Overview
  • Posts1
  • Q&A1
  • Comments4
  • Boards1
  • Clips57
  • Likes146
  • Following8
  • Send a Message

My Recent Boards

  • Cynthia H's board

Featured Photos


Recent Activity


  • Our new vanity. 4
  • Front view. 1
  • Close up of the finish.
  • Newly painted hardware completed the look. 4
  • See 1 more photo

Repurposing our dining room buffet into a bathroom vanity

Earlier this year we remodeled our master bath. We turned our "old" unused dining room buffet into our "new" vanity. It got a distressed paint job, repainted hardware, reconfigured ...»
drawers, and a vessel sink for the transition. We love repurposing furniture and are very happy with the way it turned out. For complete details about the project, visit my blog post at http://postcardsfromtheridge-angela.blogspot... #recycle #repurpose #upcycled furniture

Postcards From the Ridge
Postcards From the Ridge Oak Ridge, TN
35 Comments | Post Comment | 12437 Views
  • Cynthia H
    Clipped 5 days ago to Cynthia H's board
  • Share 3.4K
  • Like 124
  • Clip 128
Clipped to:
  • repurposing ideas
  • Vintage Reuse
  • Ants lying in Windex. 3
Liked a photo from:

ANTS? Easy, Safe Solution!

Jeanette S
Jeanette S Atlanta, GA
3 Comments | Comment on this photo
  • Cynthia H
    Liked 5 days ago
  • Share 45
  • Like 48
  • Clip 12
Clipped to:
  • Home Repairs
  • garden & yard
  • 5
  • I started by removing the covers and washing them.
  • I labeled the "fluff" taken from the back cushions so I wouldn't get confused when it was time to re-stuff.
  • I used this quilt batting ($9.99 at Walmart) to beef up the cushions.
  • I simply trimmed the batting and wrapped it around the bottom cushions to boost their fluff-ability. Yep. That's the technical term. ;)
  • I put the covers back on the new beefed-up cushions and now my couch looks as good as new.
  • Like new again ... 1
  • Like new again ...
  • Now if I can just keep this guy off the couch. 4
  • See 6 more photos

How to Make an Old Couch New Again for $10

I may have mentioned a few - or a million - times how much I love my living room couch. Well, after two years of lovin', my beloved couch was starting to show some wear. The notorious ...»
mystery spots were starting to appear and some wrinkles and sags were forming in the cushions. Time to start Mission: Couch Rejuvenation ...

Living Rich on Less - Susan
Living Rich on Less - Sus... Huntingdon, PA
49 Comments | Post Comment | 22961 Views
  • Cynthia H
    Clipped 7 days ago to Cynthia H's board
  • Share 1K
  • Like 117
  • Clip 85
Clipped to:
  • All About Furniture
  • Home Decor
  • Before:  you can actually see how greasy and dirty the cabinets had become 1
  • After:  white and clean

How to easily remove grease build-up from your cabinets

This is just a simple little story about how I finally got all the grease off the cabinets above my stove. ...»

I have had a dirty little secret!Everyone always tells me how clean my house is. It's not really. Not since I've had kids. You've seen those cute little signs, Excuse the mess, we are busy making memories or Excuse the mess, we live here? Well that's not really my style. In fact, my house is nothing like the clean it used to be before the kids. I've grown more accustomed to the mess, but so many little things tend to get over looked these days. Many people have exciting goals like running a marathon or skydiving (and I may have just become the biggest loser because I just googled Common goals people have, because I couldn't come up with 2 good ideas), you know what I've always wanted? To put my house on the market and have the ad say, "Mrs. Clean lives here". I'm not kidding, I actually told my realtor I wanted that on my add. She said, your house will sell itself. OK, she was right, but I really wanted that at the time. One thing I've been over-looking lately is my kitchen cabinets. I'm home cleaning today and thought, maybe today's the day to get that grease off the cabinets. Now keep in mind, these are just the cabinets over the stove, and grease is always building up on these cabinets. I wipe down my cabinets frequently, since they are white and show any dirt, but I do tend to "overlook" these top cabinets because I never could seem to get the grime off with much success. I have those god-awful therma-foil and for lack of a better term the surface is "pockey". That means there is a little texture that allows dirt and grease to accumulate. The picture shows best how greasy these cabinets were. I've tried many products before, but today I decided to go for some simple soft scrub and a warm dish rag. I love the lemon scent and use this for a lot of my cleaning. I poured it on my dishcloth and just rubbed it on the grease, and just like that, all of the grease and grime came off. I've tried many other cleaners and de-greasers and seriously never got such great results with barely any elbow grease at all. I might suggest if you are working over your head that you wear some protective eyewear, because trust me when I say, you don't want your break from cleaning to involve trying to get soap out of your eye! Just sayin. Check out the before and afters. It's really pretty amazing!

Easy
Diane Kaul
Diane Kaul Commerce Township, MI
65 Comments | Post Comment | 45217 Views
  • Cynthia H
    Clipped on May 10, 2013 to Cynthia H's board
  • Share 2.6K
  • Like 94
  • Clip 130
Clipped to:
  • Home Repairs
  • TERRIFIC TIPS !
  • I call it Wall Jewelry. 5
Clipped a photo from:

bathroom mosaic

Wendy Ann Chipman
Wendy Ann Chipman Osprey, FL
5 Comments | Comment on this photo
  • Cynthia H
    Clipped on May 09, 2013 to Cynthia H's board
  • Share 27
  • Like 26
  • Clip 8
Clipped to:
  • Decor Ideas
  • Cool Projects
  • Take your light and check it out closely as some are different. 1
  • By the bulb you should see some small screws
  • Remove the screws and SLOWLY pull the pieces apart. You will then see a normal, everyday, single AA battery. Yep, that is what gets charged by the sun during the day so that it glows at night! 2
  • Change the battery out with a new one and...Let there be light! 2
  • Now, if you have a different type of light, say like this one from WalMart, with the globe on top, it gets even easier to replace the battery.
  • Kathe With An E~DIY Fix Your Solar Lights
Simply pull the stake out and you will see this on the globe end.
  • One single screw. Leave the three screws by the bulb alone.
  • And there is your battery. Change it out, put the screw back in and you are done!
  • See 5 more photos

DIY Fix for Spring

Got solar lights that aren't working? Luckily, I know how to fix them right up! And, I am going to share my tip with you!Cuz, well, we're friends and all and that's what friends do, right?...

Kathe With An E (Kathe)
Kathe With An E (Kathe) Aurora, CO
117 Comments | Post Comment | 82900 Views
  • Cynthia H
    Clipped on May 01, 2013 to Cynthia H's board
  • Share 12K
  • Like 293
  • Clip 267
Clipped to:
  • OUTSIDE
  • Household Tricks
  • You can customize your pergola with curtains, lights, brick and more! 1
  • Hanging plants are a nice touch.
  • Start with strong posts for a strong pergola
  • This is the first pergola we ever built at our farm
  • Small details like this curved arch can make all the difference
  • Double beams and double notches make it strong and secure - here, we are getting ready to drill through the second bolt.
  • Our barn pergola - a lean to style pergola 2
  • A view from the upper pergola to the barn pergola
  • All of the pieces and parts cut out for a pergola
  • See 6 more photos

Pergola Season! Helpful Tips To Building Your Own

There is no mistaking it - we are in full-blown "pergola building season" at the farm. Ever since building our own and then a few more for friends and family a few years back - our ...»
"hobby" has grown to making quite a few each year ( See : Building Our Farm One Pergola At A Time)

We have been so fortunate to have met a lot of wonderful new people through the process - and, more importantly, it has really helped to build the farm and fund projects like the sensory garden and new chicken coop.

We thought we would share some of the pictures, tips and hints that we have learned when it comes to building a beautiful and durable outdoor garden pergola.

A Strong Base Is The Key To A Strong Pergola:With any outdoor structure, everything starts with the base. To put it simply, don't skimp on your posts.

When working with wood, a 4 x 6" or 6 x 6" post is your best choice for long-term durability. 4 x 4" posts - although much less expensive than the thicker ones, simply won't hold up over time. They will begin to bend and bow - and within a year or two - your structure can start to look more like a curvy art sculpture than an outdoor oasis.

Choosing The Type And Thickness Of Wood:There are a lot of choices when it comes to what species and thickness of wood to use. It really comes down to personal preference. We build all of our beams and top purlin boards from 2" thick lumber. Although there are thinner and less costly options - the 2" thickness gives the piece long-term strength and durability.

Almost all of our pergolas are made from treated lumber. It's a great choice when looking to handle harsh outdoor conditions. It's also very versatile - you can leave it to weather to a natural grey patina - or paint or stain it to match almost any wood species or decor.

Cedar is another viable option, but the cost of cedar is becoming astronomical, and it is very hard to find in 2" thickness. No matter the wood species, thinner boards tend to end up like the thinner posts, bowed and curvy over time.

Securing The Structure:A lot of people ask us if its better to bury the posts, or to mount them on a concrete pad or footer. It really comes down to personal preference, as both work well.If you have an existing concrete patio - then by all means securing your posts with a bracket is the way to go. You can find simple plate anchors (Simpson ties, etc.) at most home improvement and hardware stores that do an excellent job of securing posts to concrete.

If you choose to bury your posts - make sure to dig down deep enough to get below the frost line and prevent it from heaving out of the soil. For ours on the farm we buried our posts 24" and then back-filled with packing limestone gravel and dirt.

Quite simply, the important thing is to definitely secure it! If it's not secured, all it can take is one little serious windstorm to turn your beautiful little paradise into a pile of toothpicks.

Jim and MaryIf you would like to receive our DIY & Gardening Tips every Tuesday – be sure to sign up to follow the blog via email in the right hand column, "like" us on Facebook, or follow us on Twitter

Old World Garden Farms
Old World Garden Farms Newark, OH
16 Comments | Post Comment | 13301 Views
  • Cynthia H
    Clipped on Apr 21, 2013 to Cynthia H's board
  • Share 2.9K
  • Like 183
  • Clip 277
Clipped to:
  • Garden inspiration
  • Kim's Findings!
  • If you've got paint spills, Splatters, or Mistakes, this is all you need!
  • One of the marks on my floor where the roller actually fell off the handle! Ooops!
  • A little rubbing alcohol puddle, left on for about 30 seconds.
  • No more paint!
  • See 1 more photo

How to Remove Paint Spills, Splatters, and Mistakes Without Scraping!

I discovered this quick tip by accident and it's made a world of difference for me. If you're a messy, sloppy painter like I am, or even if you just make the occasional mistake, you can ...»
use my tip to clean all your paint "oopsies" even weeks after they've fully dried with no scraping needed. The secret is rubbing alcohol!

1 Minute 1 Easy
CreekLineHouse .
CreekLineHouse . Algonac, MI
38 Comments | Post Comment | 14478 Views
  • Cynthia H
    Clipped on Apr 19, 2013 to Cynthia H's board
  • Share 1.2K
  • Like 78
  • Clip 135
Clipped to:
  • Dont forget
  • Household Tricks
  • Old drawer...
  • A metal base welded by my resident "handy man" :)
  • And a little "puzzle" of yardsticks and bead board.
  • See 3 more photos

From Old Drawer to End Table...

A few old drawers, some yardsticks, left over bead board pieces and a husband who welds...all added up to a few fun "new" end tables with a "perfectly imperfect" look that suits my style :)
Chipping with Charm, Laurel
Chipping with Charm, Laur... Elk River, MN
10 Comments | Post Comment | 3447 Views
  • Cynthia H
    Clipped on Apr 16, 2013 to Cynthia H's board
  • Share 760
  • Like 38
  • Clip 48
Clipped to:
  • dresser divas
  • Repurposing FUN...
  • We purchased our corbels and Lowe's and installed them under the shelves to add a cottage look.
Clipped a photo from:

Craft Closet Makeover

Beneath My Heart
Beneath My Heart Wilmore, KY
Comment on this photo
  • Cynthia H
    Clipped on Apr 14, 2013 to Cynthia H's board
  • Share 1
  • Like 1
  • Clip 2
Clipped to:
  • Craft Rooms
  • Decor Ideas
Loading
Back
to top
Feedback