


Updating a Crappy 1970's Ornate Dresser-lots of Tips and How To's!
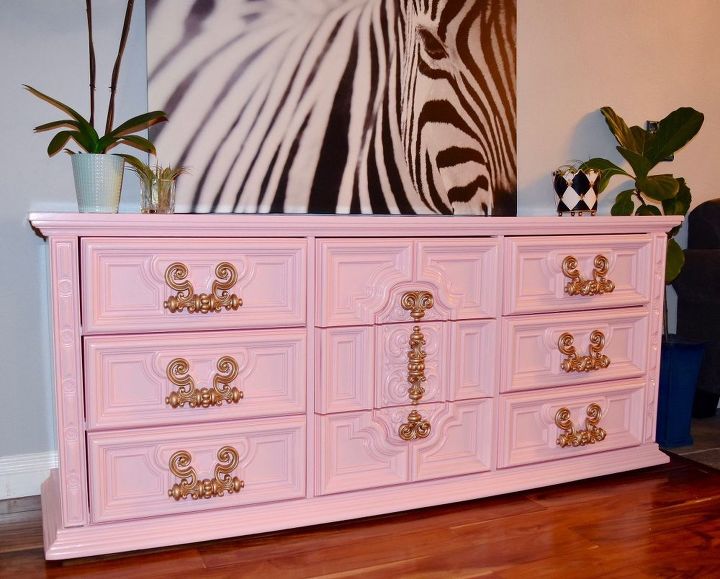
I love to transform vintage dressers. I've done, oh, maybe a hundred or so! All kinds, from antiques to the 1980's. I"ve found that these ornate dressers from the 70's are quite popular when done in crisp, glossy beautiful shades. I decided to do this one in a 'ballet pink'.
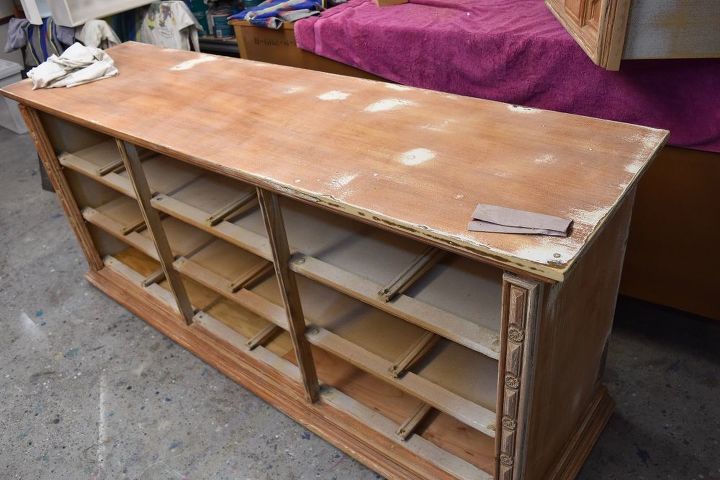
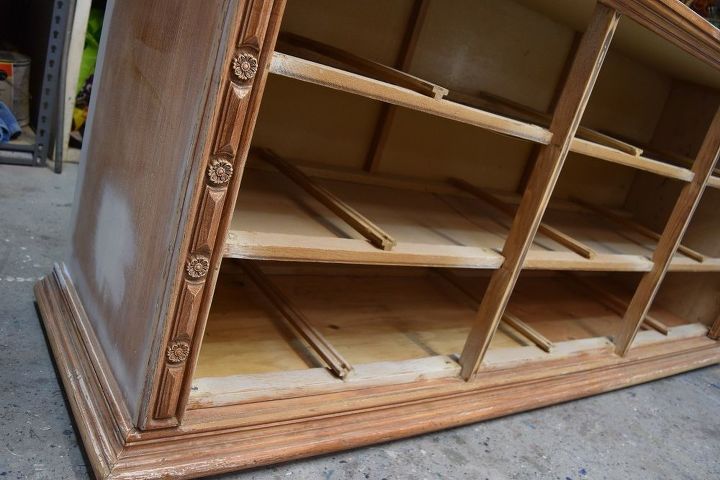
Some of these were made from plastic, resin and mdf (as is this one). It's imperative that you properly prep/prime these pieces before you even thing about painting them. Why? because the paint will just peel right off if you don't. When prepping the tops and sides of these (this one was a laminate veneer over an mdf base) use care when sanding. If you sand through the veneer, you will hit the mdf base which leaves a very rough surface that you can't smooth out. The point is to just rough up the surface so the primer has something to bond with.

This one the most awful stain/finish on it that I've ever seen. I don't know if it came like this originally or someone tried to give it a facelift. Regardless, it had to come off! This coating is some type of laminate. Very glossy. Paint will not properly adhere. And if you think you can just put a coat of primer on it and call it a day, you're mistaken.
added a bottom panel for extra support
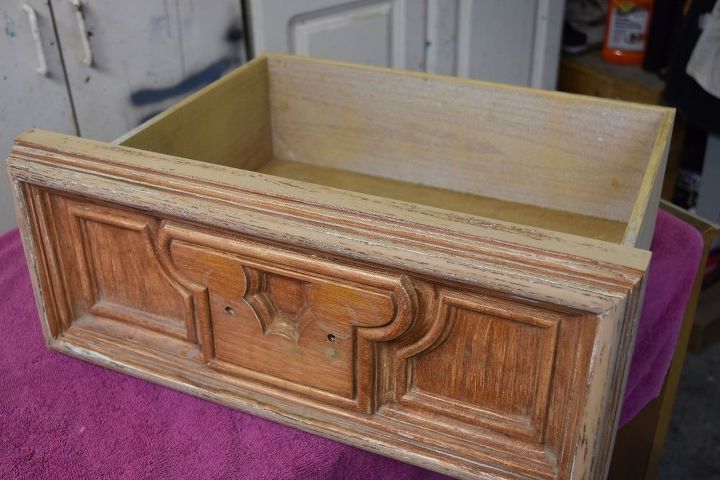
Look closely in these two pics and you can see how the brown finish is flaking in spots. All of that had to come off. I could take a scraper and get large flakes on my tool. I ended up hand sanding all nine drawers down to the bare finish. It took me FOREVER! Seriously, like 8-10 hours to sand, prime and sand again.
My poor fingertips were raw from using the sandpaper on these things. Gotta love all of those grooves and carvings! Once it was sanded, I used an old paintbrush to clean away all of residue and wiped clean with a TSP cleaner.
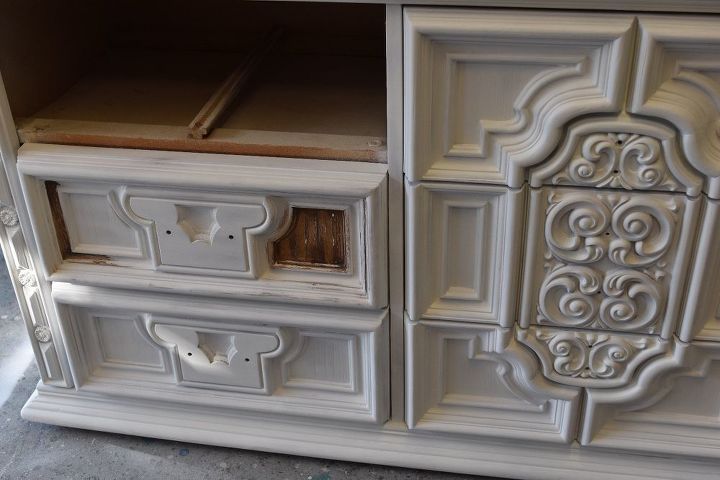
Prep your piece by sanding as stated above. Wipe down everything to remove all dust before applying your primer. I normally use Zinsser oil base primer either in a spray can or the special bonding primer in a regular can. With this type of laminate material, I used the special bonding primer. All of these primed drawers had to be fine sanded again. There were many spots where it just peeled right off because I hadn't gotten off all of the original finish. More sanding and more priming and more sanding took care of that. All of these grooves had to be sanded smooth. Argghhhh! My poor fingertips.
was playing around w/gray colors.
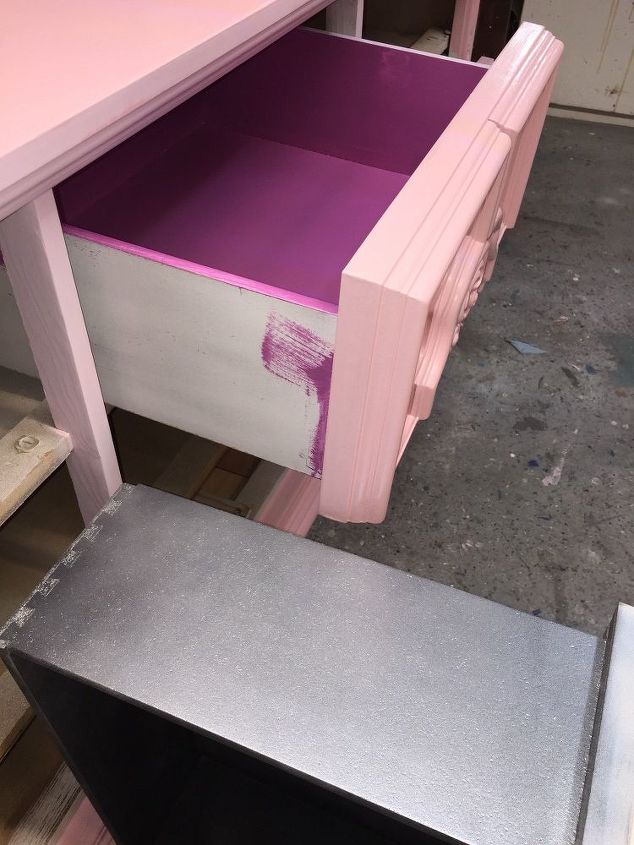
I also choose to do the sides and inside of the drawers. Again, it was a laminate type finish. A quick sand, clean off and primer application. It's also necessary to sand everything you have primed with 220 grit sandpaper. The primer does not lay down a smooth finish so you must sand it! Use your hands to feel. If you want a smooth, glossy finish to your paint, you won't get it if your base primer isn't smooth! Prep people! That's the difference between an ok looking paint job and a WOW paint job.
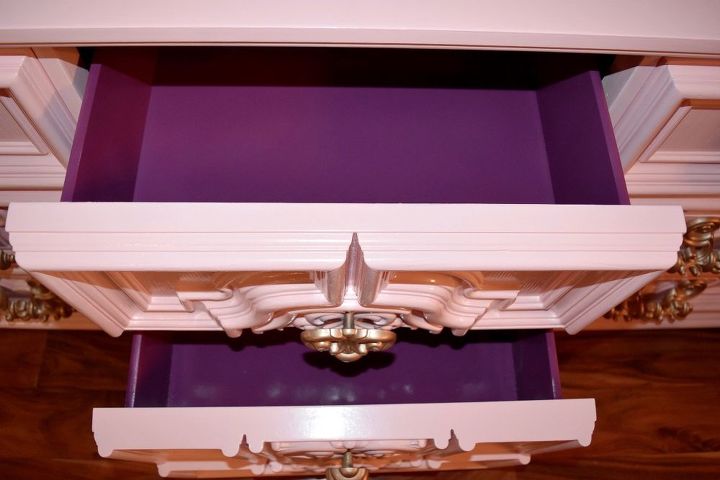
Painting of the drawers actually adds many, many extra hours. It's one of my signature things I do with my pieces. Oftentimes I will leave them as is if it's a natural wood and still in good shape. These were just ugly. Since I used a rattlecan spray on this particular color (Valspar Berry) I did these before painting the outside. You still have to tape off to avoid overspray, but if a little gets on it's not ruining the main color. So, do the insides of the drawers first!
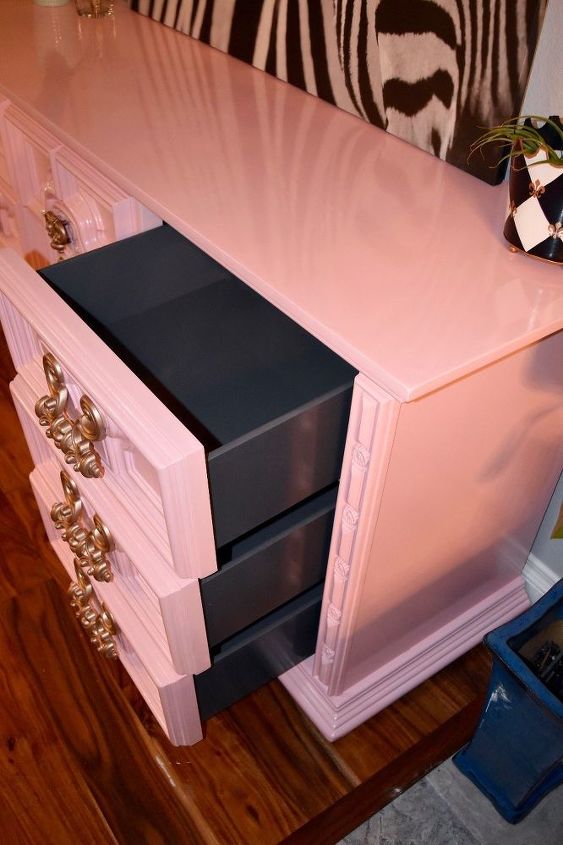
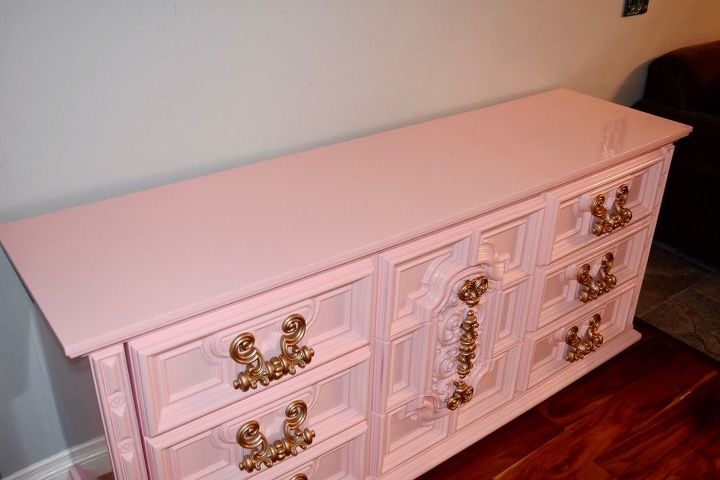
And just because there wasn't enough work involved, I chose to do a different color for the outer drawers. The berry was used on the middle (and also because it took almost 3 cans to do the 3 drawers and didn't want to spend that much painting the other six!!) and I used BM Kendall Charcoal, which I brushed, on the outer six. Again, all of nine drawers were primed and sanded before applying 2 coats of the glossy paint.

Sometimes I just do the outside panels of the drawers but these were that laminate crap and I just had to paint it. Could you use the same color as the main one? Of course. But I like to jazz it up and use contrasting colors. It's just my thing.

The pulls were all cleaned and scrubbed before using Rustoleum "Rose Gold" metallic spray. They all got 2-3 light coats and put aside to cure. I chose the rose gold color because I thought it blended better w/the pink shade.
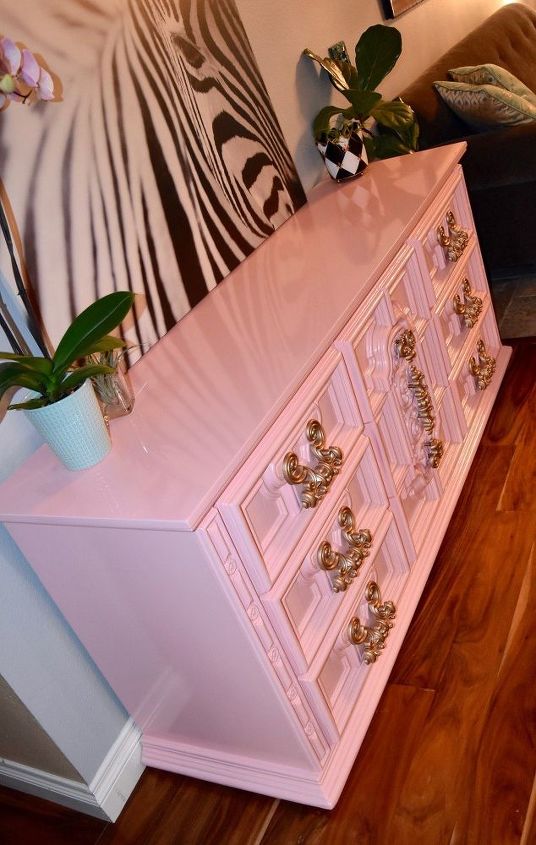
And that brings us to the meat and potatoes portion; the body. On this piece I used a very high quality paint. Fine Paints of Europe (Hollandac) in their Eco line. This is a hybrid, very similar to BM Advance. (That's the other paint I use). Do not use a straight latex paint for furniture. It stays tacky. You need a paint that is meant for wood trim, not drywall. Sherwin Williams Pro Classic is another good one, although their glossy isn't as glossy as these other two.
****BTW,,the tips I offer here are good for not only furniture, but kitchen cabinets, front doors and trim pieces. ****


Want more details about this and other DIY projects? Check out my blog post!
Comments
Join the conversation
2 of 64 comments
-
Too much work for this old painter (77 years). But I love, love, love the pink! I've already selected my pink outfit for burial. I know, too much information
 .
. -
Beautiful job! Check out Dixie Belle Paint Company's wonderful line of Chalk Mineral Paint. Dixie Belle Paint was formulated with high quality ingredients while taking out the need for sanding and priming! Wow that is so amazing! Dixie Belle Paint is the superior paint at a sweet southern price :) Happy Painting!


Frequently asked questions
Have a question about this project?