


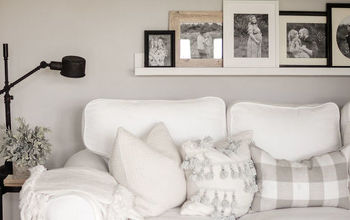
DIY Picture Ledges

These picture ledges are great for so many things!! You can easily change up the art, photos and decor you display for the seasons or whenever you want a different look (without putting new holes in the wall)!
Supplies
For 2 picture ledges approx 24”
(I’ll explain the measurements below)
•(1) 1”x2”x8’ board
•(1) 1”x3”x8’ board
•(10) 2” wood screws
•wood glue
•wood filler
•sandpaper (a sander is helpful)
•brad nailer and nails
or
•hammer and small finishing nails
•primer and paint
or
•stain (I recommend a pre stain also)
•protective finish
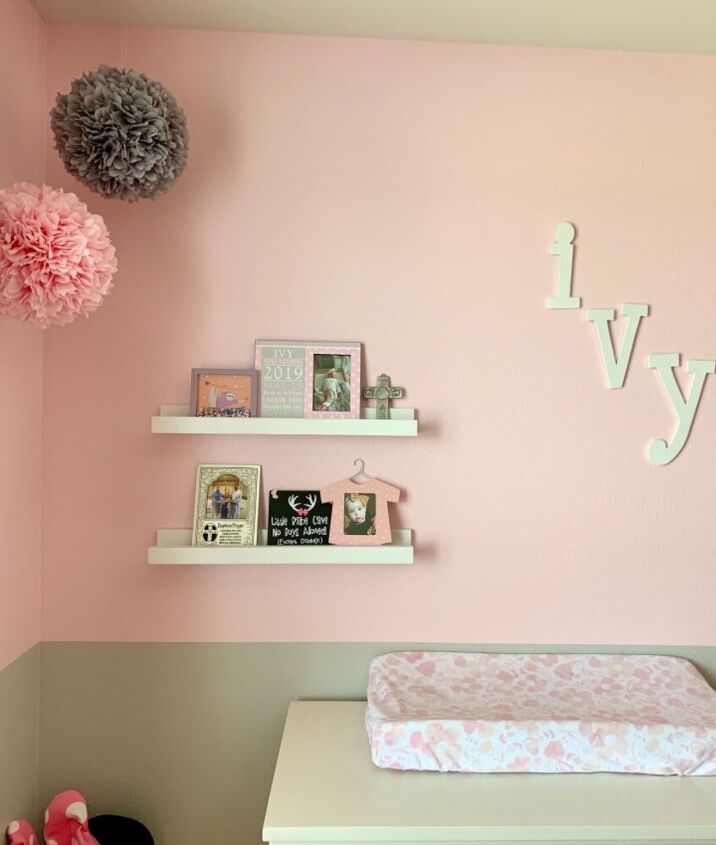
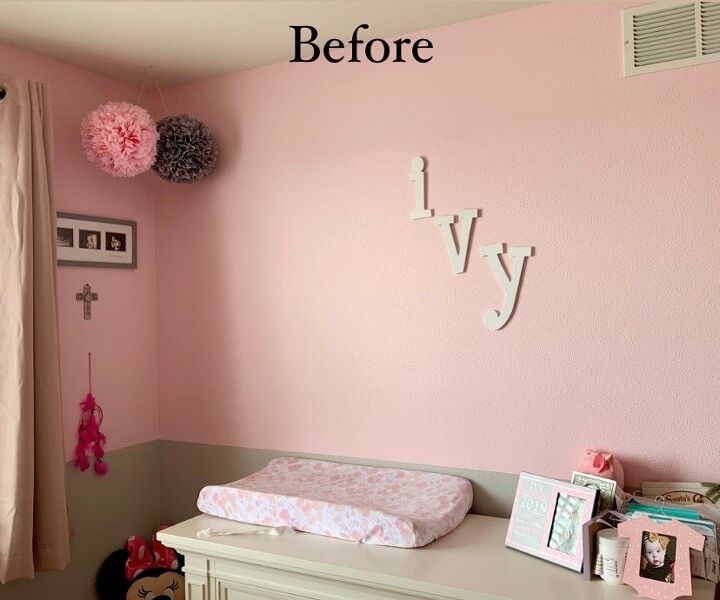
I recently made some of these picture ledges for my neighbor. Of course you could make them as long as you’d like. She wanted some for a specific spot in her daughter’s room.
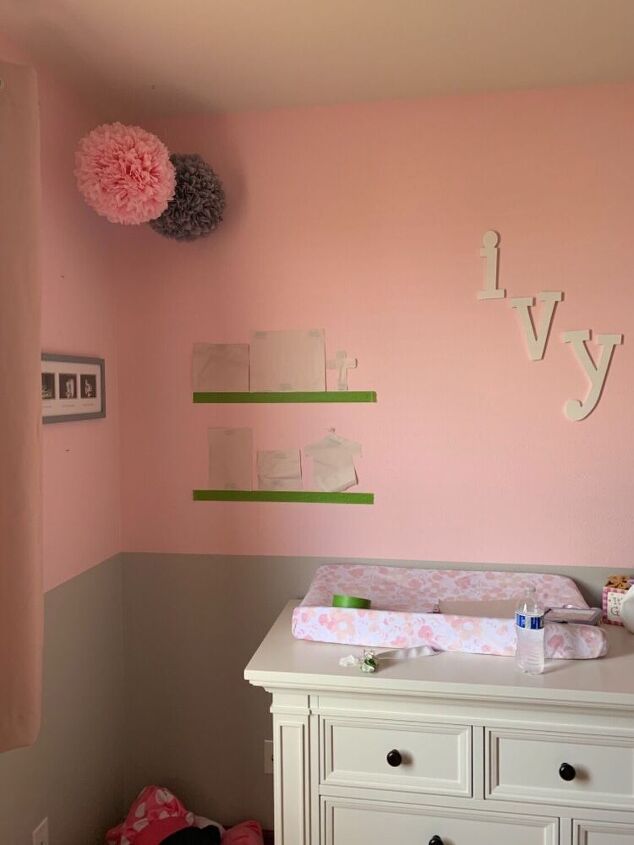
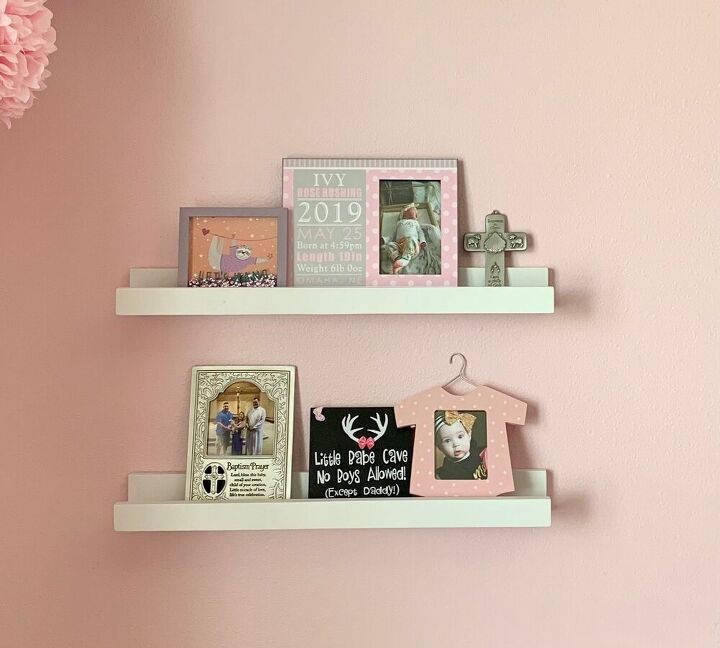
My neighbor had certain items she wanted on the shelves so I actually traced the items on paper and cut them out so she could get an idea of what it would look like. We used painter’s tape to visualize the shelves and this is what she decided on. I measured, drew up a sketch and headed to Home Depot!
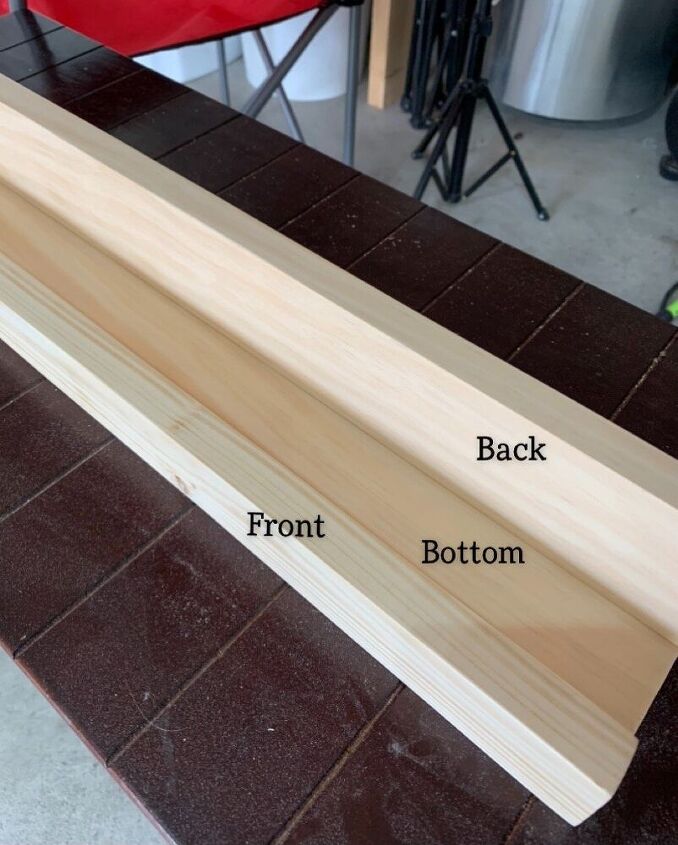
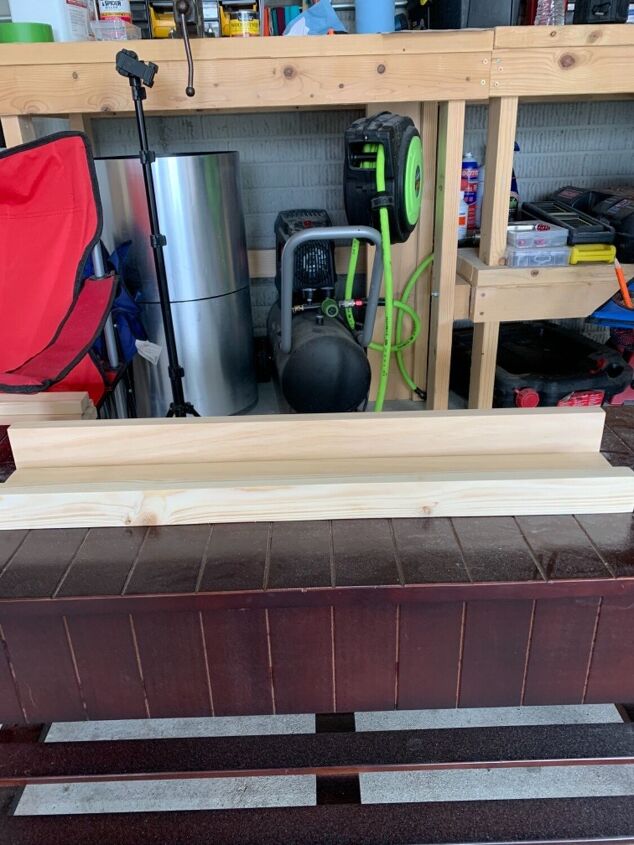
For these picture ledges I used a 1x2 common pine board for the front piece and a 1x3 for the bottom and the back pieces. I ended up using select lumber for the bottom and back pieces because there were no good 1x3 common boards left.
Cut list:
(2) 1x2 at 23 3/4”
(4) 1x3 at 23 3/4”
We had decided on 24” shelves but when I drew them up I immediately realized we could get away with only having to buy one 1x3 if we shortened the length just a bit. Yes, 24x4=96 which is the length of an 8 foot board. However, with each cut the blade is going to take off just a tiny bit extra so if I would have cut them at 24” I would have gotten to the last piece and been just slightly short. I went with 23 3/4” so I’d have a bit of wiggle room.
I made all of the cuts then sanded the boards.
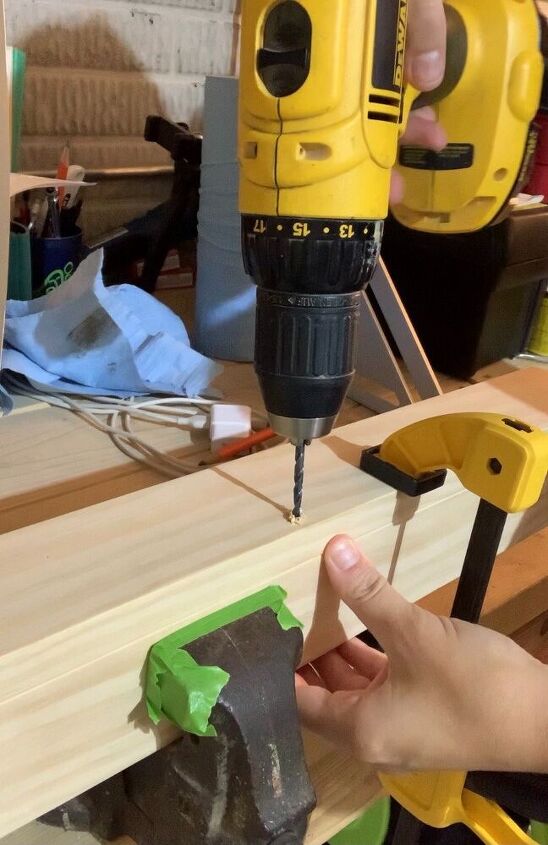
To assemble, I secured the bottom piece in a vice and clamped back piece on top using what I have (which is one 6” clamp and one corner clamp). This held the pieces in place while I drilled 3 pilot holes, 1 about an inch from each end and 1 in the middle. You’ll want to check to make sure you have everything square before you drill the holes.
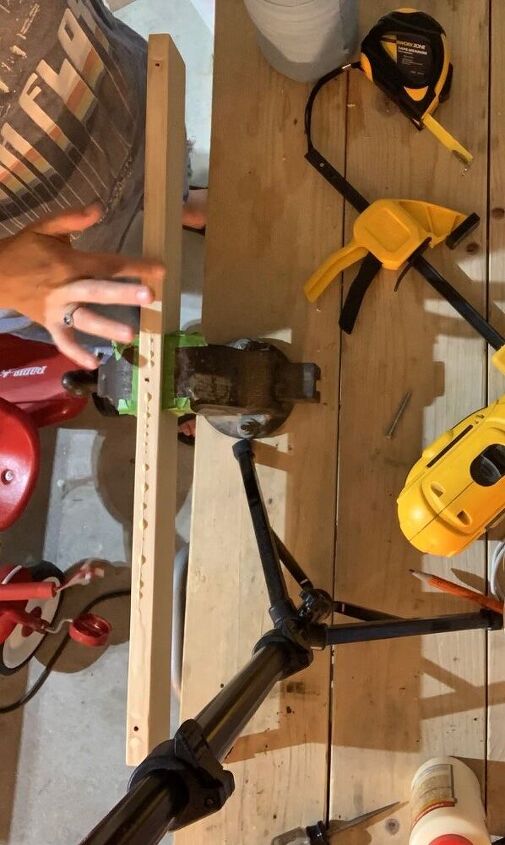
Once this was done, I took the back piece off, applied wood glue to the edge of the bottom piece and clamped it back together. I used 2” wood screws to attach the back and bottom pieces. When you hang the picture ledges, the screws will be against the wall so you won’t see them.
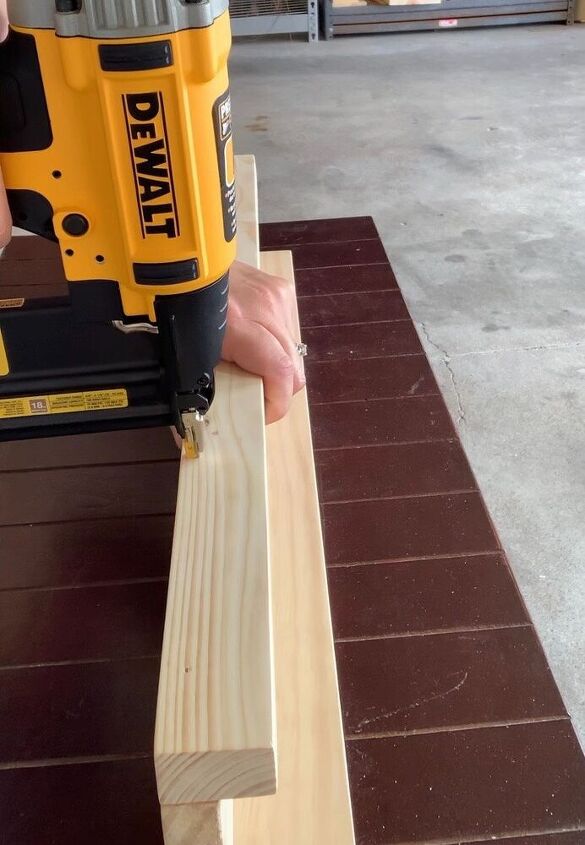
To attach the front piece, I applied wood glue to the other edge of the bottom piece and used a brad nailer to shoot a few nails in along the front. I filled the nail holes and sanded the excess.
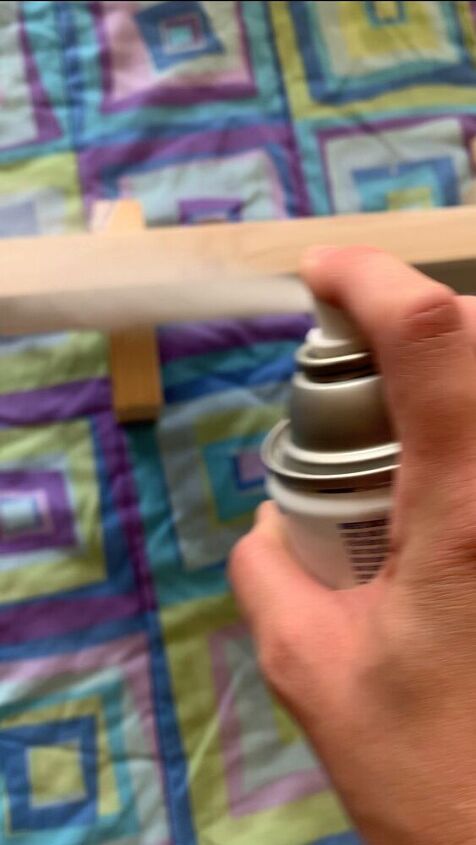
I used spray paint on these but you can finish them however you’d like! I did a coat of primer and 2-3 light coats of spray paint. I then sprayed them with a matte topcoat.
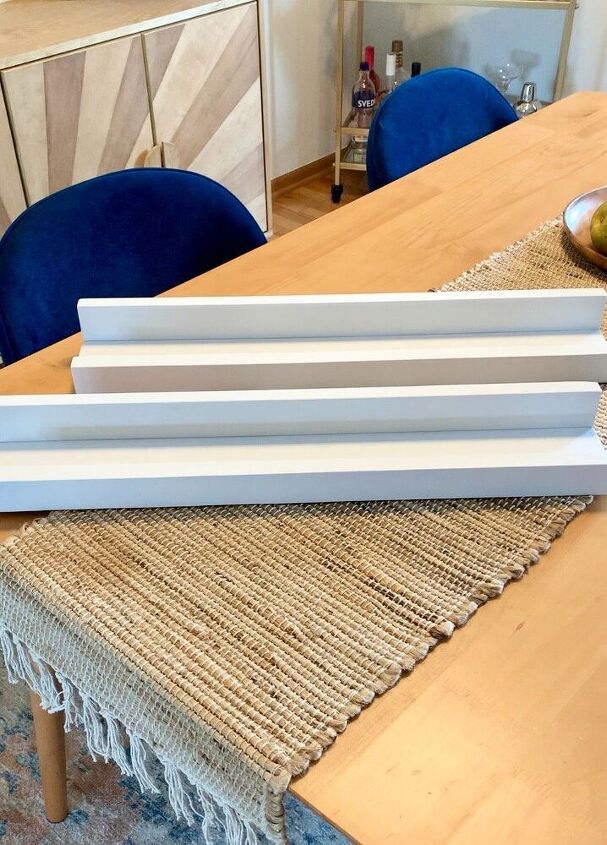
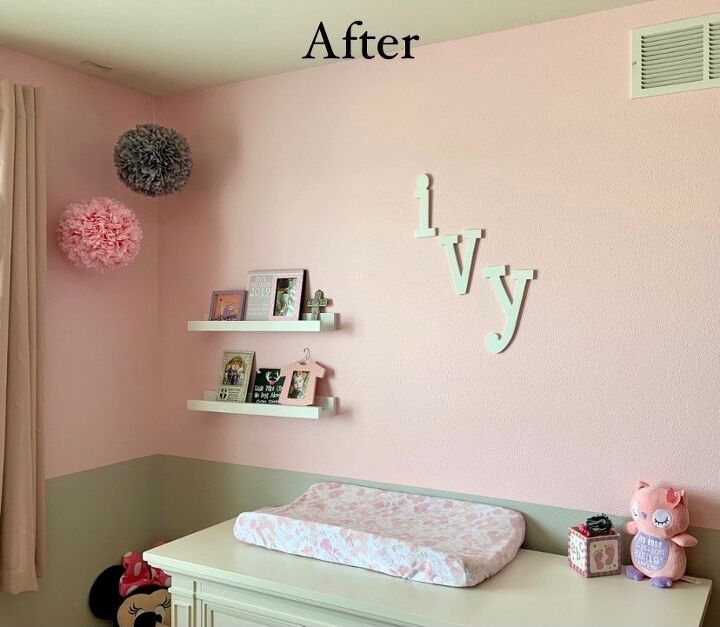
Here are the finished photo ledges! I need to coordinate a time with my neighbor, but I’ll update the post with a photo once I get them on the wall!
*Edited to add additional photos below


Comments
Join the conversation
-
I love the look of these ledgers to display items with less holes on the walls. I want to make these. Thanks.
-
People should really use Washi Tape at the front of floating shelves, it's crazy that I don't see this everywhere....


Frequently asked questions
Have a question about this project?
what is the best way to hang these?