


DIY Wooden Drying Rack
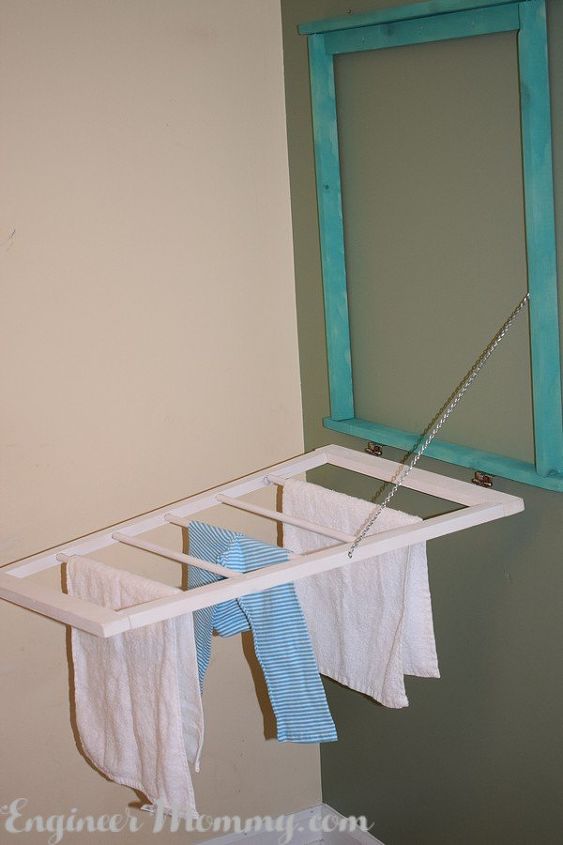
Sometimes, I don't want to turn the dryer on. I'd love to have a functional drying rack, but I don't like the ones I've seen in the stores. Most of them are plastic and boring. The wooden ones tend to be super expensive. So I made my own. I was able to customize it to my liking and I love the way it turned out! Here it is!
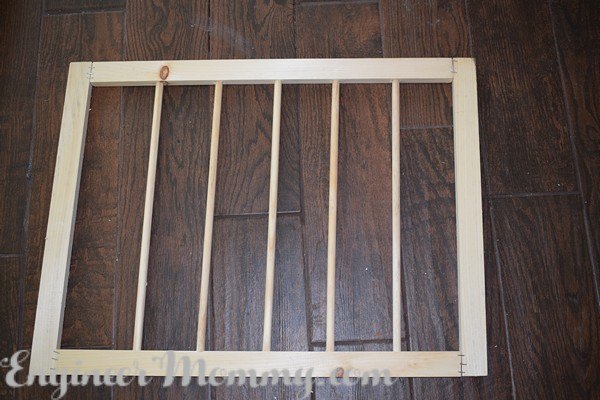
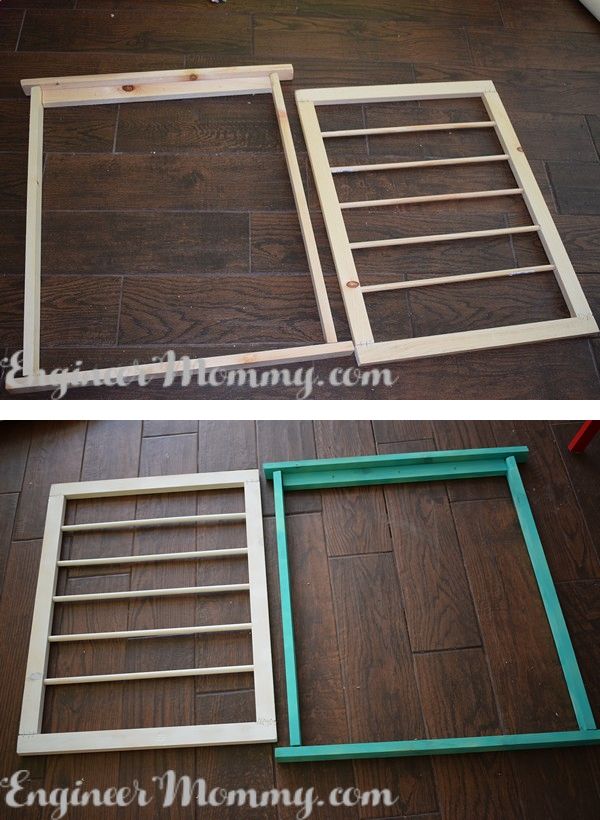
This drying rack is composed of two frames: an inner frame (the one with the dowel rods) and an outer frame. First, I cut some pieces of wood to form the inner frame for my drying rack. I cut two 21 long pieces and two 25 long pieces. I also cut the dowel rods to form five 20 long pieces. Then, I used staples/nails to secure everything together.
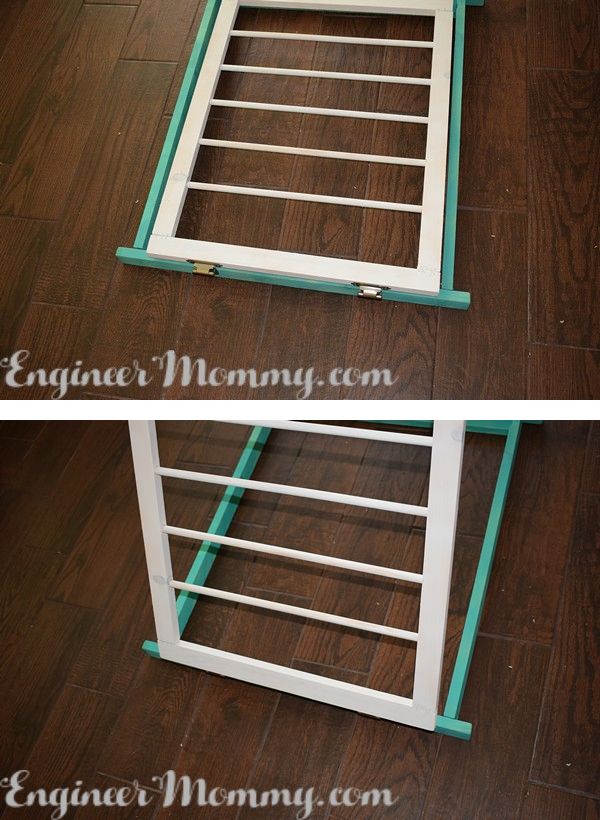
I also created the outer frame by nailing together wooden boards. Painting is always one of most fun steps of any DIY project. I painted the inner frame white and I painted the outer frame a beautiful turquoise blue.
I added some full-overlay hinges on the bottom so it would swing up and down! It works beautifully.
I also added a metal chain to keep the inner frame at the right angle when drying clothing. For the detailed list of cuts to make and tips on how to make this for your home, please visit the blog post below.

Want more details about this and other DIY projects? Check out my blog post!
Comments
Join the conversation
2 of 3 comments
-
great idea!!! always have something that needs hanging to dry I am so doing this tyty
-
Love this, looks easy enough to make.


Frequently asked questions
Have a question about this project?