


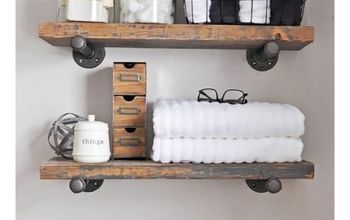
DIY Industrial/Rustic Shelves

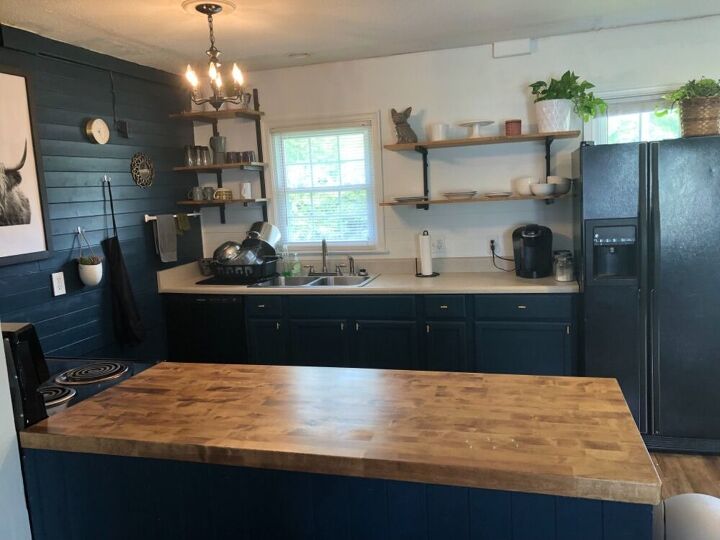
A certain show made open-shelving in the kitchen all the craze. Jumping on the bandwagon, I decided to implement open-shelving in my kitchen as well. Now one thing about open shelving is... you either hate them... or you love them. Why, you may ask.... The truth of the matter is that in order to keep an esthetically pleasing shelf, you may need to reduce the amount of items you place on them so that they don’t look busy or cluttered. Or in place of practical items, use quite a bit of decorative elements, which in turn renders them as somewhat useless since all the “pretty” is what is on display while the practical items are holed away in storage cabinets and bins in other parts of your home. Though they have their challenges, I have found that they can be quite beautiful and a nice addition to the kitchen.
With all that said here is how I made my rustic/industrial open-shelving....
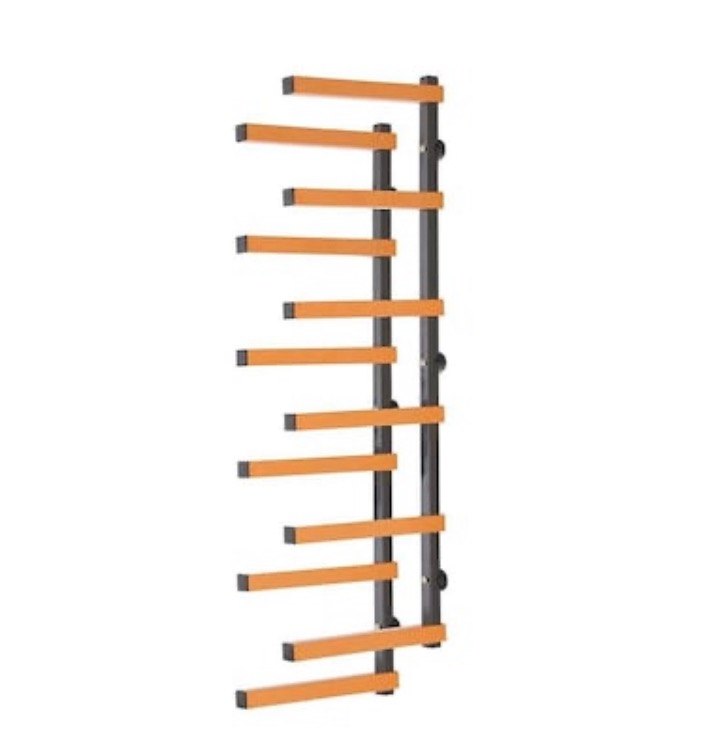
- lumber storage rack
I purchased mine from both Lowes and Ebay.
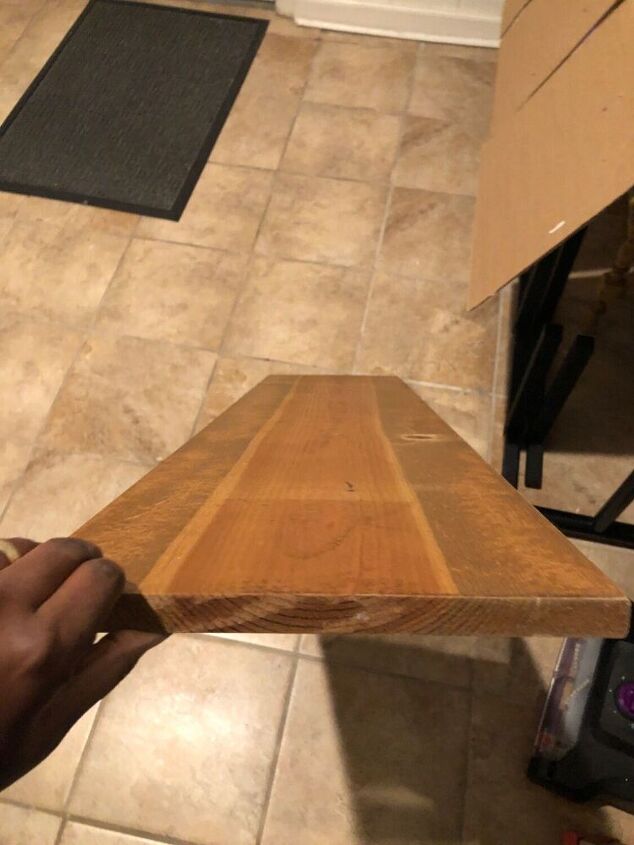
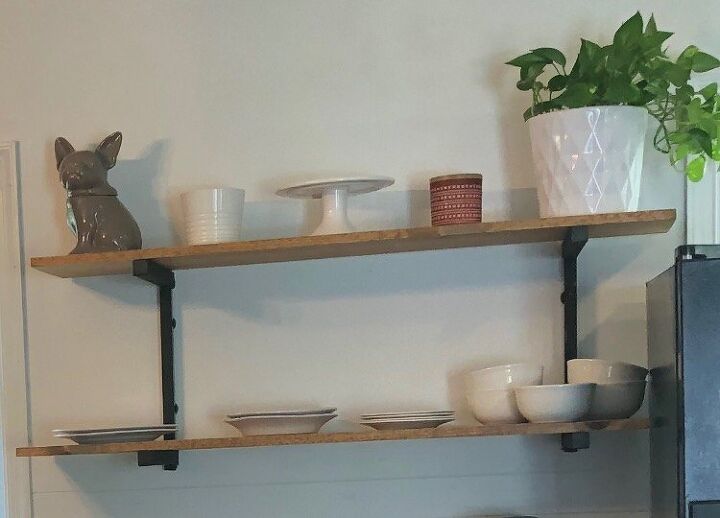
- 1x12x8 plank (in most areas these are also available in 10’ and 12’ lengths)
*I chose to stain mine, but use whatever finish matches your decor (paint, stain, raw wood, etc.).
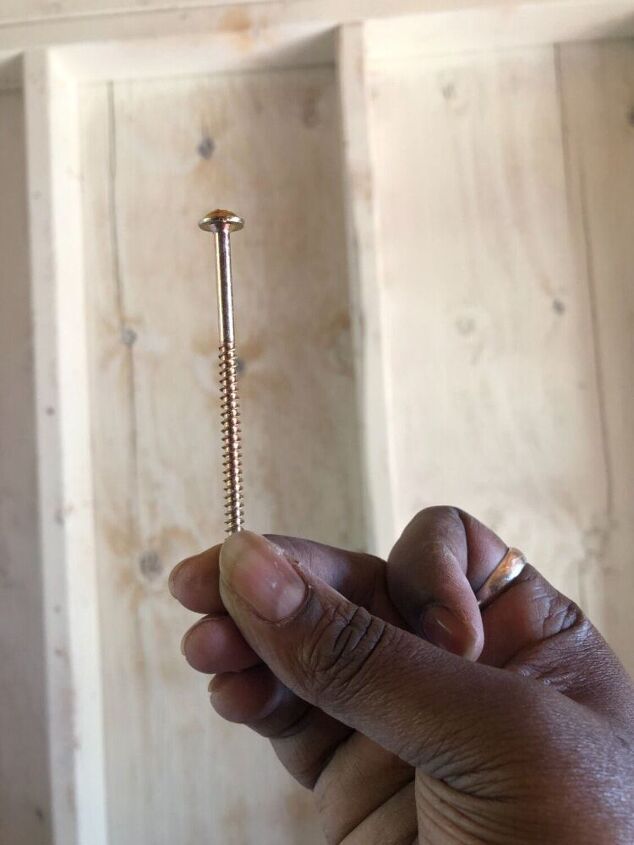
- 3” screws (if connecting to a stud use a 3” screw. If you do not have a stud in the area that you plan to mount the bracket, use a toggle bolt. See the manufacturer’s instructions concerning how much weight the toggle bolts are rated for).
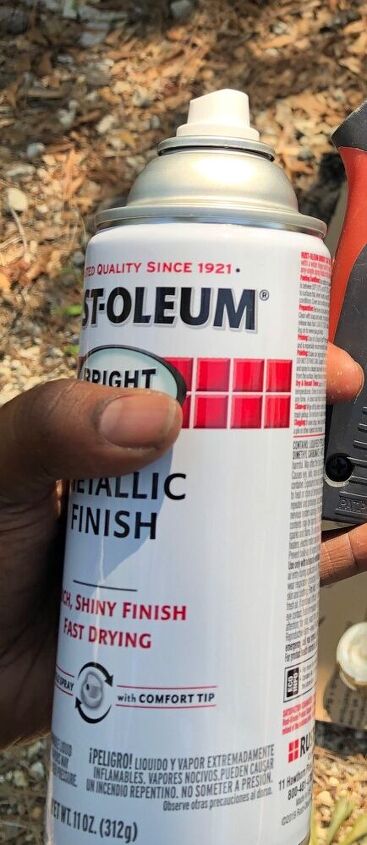
- Spray paint
This is optional because.... perhaps you like the neon-glow-in-the-dark-orange and black/grey that these shelves come painted in... 😬....no judgement here... do what makes you happy!!!
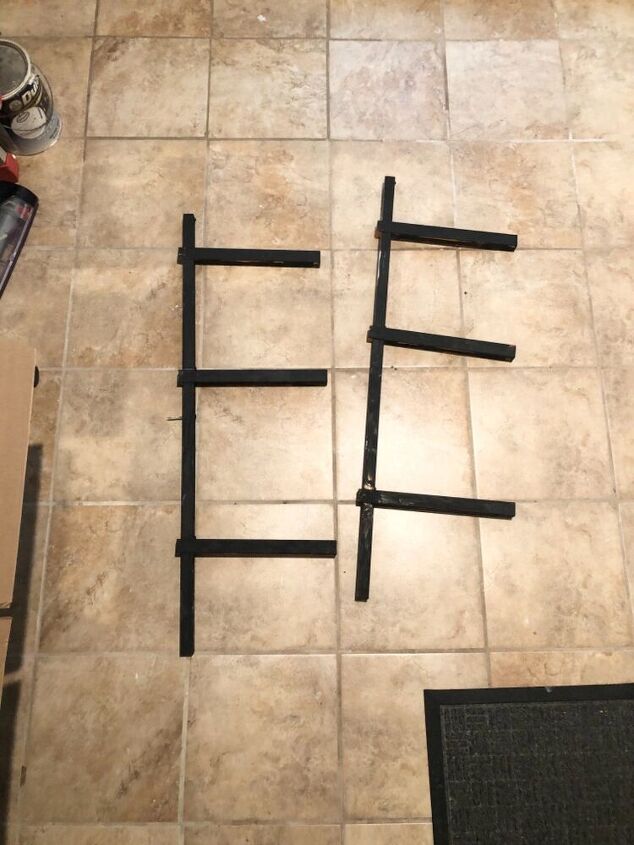
I recommend painting the bracket parts before assembly. Once they have fully dried and cured (cured, because we have learned to be patient and let things dry before we assemble things...riiiight?! [ignore any gouges you may see in the paint... I may or may not have followed my own suggestions 🙊]), assemble the brackets per the manufacturer’s instructions. As you can see, I choose a 3 shelf configuration for mine. The brackets come with arms that can be placed every 6 inches or so which gives your versatility in the arm placement.
Mount your brackets on the wall per the manufacturer’s instructions. Place your boards on the bracket arms.
*The instructions will also let you know how much weight your shelves are rated for based upon how they are mounted.
DONE!!!


Frequently asked questions
Have a question about this project?