


DIY Fern Wreath | Easily Make Your Front Door Inviting
This DIY fern wreath adds so much beauty & charm to our front porch, and you’d never believe how easy it was! Plus I can reuse the flowers!

Disclosure: There are some affiliate links below, but these are products I recommend. I won’t put anything on this page that I haven’t verified and/or personally used.
A couple of weeks ago I shared our small front porch.
In that post, I shared that I’ve always struggled to decorate it.
Well, because of that I’ve never put much effort into my front door either.
I have a simple wreath that I usually keep up all year except for Christmas. But I’ll be honest, sometimes after Christmas, when I take down the evergreen wreath I never end up putting that simple wreath back up.
I just leave the front door empty.
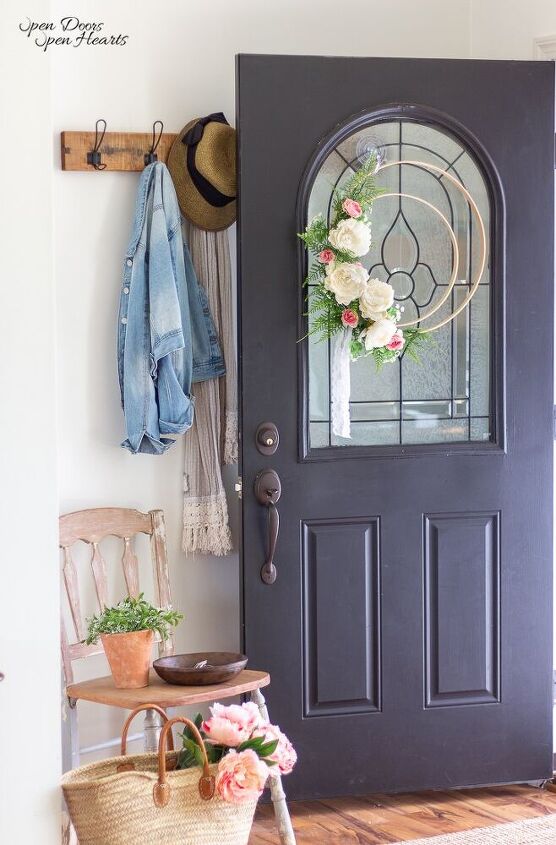
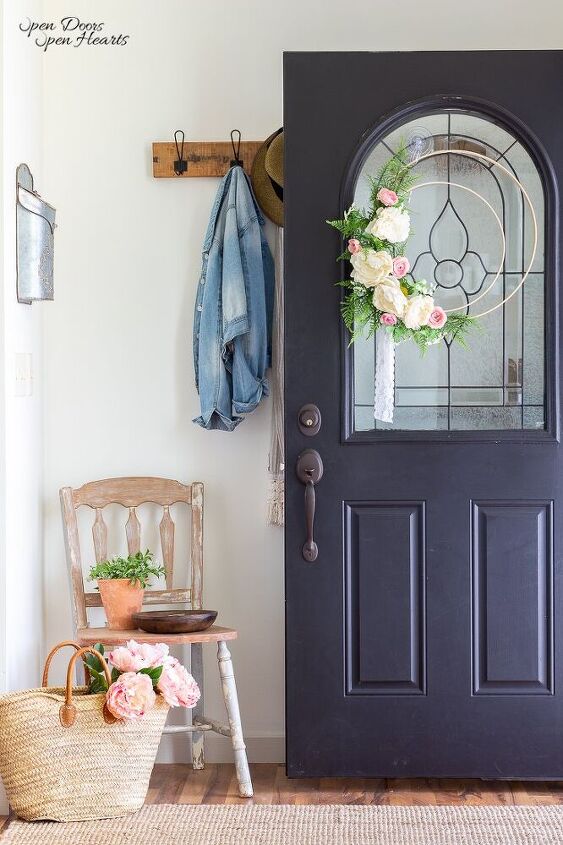
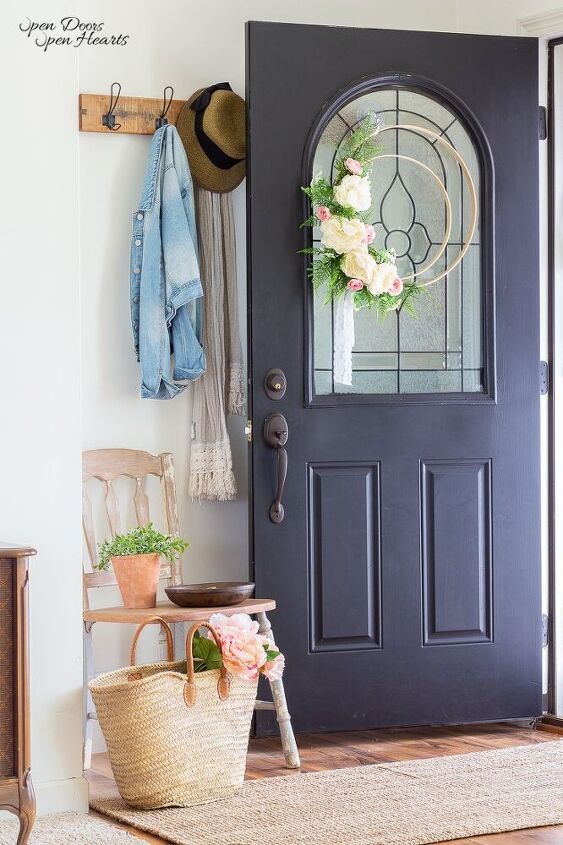
But now that I am going to be spending more time on my front porch I decided I should make a handmade fern wreath for the front door.
Adding a little bit of charm to the front door will not only make it more inviting when guests come over, but it will also brighten the space for my personal front porch sittin’.
For this Spring/early Summer wreath, I decided to stick with the colors and style I have on the inside. I am loving the blues and pinks (for now haha).
But you all know that I like to change it up as the season’s change. So I decided to make a wreath that could easily transition with the season.
I didn’t use glue for this wreath.
This means when I want to add hydrangeas for Summer, Sunflowers for late Summer, or Dalihas in the Fall I don’t to start from scratch! I just detach the current flowers and swap them out!
TIME SAVER!!
Raise your hand if you need more time in your day!
I’m raising 2 hands over here!
I didn’t want to spend too much money.
We have some fun projects coming down the pike in the garden AND we are finishing up the built-in bookcase in the girls’ room (has anyone noticed the price of wood lately?!).
So I want to be wise with where I’m spending.
We try to make a physical list of our priorities during our yearly meeting in January. That list isn’t just projected to complete, it’s also purchases we want to make.
Somehow a new front door wreath didn’t make it onto the list this year haha!
So…
I went to the back storage room to see what I had to work with.
Once I got back there, I could see that I had enough greenery and florals to create a beautiful DIY fern wreath without buying anything!
Although, my initial plan did need a few alterations.
Originally, I was thinking about eucalyptus as the foundation of greenery to build off of. But I didn’t have enough of that in the basement.
So I went with what I had.
Ferns!
WINNING!!!
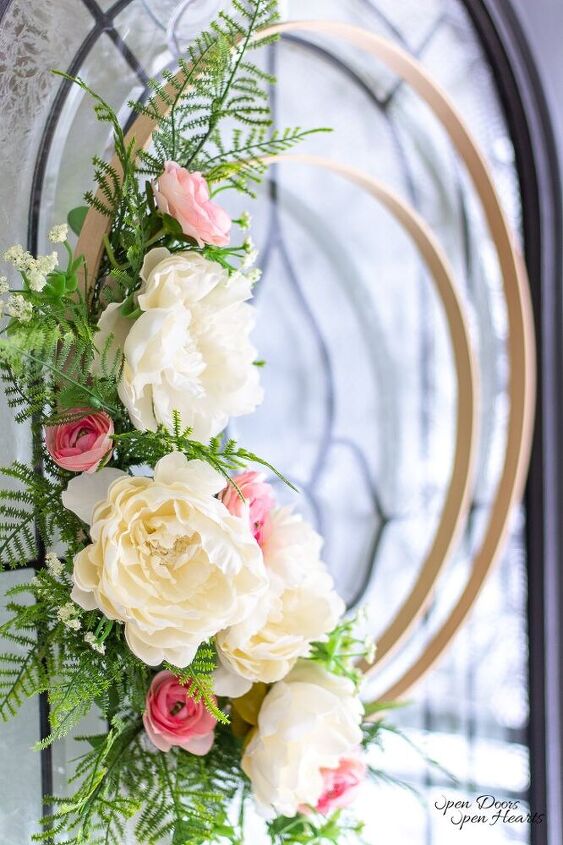
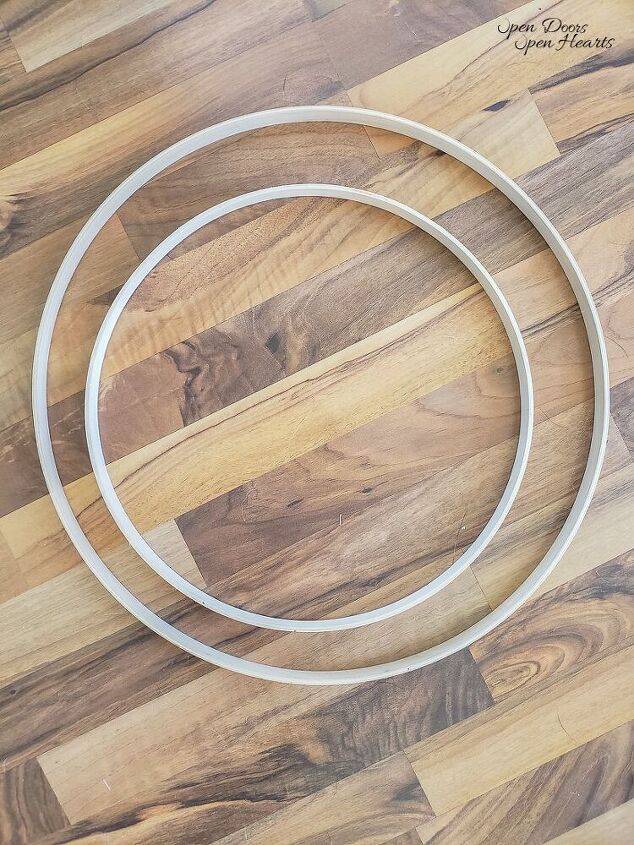
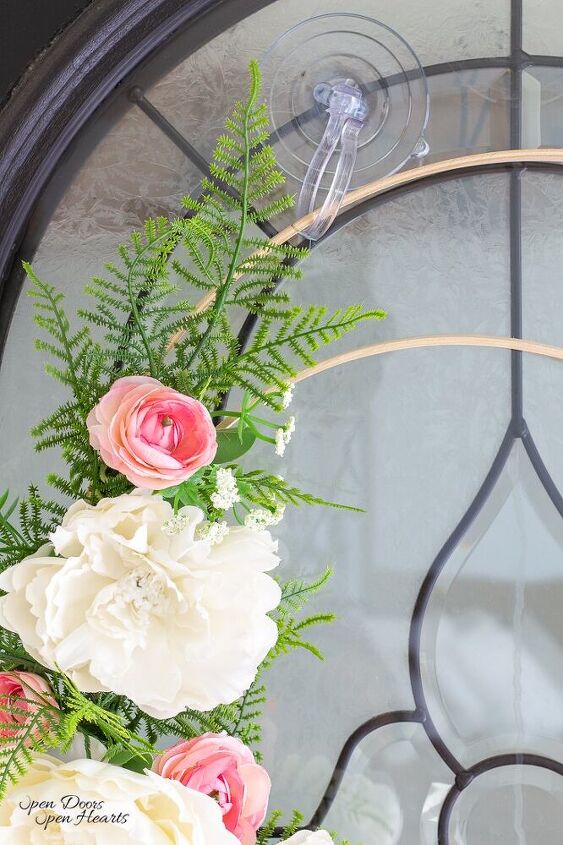
Also, remember the wreath I made last fall? I loved the way it looked with the 2 embroidery hoops.
So I grabbed a couple more embroidery hoops I had sitting back there to make this wreath.

(You guys, that fall wreath is still holding together like a champ! Nothing falling apart or little pieces of dried grasses all over! Looks just as beautiful as the day I created it!)
The best way to attach fake flowers to your fern wreath, or any DIY wreath for that matter, is very dependent on the type of wreath you’re using.
For wreaths with thin rings like these embroidery hoops, or metal hoops I like to use something from my husbands’ tackle box.
FISHING LINE!
The fishing line is clear which makes it hard to see.
When you’re creating a DIY wreath and aren’t going to be able to hide your attachments with a bunch of greenery and florals this is my go-to method.
When I made the evergreen wreath with the grapevine hoop, I didn’t have to worry about that because the grapevines helped me hide the stems and the floral wire I used.
The next trick I learned is something you can’t do with every fake flower, but you can with some.
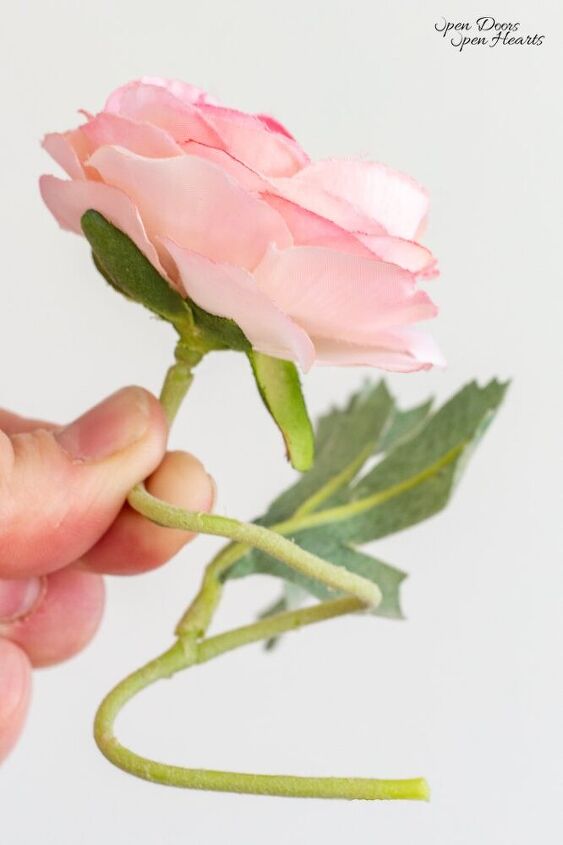
I took my flowers and twisted the stems so they look like a continuous loopy-loop from the flower head to the end of the stem. By doing this I am able to get a secure attachment without ruining the flower with glue.
So when I’m done with peonies and ranunculus for my wreath I can put them in other arrangements around the house!!
These are a few of the most common greens for a diy wreath:
- Ferns
- Eucalyptus
- Boxwood
- Magnolia leaves
If you’re interested in a couple of other fun and less common greenery textures for wreaths (and bouquets alike) try:
- Blueberry branches
- Raspberry branches
- Tree branches
If you need some of the supplies, I’ve searched the web and found them for you!
I couldn’t find the 18” hoop but I did find a 10, 12, and 14.
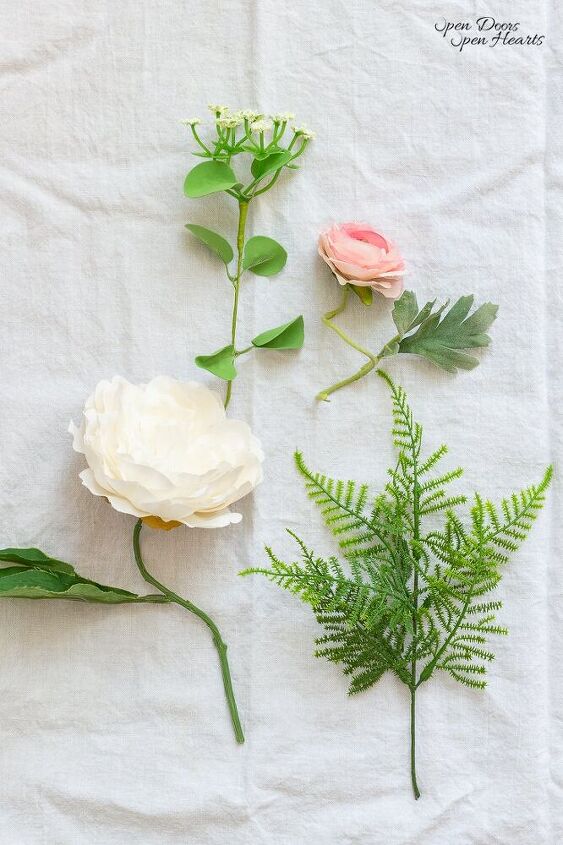
Greenery (I went with fern, but you could use something else.)
Step 1.
The first thing I did was gather all my supplies
Step 2.
I tied fishing line around the 2 embroidery hoops to attach them to each other.
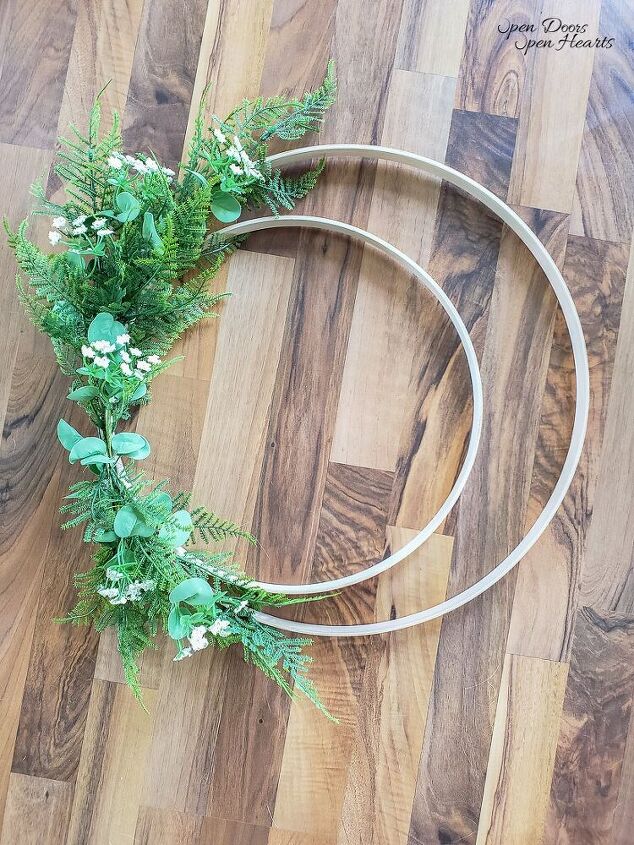
Step 3.
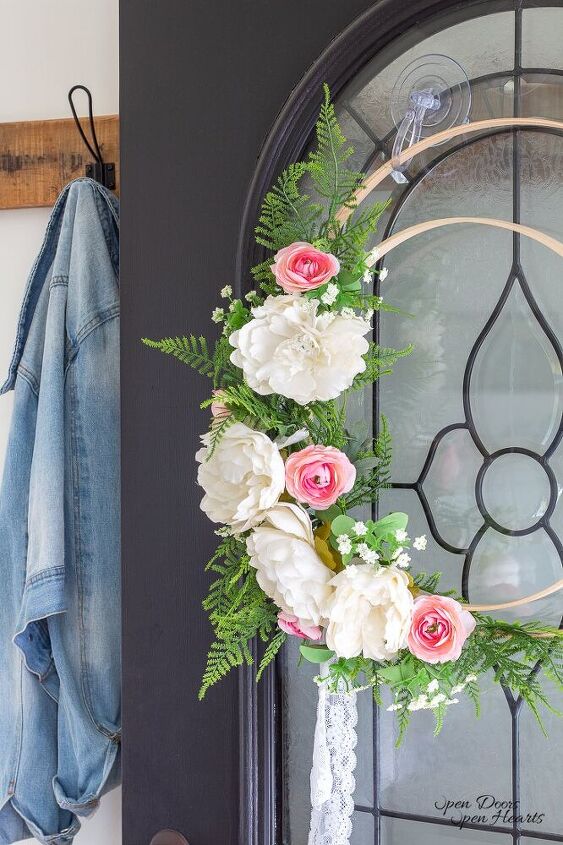
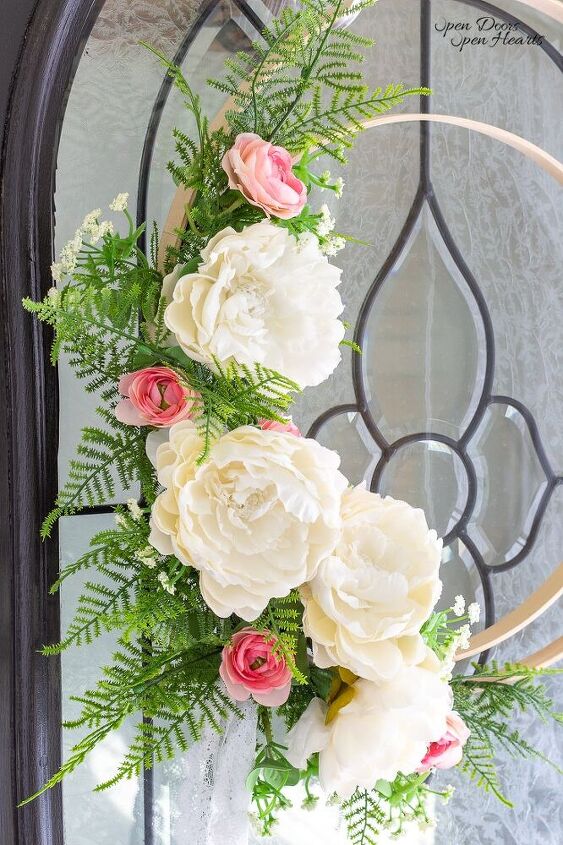
After the hoops were put together, I began adding the fern for the foundation. Then I added a little bit of greenery with small white flowers.
Again, I used fishing line for this to hide the attachment.
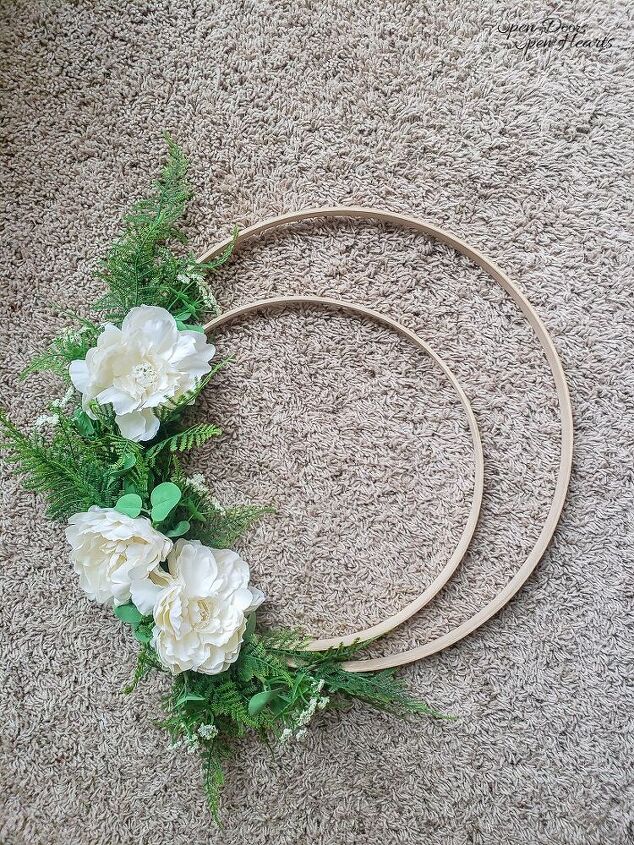
Step 4.
I began attaching the big white flowers followed by the little pink flowers.
I used a combination of the fishing line and twisting the stem for attaching these flowers. It all was dependent on where I wanted the flowers and which method would work the best based on that location.
I always tried to use the fishing line first, because it’s much more secure. But there were a few spots where the fishing line was creating more of an issue than it was solving a problem.
If the fishing line didn’t work I would try to slide the stem of the flower under fishing line that was already tied around the wreath.
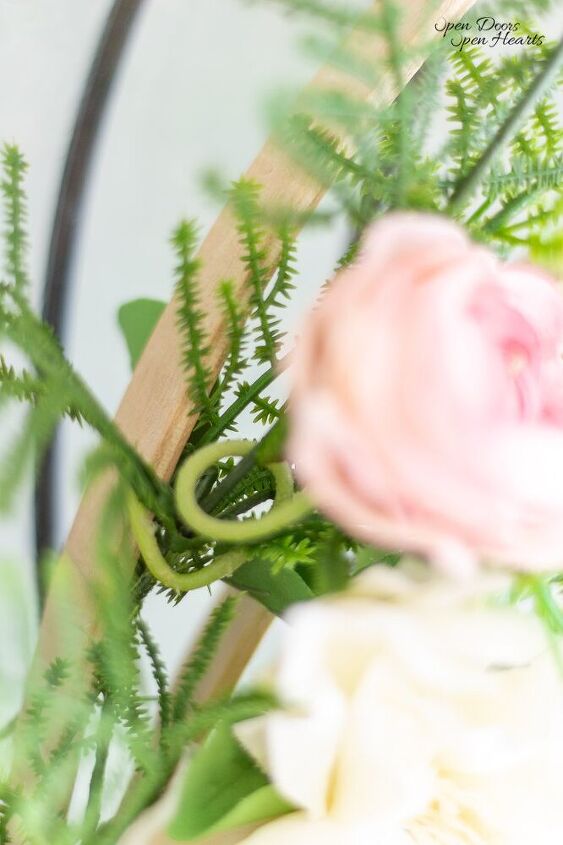
Finally, if that failed I twisted to stems and began spinning the flower around the cluster of greenery directly behind the location that I wanted the flower to be in.
Step 5.
Since I loved the fall dried grass wreath so much, I decided to add a little ribbon to this one also.
I actually found it at the bottom of my flower tote (good place for ribbon huh?!).
Someday I am going to get so super organized it’s going to be beautiful. But until then, I’m working on being content in the season of life I’m in.
The season that involves all kinds of chaos!!
Step 6.
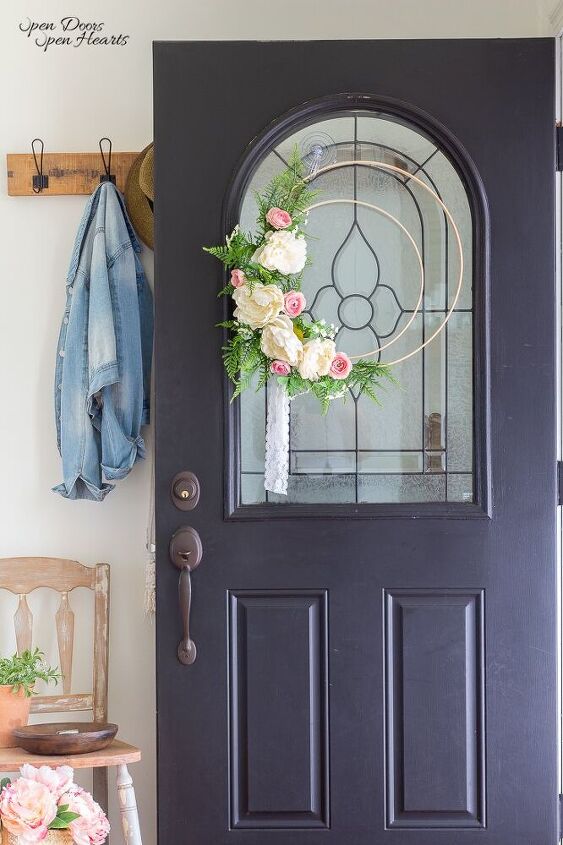
Now that all the flowers were attached I took my asymmetrical diy fern wreath and hung it on the front door.
Because the wreath is asymmetrical, it is heavier on the left. So I had to adjust for that when I hung it on the wreath hook.
I simply tied the fishing line around the hoop and the wreath hook so the wreath wouldn’t slide.
Then I moved the hook so the wreath was centered on the door.
NOT the hook itself!

Thanks so much for stopping by! Don’t forget to follow along on Pinterest, Facebook, and Instagram! Also, sign up to be a part of our newsletter at the bottom of this post so you never miss a thing!
Have a great week! XoXo
Open Your Doors,
- Pair of Scissors
- 1 18 in Embroidery Hoop
- 1 14 in Embroidery Hoop
- 1 spool Fishing Line
- 6 large fake flowers White Peony
- 6 small fake flowers Pink Rananula
- 2 bundle Fern Stems
- 1 bundle greenery with small white flowers
- 1 spool Lace Ribbon
- Gather all supplies
- Tie the fishing line around the 2 embroidery hoops to attach them to each other.
- After the hoops were put together, I began adding the fern for the foundation. Then I added a little bit of greenery with small white flowers with the fishing line.
- Begin attaching the big white flowers followed by the little pink flowers.
- Once the wreath is complete, add a lace ribbon on one side.
- My First Milk Paint Experience – Faux Fireplace Mantel
- How to Create A Simple Boho Table From Pallets
- Functional Storage for Copper Pots and Pans
- Barn Finds – How to Style Vintage Glass Bottles
- Create an Inviting Dining Room: Mixing Vintage and New

Comments
Join the conversation
-
Gorgeous! That’s all I can say!
-
Beautiful. I have wrapped hoops with macrame' cording and done something similar. It gives it another dimension but I love the simplicity of this.


Frequently asked questions
Have a question about this project?
Do you separate the2 pieces of the hoops or leave them as 1 unit? I cannot tell for sure.