


Romantic Vintage Christmas Tree With Dried Floral & Citrus
This year, I’m feeling like a very romantic, old time, vintage Christmas. I want soft, cozy, relaxing. Nothing too loud. Does what I’m saying even make any sense? I don’t know. Maybe it’s just a feeling. Some years, you need a quiet, subtle Christmas. And that meant creating a vintage Christmas tree theme this year.
I purchased a 6 foot faux tree for the first time every and love it. The color is bright and the exact green I was looking for. It was also a great price. Sure, I could have gotten a higher quality tree for a few hundred dollars more, but I truly love this and thought it was the perfect price-point for my own fun tree.
You see, we’re still getting a live tree. We do every year. But, I wanted a fun tree, my own, to decorate. And then we still do a family tree that’s a mish-mash assortment of all different ornaments, colors, and styles. This way, everyone is happy and I get two trees in my home. It’s a win win!
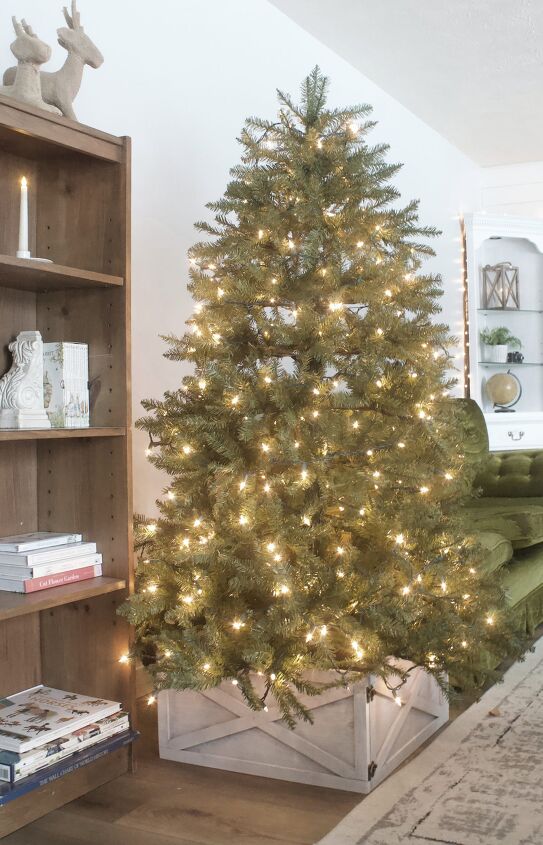
I love a good before and after.

I'm still swooning over here. It’s just so good.
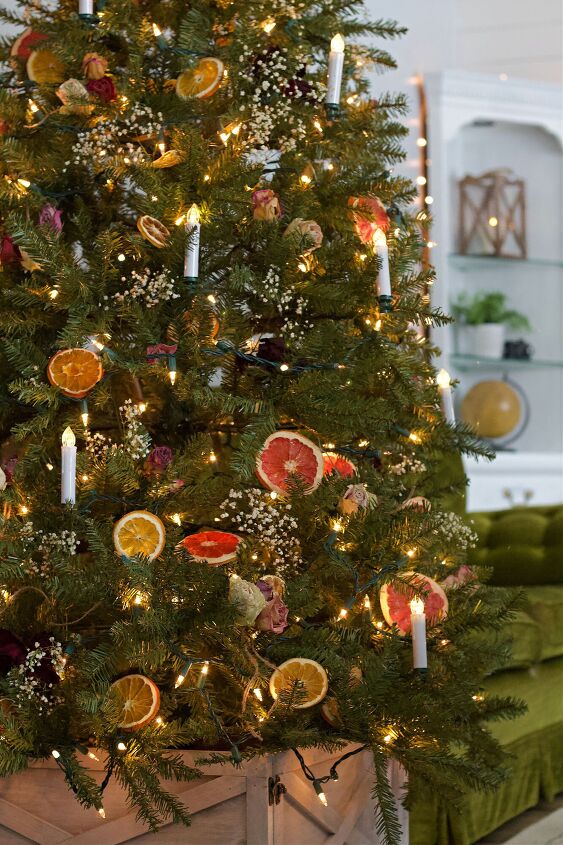
Don’t get me wrong, I love a traditional Christmas theme, I’m just going traditional from a few hundred years ago this time. Back when it was normal to have candles on your tree (how scary was that by the way?) dried floral from your summer gardens, and fruit. It’s what people had to decorate with in the 17 and 18 hundreds, and I’m bringing it back into my home this year.
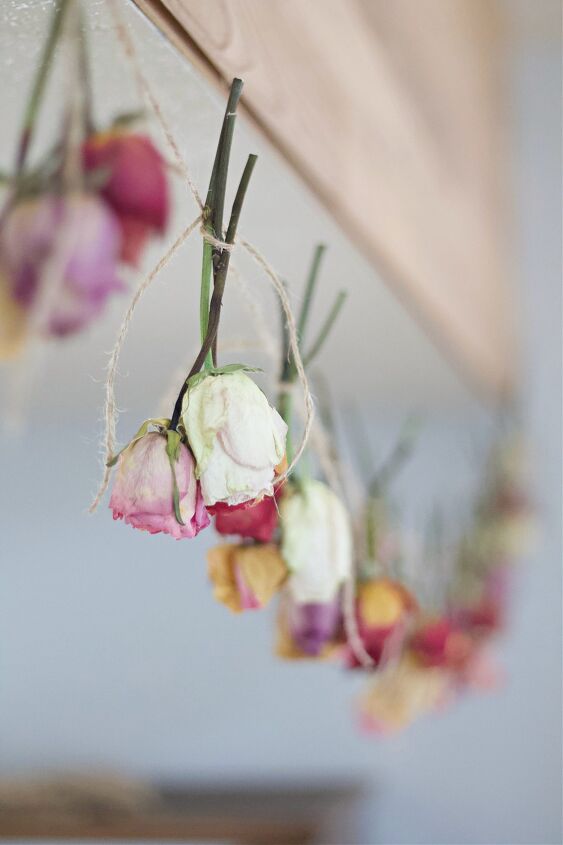
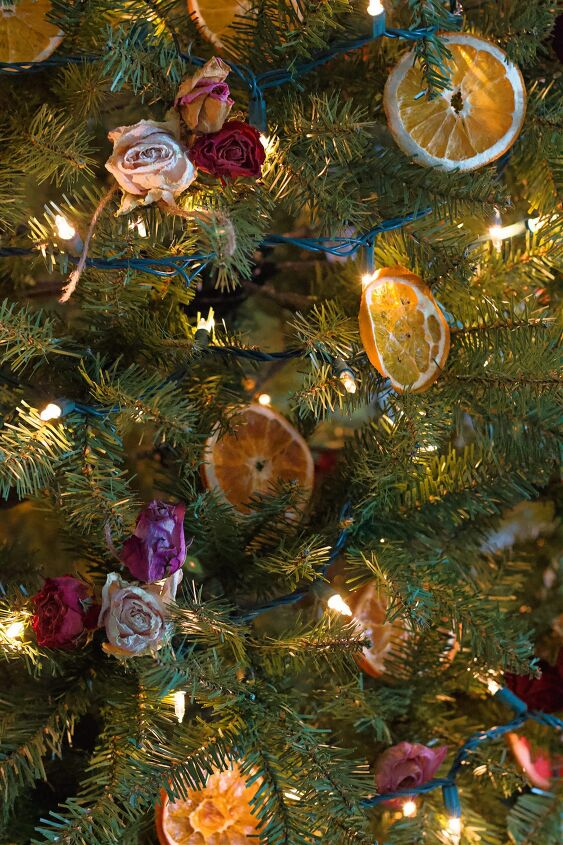
Drying roses
Roses are so easy to dry. Simply cut them the length you need, I kept mine about five inches long, and hang them upside down. Truthfully, they looked beautiful just hanging in my dinning room for two weeks.
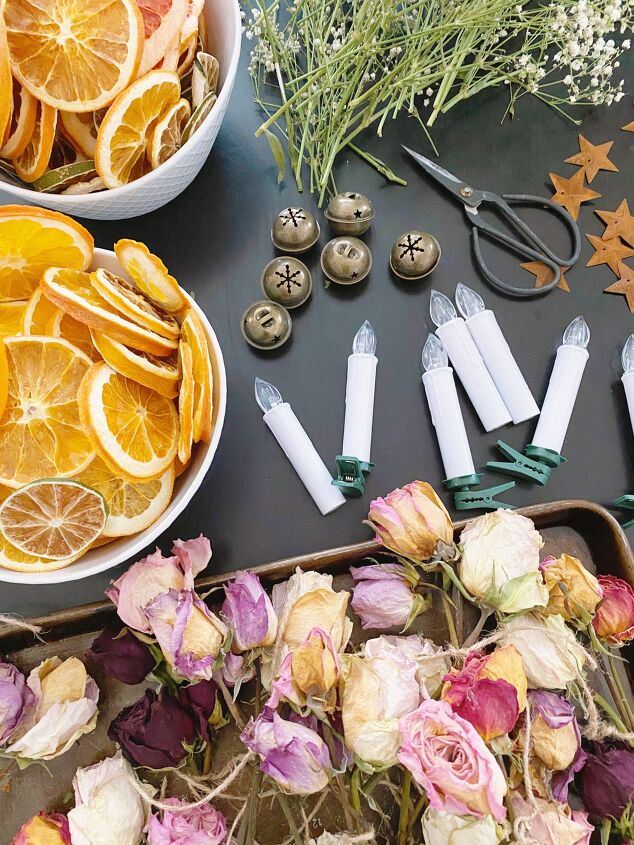
I purchased four dozen roses, and tied them into threes with jute.
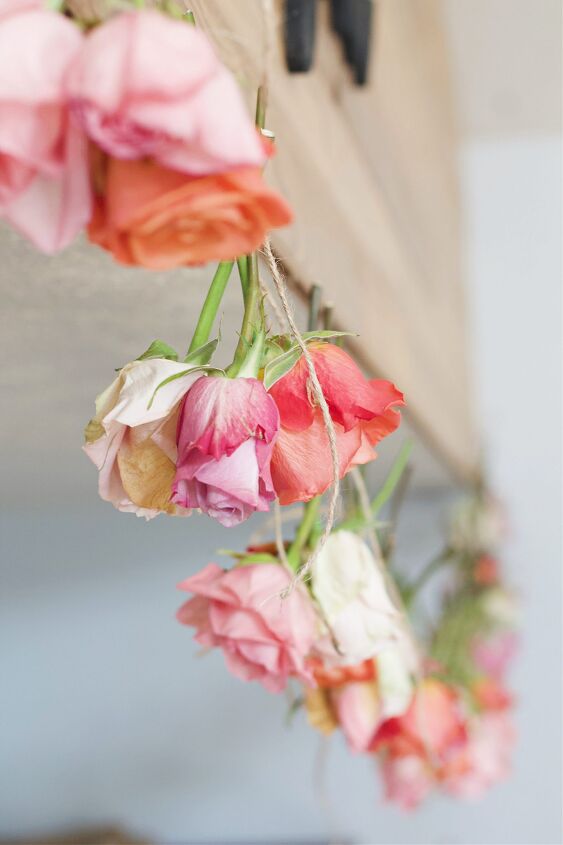
Once the stems are dry and don’t move when you turn the flower right-side up, they’re done. Usually it takes around two to three weeks.
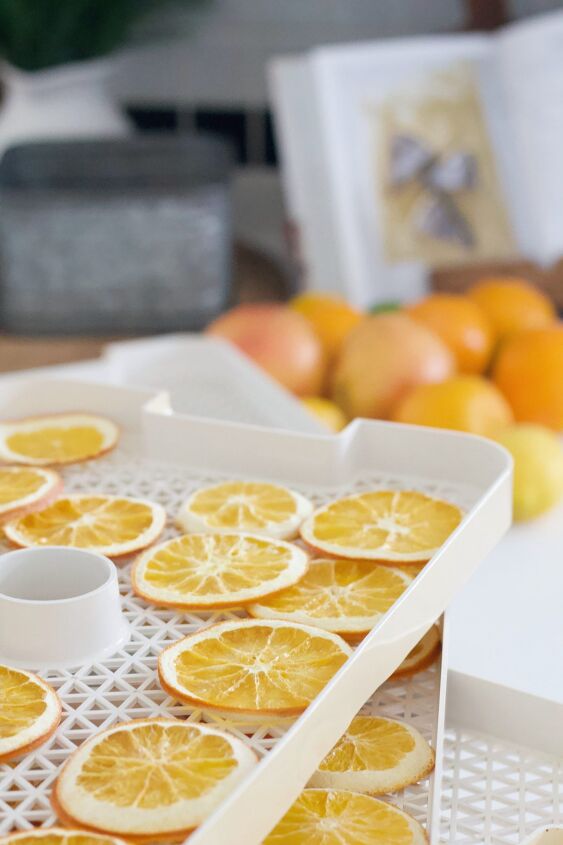
Drying citrus
I dried oranges in the oven a while back, and it worked great. However, I heard that doing it in a dehydrator was easier, and the colors stayed truer. Both those things ended up being correct. I didn’t have to rotate them often or worry about forgetting the oven being on, and the colors stayed so bright and pretty. Like natures own little stained glass windows.
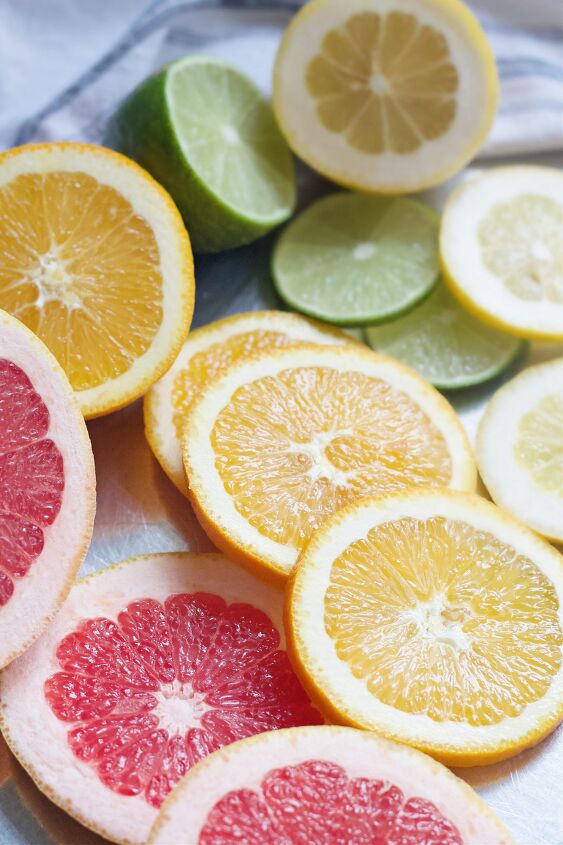
This time around, I also added grapefruit, lemons, and limes to the mix and loved the color variations they gave off in the tree.
My dehydrated is old, so it took a little over a day to dry, so your timing may be different.
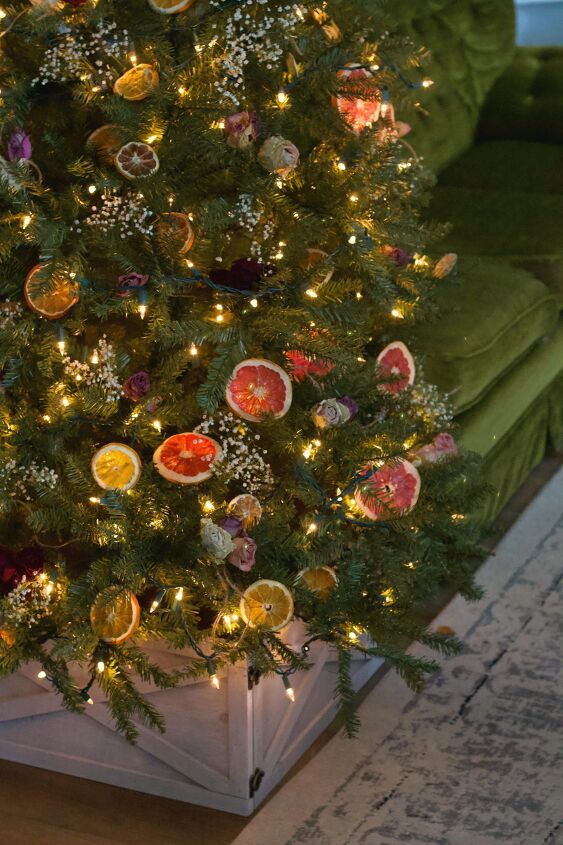
Once you’ve got all the ingredients, the floral and citrus are dry, it’s time to make your romantic, vintage Christmas tree. Oh! Don’t forget the babies breath! It doesn’t need to be dried first, it can dry on the tree.
How to assemble the tree
I started with the roses, since they were what I had least of. I wanted to make sure they were placed evenly throughout the tree. I’d put a few on, stand back and look, and then fill in any holes and empty spots. I didn’t hang them, rather, I carefully tucked them between the branches. Because this is a faux tree, I was able to manipulate and move the stems to hold the roses securely.
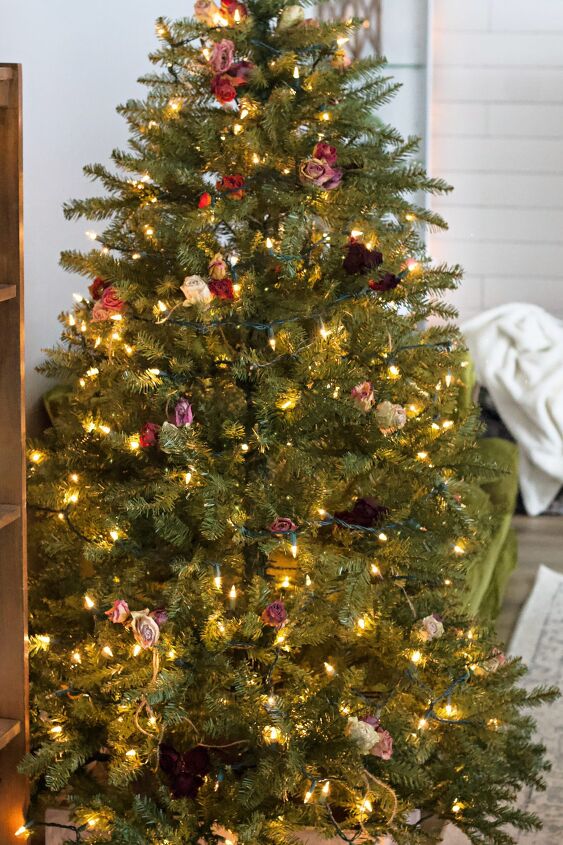
Once the roses were in place I began on the citrus.
Again, I didn’t hang them, though that’s an option if you want to. I simply tucked them between the branches again, and really felt it made it look even more natural. I shared the whole process over on Instagram stories. Make sure you’re following there for all my DIY in real time!
From there I took the babies breath and filled in any other spots that seemed empty.
One of my favorite additions to the tree I purchased at the last moment. I saw someone candle lights on their tree and I fell in love. They’re the perfect way to complete this romantic, vintage Christmas tree.

The best part? They’re on a remote and each only take one AA battery. You can set them to bright or dim, flicker or steady, and set them on a timer as well. They come with clips to hook them on the tree, and also suction cups to place them on windows, which is another perfect way to cozy up your home from the the outside looking in.
I also added a few vintage bells, the same ones I used on my cozy Christmas mantle. They go with everything. They’d also be great on the tops of gifts, in centerpieces, and more.
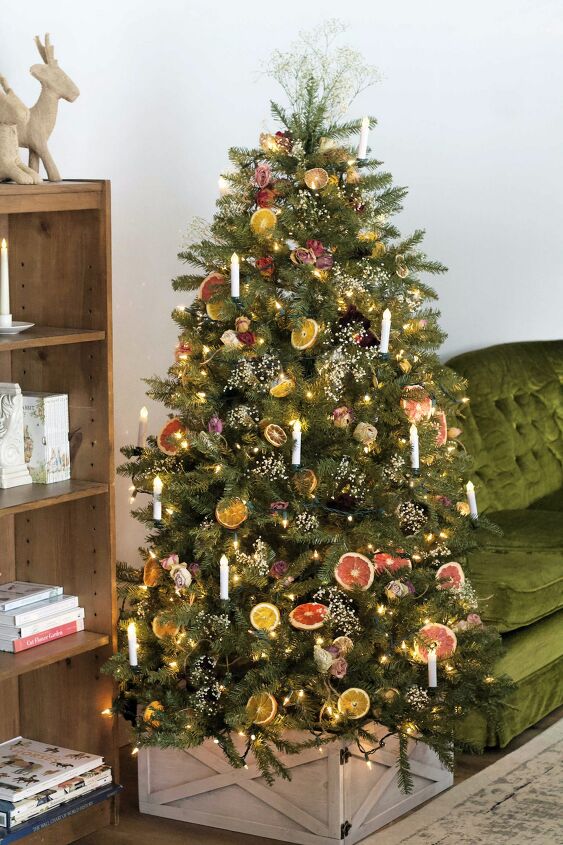
That’s it. Truly, such a simple tree and a way to connect with the past and enjoy a vintage Christmas in your home this year.


Comments
Join the conversation
-
WOW, WOW, WOW. This is truly the most beautifully decorated tree I have ever seen. Bravo, Encore.
-
This is totally my vibe for the holidays. There is such a classy warmth about it!


Frequently asked questions
Have a question about this project?
Love the little box for the base, did you make that? Love the old fashioned look.
Can you please share where you found the candles? PS -- I am drooling over your tree - vintage perfect!! 💗💕💓