


"Thank You" Inspires New Lamp Makeover

A thank you note from my sister inspired a bright new look for a sad lamp that was overdue for a makeover.
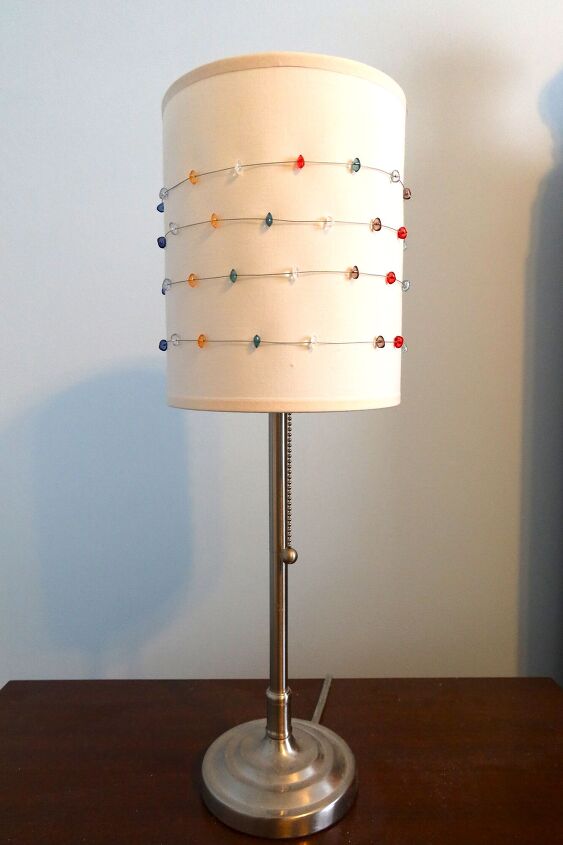
I've had this lamp for over 15 years. It's a handy little lamp that now lives in our guest room, but it looked cheap. I always wanted to do something with it, but I wasn't sure what. It has a fabric shade that was in good condition, so I knew it had potential.
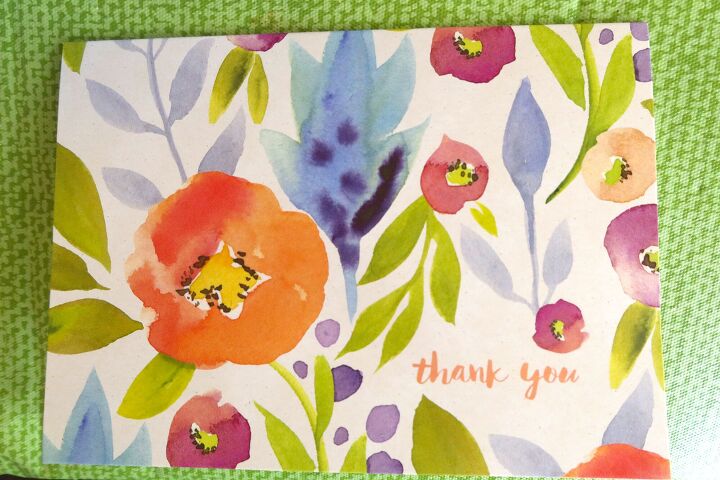
Then I received this pretty thank you from my sister. I loved the bright watercolor image and thought that these colors and the imagery would look beautiful in our newly updated guest room.
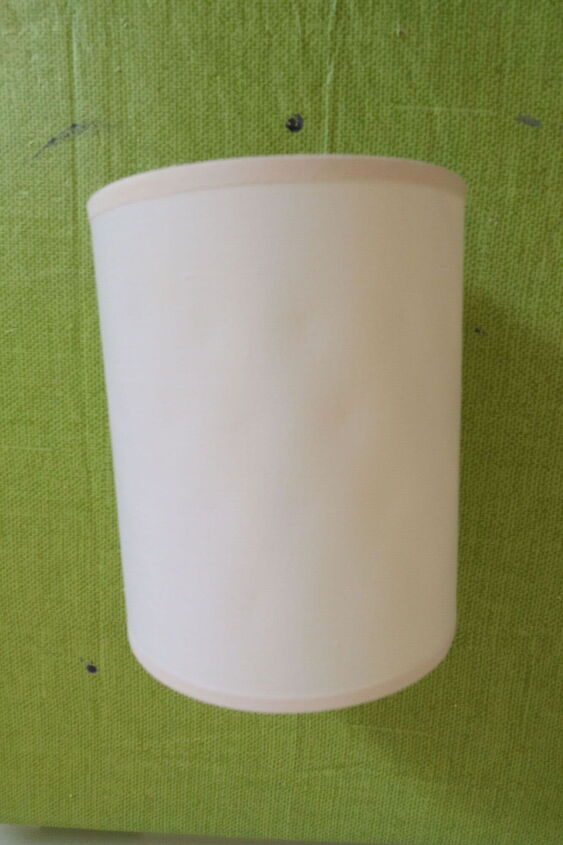
The first thing I did was remove the shade from the lamp. Then I cut off the wires with wire cutters and remove the beads. This was very easy. The wires were not even connected to the lampshade.
Next, I used a lint roller to clean any dust and dirt from my fabric shade.
I laid my shade down on my work surface and put a rolled towel on either side of it. This would keep my shade from moving around.
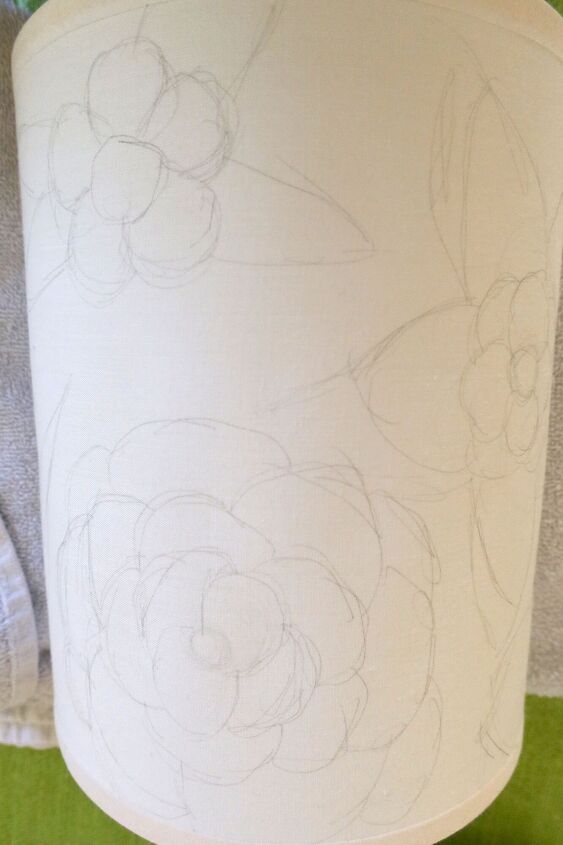
Using a light pencil, I loosely sketched some basic flower shapes and leaves. I used my thank you card as a reference, but didn't follow it too closely.
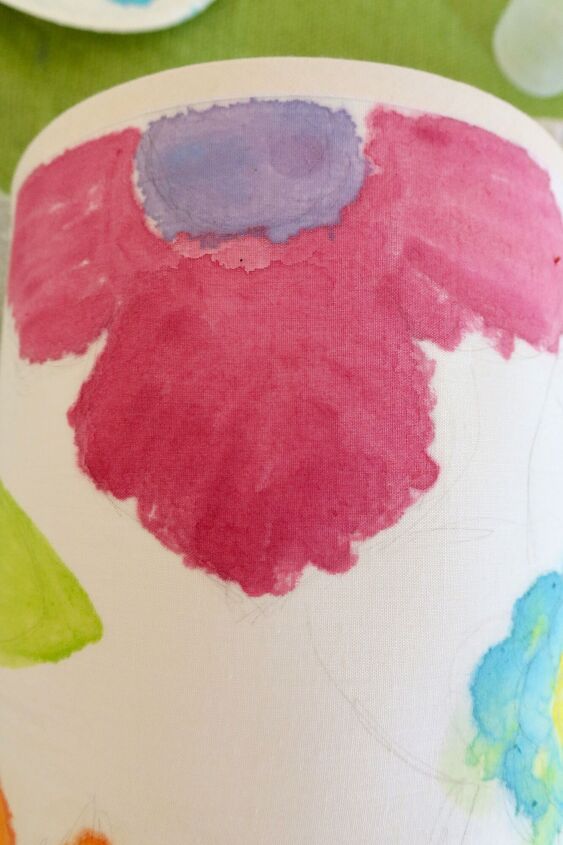
Adding my paint was a little scary at first. I used acrylic paint mixed with quite a bit of water. I suggest testing your paint on the inside edge of your shade to see how much your paint will bleed on your shade. My paint bled quite a bit, which was good because I wanted a flowy water effect.
I started lightly brushing my paint into the center of my flower petals, adding more water if I wanted it to bleed more, or adding more paint if I wanted my color to be stronger. Then I let my paint absorb to form loose petal shapes. I used the same technique to make my leaves.
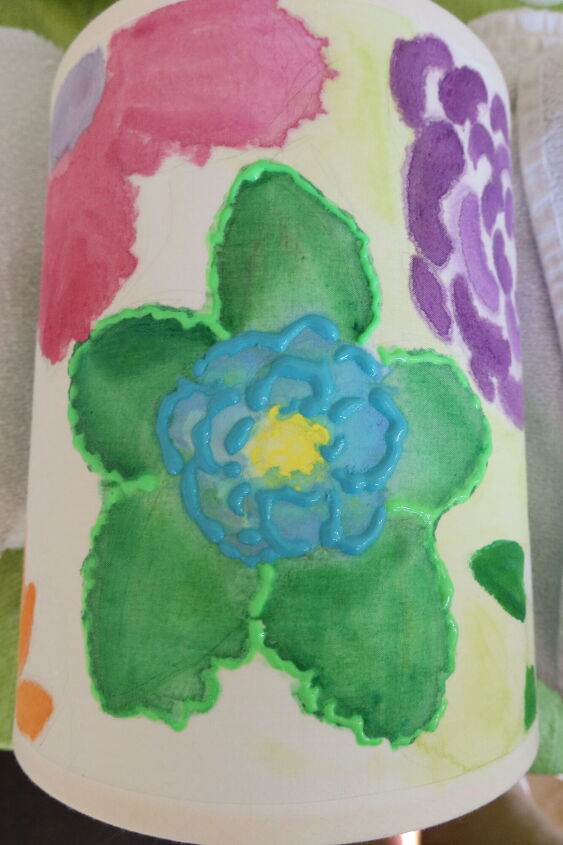
When my paint was completely dry, I used Tulip brand 3D paint to add outlines around my flower shapes. This paint dries flat, but added some nice detail.
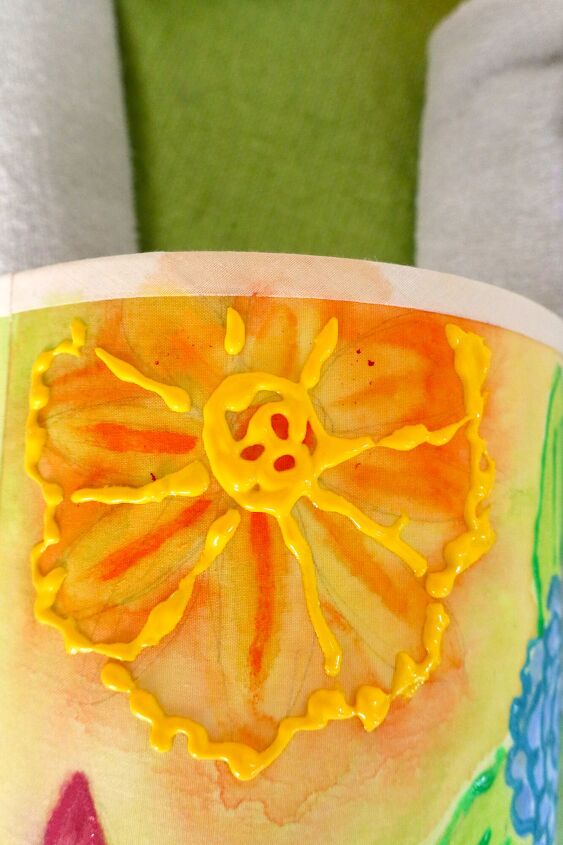
Another way to make a flower is to paint a circle of color. I used yellow in the sample above. While your circle is still wet, you can add other colors, like orange and pink. Once your circle of color is dry, you can use the 3D paint to define the petals and draw the center of your flower.
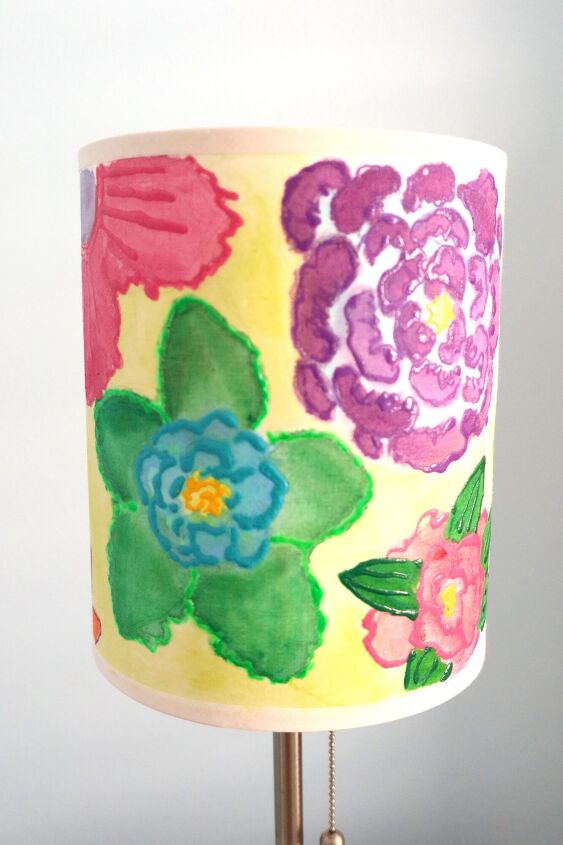
I finished my new lampshade by painting my background with a light spring green. Again, I used a lot of water with my paint and let the color bleed into the fabric.
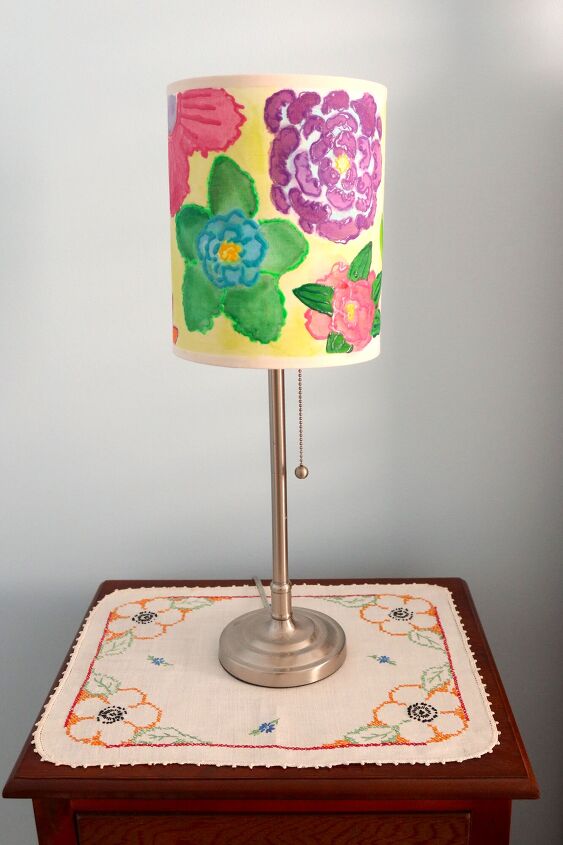
My new shade gives this old lamp a bright new look.
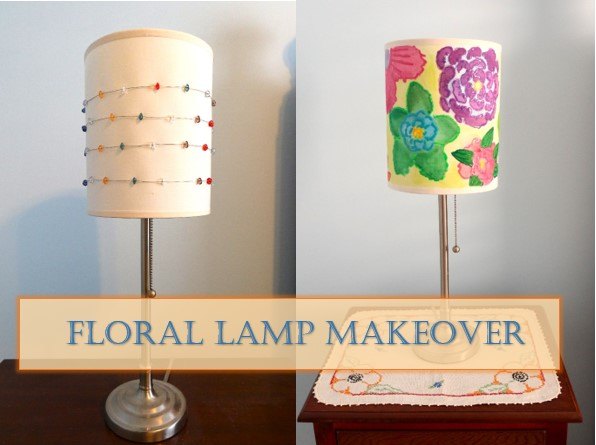
It's quite a transformation from old to new!
Resources for this project:


Comments
Join the conversation
-
Have a blessed day ' 🙏
-
Really cute!


Frequently asked questions
Have a question about this project?