


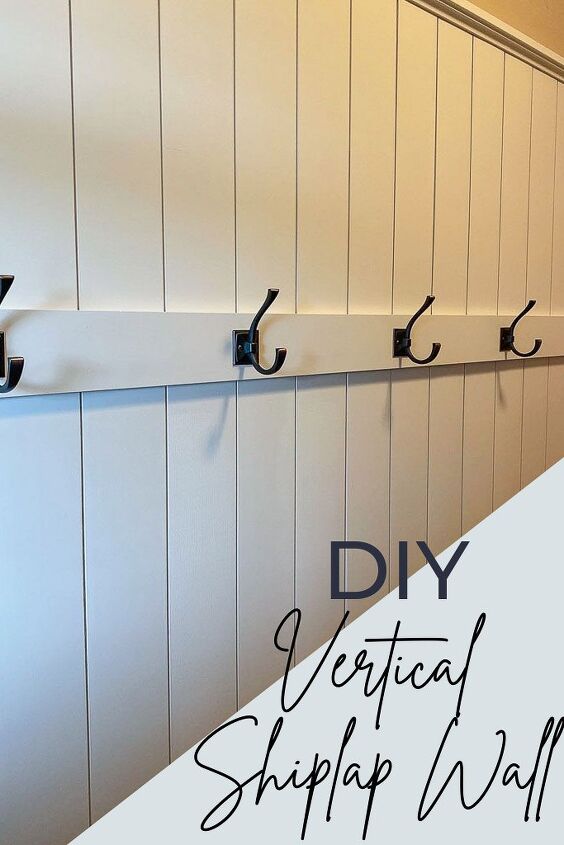
How to Install a Vertical Shiplap Wall
This guide will walk you through the steps of installing a vertical shiplap wall in your home. It’s actually easier than you think! Find out what tools you need to get started, how to avoid common installation mistakes and what paint sheen provides the best finish look for your project.
This post contains affiliate links. Please see my full disclosure policy for more details.
Vertical shiplap is more than just a trend. It’s an effective and quick way to add some interest into your home without doing a lot of work! Plus, vertical boards come in dozens of different textures and sizes that are perfect for any room or space.
Installing vertical shiplap in your home is a great way to add texture and interest to any space. It’s also an easy project that you can do yourself! In this guide, I’ll walk you through the steps of installing vertical shiplap on your own wall.
I’ll cover how to prepare the surface, what tools you need for installation and how to avoid common installation mistakes – like not installing each board level to the wall. We’ll also talk about different paint sheen options so that you know which one provides the best finish look for your project!
I purchased our shiplap boards from Home Depot. While you can purchase large format size boards, and even textured or pre-painted options, I went with the contractor grade 5 inch width for this project.
They were pine boards and already pre-primed which made them easier for painting after the installation.
The total cost of the vertical shiplap boards was around $250.00. This was for an accent wall that was roughly 10 feet long and 7 feet tall. Which really wasn’t too bad considering how different it made the room look.
- Brad or finish nailer * I would strongly encourage a finish nailer specifically for vertical boards. It ensures a stronger installation since you aren’t able to secure each board to a stud in the wall.
- Shiplap boards
- Tape Measure
- Pencil
- Liquid Nails
- Paints *choose high quality to avoid chipping
- Miter Saw
- Level
- Caulk and caulking gun
- Wood filler
- Sanding Block
- Paint Brush
- Foam Paint Roller
- Stud Finder
Remember! Always be sure to take measurements and double check them before you begin making any cuts.
The vertical shiplap boards require either nailing or gluing.
Nailing vertical shiplap boards is a little more difficult than gluing them in place, so if you’re feeling uneasy about nailing vertical shiplap board then we recommend starting with the vertical shiplap installation by using liquid nails.
You’ll also want to be sure that your vertical boards are level along the wall as you line them up for installation so that your wall doesn’t appear crooked.
Lastly, vertical shiplap boards should be nailed on the tongue side of each vertical board and on the boards flat surface to make sure they’re strongly adhered to the wall.
It also helps if you paint vertically along the tongue and groove lips of the board before you install them. It can be very tricky to get paint into those tight gaps once they’re up on the wall.
Side note: A common mistake is not using enough nails when installing vertical shiplap. You’ll want to secure your boards to the wall about every six inches for extra stability.
If you prefer a clean transition of your shiplap boards to your floor baseboards, then I recommend first removing your existing baseboard before you begin. Unlike in my board and batten tutorial, these boards were too deep to just rest on top of the baseboards.

I scored the caulk line with a razor knife and gently pried the baseboard from the wall using a crow bar so as not to damage it. It was in good condition and I wanted to reattach it to the vertical shiplap wall once all of the boards were installed.
Then I used an oscillating multi tool to trim down the length of the adjacent baseboards so that my shiplap would sit snugly next to them.
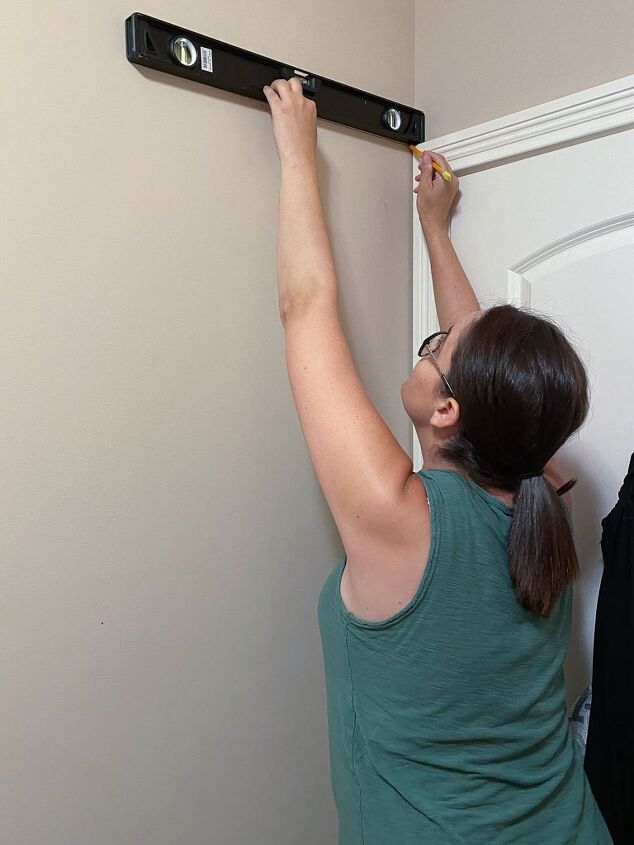
Since I wasn’t extending the shiplap boards all the way to the ceiling, I began by drawing a level line across the width of my wall. This would ensure a nice level placement and served as a guide for how long I would need to cut each board.
I measured and cut each vertical board to the appropriate length. You’ll want to cut boards with a straight edge on your miter saw according to your length measurements taken earlier.
Next, I applied liquid nails to the back of my first board for additional stability. This was optional, but because these were going to be weight bearing boards, I wanted to make sure there was no chance these guys were coming loose from the wall.
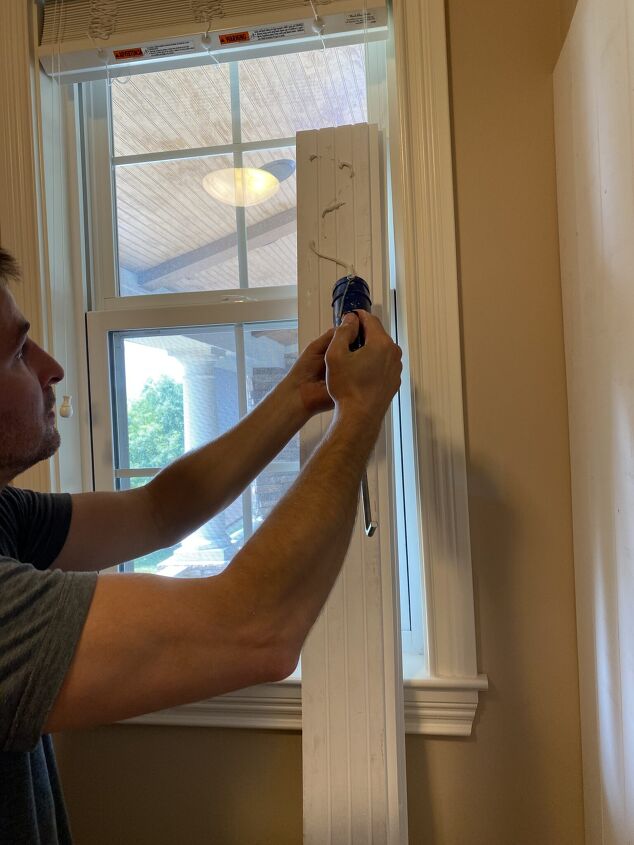
Beginning on the left side of the wall, I lined my first board up vertically and used a level to ensure the entire length of the board was perfectly straight and even.
While holding the board in place, I inserted my first nail hole into the top right tongue of the board, followed by a second hole about 6 inches down, this time on the flat surface of the board.
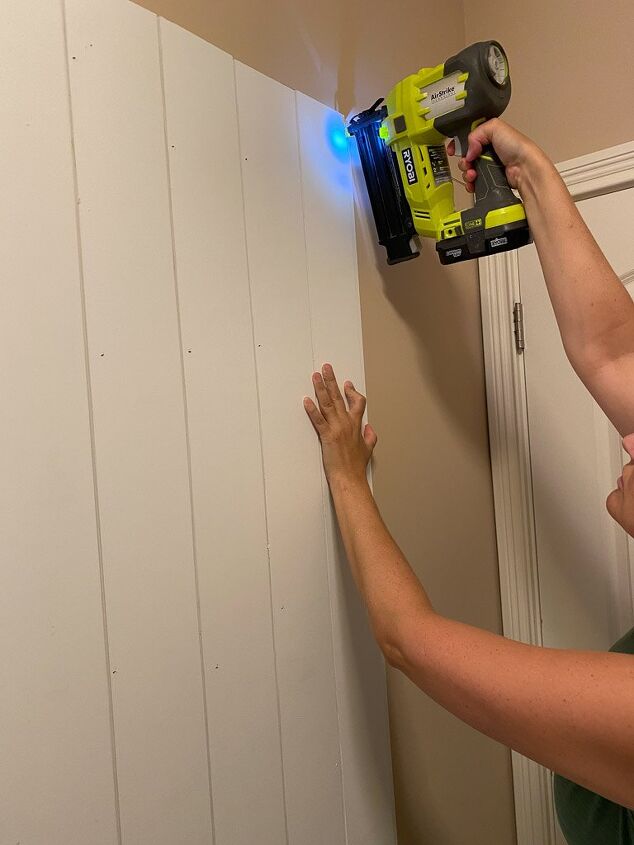
Once you have the top of your board secured, you can use this same method to secure the bottom piece. This ensures that your board doesn’t move and remains level while you attach it with additional nails.
I then continued to nailed in a zig zag pattern every six inches going all the way down the length of my board.
Repeat this entire process for all vertical boards across your wall.
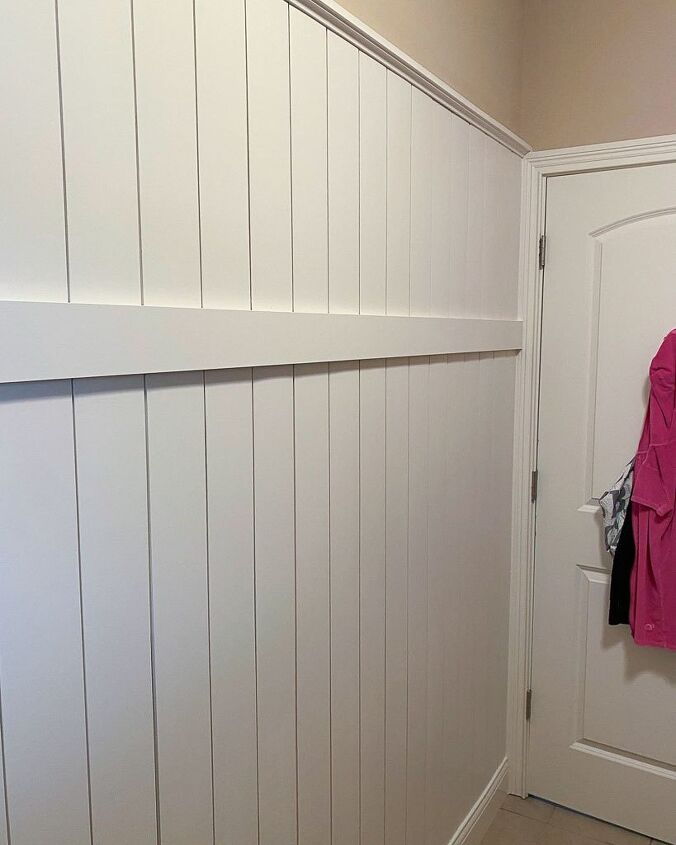
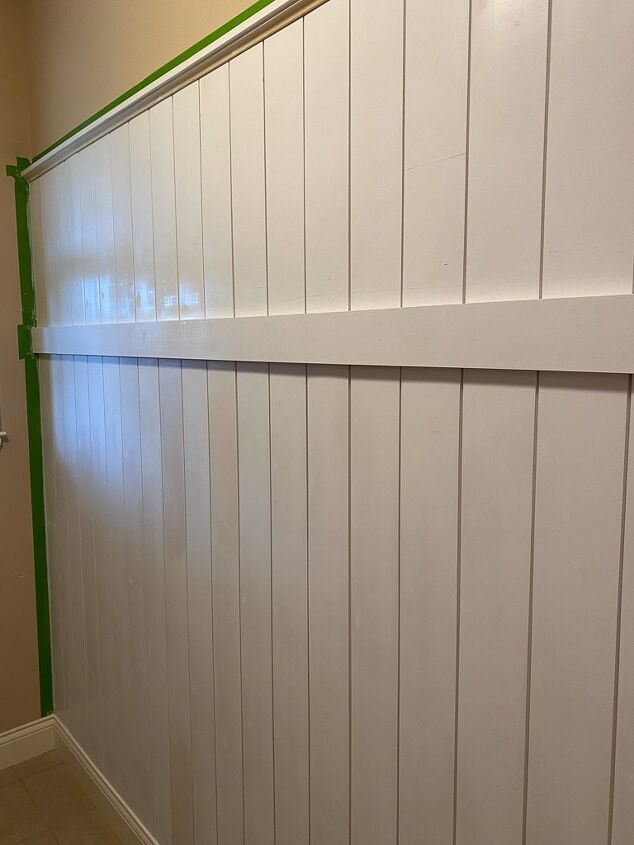
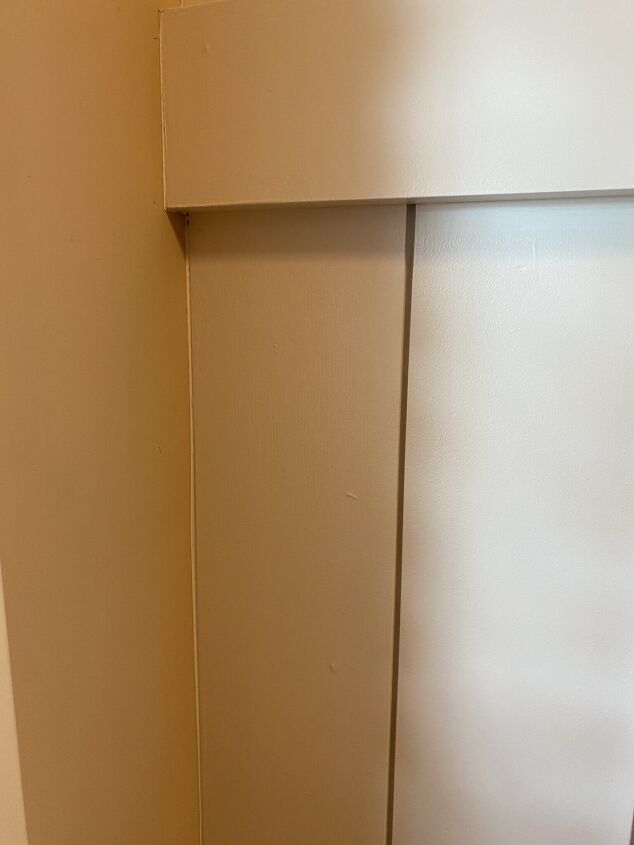
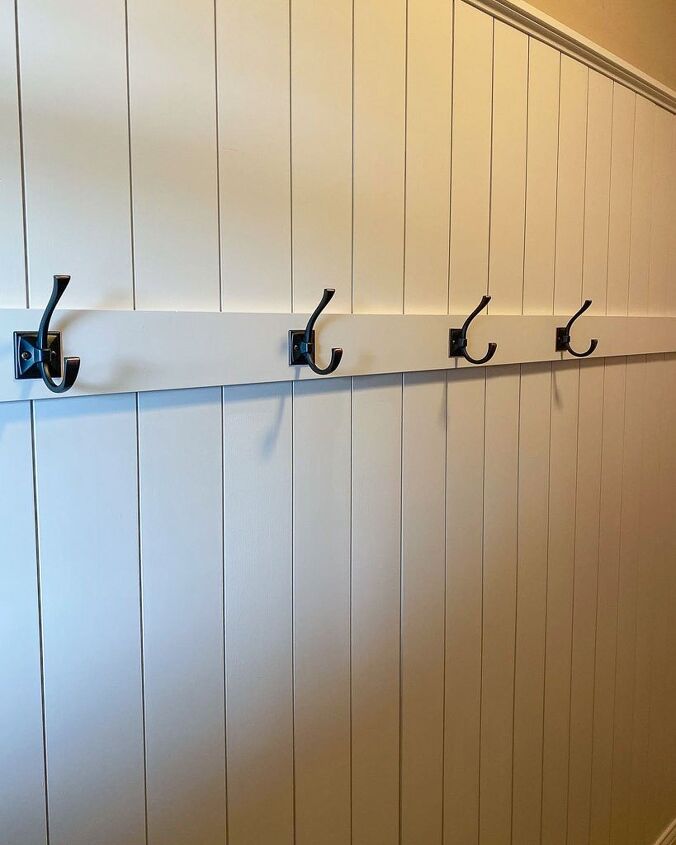
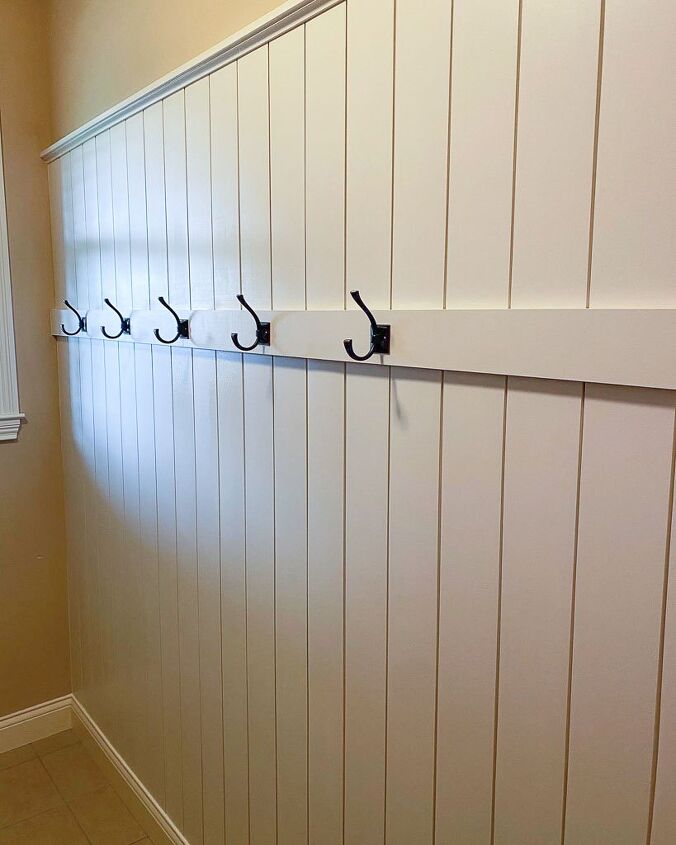
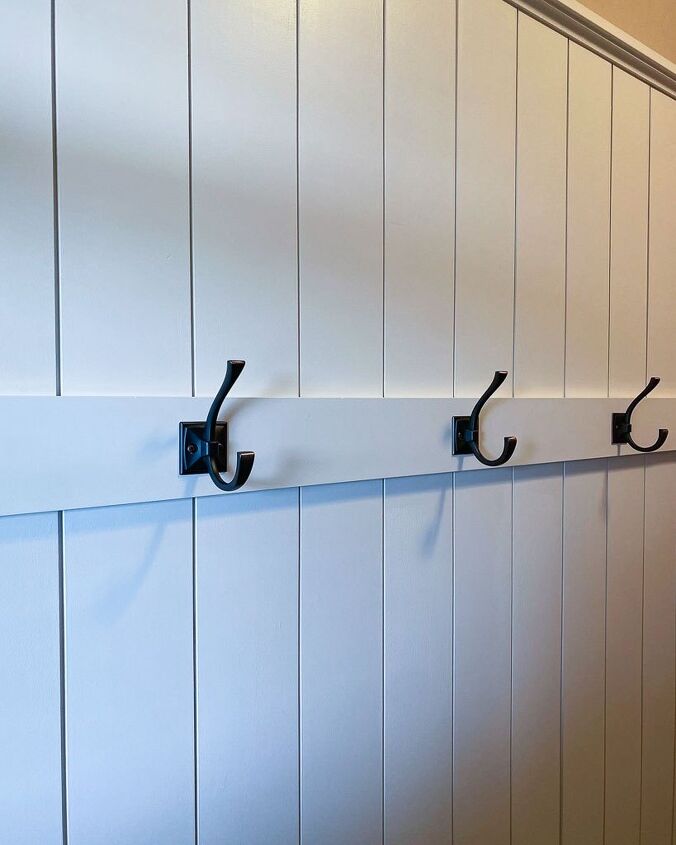
Lastly I capped the vertical shiplap wall with a piece of 1×2 MDF trim and secured it using the finish nailer. And as an added decorative touch, I attached a piece of cove molding just beneath the MDF trim piece. I love how it creates a more custom finished look.
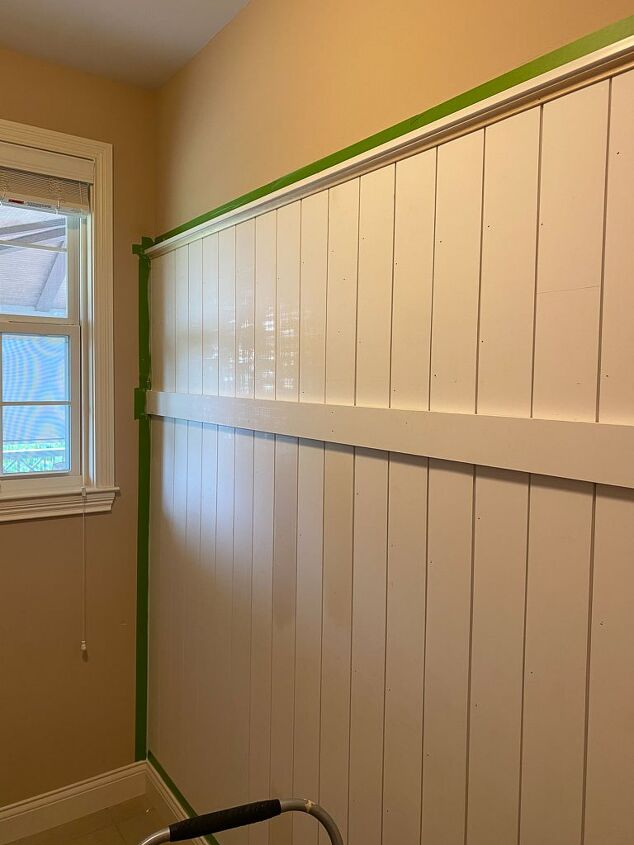
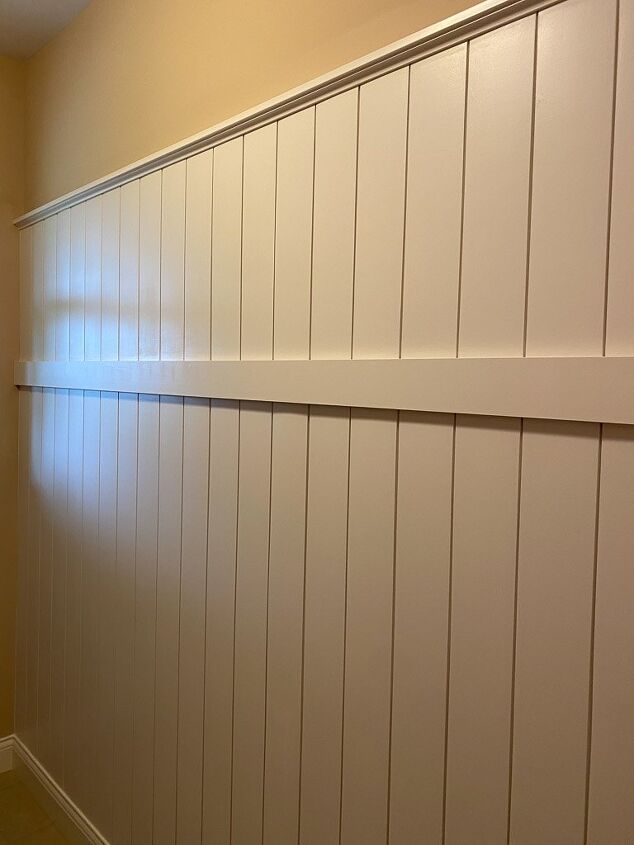
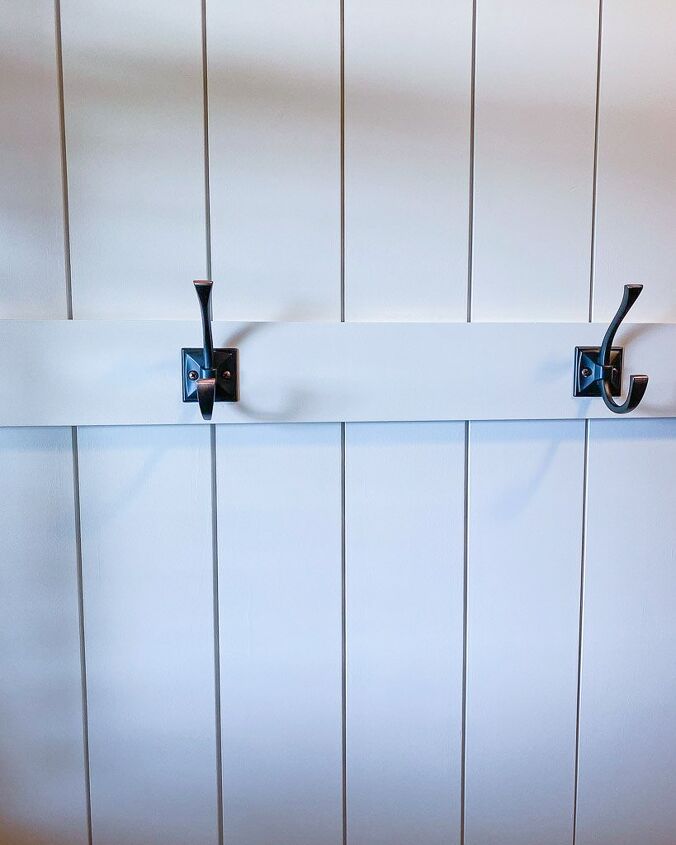
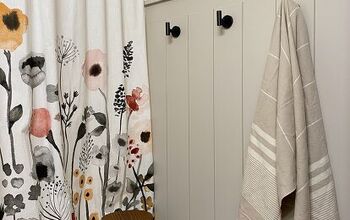
While it wasn’t necessary, I also added a piece of 1×4 MDF trim as a decorative accent for wall hooks to be installed later.
Align your baseboard level to the wall and secure it with a nail every 12 inches. You may need to trim the existing edges of the baseboard to allow it join to the side walls.
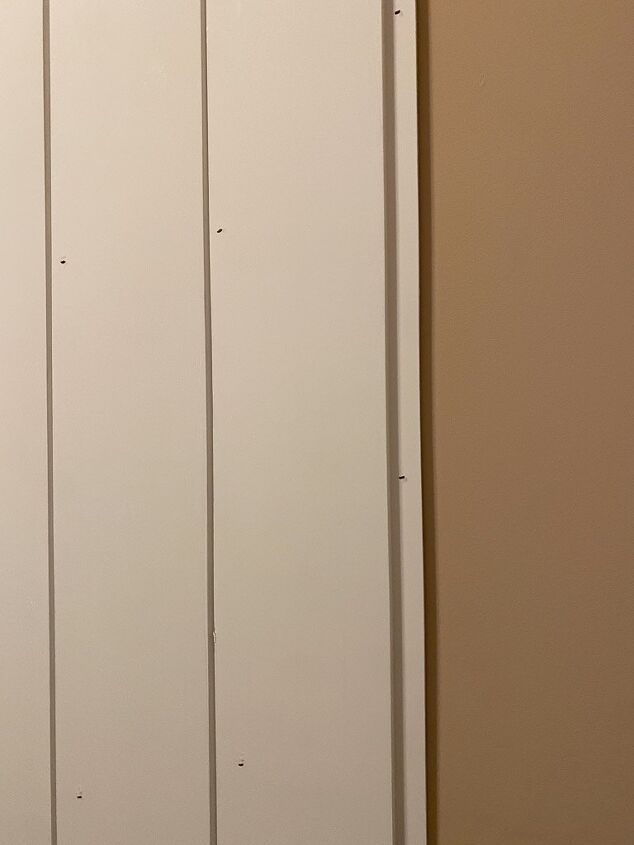
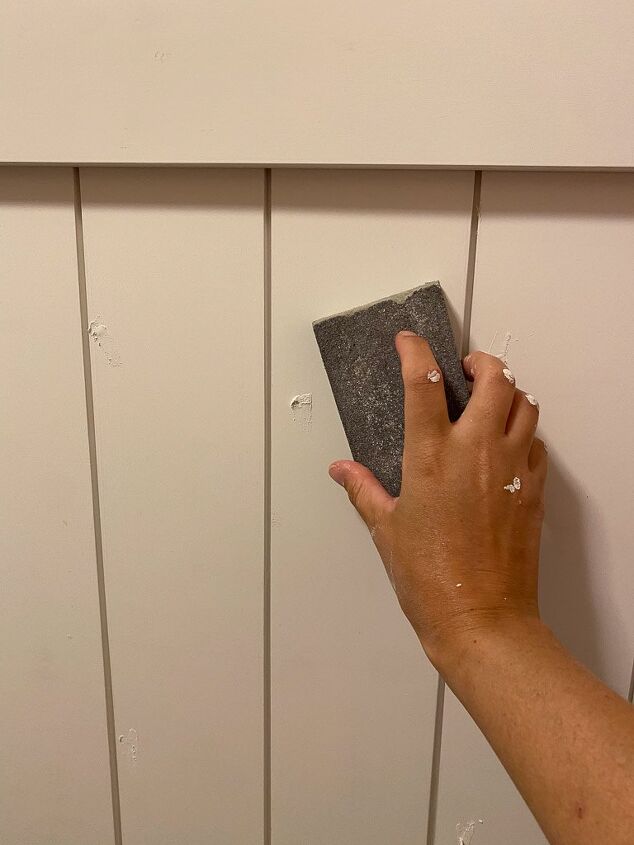
Now you’re ready for the fun finishing process. You’ll want use a small amount of wood putty to fill and patch all of your visible nail holes. Make sure that all nail holes are thoroughly filled and sanded so that your boards have a nice even surface for the paint to adhere.
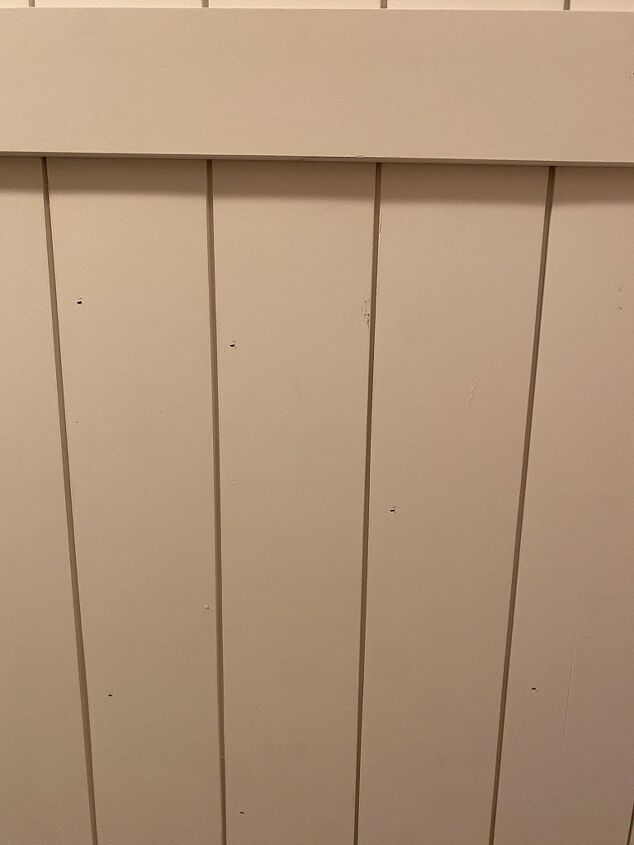
Once the putty is dry, you can sand and smooth it off with a fine grit sandpaper and vacuum up all dust that is created from the process.
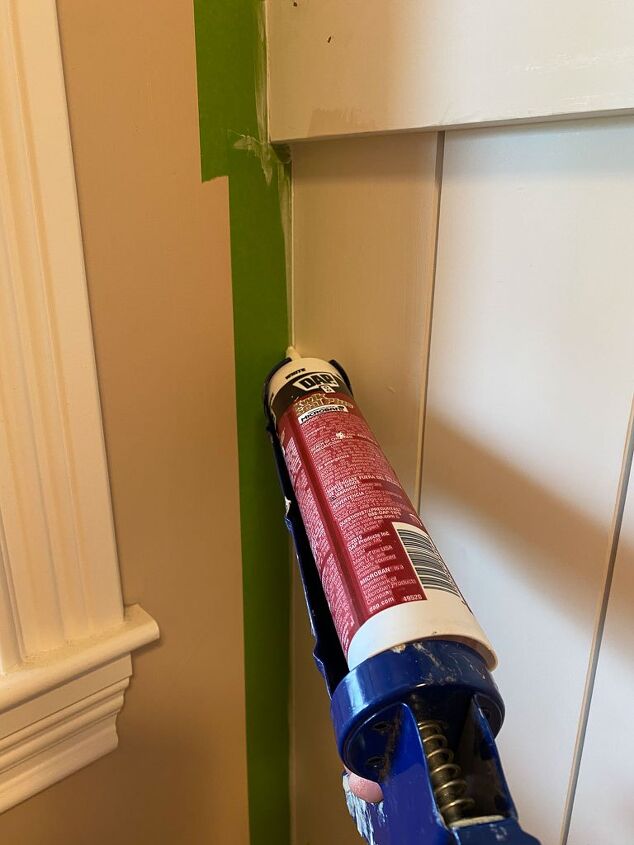
Lastly, you’ll want to caulk along all visible seems where your wood trim and vertical boards align with the adjacent walls.
You can absolutely paint vertical shiplap before installation if you prefer, but you’ll still need to fill in those pesky nail holes and touch up with a fresh coat of paint.
You’ll want to prep your surface before you begin painting.
Since the boards I used already came pre-primed this eliminated one step of the process.
Painting a wood surface can be tricky but it’s actually quite easy if you have some knowledge up your sleeve!
If you want your vertical boards to have a really glossy sheen, then use a semi-gloss finish coat. If you prefer something with less shine but more durability (and easier touch ups), then go with satin instead!
For a durable paint finish that still hides imperfections, I opted to use a satin sheen paint on the wall. It has just enough gloss and sheen to make it washable, but it’s still great at concealing flaws that are pretty common in shiplap boards.
Two coats of this bone paint color were enough to completely over the wall, and I found that brushing in the crevices first and then going over the entire surface with a mini foam roller provided the best finish possible.
This is what it looks like all complete!
Do you have questions about vertical shiplap installation? Put them in the comments section below and I’ll respond soon!


Comments
Join the conversation
-
Great tutorial, thanks for all the tips!
-
Perfeito! Perfect! Parabéns! Welldone!


Frequently asked questions
Have a question about this project?
Do people put shiplap over fireplaces?
Where can I view your tutorial for board and batten?
Does vertical ship lap make the area appear smaller or just draw the eye up to appear taller