


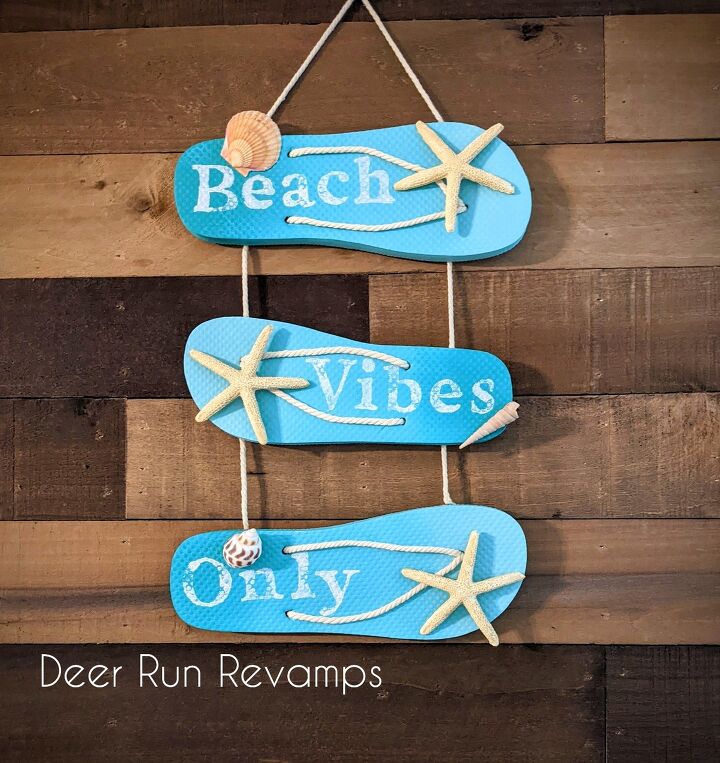
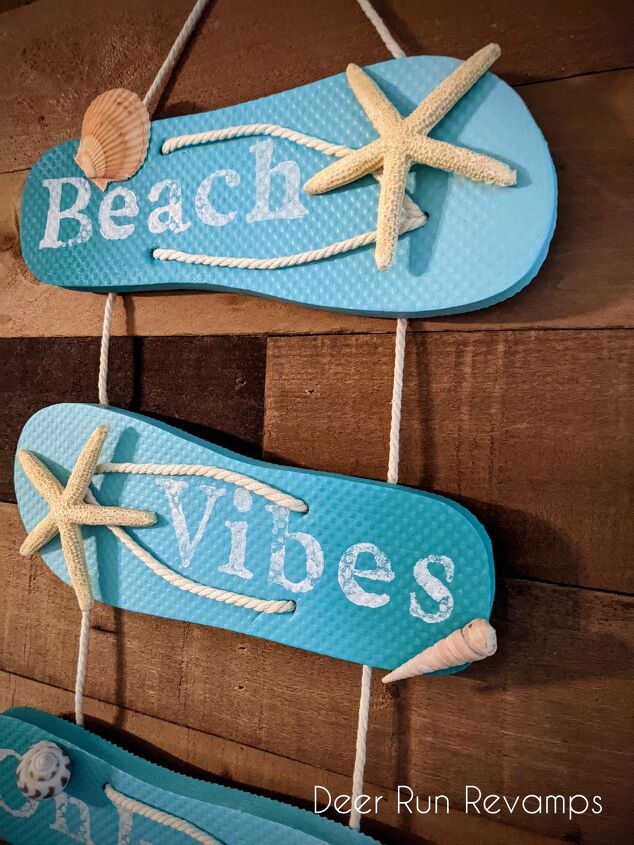
Make An Inexpensive Beachy Wall Hanging Using Dollar Store Flip Flops

Who doesn't love some inexpensive home decor??
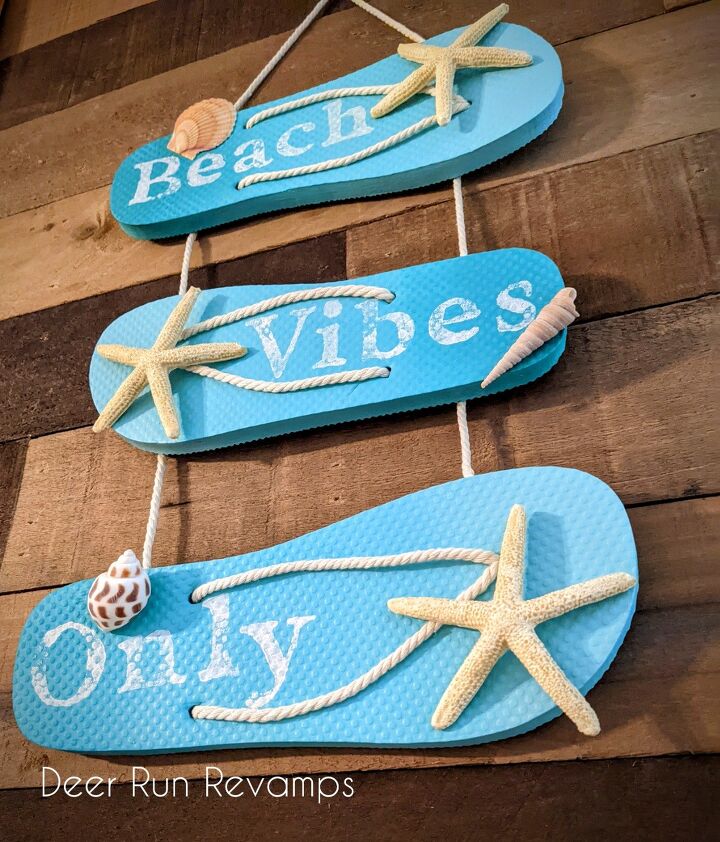
This wall hanging cost less than $5 in materials (the price of the amount of materials used) and I couldn't be happier with how it turned out!
It looks perfect in our sunroom 😍
If you don't have the items that I used on hand like I did (I only had to purchase the flip flops), improvise 😁 Use the paints you have on hand, or instead of stamps for the letters, use stencils or hand paint them, use a different kind of rope if you don't have macrame cord....get creative 😉
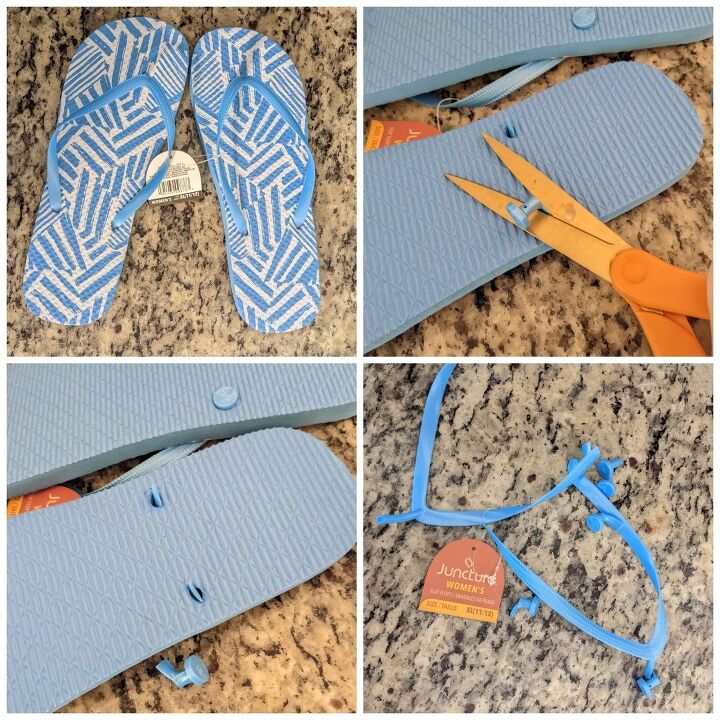
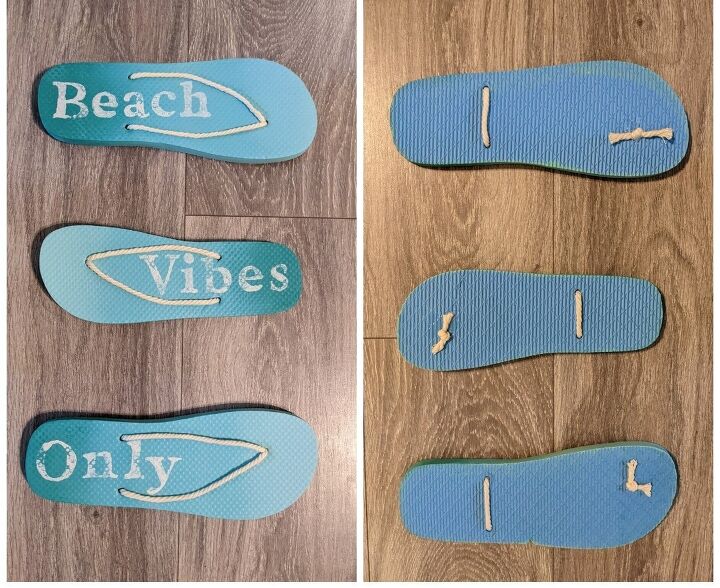
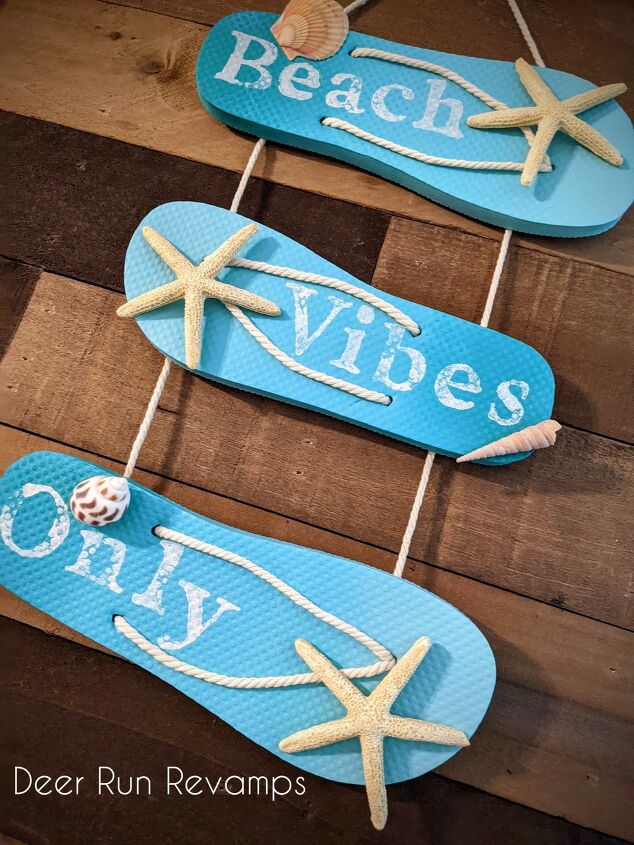
Grab yourself a couple pairs of flip flops from the dollar store. I got one XL pair and one Large (not on purpose, I was in a rush and grabbed 2 pairs that were hanging together assuming they were the same size 😆, but I like the look I got from two different sizes)
Then I cut off the thong straps.
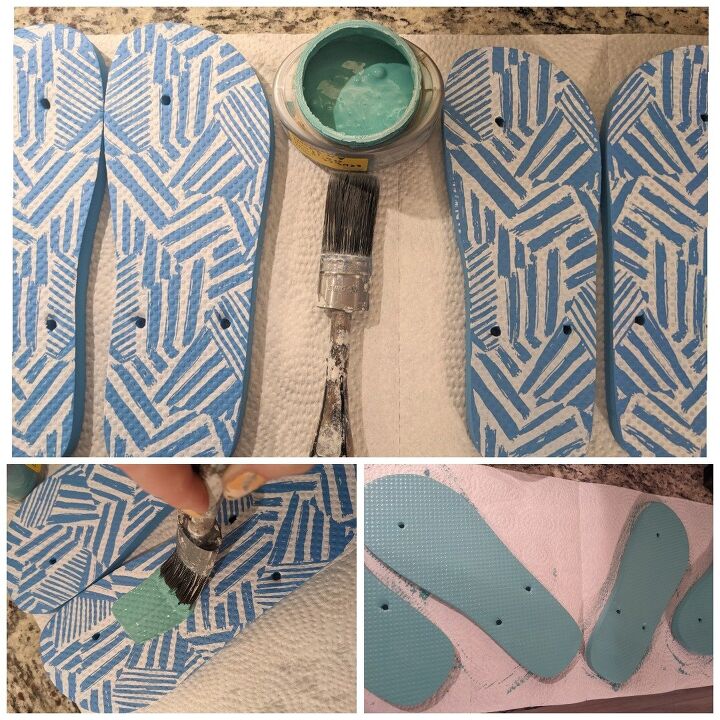
Then it's time to paint on the base color. I mix any left over chalk paint colors together often to make different colors. This was one of those custom mixed colors. I got a pretty greenish blue sea foam like color and painted the flip flops. At this point, I wasn't 100% positive of what saying I was going to put on them, so I painted all 4 flip flops. I had to apply 2 coats to completely cover up the design underneath
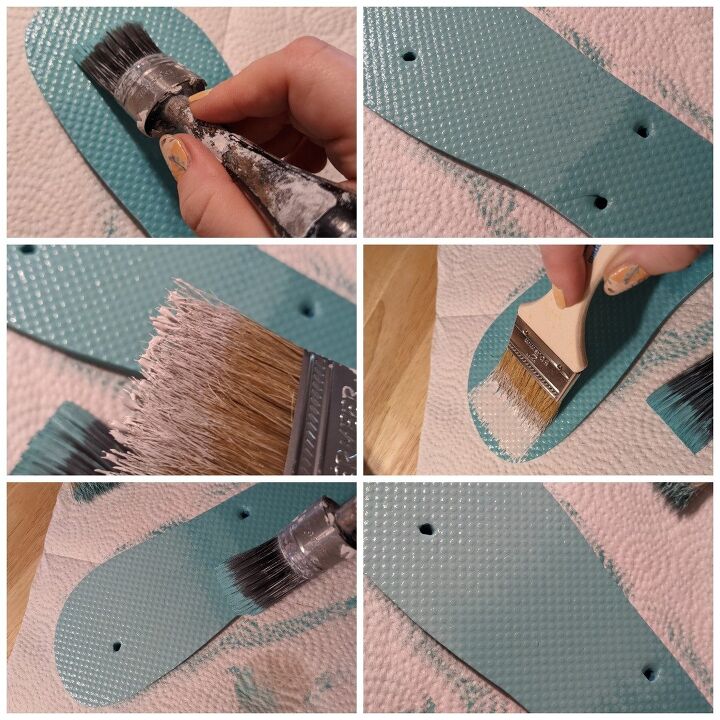
Once the base coats was dry, it was time to blend in some other colors and give these flip flops some dimension. I started at the top of the flip flop and applied a coat of my base color about halfway down. Then while that was still wet, I took a small amount of white chalk paint and blended that into the top 1/4 of the flip flop, going back to my base color to blend in the sharp line between the two colors.
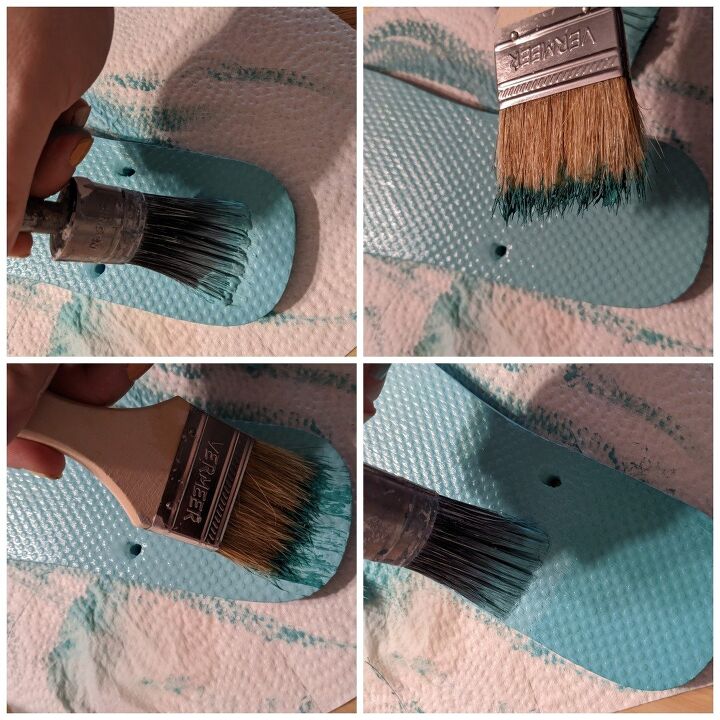
Then I did the same process, but with a darker teal color and for the bottom of the flip flop. So the top was a lighter turquoise, the middle was my base sea foam color, and the bottom heal part was a darker sea foam/teal color
The white and darker teal color are both Folk Art brand chalk paints, one was their white and the teal is called Grotto
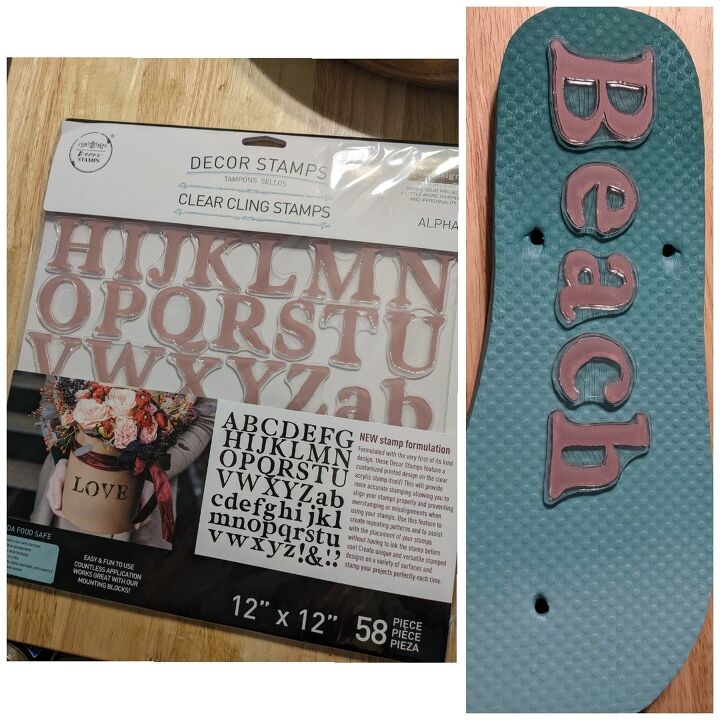
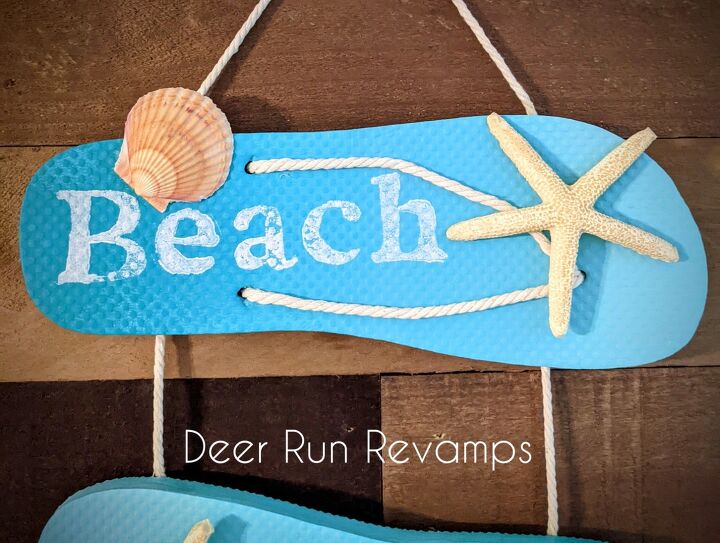
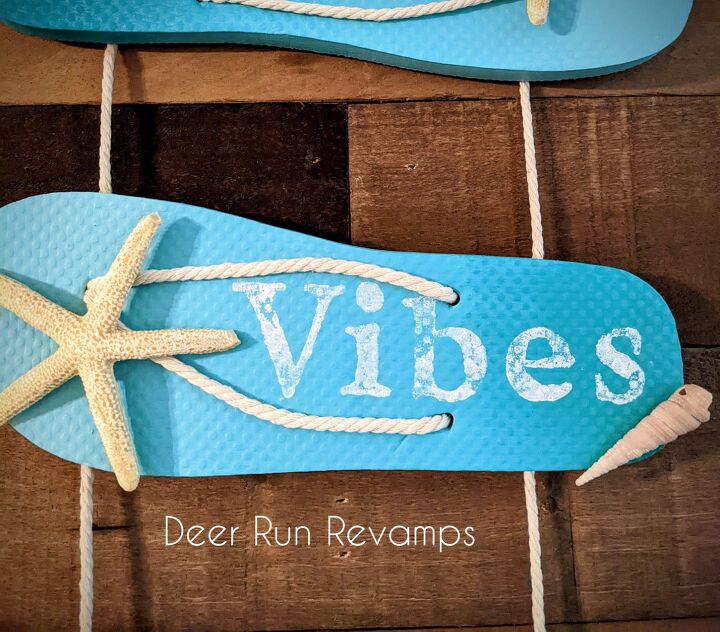
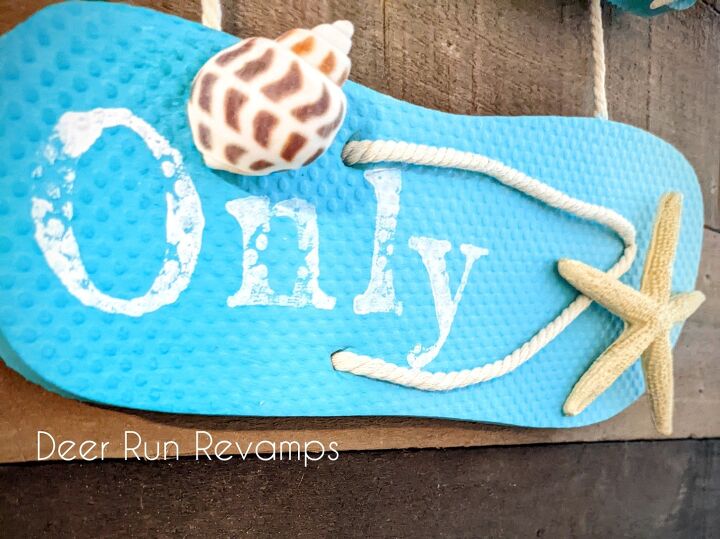
Once that dried, I loved onto the saying. I settled on Beach Vibes Only, so I only needed 3 of the 4 flip flops. I decided to go with both XL and one Large flip flop for the middle word which is Vibes.
I have this stamp from Redesign With Prima called Alpha. It's all the letters of the alphabet in both upper and lower case along with a few punctuation marks. I laid out my letters for the first flip flop to get an idea of how it would fit.
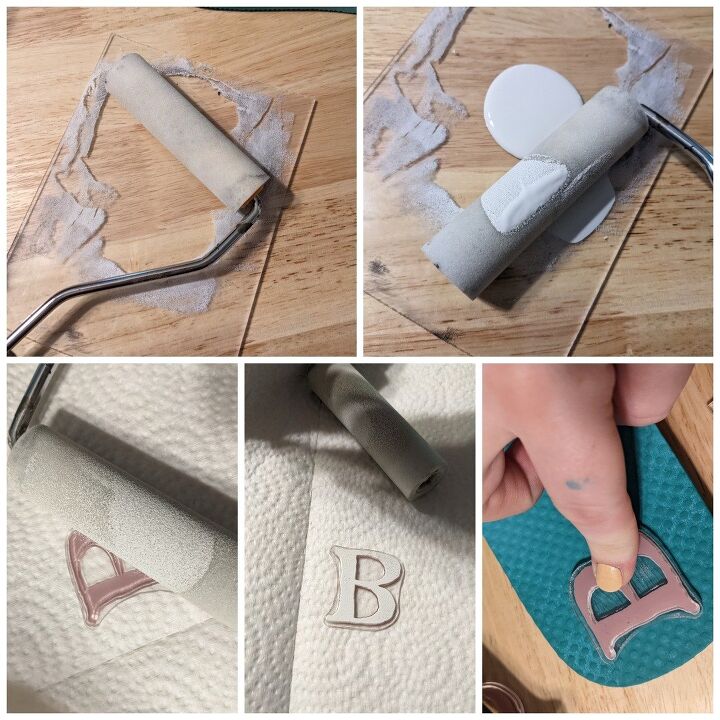
Then I grabbed my roller kit from Redesign With Prima. This kit comes with the acrylic block to pour some paint into, the roller handle and some foam roller refills. Perfect for stamps and stencils.
So I poured some white paint onto the acrylic block, then rolled the roller in it getting just a bit of paint onto the center of the roller. You don't want a ton of paint on the roller. Then roll over the letter and carefully press the letter into place. Gently tap all over the letter being careful not to move it. Once you've tapped the entire stamp, carefully lift it straight up then immediately wash any excess paint off of the stamp and lay on a paper towel to dry. This will ensure your stamps will last a very very long time.
Now continue on to each letter repeating the process above until each flip flop is complete
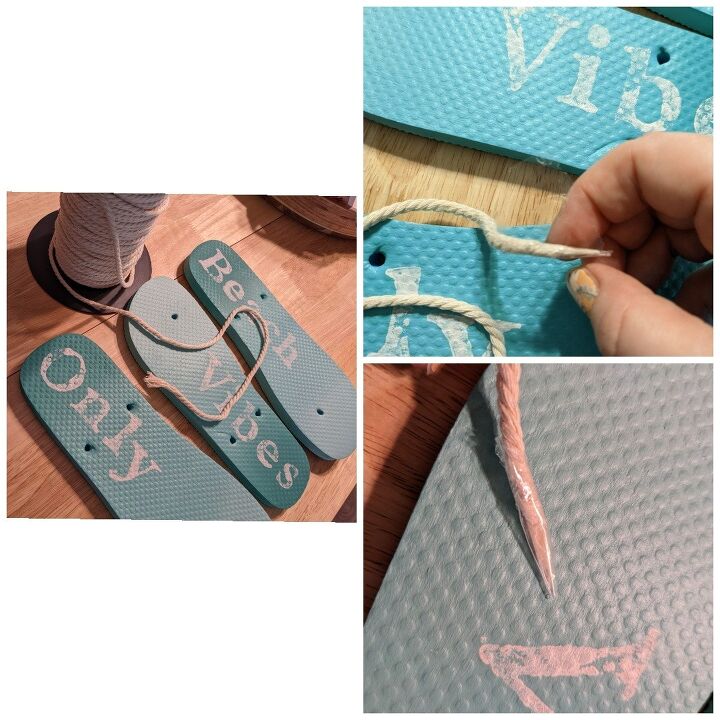
I used a 4mm cotton macrame cord to create the new thong section of the flip flop. Take a small piece of tape and wrap the end tightly. This makes it super easy to push the cord through the holes.
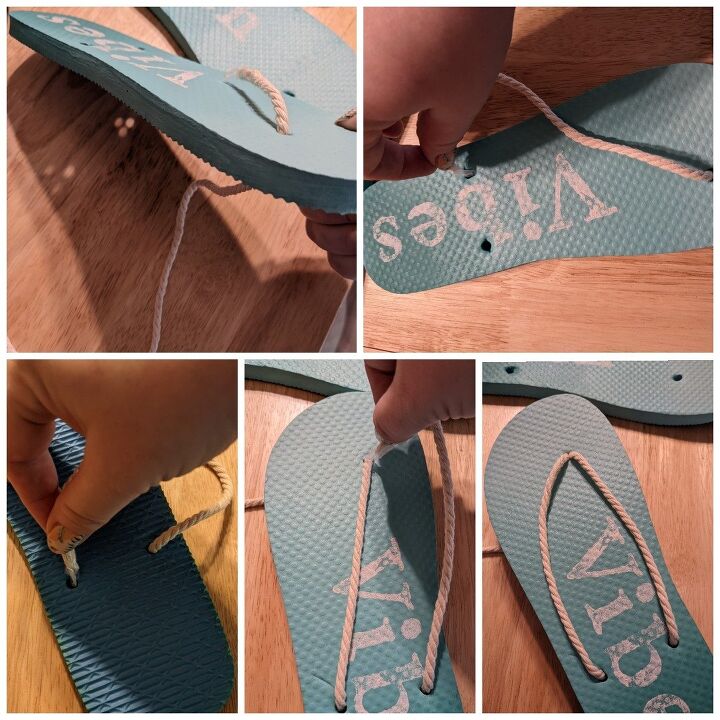
Then stick the cord through the top hole of the flip flop coming from the back and Into the right side of the bottom holes, crossing over underneath the flip flop to the other hole, and back through to the top top hole and push it through so that both the starting end of the cord and the ending part of the cord are both through the top hole on the under side of the flip flop
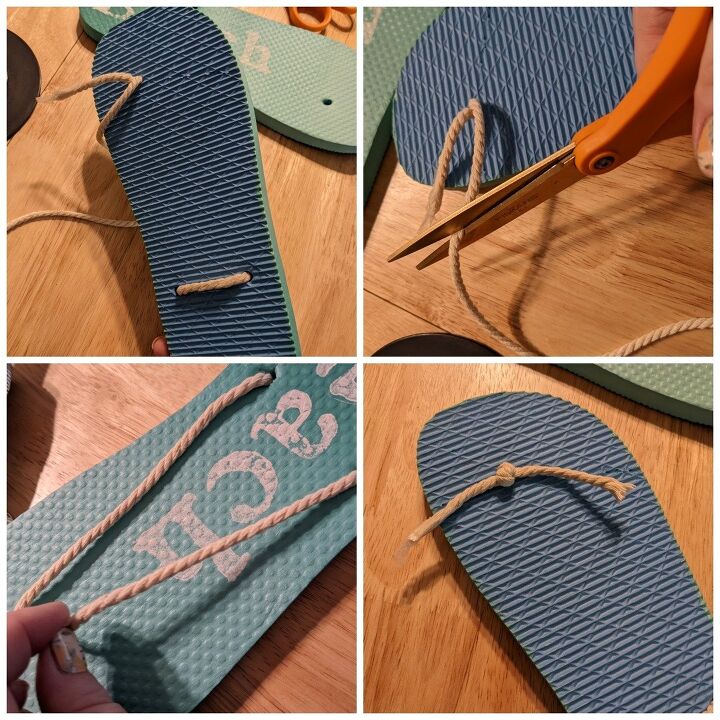
Cut the cord so that you have about 4 inches on each end. I made sure the thong section was a bit loose so that I could make it lay a specific way.
Then tie a knot with the 2 ends
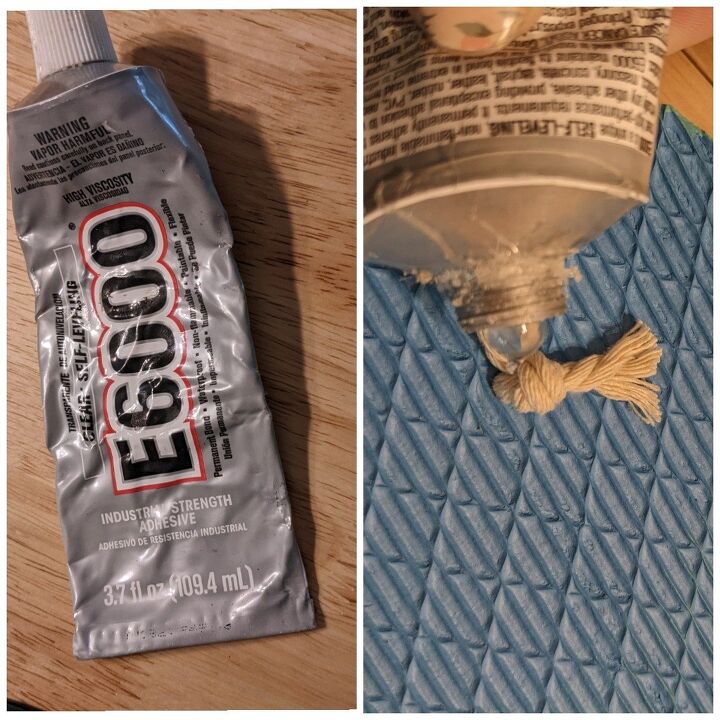
I added a dab of E6000 glue to the knot to ensure it holds
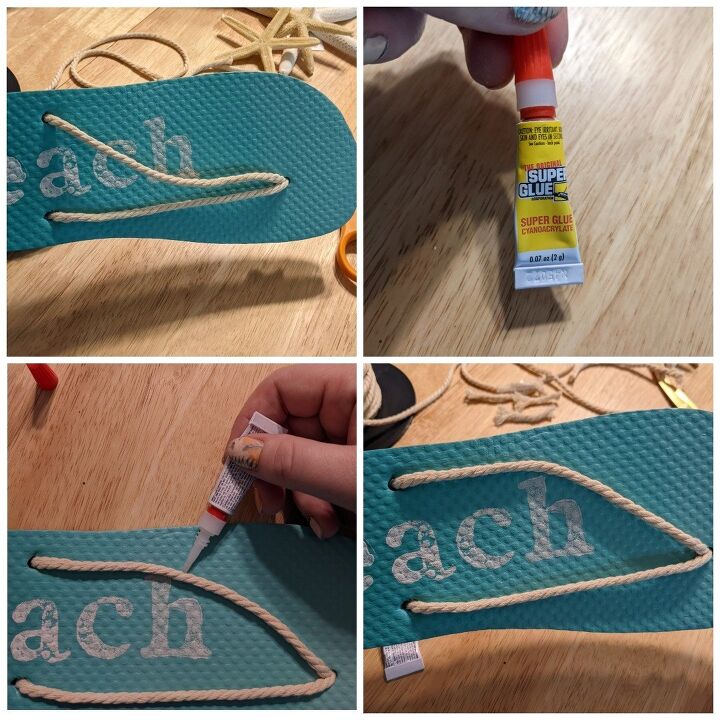
When holding the flip flop up as if it were hanging on the wall, The thong section hangs down past the letters, not the look I want. So I added a very small dab of super glue to hold the cord in place so that it went around the letters.
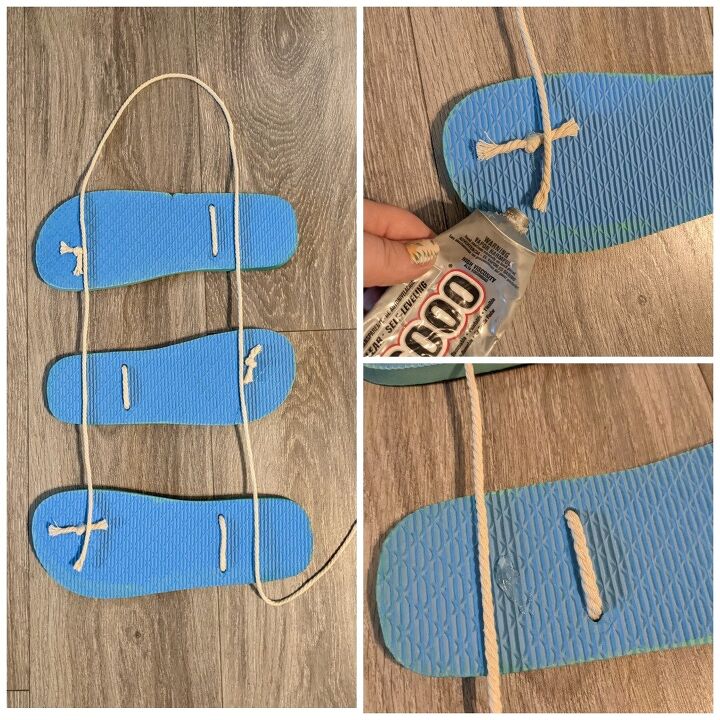
Once that glue was dry, I went ahead and glued on the string that holds it all together.
I laid the flip flops out and laid the macrame cord over them to get an idea of where I wanted the string to go. Then took my E6000 and starting at the bottom left, I glued the very end of the cord into place. Then I just moved up the left side gluing the cord into place onto each flip flop. For the top, I left about 6-8 inches of cord to use as my hanger, then went down the right side gluing the cord to each flip flop.
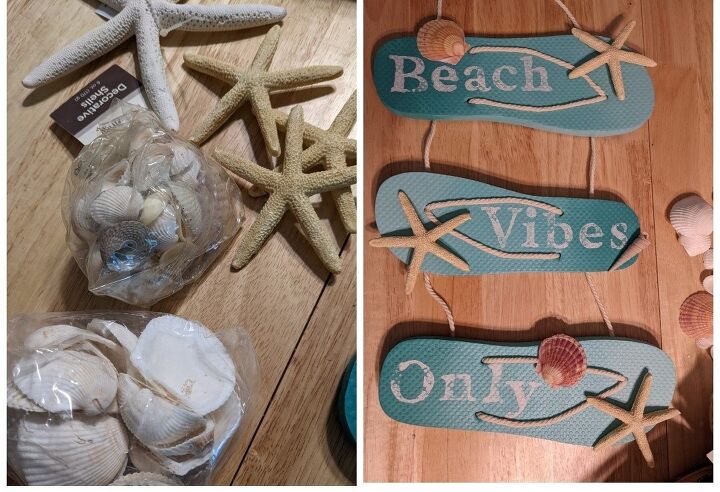
I grabbed some starfish and shells and glued them on using E6000 and super glue

Once the glue was dry, I hung it up and enjoyed my new creation 🐚🏖️
This was a super easy, super cheap project
You can even get the kids involved!
And there's so many other sayings you could put on these flip flops!
You can find the Redesign With Prima Alpha Stamp, along with many other products, in our Etsy shop
https://www.etsy.com/listing/903330822/redesign-with-prima-alpha-clearly
Thank you so much for reading our tutorial! We hope you've enjoyed it! ♥️♥️
And as always, if you have any questions, feel free to reach out
Resources for this project:
See all materials


Comments
Join the conversation
-
Very cute!!
-
Great idea! Going todo this


Frequently asked questions
Have a question about this project?
Why do you have to paint the flip flops?
I don’t understand how you paint the letters and then press them down on the flip-flop. What in the letters be backwards? You’re not attaching the letters to the flip-flops, correct? But if you put the paint on the upside, they’ll be reversed when you press it onto the flip-flop. more pictures of that would be helpful because I just don’t get that part. Very cute project and I want to make it.
Did you use a sealer after you were done painting each flip flop?