


$20 No-Sew Office Chair Makeover

by
Katie Reed
$20
1 Hour
Medium
Recently I have been in the process of creating myself a beautiful home office. My tastes are quite eclectic, and I'm not one to be very matchy matchy, but I'm working on it, and I'm pretty happy with what I have so far. But one thing that wasn't working for me was my office chair.
Now, I will tell you that as part of my office beautification, I did spend a buttload of money on some new furnishings. I'll write about it all another time, but one of the biggest splurges was when I bought an amazing chair from World Market. It was $300. So you can imagine my mortification when, after a month of trying to make it work, I realized that I just wasn't going to be able to keep it as my desk chair.
But having blown my budget on that chair, I knew I couldn't justify the expense of getting a new one. I couldn't bear the thought of getting one of our cat-scratched, yogurt-coated old ones in my beautiful new room. So I did what any crafty woman would. I decided to DIY it.
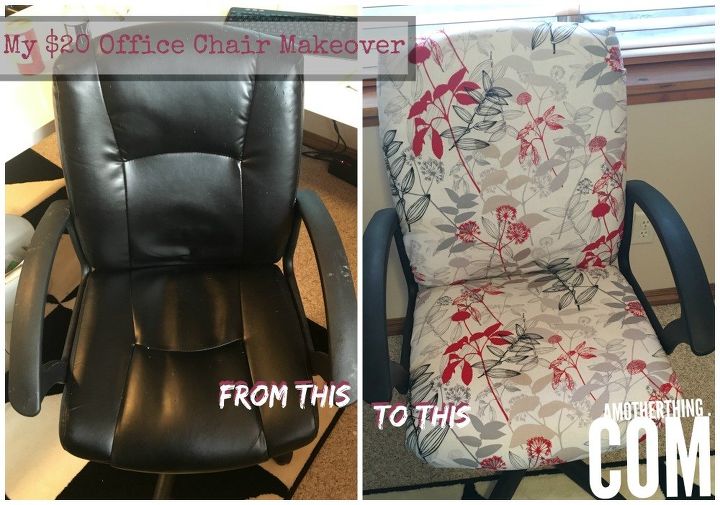
Here's the before and after. Pretty snazzy, eh??
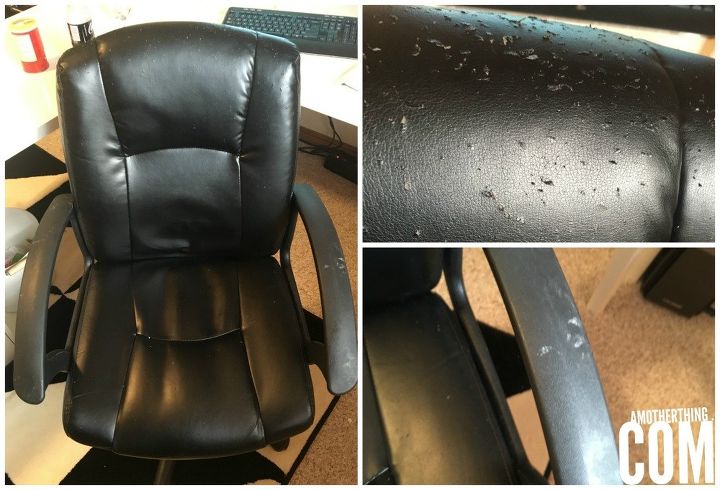
I began with a pretty awful chair that was dirty and completely cat-scratched.
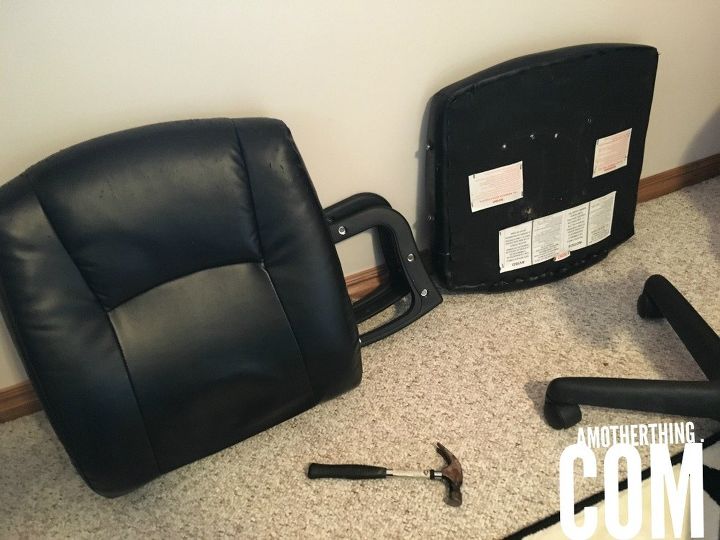
I took it all apart (it was pretty easy, as it was held together by 4 screws) and cleaned it up a bit.
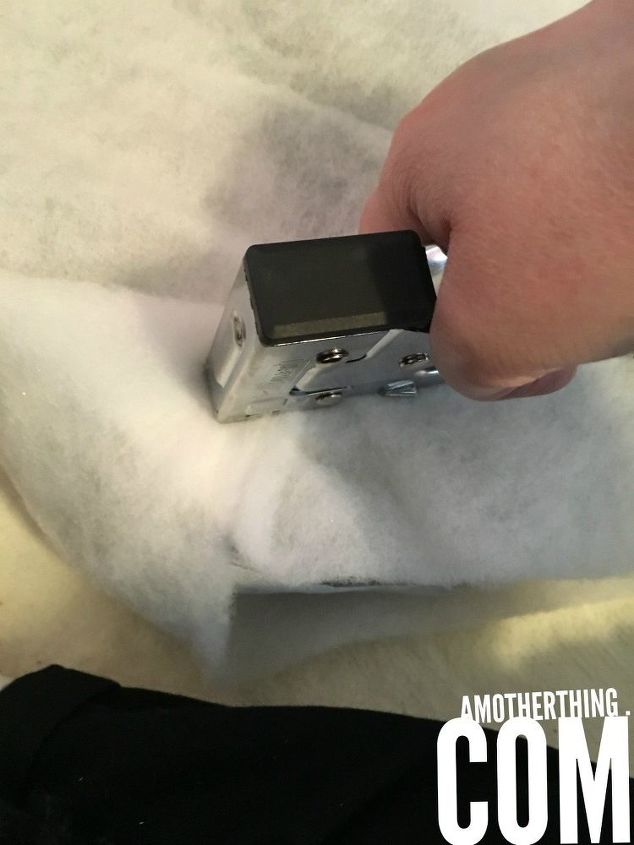
After removing the top cover (it was zippered for ease!), I wrapped it in batting and stapled it down.
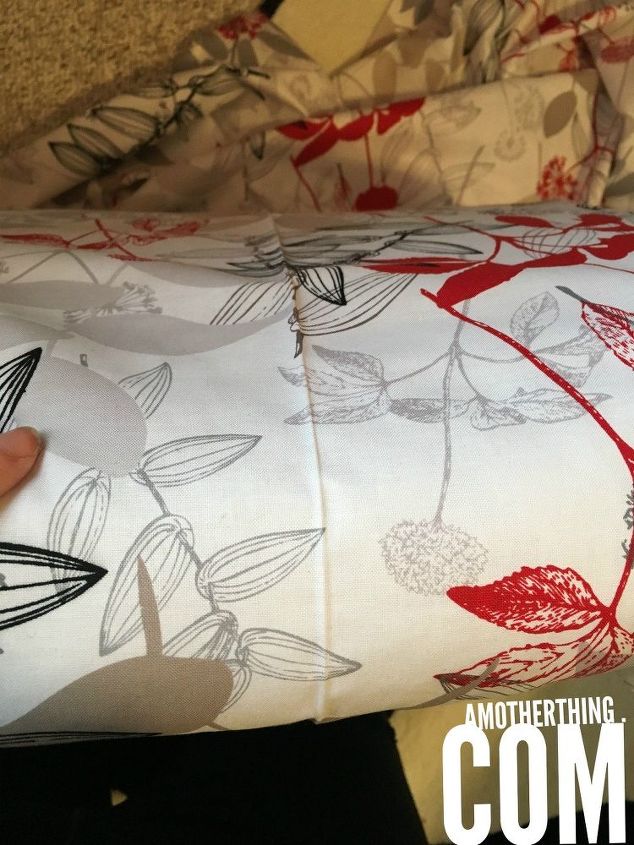
I then used some cheap fabric from Walmart to cover it.
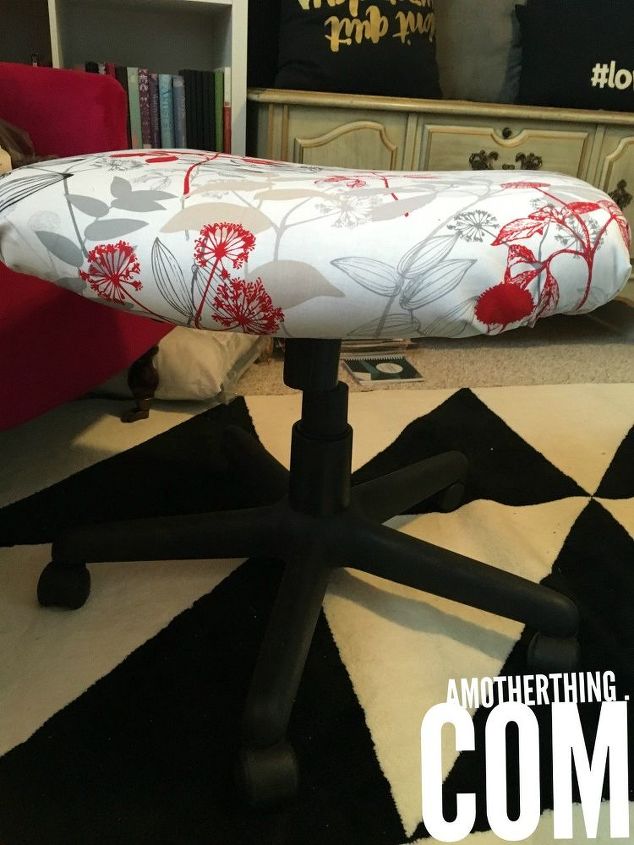
The bottom part was super simple, as I could hide staples underneath the seat with no issues.
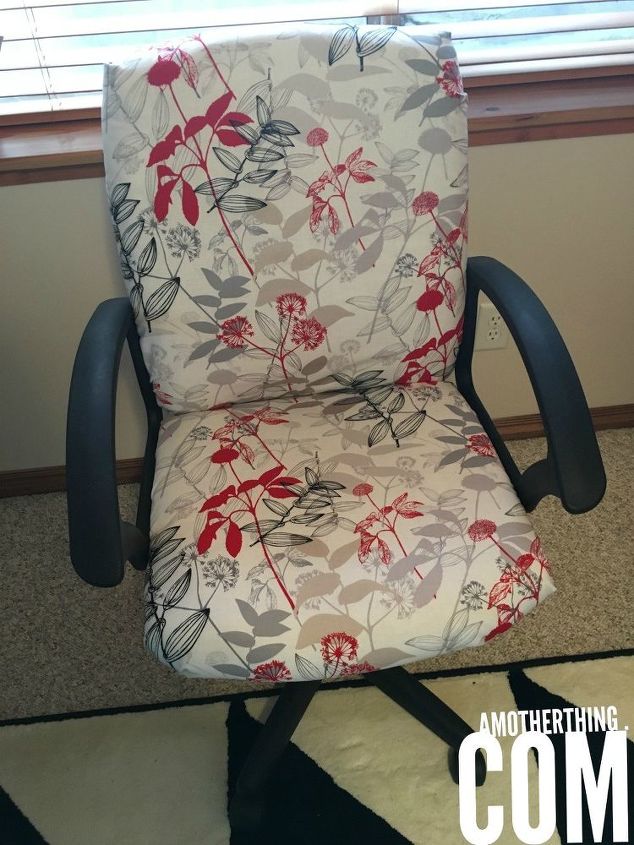
The top of the chair was super difficult, though. You can't just staple it in willy nilly. You have to hide them! Since I didn't know how to sew it right, I got creative with my staple gun.
Want more details about this and other DIY projects? Check out my blog post!
Comments
Join the conversation
3 of 41 comments
-
You could do the back in two pieces. Wrap the front of the chair and staple the edges on the back. Cut a second piece to cover the back. Hem the edges of that piece by folding over and ironing a crease. Put it over the back, covering the staples and attach with either those big brad looking things or use fabric glue or stitch witch with a steam iron.
-
Love the new office chair, I didn't have a lot of time, so I ran across 2 King Size Pillow Shams, slipped it over the back, stapled the remainder of the fabric under chair . On the Bottom Part, I slit the back of sham to fit around the stand , then cut off excess and stapled. Worked better than I hoped !! I only paid 3.00 for the shams !!


Frequently asked questions
Have a question about this project?