


How to Quickly Clean Your House From Top to Bottom

You’d love to know how to quickly clean your house, but it’s easier just to daydream about it, right? It’s more simple than you think with the right tools and supplies—and a plan.
No matter how large or small your home is, there is a way to declutter and de-grime without breaking too much of a sweat. It’s important to know that a quick cleaning session and a deep cleaning session require similar tools and supplies, but different plans of attack.
Our guide will give you the best ideas and three simple cleaning plans to make your home sparkle, along with some DIY cleaning solution recipes using common household items for when you’re in a pinch and don’t have time to run to the store.
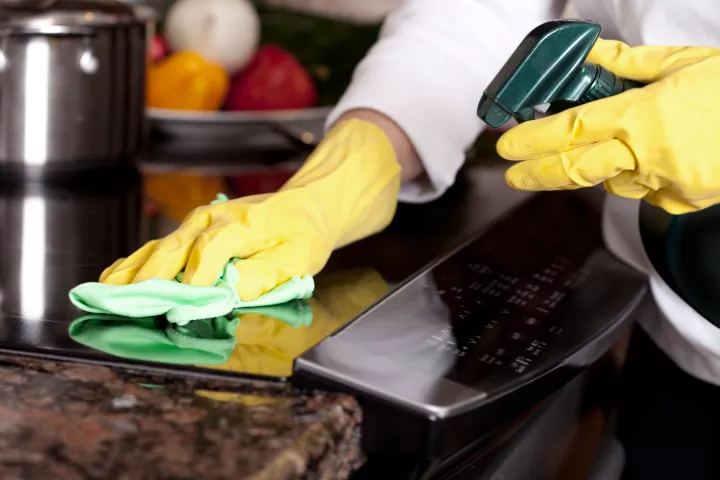
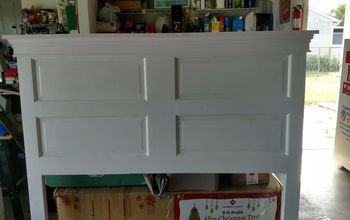
Photo via 1 Less Thing Cleaning
Plan 1: How to Clean Your House in 30 Minutes or Less
If you have only 30 minutes or less get yourself into high gear and clean your home quickly with these five steps that only take a few minutes each.
Do you remember the “Ten Second Tidy”? Well, this is like that but with a little more power—the key is to focus only on high-traffic areas like your entryway, living room, and main bathroom.
Tools and Materials Needed
- Large bag/box/laundry basket for clutter (optional)
- All-purpose cleaner
- Cloth or paper towels
- Vacuum
- Candle(s) (optional)
1. Declutter
Throw (we literally mean this) clutter from high-traffic areas into a bag, box, or laundry basket, or put it all temporarily in another low-traffic room.
2. Wipe Down
With your all-purpose cleaner and a cloth or paper towel, wipe down the kitchen and bathroom counters (and the toilet) and any tables you may sit around.
3. Take Care of Garbage
Kitchen, bathroom, office wastebaskets—take it all out!
4. Vacuum
Run a vacuum through the high-traffic areas, making sure to get wall corners and edges, where dirt buildup tends to be heavier.
5. Set the Mood
Take the extra minute to dim the lights if it’s nighttime. Light a candle or two for ambiance and fragrance.
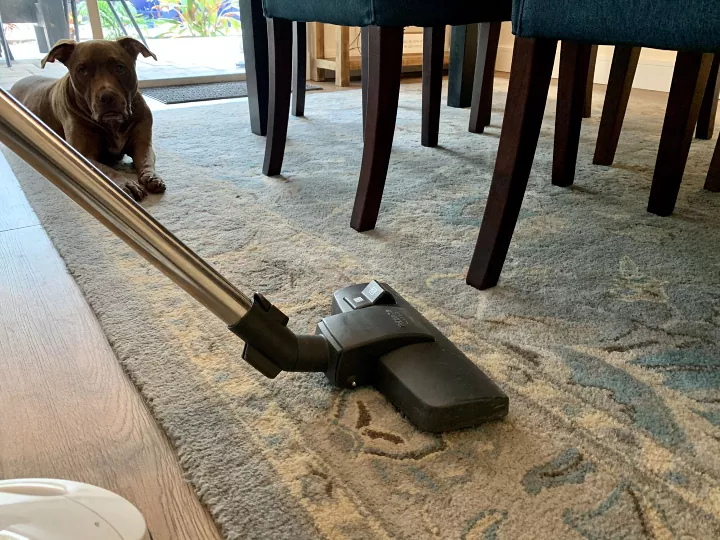
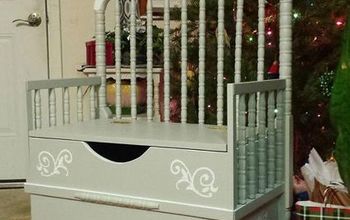
Photo via Rebecca, RestyledHomes
Plan 2: How to Clean Your House in One Hour
To clean your house efficiently in one hour, prioritize what needs cleaning the most. If your guests will never step foot in your master bedroom, who cares if your bed is unmade? Don’t waste time tidying up unnecessary rooms. Instead, ask yourself what action will make the biggest impact.
Here are the typical hot spots to work on and some guidelines on how long each may take and what not to forget to do:
1. Declutter the Entryway—10 minutes
Remember to keep a rubber tray or basket by the door to throw shoes in. If there are piles of mail on the table, tidy them up or throw them into another room that won’t get traffic for now.
2. Clean the Main Bathroom—15 minutes
If your main bathroom will likely be used by guests, remember to:
- Put away toiletries
- Wipe down the sink and faucets
- Keep the shower curtain or door shut
- Clean the toilet
- Shake out rugs
- Wipe the mirror
- Put out fresh towels
- Add a new roll of your best toilet paper
- Pop an air freshener in the room
3. Declutter and Wipe Down the Kitchen—20 minutes
In the kitchen, first declutter by clearing everything off the counters, then follow up by wiping down surfaces.
Remember to:
- Throw items and papers into cabinets, drawers, and decorative boxes
- Push items on the counter, like your toaster and coffee machine, to the back and sides to make the surface appear less busy
- Clear out the sink and put dishes in the drying rack away
- Take out the garbage
- Wipe down the counters
- Run a dry mop or vacuum around the floor
- Light a jar candle (for scent and ambiance)
Two Must-Have Cleaning Tools
4. Vacuum the Living Spaces—15 minutes
Take care of your vacuum, because it can give your home a quick pick-me-up by removing dust and cobwebs. When it comes to vacuuming all living spaces, remember to:
- Use a soft upholstery brush to vacuum along baseboards for crumbs and dirt
- Use crevice tools to get under tables and capture dust bunnies
- Vacuum carpets and floors with the right pile height and hard flooring adjustment
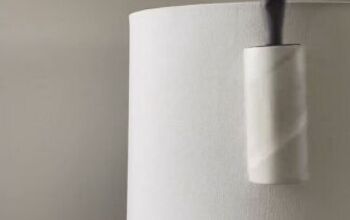
- Vacuum lampshades and artwork if you spot cobwebs around them
Adjust Vacuum Height

Photo by Alicia W
Plan 3: How to Quickly Deep Clean Your House
Spring cleaning usually means deep cleaning, but deep cleaning doesn’t have to feel like a burden or take forever to do. Learning how to spring clean your house quickly is possible if you have the right plan to deep clean your home.
Besides an annual spring cleaning, you may want to deep clean for the following reasons:
- Upcoming holidays
- Overnight guests
- Entertaining
- Selling your home
Every room or space, no matter how large or small, typically has nine areas to clean, and we’re going to go through how to clean each one. Taking care of all of these areas equals deep cleaning.
Tools and supplies are included in each step.
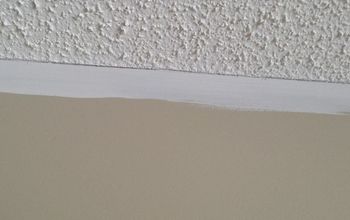
1. Clean the Ceiling
When deep cleaning your home, always start from the top of the room and work your way down. That way, when dirt and dust fall down, they won’t re-dirty an already-dusted and vacuumed floor. Here’s how to clean your ceiling:
Tools and Materials Needed
- Step ladder
- Long-handled duster
- Spray bottle
- Warm water
- Liquid dish detergent
- White distilled vinegar
- Clean white cloths (lint-free)
Directions
- Use a step ladder and a long-handled duster to dust the entire ceiling, including ceiling fan blades and ceiling fixtures, corners, and molding.
- Use a spray bottle to very lightly spray the ceiling with a mixture of warm water, a few drops of dish detergent, and a splash of white distilled vinegar.
- Wrap the head of a long-headed duster with a slightly dampened clean white cloth and go over the ceiling.
- Rewrap the duster with a dry clean white cloth and go over the ceiling again to catch any wet spots.
Step 2: Wash Down Painted Walls and Doors
Washing walls is a step that people commonly skip over when cleaning their homes. The truth is, your walls easily capture dirt and dust, and they need to be delicately cleaned regularly to brighten them up and preserve paint or wallpaper. Here’s how to clean walls:
Tools and Materials Needed
- Drop cloth/old towels
- Short-handled duster
- Clear liquid dish detergent
- Warm water
- Bucket (make a rolling bucket for easier cleaning)
- Sponge
- Clean white rag
- Baking soda
- Melamine eraser (optional)
Directions
- Move furniture away from the walls
- Take down artwork from the walls.
- Lay a protective drop cloth or old towels under the wall you want to clean.
- Use a short-handled duster to dust the walls in sections from the top down.
- Mix a few drops of clear dish detergent in a bucket of warm water and use a sponge saturated in the solution to wipe down the walls. Rinse the sponge frequently.
- Spot clean stains by dipping a wet cloth into dry baking soda and gently scrubbing the stains. Alternatively, use a slightly damp melamine eraser on the stain, gently rubbing so you do not damage the paint on the walls. Wipe the spot with a damp sponge and let dry.
3. Clean Windows
For DIY cleaners, you can use a bucket of water with a teaspoon of dishwashing liquid, or water with white distilled vinegar or rubbing alcohol in a spray bottle. Use a squeegee indoors or outdoors, but remember it could get a little wet washing your windows this way indoors so you might want to lay down a drop cloth before you start.
Tools and Materials Needed
- Squeegee
- Bucket
- Water
- Liquid dishwashing liquid
- Spray bottle (optional)
- White distilled vinegar or rubbing alcohol (optional)
- Drop cloth
- Dry, clean rags
- Microfiber rags
Directions
- Dip the squeegee all the way into a bucket with the cleaning solution and then use your hands to squeeze as much of the excess solution from the squeegee pad before you put it up to the window.
- Start at the top corner of a window and press one corner of the squeegee blade vertically from top to bottom just once (this makes it easier to do a clean horizontal squeegee job).
- Start at the top of the window and press the squeegee blade against the window horizontally from one side to the other.
- After the swipe, wipe the squeegee clean and dry it with a rag.
- Continue the same steps as you move down the window horizontally.
- Finish and dry the glass by wiping around the perimeter of the window with a microfiber rag wrapped around your finger. Concentrate on drying the pools of water on the bottom of the window.
Vacuum Window Coverings
4. Clean Wood Cabinetry
If your wood cabinets are spotted with grease or grime, this method and cleaning recipe will help you out.
Tools and Materials Needed
- Spray bottle
- Distilled white vinegar
- Water
- Dry, soft cloth (lint-free)
Directions
- Mix a 50/50 percent solution of distilled white vinegar with water in a spray bottle.
- Add a couple of drops of liquid dishwashing detergent to the mixture.
- Spray the mixture on the cabinets.
- Let it sit for a couple of minutes.
- Wipe cabinets clean with a dry, soft cloth.
5. Upholstery and Mattresses
Deep cleaning of your upholstery—like sofas and chairs—and mattresses are not only a must-do for a good deep clean, but cleaning will help protect the pieces from damage and wear. You can clean your mattresses and upholstery with baking soda; just be sure to test a small section of your mattress or piece of furniture with baking soda before attempting this method on the entire piece.
Tools and Materials Needed
- Baking soda
- Vacuum with a brush attachment
Directions
- Use your brush attachment on your vacuum to remove hair, loose dirt, and crumbs from upholstery cushions (under cushions, as well) and backs and arms. Strip your bed of its bedding and vacuum your mattress the same way.
- Generously sprinkle baking soda on upholstered cushions, backs, and arms. For mattresses, sprinkle baking soda generously on the entire surface.
- Let the baking soda sit for at least an hour to absorb dirt and odors.
- Use the brush attachment on your vacuum to remove all the baking soda.
6. Clean Hidden Areas of Floors
Deep cleaning your floors (and carpeting) means moving heavy items and getting into places you don’t usually reach during normal cleaning. By doing this, you’ll remove any sticky residue that can attract insects and rodents. Choose your favorite floor cleaner (it can be a wet spray mop or a regular mop, your choice) to use. Here are the areas that need attention during deep cleaning:
Tools and Materials Needed
- Vacuum
- Floor cleaner
- Bucket
- Mop of your choice
Where to Mop
- Behind and under the oven
- Behind and under the refrigerator (don’t forget to vacuum the coils)
- Flooring under baseboard heaters
- Behind and under beds
- Behind toilets
- Under heavy furniture
- Inside closets
Cleaning vs. Organizing
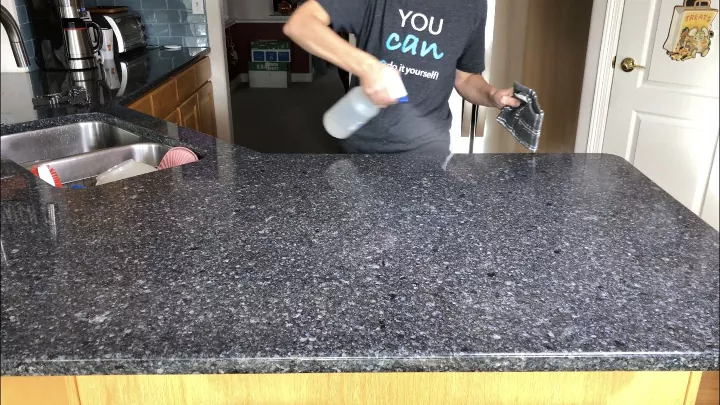
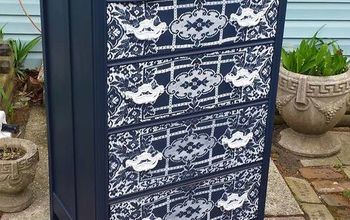
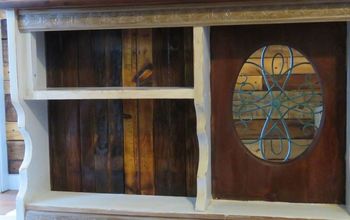
Photo via Chas' Crazy Creations
How to Make a DIY All-Purpose Cleaner with Vinegar
You don’t need to scour the internet for the best DIY all-purpose cleaner. Most recipes use the same base ingredients with slight variations.
Here’s all you need to make an effective, non-toxic, all-purpose cleaner with some disinfecting properties that you can use to wipe down counters and other hard surfaces around your home, including tubs, walls, dirty plastic toys, doorknobs, and light switches.
Note: Don’t use vinegar, lemon juice, or other ingredients that contain acids on any natural stone, granite, travertine, and marble counters or flooring.
Tools and Materials Needed
- Spray bottle
- Funnel (optional)
- Distilled white vinegar
- Water
- Lemon juice from ½ a lemon
- Essential oil
1. Combine Vinegar and Water
Use a funnel to mix a 50/50 solution of vinegar and water in the spray bottle. Mix to combine.
2. Add Lemon Juice
Cut a lemon in half and juice it. Add the juice to the mix. Adding lemon will neutralize odors, remove stains, and can act as an antibacterial agent in your cleaner.
3. Add Essential Oil
Add 15 or so drops of your favorite essential oil (it will also mask the vinegar smell). Swirl to combine.
How to Make a DIY All-Purpose Cleaner Without Vinegar
If you can’t stand the smell of vinegar or don’t have a bottle on hand, you can still make an effective DIY all-purpose cleaner using rubbing alcohol. Even better, you can use rubbing alcohol on natural stones, since alcohol has a neutral pH that won’t etch or damage softer granites and even marble.
Tools and Materials Needed
- Funnel (optional)
- Spray bottle
- Rubbing alcohol (70%)
- Castile soap (optional)
- Essential oil (optional)
- Water
1. Combine Alcohol and Water
Using a funnel to make it easier, mix about 50/50 solution of rubbing alcohol and water in the spray bottle.
2. Add Castile Soap
While liquid castile soap is not a disinfectant, it’s good for removing bacteria, germs, dirt, and grime. If you want to add castile soap, add about a teaspoon to your mixture and shake the bottle.
3. Add Essential Oils
If you want a fragrant cleaner, add 15 to 30 drops of your favorite essential oil, or a mixture of oils, into the spray bottle. Popular oils for cleaning are usually citrusy, such as lemon, grapefruit, or orange. Some essential oils, such as tea tree oil, have antibacterial and antimicrobial compounds. If you don’t like the smell of tea tree oil, try lemongrass, lavender, or eucalyptus for similar results.
Tips and Hacks for Difficult Cases
If you're really in a hurry and don't have the capacity to take on deep cleaning, or if there's contamination like mold in your home, it may be time to call in the professionals.
Carpet, Upholstery, and Tile and Grout Cleaning
If you have a lot of furniture or flooring, including grout, that needs deep cleaning and you’d like it done quickly, it may be worth the expense to call in specialists who have the right tools and technology to get the job done in a timely manner. Not only will a professional cleaning service remove embedded dirt and odors, but the service can extend the life of your furnishings and floorings like carpeting.
Mold Remediation
If you discover mold roughly covering a surface that has reached about the size of a bath towel, it is probably best to call in a mold remediation service. Not only will a mold remediation service clean up the mold, but they will also find and eliminate the source.
Do you have any tips for cleaning your home quickly? Share them in the comments, we'd love to hear!


Frequently asked questions
Have a question about this project?