


How to Restore Hardwood Floors Without Sanding (Yes, It's Possible!)

By Brooke Ressell
Hardwood floors are gorgeous when they’re in pristine condition. But, your love for them can fade rather quickly once the normal wear and tear leave them looking dull, dinged, and faded. But hardwood floors are meant to be stepped on and lived in just like any other fixture in your home, so the need to restore them eventually will inevitably come.
Of course, sanding hardwood floors and restoring them is a long, tedious process for any homeowner. And paying to have them sanded and restored professionally can cost you a small fortune.
Luckily, there are several ways to restore the hardwood floors in your home without sanding, and the results are quite impressive. To prove our point, we’ll walk you through everything you need to know when it comes to learning how to restore hardwood floors without sanding. You’ll realize it’s surprisingly easy—so much so that you’ll be itching to get started today.
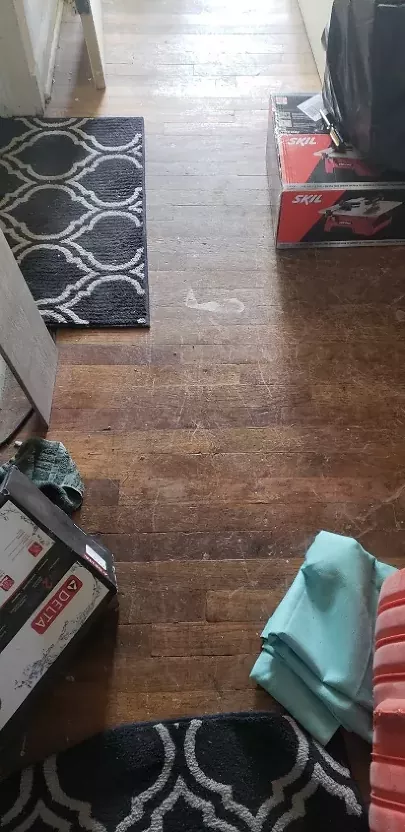
Photo via Vivian Burford
Signs That Floors Need Restoring
Before you put in the time and attention needed to fix hardwood floors without sanding, you’ll want to verify that your floors truly need restoring in the first place.
To help you make your own determination, here is our list of five signs that your hardwood floors need restoring now:
- Your hardwood floors have big and noticeable scratches, dents, splinters, gouges, or chips in them. Small imperfections don't warrant a whole refinish; these come with the territory of owning hardwood floors.
- Your hardwood floors are discolored or fading in certain areas.
- Your hardwood floors have stains as a result of water damage.
- Your hardwood floors are stained a color that you don’t like or that doesn’t match other wood surfaces in your home.
- Your hardwood floors need to be patched in certain areas so restoring an entire room is necessary.
If you can put a big checkmark next to any of these five signs, it’s time to start restoring your hardwood floors.
Safety Warning
Refinishing hardwood floors with or without sanding will require some chemicals that can irritate the eyes and skin and should not be ingested. Be sure to wear the proper safety gear when refinishing your floors, including rubber gloves, safety glasses, and long-sleeve work clothes. We'll also indicate in the tools and materials lists when a dust mask is recommended.

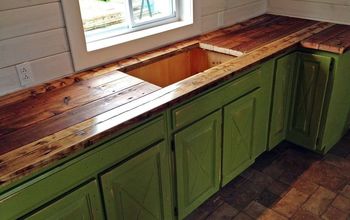
Photo via Patricia Taylor
How to Restore Floors with a Revitalizer
The first method you can use to treat hardwood floors without sanding is restoring them with a revitalizer. A floor revitalizer is essentially a hardwood floor cleaning product, except it goes much, much deeper to deep-clean, shine, and fill in scratches and gouges in floors.
In this section, we’ll walk you through the process of using a revitalizer product on the hardwood floors in your home.
Tools and Materials Needed:
- Vacuum with attachments
- Mop
- Hardwood floor cleaner
- Rubber gloves
- Safety glasses
- Painter’s tape
- Paint roller
- Paintbrush
- Paint tray
- Revitalizer product
Step 1: Clear the Room
You’ll want to clear out all furniture in the room you’re working in, making sure the room and the floor are a blank canvas.
Step 2: Vacuum the Hardwood Floors
To get started, use a vacuum cleaner to remove any dirt or debris from the surface of your hardwood floors. Be sure to use the appropriate vacuum attachments to really get into any corners where two walls meet.
Step 3: Put Rubber Gloves and Safety Glasses On
Next, you’ll want to put rubber gloves and safety glasses on to protect your skin and eyes from the hardwood floor cleaner and revitalizer products you’ll be using.
Step 4: Mop the Hardwood Floors
Then, clean your hardwood floors with a mop and a hardwood floor cleaner of your choice, removing any sticky residue from the hardwood floor surface in the process.
Step 5: Allow to Dry
Once your hardwood floors have been cleaned, allow them to dry thoroughly (which can take anywhere from thirty minutes to one hour) before moving on to the next step.
Step 6: Tape the Floor
After your hardwood floor has dried, use painter’s tape to tape off the trim work around your room. This helps you keep the revitalizer product on the hardwood floors only.
Step 7: Apply the Revitalizer Product
Next, apply the revitalizer product to the hardwood floors. To make it easy, use a paintbrush to cut in around the walls and corners and a paint roller to roll the product evenly over the larger surface areas. The solution will start out white but turn clear as it dries.
Step 8: Allow to Dry
Follow the instructions provided by the revitalizer manufacturer and allow it to dry. Do not move furniture back into the room until you are sure that the finish has dried and it is safe to do so.
How to Restore Floors with Chemical Abrasions
The second method you can use to refinish floors without sanding is the chemical abrasion process. “Chemical abrasion” sounds a bit scary, but you’re really just applying a chemical solution to the flooring, which will etch the old finish to prepare for a new one, ditching the sanding step typically associated with restoring hardwood floors.
Tools and Materials Needed:
- Vacuum with attachments
- Damp cloth
- Painter’s tape
- Rubber gloves
- Safety glasses
- Work clothes
- Work shoes or shoe covers
- Chemical abrasion kit
- 2 paint trays
- Abrasive pad
- Mop
- Bucket
- Dishwashing liquid
- Clean towel (if needed)
- Floor stain (if needed)
- Paint roller
- Paintbrush
Step 1: Clear the Room
Move out all the furniture in the room you’re working in.
Step 2: Vacuum the Hardwood Floors
Vacuum your hardwood floors so that all dust, dirt, and debris particles are removed from the surface. Use an attachment to clean any of the corners well.
Step 3: Wipe With a Damp Cloth
Next, quickly wipe your hardwood floors down with a slightly damp cloth. Be sure to scrub any areas in particular that have sticky grime on them.
Step 4: Tape Trim
Then, apply painter’s tape to the trim all around the room so that the chemical abrasive does not splash up onto it.
Step 5: Suit Up
Change into work clothes and work shoes—or shoe covers—if you haven’t done so already. Now is also the time to put on safety glasses and rubber gloves in order to protect your eyes and skin from the harsh chemicals you’ll be using in the next step.
Step 6: Apply the Chemical Abrasive
Open the chemical abrasive kit and pour the liquid abrasive into one of your painter’s trays. Dip the abrasive pad into the painter’s tray to coat it well, squeeze out any excess product, and start scrubbing your floors, one small section at a time.
Broom Handle Hack
Step 7: Continue Applying the Product and Scrubbing
Continue applying the liquid abrasive and scrubbing the hardwood floors in small sections at a time until the entire floor has been treated.
Step 8: Wipe Off the Block
Throw the abrasive pad away and wipe off any product that has gotten on the block itself as you will use this again later.
Step 9: Allow to Dry
Allow the floor to dry for thirty minutes.
Step 10: Mop the Floor
Next, fill a bucket with a gallon of water and two tablespoons of liquid dish soap and mop the floor in small sections at a time.
Be sure to squeeze the mop out well as you’re using it; you don’t want puddles to form on your floor as you mop.
Step 11: Allow to Dry
Once the entire floor has been mopped, allow it to dry for thirty minutes.
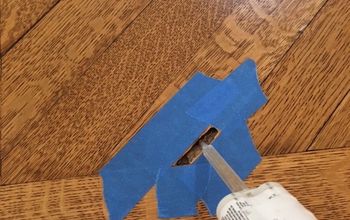
Step 12: Touch Up Stain
If there are any areas that need to be touched up with stain to match the rest of the floor, do so now. Simply take a clean towel and feather stain into the areas that need it.
Step 13: Allow to Dry
Allow the floor to dry for the recommended amount of time suggested on the stain product you used.
Step 14: Pour Finish
Pour the finishing product included in your chemical abrasion kit into the second painter’s tray.
Step 15: Apply the Finish
Next, use a paintbrush dipped in the finishing product to cut in around the edges of the hardwood floor. Then, attach the finishing applicator pad to the clean block, coat it in finish, and spread the finish along the remaining surface of the hardwood floor.
You have to work fast as the finishing product will start to get tacky within five to ten minutes.
Step 16: Allow to Dry
Follow the manufacturer’s recommendations for dry time carefully. Move furniture back into the room only after the floor has dried properly.
How to Restore Floors by Buffing and Recoating
The third method you can use for refurbishing hardwood floors without sanding is the buffing and recoating process often called screen and recoat. In this method, the existing finish on the hardwood floor is scraped away down to the wood using a floor buffer (which can be rented from most home improvement stores) and a new floor finish is applied.
Tools and Materials Needed:
- Vacuum with attachments
- Mop
- Hardwood floor cleaner
- Plastic sheeting
- Work gloves
- Safety glasses
- Dust mask
- Sanding screens
- Floor buffer
- Wood stain (if needed)
- Clean towel (if needed)
- Water-based polyurethane
- Painter’s tape
- Threaded broom handle
- Applicator pad
- Applicator block
- Paint tray
- Paint roller
- Paintbrush
Step 1: Clear the Room
Empty the room you’re restoring the floors in of all furniture and rugs.
Step 2: Vacuum the Hardwood Floors
Vacuum the hardwood floors and use a vacuum attachment in all of the corners.
Step 3: Mop the Hardwood Floors
Using a mop and a hardwood floor cleaner, mop the hardwood floors removing any remaining dirt or grime.
Step 4: Seal and Ventilate the Room
Attach plastic sheeting to any of the entryways and ducts using painter’s tape. Then, open any windows in the room.
Step 5: Wear Protective Gear
Place all protective gear on including safety glasses, work gloves, and a dust mask.
Step 6: Scuff Up Corners With Sanding Screen
Use a sheet of sanding screen to scuff up the corners and along the edges of the hardwood floors.
Step 7: Use the Buffer
Place the buffer on top of a new sanding screen and start buffing the floors. You do not need to attach the sanding screen to the buffer itself.
As you work your way around the room buffing the floors, flip and replace the old sheet of sanding screen with a new one as needed.
Step 8: Vacuum Up the Dust
Once you’ve made one to two passes around the room with the buffer, vacuum the entire room to remove any of the dust that has been kicked up during the buffing process.
Step 9: Touch Up with Stain
Using a clean towel and stain, touch up any areas that need it with a new coat of stain.
Step 10: Allow to Dry
Allow the stain to dry for the recommended amount of time listed on the stain can.
Step 11: Attach Painter’s Tape
Attach painter’s tape along all of the trim to protect it from the polyurethane you’ll apply in the next step.
Step 12: Apply Polyurethane
Apply water-based polyurethane to the corners and along the edges of the floor using a paintbrush. Next, pour some polyurethane into the paint tray. Then, attach the applicator pad to the applicator block and attach both of these items to a broom handle. Dip the applicator tool into the polyurethane and spread it across the surface of the floor.
Step 13: Allow to Dry
Follow the manufacturer’s recommendations for dry time. Once the floors are completely dry, move furniture back into the room.
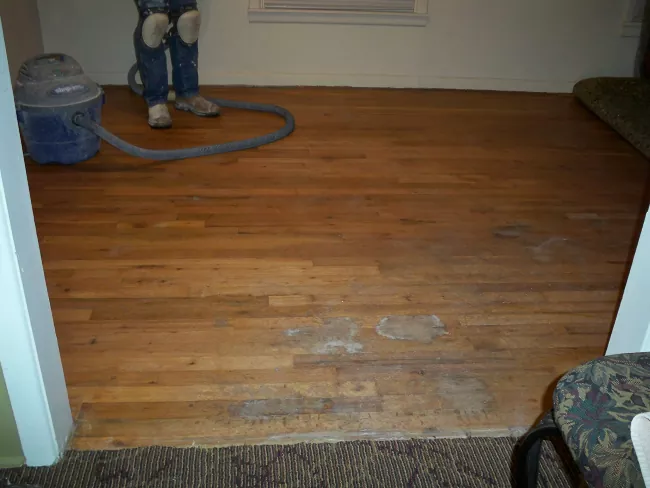
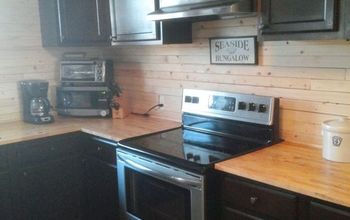
Photo via Sherry R
When You’ll Need to Resort to Sanding
Can hardwood floors be refinished without sanding? Absolutely! But at some point, it is best just to resort to sanding your hardwood floors in order to restore them.
Here are five instances where it makes sense to sand your hardwood floors instead of using any of the sanding-free methods we’ve described above:
- You just installed new hardwood floors that need to be finished.
- Your hardwood floors are cupping, or warping due to moisture damage.
- Your hardwood floors have deep scratches in them beyond the surface level.
- Your hardwood floors have a film or wax on them that needs to be sanded off before restaining.
- Your hardwood floors have a dull finish in some areas and a lot of polyurethane remaining in other areas.
- Your hardwood floors have unsightly water or pet stains that won’t come up.
Have you successfully restored hardwood floors without sanding? Tell us about it in the comments below!


Frequently asked questions
Have a question about this project?