


7 Ways to Unclog a Bathroom Sink

Learning how to unclog a bathroom sink is almost like learning how to unclog a toilet. You need the right tools and techniques, but it should be a quick fix, and you don’t need to be an expert plumber. The culprit is usually a built-up greasy ball of soap scum and hair in the drain or tangled around the sink stopper’s rod. Sometimes, no tips or tricks will work, which means you’ll need to call in an expert because there’s probably a clog too far down the drain system or too dense for you to remove yourself. But before you call a plumber, try these classic, proven ideas in our guide to unclogging a bathroom sink.
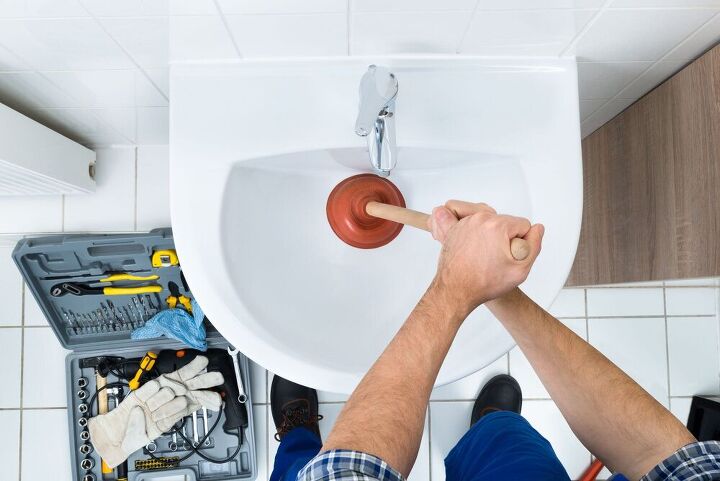
Photo via Shutterstock
How Do I Know My Bathroom Sink Is Clogged?
You’ll know your bathroom sink needs to be unclogged well before there’s standing water. Chances are there is a large wad of gunk that has built up over time that’s blocking water from draining through the system. If you experience any of the following situations, your sink is clogged:
- Small amounts of water drain slowly
- Draining water leaves residue in the basin
- There’s an odor coming from your drain
How to Unclog a Bathroom Sink Naturally
We’ve given you six methods to try to unclog your bathroom sink, and recommend you try them all in order. If you’ve reached the last method but you still have a clog, it’s time to try a chemical de-clogger.
How to Unclog a Sink With Boiling Water
Boiling water can break down residue that might be clogging your sink. Use this method only if you are still able to drain the basin of all the water. Also, do not use this method on sinks made of porcelain, according to The Home Depot, or the boiling water may crack the sink.
Tools and Materials Needed:
- Small pot or kettle of boiling water
- Protective gloves to prevent burns
Step 1: Pour Water Into Drain
Slowly pour boiling water into the drain. Watch to see if the clog seems to be breaking up, which will cause the water to drain faster. This should ideally happen in a few seconds.
Step 2: Add More Water
If the clog breaks up, stop adding water. If the clog is still there, pour in more boiling water and observe if the second dose of water works. If this does not work, move to the next method.
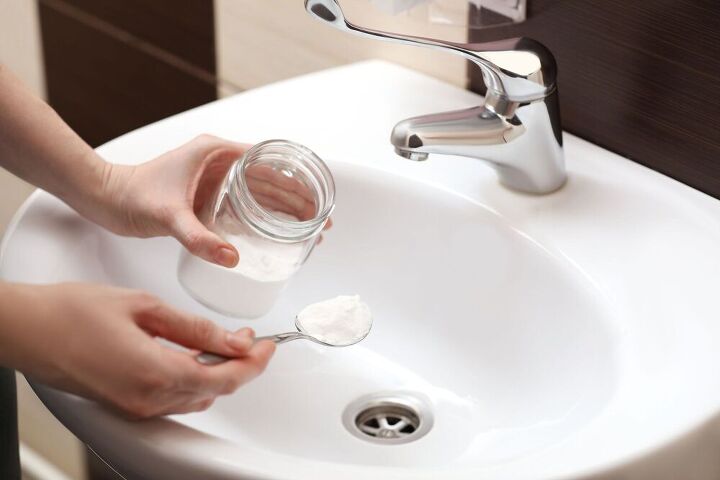
How to Unclog a Sink With Baking Soda and Vinegar
Baking soda and vinegar are notorious for, when combined, creating a fizz to dissolve a blockage in your sink pipes. The baking soda and vinegar method is best used if you still can drain the water out of the basin since you need direct access to the drain itself.
Tools and Materials Needed:
- Funnel
- ¼ cup of baking soda
- 1¼ cup of white vinegar
- Sink stopper or towel
- Small pot or kettle of boiling water
- Protective gloves
Step 1: Add Baking Soda
Pour the baking soda into the drain using the funnel.
Step 2: Add Vinegar
Pour in the vinegar using the funnel.
Step 3: Plug Drain
Plug up the drain with a stopper or a towel.
Step 4: Wait
Leave the drain undisturbed for about 20 minutes.
Step 5: Remove Stopper
Take the stopper or towel off the drain opening and slowly pour boiling water into the opening. See if the clog has been cleared.
Step 6: Repeat
If the clog is still there, repeat the process. If the second time does not work, move on to the next method.
How to Unclog a Sink With a Plunger
The right type of plunger is key for unclogging a sink. Do not use a toilet plunger with a flap—the correct type for a sink is a small traditional wide-mouth cup plunger (it may have a red or black rubber head and wood handle, for example), or a small accordion-style plunger. This method can be used even if there’s standing water in the basin.
Tools and Materials Needed:
- Plunger
- Protective gloves
Step 1: Remove the Stopper
Wear protective gloves and take out the sink stopper. (If you cannot take out the stopper, it is likely attached to a pivot rod that’s holding it in the sink. The pivot rod is usually located under or on the back of the sink. You’ll need to loosen the nut holding it in. Remove the rod, then the stopper.)
Step 2: Add Some Water
If the basin is empty, add a small bit of water (about an inch or so) to help the plunger seal the drain opening.
Step 3: Plunge the Drain
Place the plunger over the drain opening and pump up and down about 10 to 15 times.
Step 4: Remove Plunger
Remove the plunger and see if the water drains. If it drains, the clog is gone.
Step 5: Test the Drain
Keep testing the drain a couple more times with more water to see if it continues to drain. If draining is still slow, repeat this process one more time. If the water continues to drain slowly, move to the next method.
How to Unclog a Sink With a Shop Wet/Dry Vac
Shop wet/dry vacs have strong suction power that can move a clog. They are powerful, so use them as one of the last resorts for stubborn clogs.
Important: Never use a regular vacuum to unclog a sink drain. You could ruin a regular electric vacuum or harm yourself. Only use a shop wet/dry vac.
Tools and Materials Needed:
- Shop wet/dry vac
- Bucket
- Screwdriver or wrench
- Small bowl
- Wire hanger
- Sink stopper, towel, or rag
There are two ways to approach sucking up the clog; You can put the hose into the drain in the basin or you can put the hose into the P trap. Try the basin method first.
Basin Method
Step 1: Drain the Water
Drain as much water out of the basin as possible. (You can use the wet/dry vac to do this, as well.)
Step 2: Remove the Stopper
Take out the stopper or any screening from the drain.
Step 3: Insert Vac Hose
Feed the hose into the drain hole enough so that the nozzle feels secure in your hands and won’t pop out when you turn it on.
Pro Tip: Use a Drain Attachment
Opt for a drain accessory that attaches to your shop vac’s hose. It’ll make it easier to feed the hose down the drain.
Step 4: Turn on the Vac
Set the vac to “liquid.” Turn on the shop vac and leave it in the drain for only 5 to 6 seconds.
A wet/dry vac will have a high-pitched sound when it’s first turned on. When it encounters or sucks up the clog, it will sound distinctly different. If you don’t hear any changes in the sound of the vac, it may not have encountered the clog.
Step 4: Remove Hose
You may find that the clog has surfaced to the top of the drain where you need to manually remove it. Or, you may need to insert the hose again for more suction.
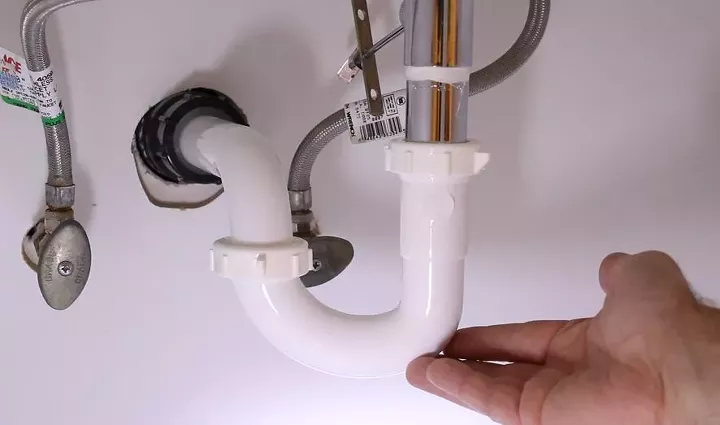
Photo via Home Repair Tutor
P Trap Method
The P trap is the U- or P-shaped PVC or metal pipe behind the sink that goes into the bathroom wall and connects other pipes that bring water to and from the sink. Its function is to prevent sewer gasses from entering the home and it also acts as a stop-gap in case something valuable accidentally tumbles into the sink’s drain. To clean your sink’s P trap of any clogs, follow these steps:
Step 1: Place the Bucket
Put the bucket underneath the P trap.
Step 2: Remove the P Trap
Remove the P trap using a screwdriver or wrench and put the screws or other fasteners in a small bowl so you don’t lose them.
At this point, after removing the P trap, you may encounter the clog without even needing to use the shop vac hose. Use a straightened wire hanger to dig around in the trap after you’ve undone it so you can see if the clog is right at the opening of the trap. If you don’t feel anything, keep following these steps to use a shop vac hose.
Step 3: Attach the Hose
Put the hose of the wet/dry vac into the vertical pipe part that goes up into your sink basin. Put the vacuum on “wet” setting. You do not need to remove the shop vac’s filter since you’re not retaining too much moisture.
Step 4: Close the Drain
Before turning on the vac, close the stopper in the drain. If you don’t have a stopper, seal the opening with a towel or rag.
Step 5: Turn on the Vac
Turn the vac on, pulsing it on and off a couple of times. This pulsing can activate the clog in one or another direction.
Step 6: Reinstall the P Trap
Put the P trap together, unseal the drain, and check the sink. If this method did not work, go on to this next method.
Drain Snake
You can buy a drain snake (also called a drain auger) or rent a more professional and powerful version from your local home improvement store. Read the manufacturer’s directions on how to use the specific drain snake but here are basic steps:
Tools and Materials Needed:
- Bucket
- Screwdriver or wrench
- Small bowl
- Drain snake
Step 1: Remove the P Trap
Place the bucket under the P trap. Remove the P trap using a screwdriver or wrench and put the screws or other fasteners in a small bowl so you don’t lose them.
Step 2: Remove the Drain Stopper
Remove the drain stopper so you can have a clean hole for the snake.
Step 3: Thread the Snake into the Drain
Manually put the snake into the drain. Use the handle to uncoil it deeper into the drain.
Step 4: Manipulate the Clog
You may feel it when you hit the clog with the snake. If so, manipulate the snake a bit to further loosen the clog. The clog will either go deeper as it loosens or it may end up attached to the snake’s head as you recoil the auger.
Step 6: Replace Components
Once the clog is removed, replace the P trap and the drain stopper. Test the drain to see how it’s draining water. If this has not worked, your last resort before calling in a professional is to use chemicals.
How to Unclog a Bathroom Sink Using Chemicals
Of course, chemicals can do the job in a jiffy. Lye, one of the active ingredients in most store-bought drain cleaners, dissolves soap scum and hair in a microsecond. Tiny amounts of lye are fine for your system, but relying on chemicals to unclog your sink every time may soften PVC pipes and be too harsh on metal pipes and drains. A chemical drain cleaner can also be dangerous if you inhale the fumes or use it with other cleaners that produce toxic fumes, according to drain cleaner maker Drano.
There are other types of drain cleaners, but they need to be used with extra caution, as well. According to Roto-Rooter Plumbing, acid drain cleaners are very dangerous and should be used only by professionals because they contain sulfuric acid which can cause severe burns. Oxidizing drain cleaners also break down organic material that causes clogs using bleach, nitrates, and peroxides—all harsh chemicals.
Preventative Tips for Keeping Your Bathroom Sink Unclogged
To prevent future clogs, or at least to minimize them, try these tips for your bathroom sink:
- Hot water: Run scorching hot water from the tap down the drain for a few seconds after each use.
- Boiling water: Every once in a while (no more than once a month or two), slowly pour a small pot of boiling water down the drain to loosen up any scum that’s building up. Reminder: If you have a porcelain sink, avoid using boiling water or it can crack the basin.
- Stopper: Replace a missing drain stopper, even if it’s a small screened version that can at least prevent foreign items from escaping into the drain. Also, take your stopper out and clean the rod frequently—if you remember, try to do this once a week to stop gunk build-up.
- Shaving: Believe it or not, those tiny hairs that go down the drain as you’re shaving can build up and cause clogs. Capture them in a towel or paper towel and dispose.
- Tangled hair: Tend to your sink stopper every few months to fish out hair that gets tangled around the stopper rod using a straightened wire hanger that has a small bend on one end. Or use an affordable, flexible, plastic drain clog snake hair remover every other month or so to keep your drain clean.
Tips for Difficult Cases
If you notice that your bathroom sink, shower, and toilet are all clogged at the same time, do not try any of these fixes on your sink and call an expert right away. You may have a larger drainage or sewer line problem, which requires a licensed plumber’s services. If you have a septic system, the holding tank may have reached its capacity, which can result in a backup. You may also have rusted, corroded, or otherwise damaged pipes causing the clog, and those will need to be replaced.
Comments
Join the conversation
-
Thanks for the tips
-
Thanks for useful tips. Sometimes it's too difficult to solve such problem. Last time we tried cling film to unclog the toilet


Frequently asked questions
Have a question about this project?
How to unclog a toilet