


How to Refinish a Dining Table and Take It From Drab to Fab

By Judy Schumer
Does your beloved table have too many scratches and worn spots? Or maybe you just discovered your dream dining table at a thrift store, but it needs a little love. You can refinish your dining table with a few steps and a little bit of work, ultimately giving it a brand new look.
Read on to find out how to figure out if your dining table needs to be refinished, if it's the type of wood that can be refinished, and the step-by-step guide for getting the job done.
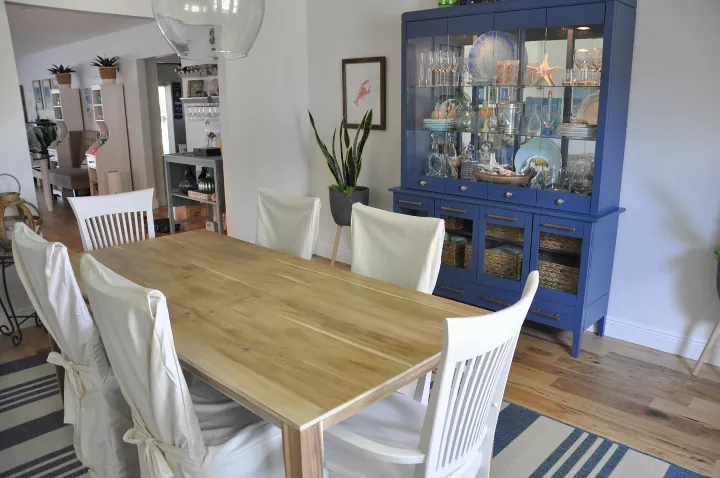
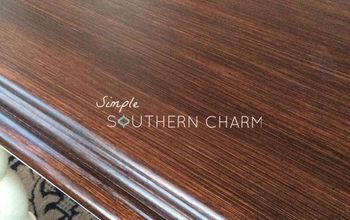
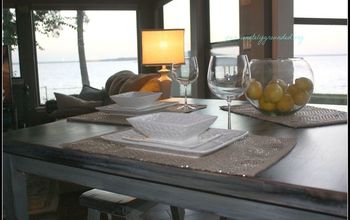
Photo via The House house
Signs a Dining Table Needs Refinishing
Sometimes you can cover up scratches and small flaws with a little bit of Old English scratch cover. Other times, you'll need to refinish the dining table to bring it back to its former glory. These are a few situations that warrant refinishing:
- The surface is sticky even after cleaning. When this happens, the finish is breaking down, and the surface of your table can become gummy. No amount of furniture polish will fix this.
- The finish is chipped or peeling off. This is a sign of deteriorating protection for the wood underneath the finish. Refinishing will restore the beauty of the wood and protect it from damage.
- Multiple scratches or dings. Hiding one small scratch can be easy; attempting to hide numerous or very large scratches is futile as the scratches take up more and more of the tabletop area.
- You’re hiding the table. If you feel the need to put a tablecloth on your table because what was once a beautiful wood finish is covered in heat or water damage or markings from heavy use, consider refinishing your table.
How to Assess a Dining Table Before Refinishing
Before you get the sander out, take some time to assess your table and prepare it.
Determine Table Material
Once you've decided to refinish your wood dining table, you'll need to assess the type of wood and current finish before proceeding.
Laminate: Laminate looks like wood but is just fiberboard with a wood-looking coating made from plastic. Laminate cannot be refinished because the stripper or sander would pull off the grain, exposing the fiberboard underneath.
Solid Wood: One of the hints that you have a solid wood dining table will be the table's weight. Solid wood is hefty and tends to have joints. Solid wood usually has unfinished pieces on the underside to join parts of the table together, with visible grain in a non-repeating pattern. On some antique pieces, the grain is raised enough that you can feel it by running your bare hands across the tabletop.
Veneer: Veneer is a thin piece of wood that has been glued to particle board or low-quality plywood. The veneer is high-quality wood, but it is much less expensive than solid wood because it isn't solid all the way through. If the grain is peeling off and exposes wood underneath, it is a veneer. Veneer, unlike solid wood, has a wood grain pattern that repeats. To refinish veneer, it needs to be fairly thick across the entire surface of the table. Run your hand across the top of the table to feel for uneven spots on the surface. If you feel pits, you probably do not have enough wood to refinish before hitting the cheaper particle board.
Determine Table Age
It's crucial to determine how old the piece you're refinishing is if you're removing paint. Furniture painted in the 1970s and earlier may have been painted with lead-based paint, which is a health hazard and requires special handling to remove.
If you’re unsure about the age of the paint on your dining table, pick up a lead swab test kit to test the paint before attempting to remove it. If you do have lead-based paint on your table, Go to the Environmental Protection Agency's website for information on how to remove the old paint safely.
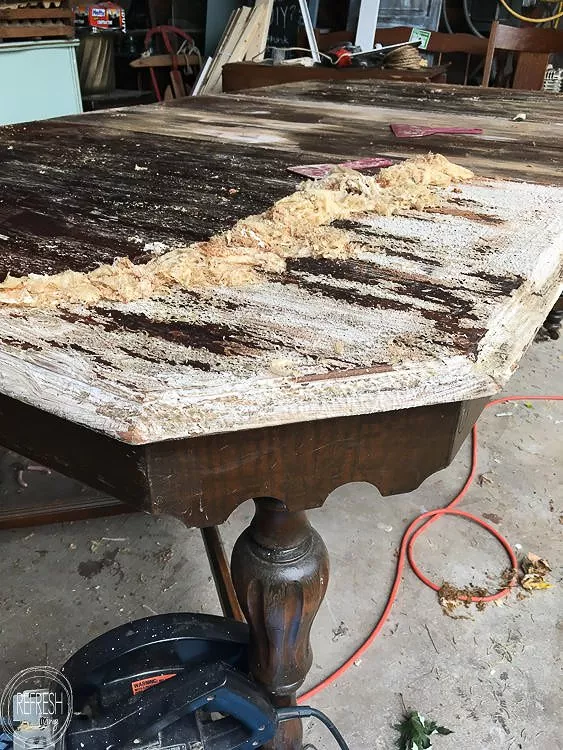
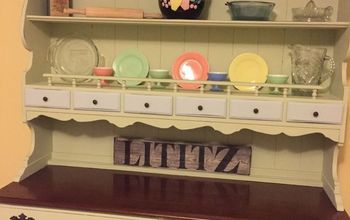
Photo via Jenny @ Refresh Living
How to Refinish a Dining Table
Before starting any project, make sure you're wearing the proper safety equipment to protect your eyes, skin, and lungs. Set up all your tools and materials in one place so you can quickly move from one step of the process to the next without having to search for anything you need along the way. Let’s get to refinishing that dining table!
Tools and Materials Needed:
- All-purpose cleaner
- Clean, soft rags
- Drop cloths
- Safety goggles
- Heavy rubber gloves
- Painter’s mask
- Paint and varnish stripper
- Putty knife
- Mineral spirits
- 100 and 220 grit sandpaper
- Sanding block
- Tack cloth
- Vacuum (if needed)
- Two paint brushes (one for stain, one for topcoat)
- Oil-based wood stain
- Dish soap
- Oil-based polyurethane topcoat
Step 1: Clean the Table
Set up shop in a well-ventilated area. Use the all-purpose cleaner to clean the table thoroughly. Be sure to clean the legs and any carved areas. Let the table dry. Place drop cloths all around the table to catch any drips as you're working.
Step 2: Apply the Stripper
Apply the chemical stripper with a paintbrush, following the manufacturer's instructions for application. Be sure your skin is covered to avoid chemical burns when using a paint stripper. Always wear safety goggles to protect your eyes and a painter's mask to avoid breathing in harmful fumes.
Step 3: Scrape the Softened Finish
Once the stripper has been left on the table for the recommended amount of time, use the putty knife to gently scrape away the softened paint or finish. Scrape a long path, with the scraper held at a low angle. You want to scrape off the paint or finish, but be careful to not scrape the wood itself.
Let dry and repeat a second time if necessary to remove any residual paint or stain.
Step 4: Wipe With Mineral Spirits
Use a clean, soft cloth to apply mineral spirits to the table to remove any traces of the paint stripper. Dry with another cloth, then let the table fully dry for about an hour.
Step 5: Sand the Table
Once the table has dried, place 100-grit sandpaper in a sanding block to begin sanding the table surface. Go over all areas to remove any residue from stripping and even out imperfections. Once you've sanded the entire table, change the sandpaper on the block to 220-grit and sand the table surface a second time.
Step 6: Remove Dust
Wipe all parts of your dining table with a tack cloth to remove any traces of dust created by sanding. You can also use a vacuum its the dusting attachment to clean up any residual dust.
Step 7: Apply Stain
With a paintbrush, apply a light coat of the wood stain to the entire table, following the grain of the wood, using even strokes. Let the stain soak into the wood for a few minutes, then wipe away excess with a clean cloth. Continue applying light coats of stain followed by wiping away the excess until you get your desired color.
Step 8: Allow the Stain to Dry
Allow the stain to dry for 24 hours. Clean your paintbrush with mineral spirits and rinse with warm soapy water. Store in a cool, dry place.
Step 9: Apply the Polyurethane
The final step in refinishing your dining table is to apply a protective polyurethane topcoat. Using a new paintbrush, apply a light coat of polyurethane onto the newly-stained wood. Allow to dry for four to six hours, or the time recommended by the poly’s manufacturer.
Step 10: Sand the Top Coat
Place a clean sheet of 220-grit sandpaper on the sanding block. Lightly sand the surface of the table. Use a soft, clean cloth to wipe away the dust from sanding (or vacuum with the brush attachment).
Step 11: Reapply the Polyurethane
Repeat Step 9 to apply the second coat of polyurethane to the table.
Step 12: Allow the Top Coat to Cure
Let the final coat of polyurethane cure for three to seven days. The topcoat gets harder as it cures, so the longer, the better.
Have you refinished furniture? Share your projects in the comments; we love to hear what you've been working on!
Comments
Join the conversation
-
Lots and lots of great tips. Citristrip stripper is a safer stripper. I like to use three coats of a water based polyurethane rather than oil based since it does have a yellow ting and yellows over time.
-
I was thinking of DIYing my dining room table and chairs. This article gave me a great base to start. Thank you


Frequently asked questions
Have a question about this project?