


The Story of the Blue Foil Leaf Table
See how I took a used dining table and turned it into a colorful work table for a craft room using layered foil leaf.Sometimes necessity meets crazy! As in, I need a craft room table….and I want to cover it with foil leaf!
WHAT?!?!? A foil leaf craft table? Something delicate covering a table that will take daily abuse?
Once upon a time…
Before you call me crazy, listen to my story…and rationale.
I had been shopping for possible craft tables and just wasn’t finding one I liked.
Truthfully, I didn’t want to spend the money on it. Tables can be expensive and I needed a large one.
The Preface
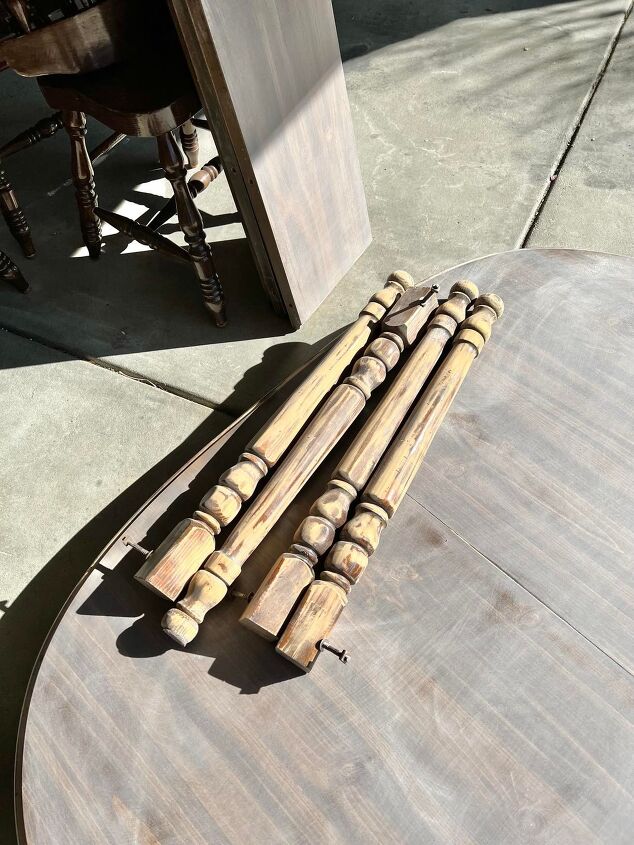
A friend of a friend (let’s call her my fairy godmother who is fantastic at sourcing great finds and also cuts my hair!) pointed me to a Facebook Marketplace ad offering a free dining table and chairs.
After a few room measurements, I went for it and got this sturdy, strong, and FREE table! I was thrilled! (I did not need the chairs so those were donated to a local charity.)
***This post contains affiliate links that help to buy me coffee in my retirement. (Have a cup with me!) Sonata Home Design is a participant in the Amazon Services LLC Associates Program, an affiliate advertising program designed to provide a means for us to earn fees by linking to Amazon.com and affiliated sites. Additional affiliates links are also included for your convenience.
Chapter 1…Let the sanding begin!
It was quite a dilemma as to what color I paint the table. White, navy, blush pink, light blue???
An Instagram story poll, while supportive, did not yield a clear winner. (Hey! I would love for you to follow me on Instagram!)
So, I just started rolling it white. I figured I would see what it looked like and take it from there.
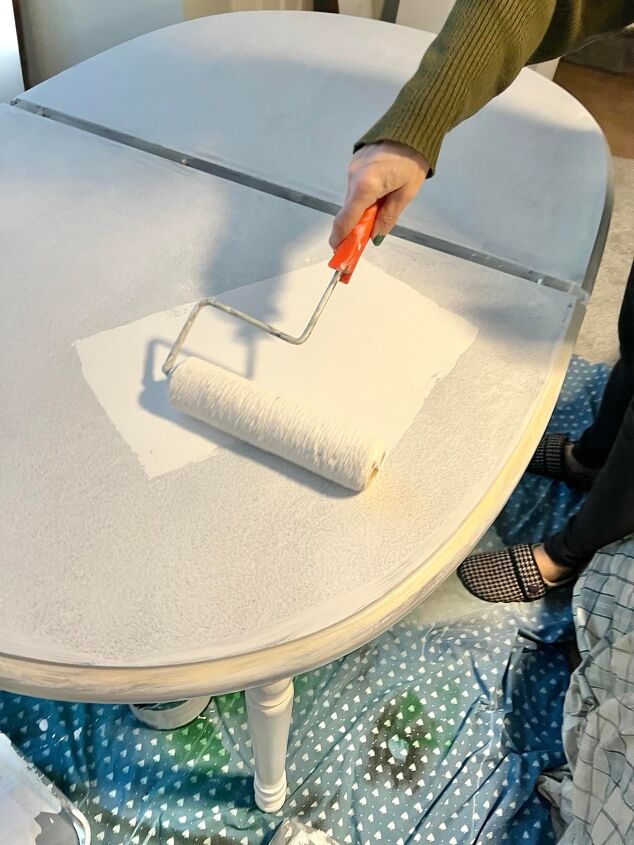
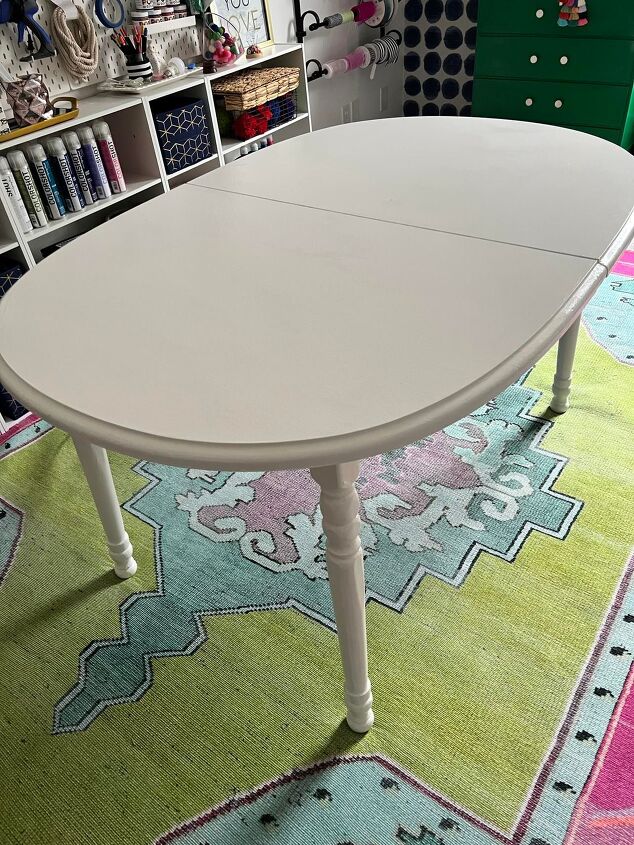
Nice. Classic! I liked it!
But I wanted just a bit more…
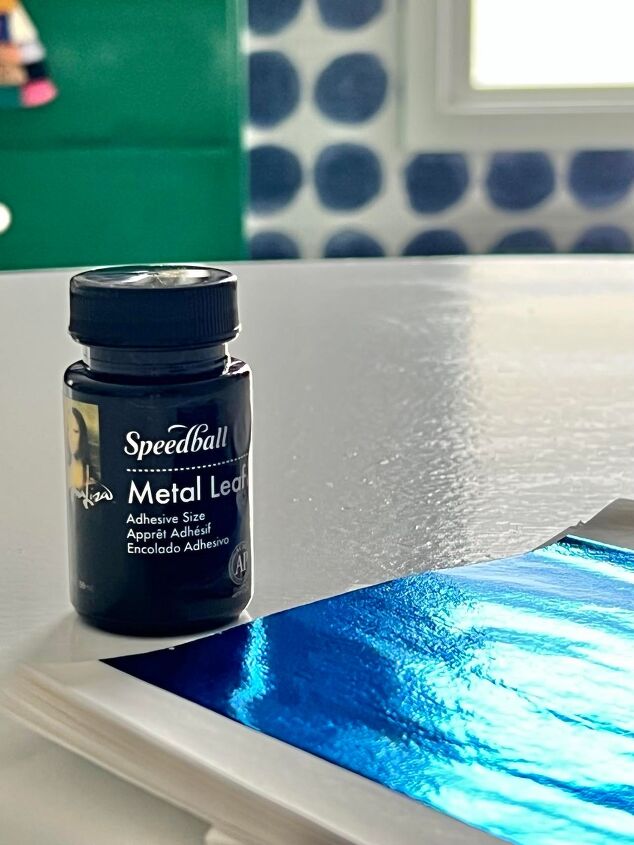
You see, I have a small obsession with gold leaf…
…and remembered that foil leaf comes in all sorts of colors!
Including this amazing shade of blue! You can see all the colors of Foil Leaf HERE.
If you are needing metal leaf adhesive, this is my favorite one.
So, I went for it!
Applying Foil Leaf is Easy (if a little messy!)
- Apply the leaf adhesive to the surface with a paintbrush. Let dry for abut 10 minutes or until tacky.
- Place the leaf on top of the adhesive. Be aware the foil leaf is VERY thin and tears easily.
- Gently brush across the leaf. Any excess can be brushed away or applied to another part of the surface.
- Let dry completely. (I like to let it set overnight.)
Seeing some of the white underneath the leaf was kid of fun and I could have left it that way. However, I decided to keep layering the leaf for a more solid look.
In process…here you can see some of that white popping through.
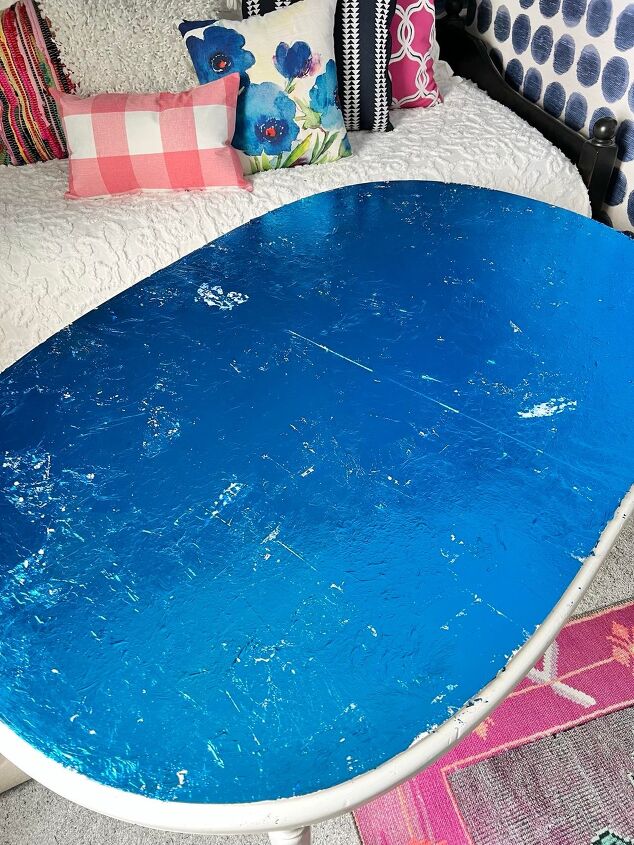
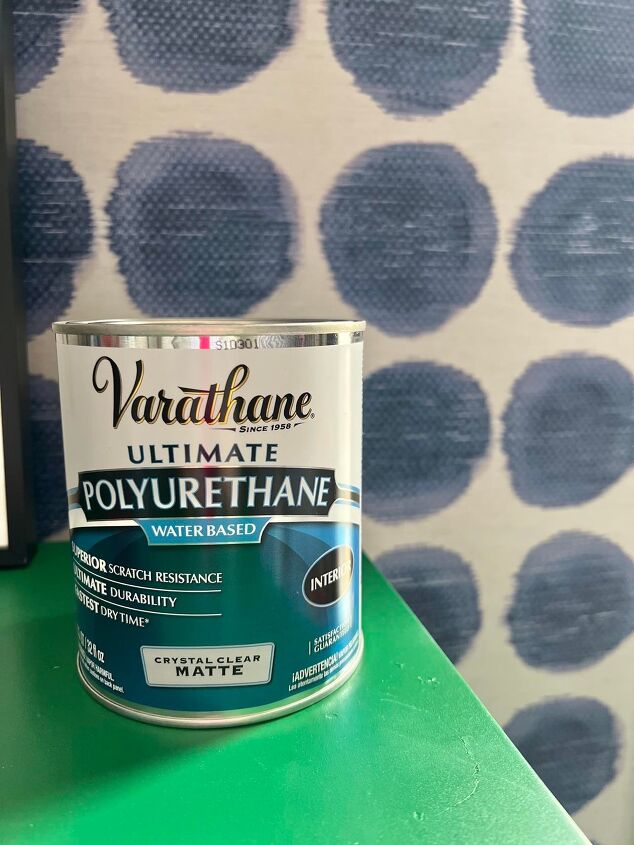
Once I layered the foil leaf to the point of satisfaction, I added a coat of polyurethane to the top for protection. This is a craft table, after all, and will take some abuse!
Voila!
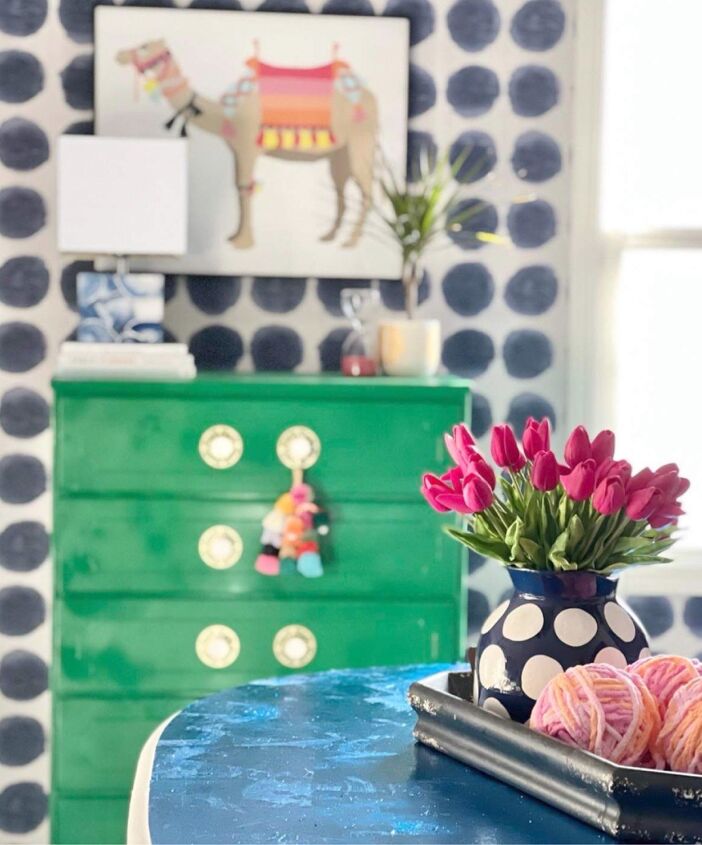
I can move the table toward the window and actually work at it seated at the daybed.
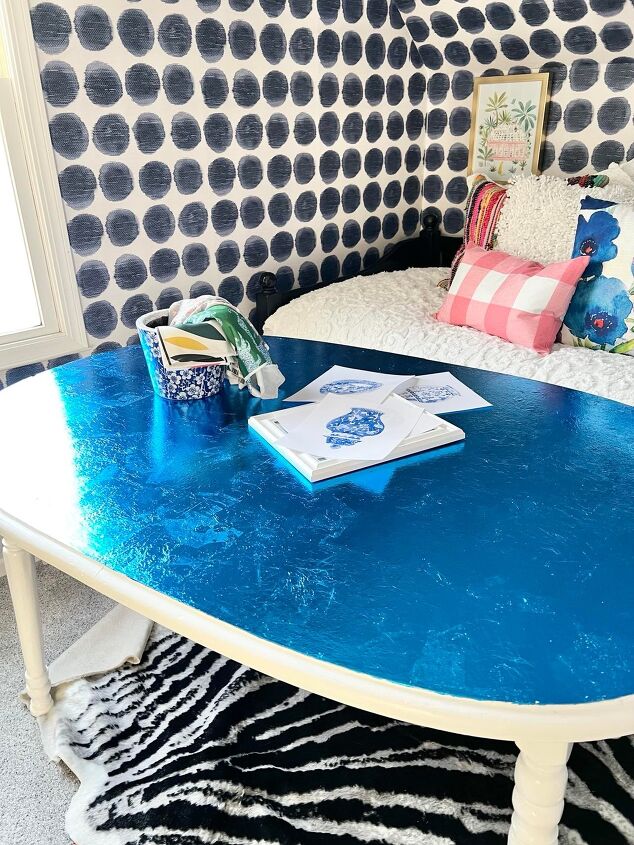
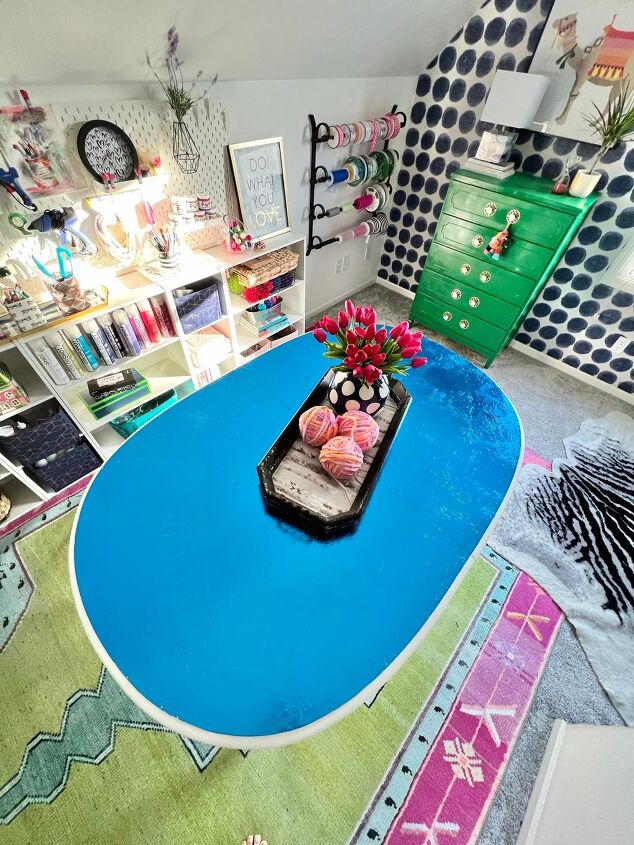
Or, I can move it to the middle of the room. (This is probably where it will be most of the time.)
Oh, how I love the shine! It is like having a crystal clear blue water feature in the room!
The Summary
Admittedly, a foil leaf table to be used for crafting and other projects may not be considered the most practical.
Yet…
- The tabletop is solidly protected with the polyurethane.
- If the top gets “dinged up”, all the better! Well used and well loved is always in style!
- The table was FREE! I am not out anything!
- Between the foil leaf and the adhesive, I spent only about $40.
- I just really love it! And, we should aways put only what we love in our homes!
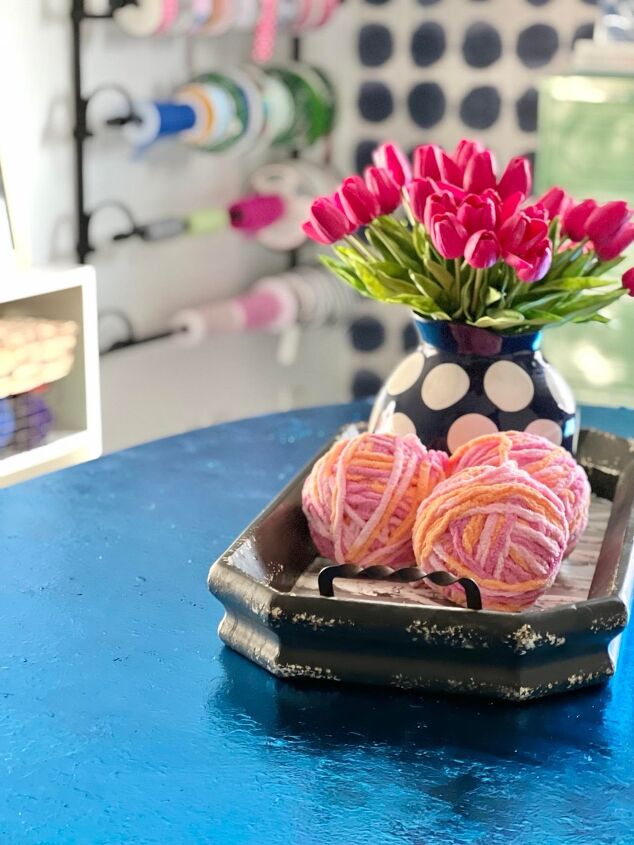
Guess where I am having my morning coffee today?
Get ready for some crafting projects!
End of story? Not yet! It has another chapter…figuring out the perfect work stool for my “new” table! Stay tuned!
Cheers!
P.S. The new craft room is coming along nicely (if at a snail’s pace!) It you would like to see how it has progressed, take at look at these…
Creating a Craft Room
Craft Room Storage Idea
Dresser Makeover
Resources for this project:
See all materials


Comments
Join the conversation
-
Your idea & beautiful execution reminded m that I love gold leaf too & have used it patchily on old frame. Doing a tabletop sounds like a winner to me.
-
I bet your mirror is beautiful! Thank you so much for reading and for commenting! Have a great day!


Frequently asked questions
Have a question about this project?
Fabulous!! Yes I WILL try this.i love gold leaf but BLUE?? WOW, KAREN
I think I have the same table(one of those pass me down ones). Did it have like a veneer top n made n the 70’s with big heavy wooden chairs? If so I was told u can’t do anything about the top. I’m so glad to see there is something that can be done. Do you have pics of the table and chairs before u worked ur magic?
When you say brush across the top of the foil, are you using a dry brush or brushing on more adhesive?