


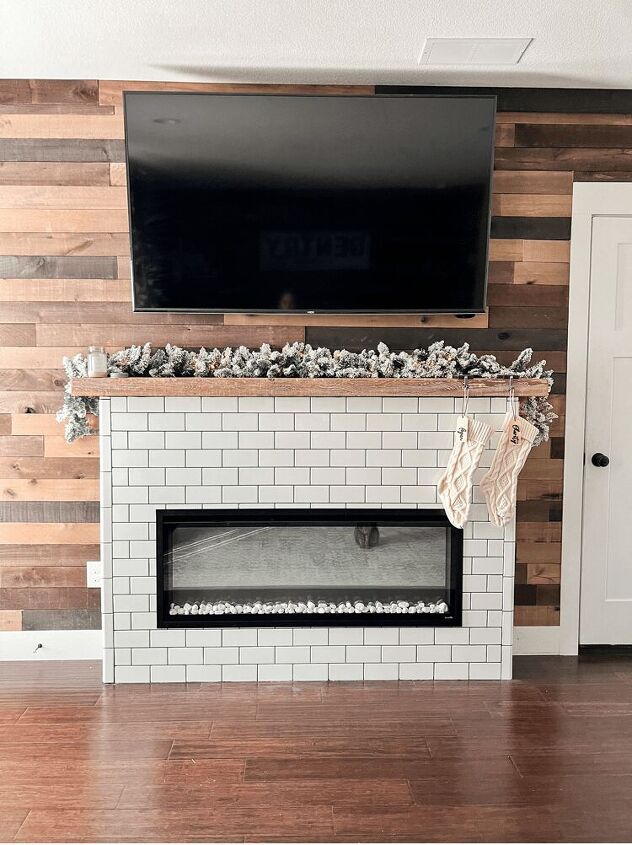
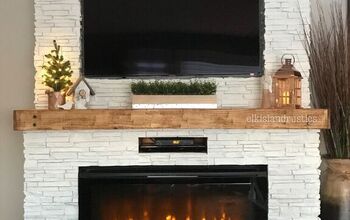
DIY Fireplace: Subway Tile and Installation

If you remember, a couple of weeks ago I shared the process for framing our fireplace out. So now, I am going to share the process of adding in subway tile. And actually installing the fireplace itself. Again, the fireplace is from SimpliFire and I have a coupon code for you to use if you are interested in ordering one too! Just use “MACEDONIA10” for 10% off any fireplace from now until December 31st, 2021. Now, I’m going to show you all the tips and tricks for adding in subway tile for our DIY Fireplace! Spoiler alert- I think it turned out fabulous!!
This fireplace was gifted to me from SimpliFire but all thoughts and opinions are my own. This post also contains affiliate links. Click here to read my disclosure policy.
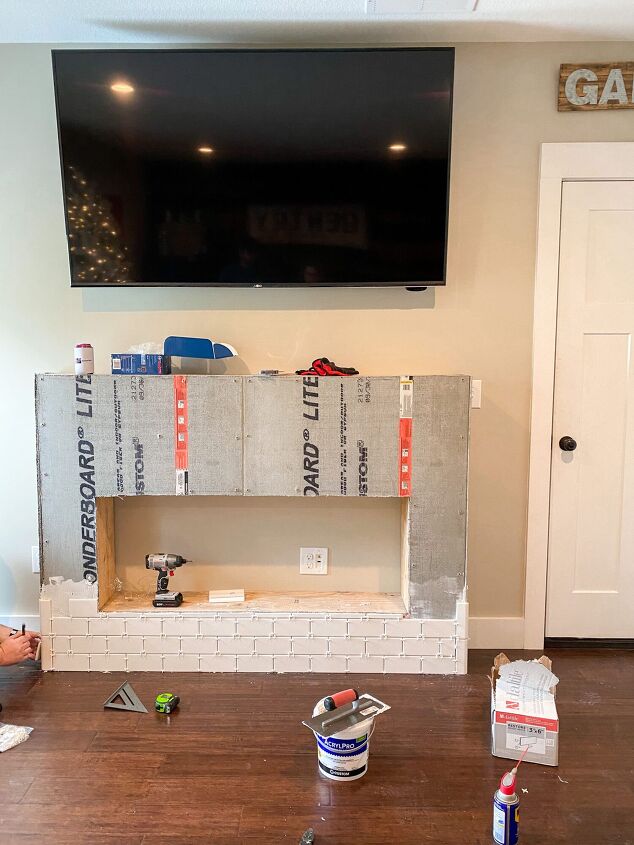
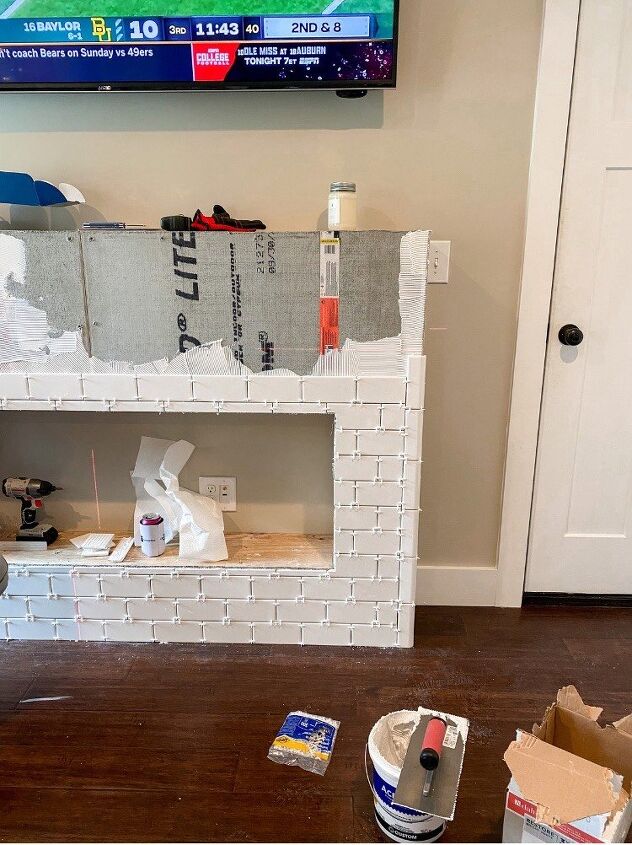
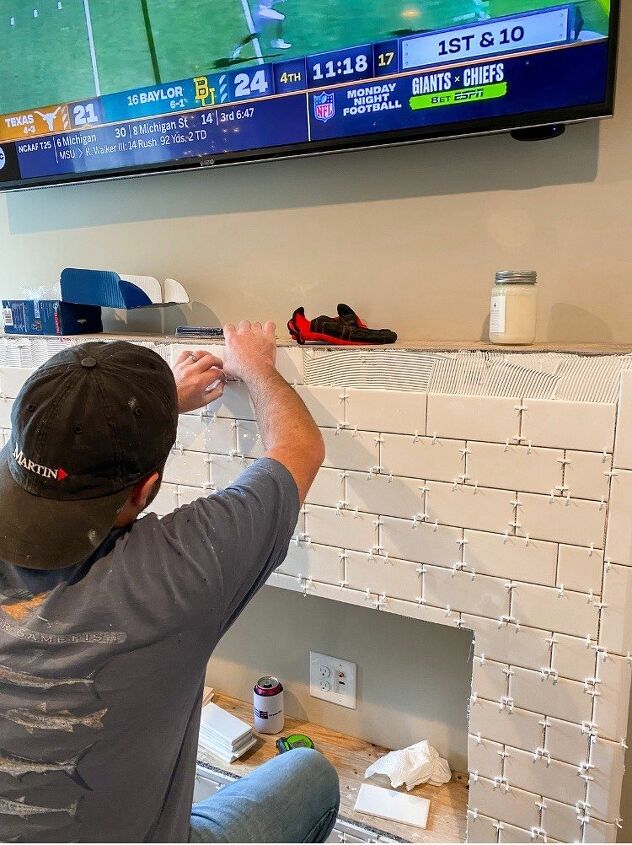
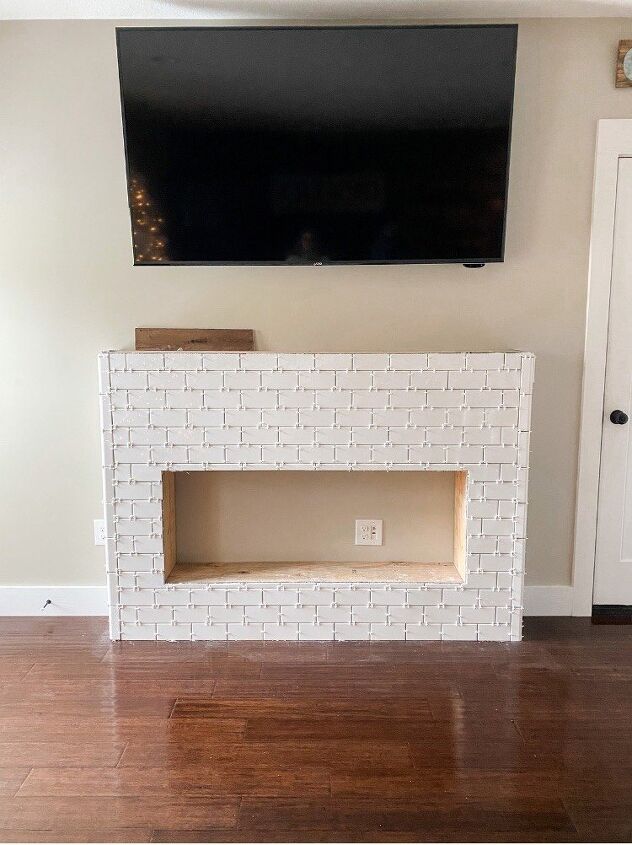
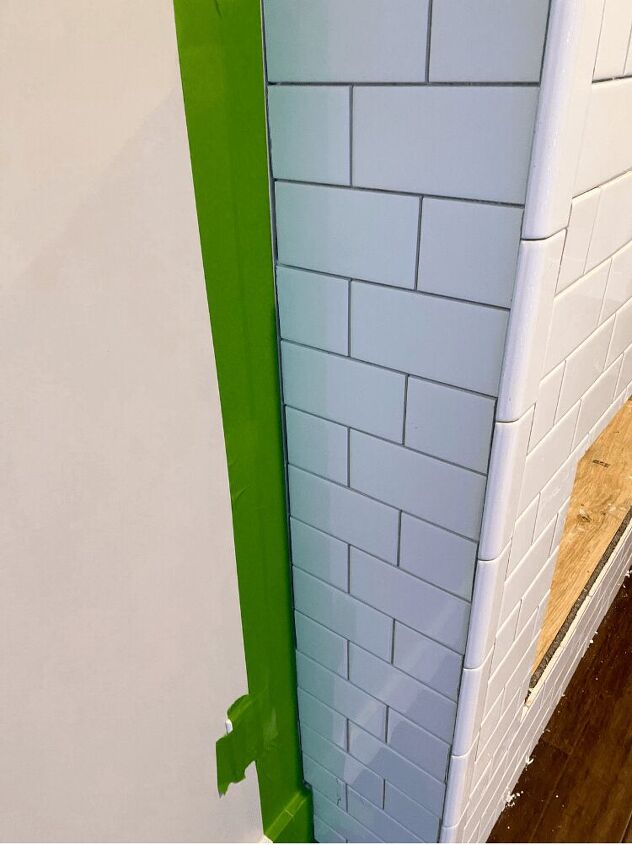
Getting started, my husband and his friend took all the measurements they needed to add in the tile. Then, they spent some time cutting the tile down to size using a tile cutter. They did this as they went along, taking measurements of what needed to be cut each time. My husband would typically draw a line of what needed to be cut on the tile with a Sharpie. And then took it outside and used the tile cutter to get the correct shape for it.
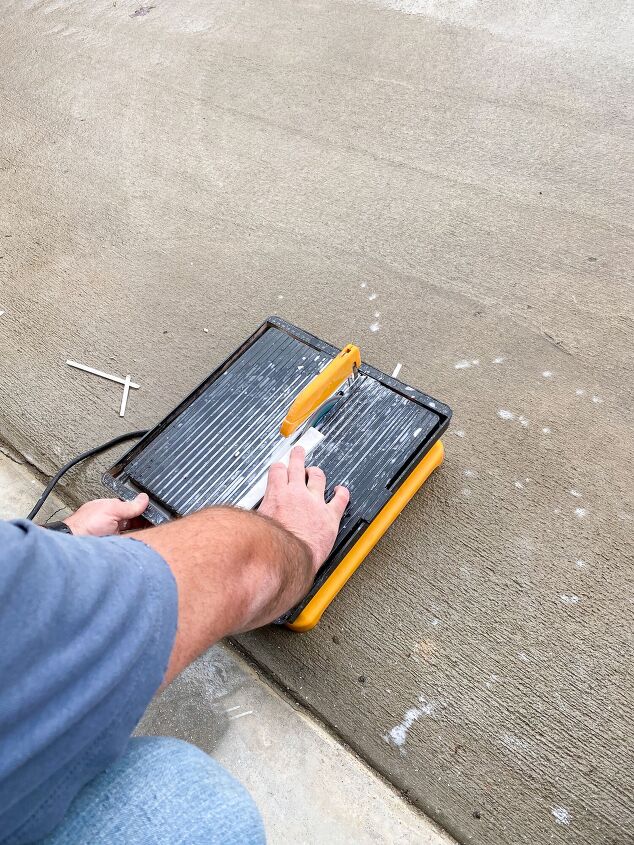
It was definitely easier having some help with this part of the process. My husband and I have never done any tile work ourselves before. So that’s why we called in his friend to help us with this project. And I am so glad that we did! We learned a lot during it and it turned out to be exactly what we wanted! I’m not sure if we did this completely all by ourselves with no experience, if we would have gotten the same result.
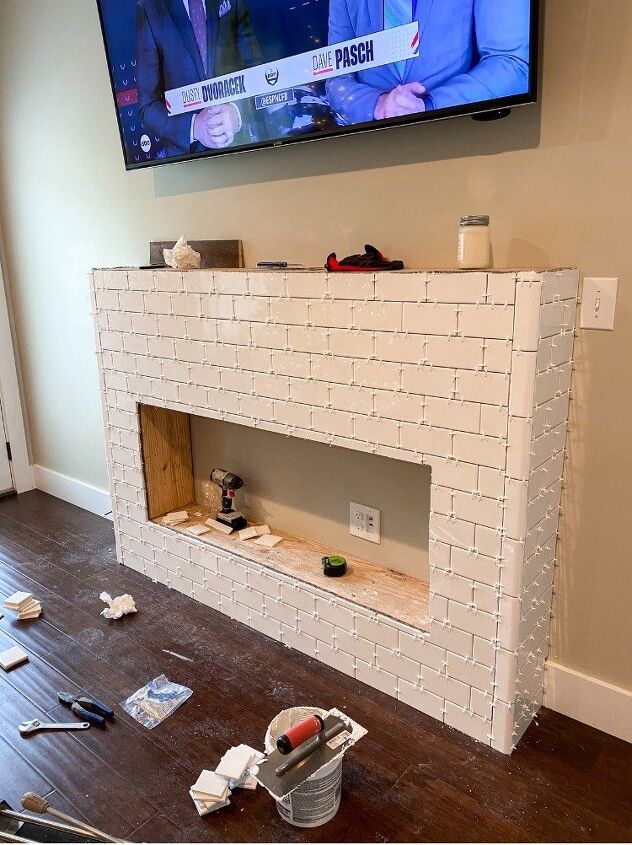
To attach the tiles to the DIY Fireplace, they just used tile adhesive. They also used 1/16 in spacers in between each tile. We wanted to go back after all the tile was placed and add in some grout as well.
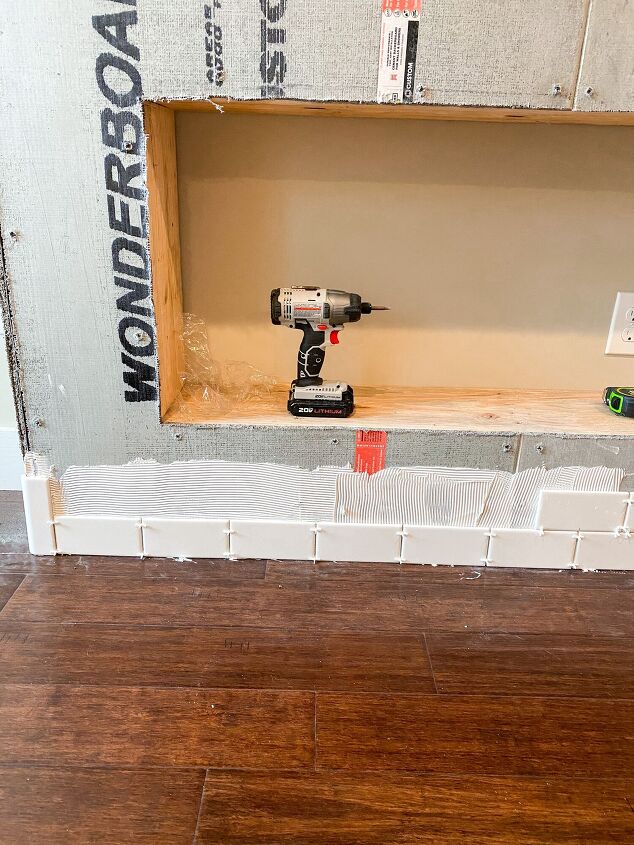
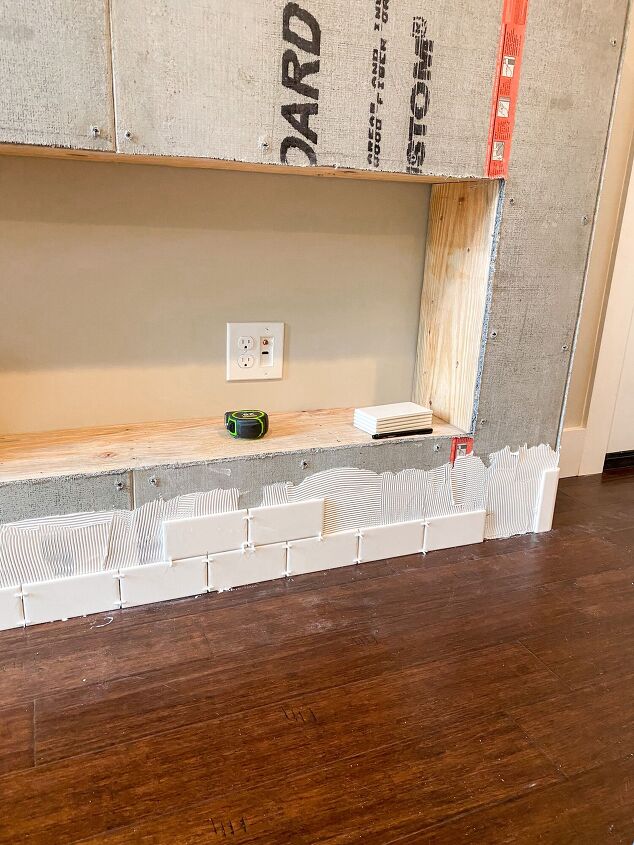
The tile process took another full day. It was most tedious just getting the first few lines done because you wanted to make sure they were nice and straight. Once they got in the groove of placing the tile on the fireplace, it went pretty fast. But, adding the grout didn’t take as long. That only took a few hours one evening after the tile was all placed. So once you get past adding in the tile, you’re all set!
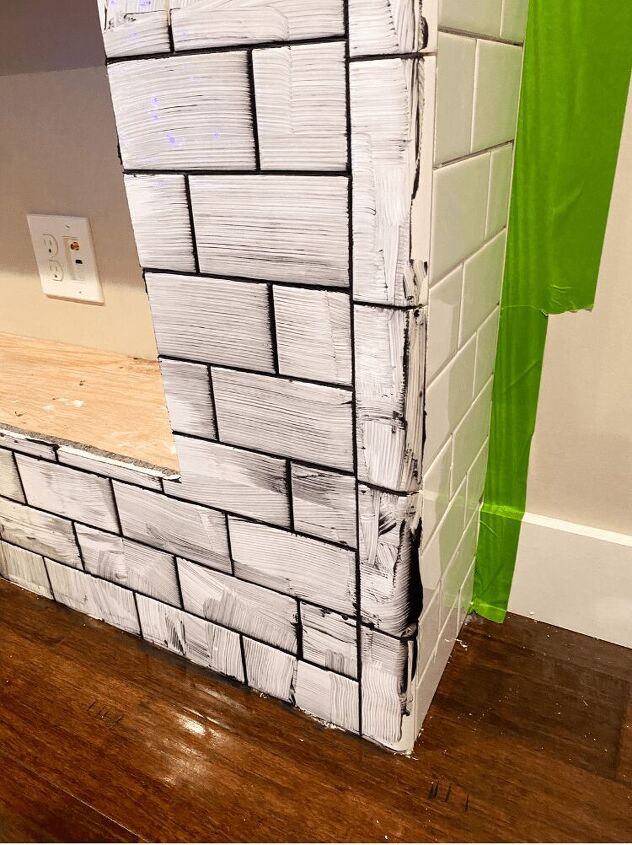
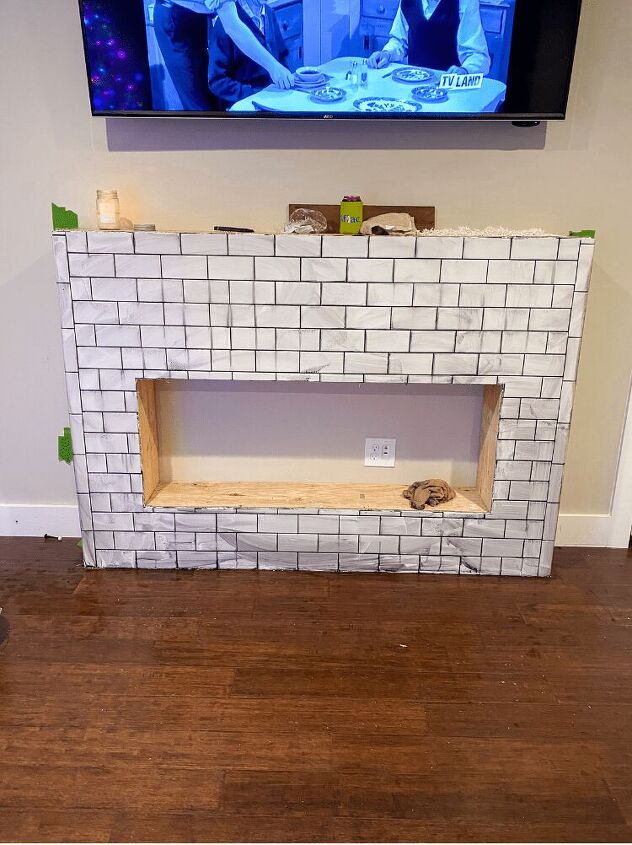
We finished all the tiling on a Saturday and let it rest for a few days after that. Then, on Wednesday evening, we added in the grout to the tile. This was a cool process for me to watch and learn from because again, I have never done it before.
The first thing they did to get ready for the grout was to use painters tape all around the walls. That way the grout doesn’t get on your walls when you are in the process of doing it. Get it as close to the wall as you can to prevent any leaks or drips from the grout.
After that, you are all ready to mix up your grout! They applied it to the tile using a rubber grout float. To clean it off after applying it, they used a grout sponge. And then to polish it all off, they used a polishing cheesecloth. That really helped fine tune it and get off any excess grout on the tile.
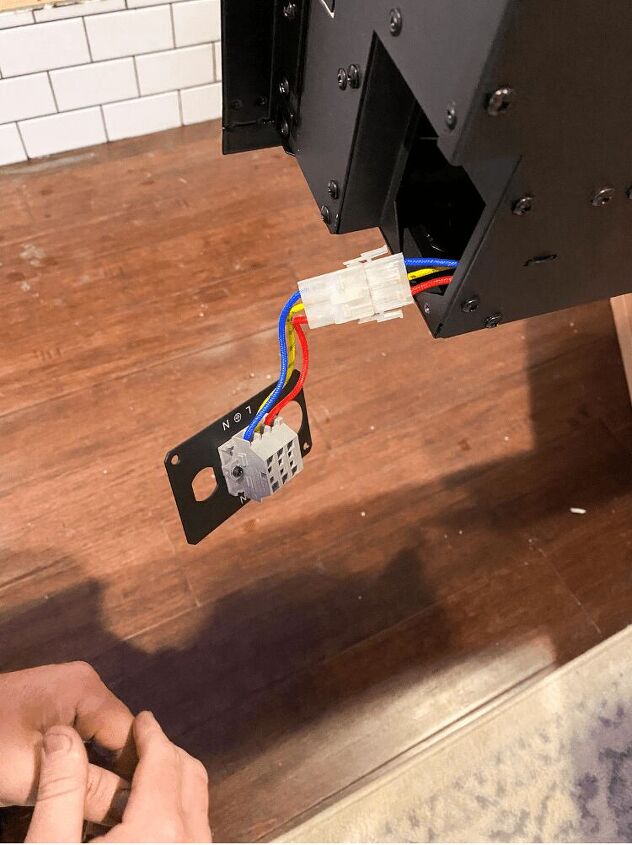
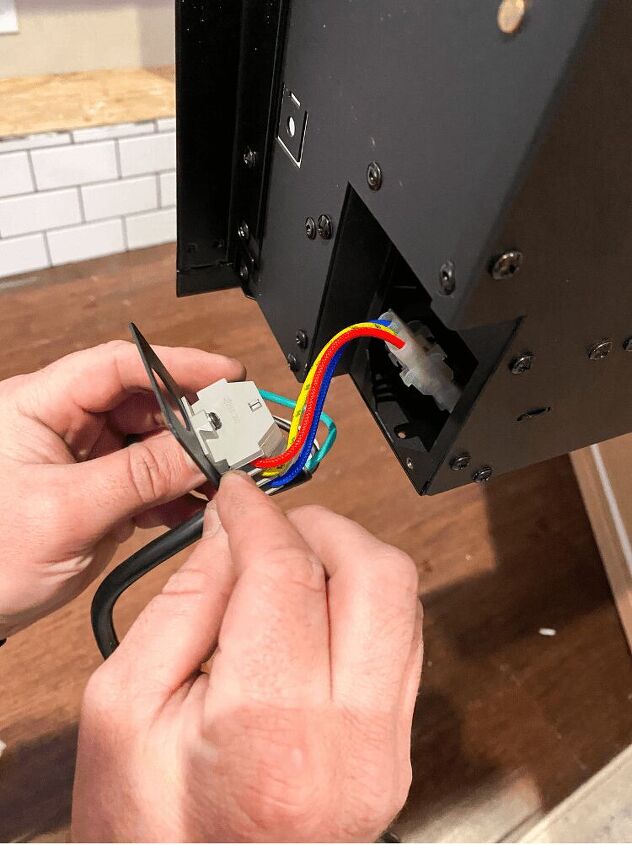
Now here’s the fun part- installing the fireplace! And this process was unbelievably easy. Probably the easiest part of this whole DIY project. The fireplace came with an electrical plug that can be easily plugged into the fireplace itself. So no electrician or electrical experience is needed to install it.
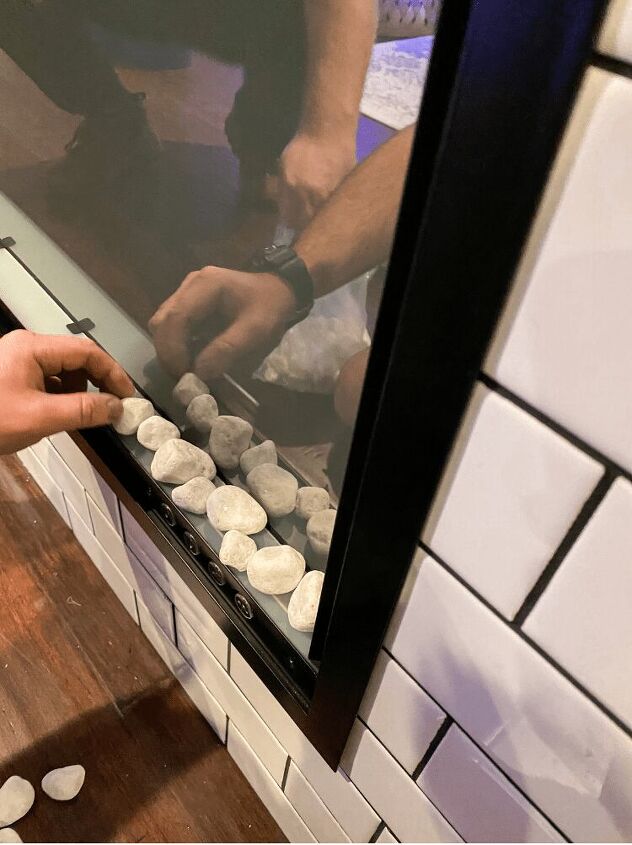
The fireplace then easily screws into the framework. After getting it secured, you can then add in the decorative rocks and/or glass pieces it comes with. We choose to do the white rocks on the bottom, but it also comes with large or small clear glass pieces. After that, you can place the glass on top of the fireplace and screw it into the pre-manufactured holes. This is probably easiest to do with two people. That way someone can hold the glass into place and then someone else can use the drill to screw it in.

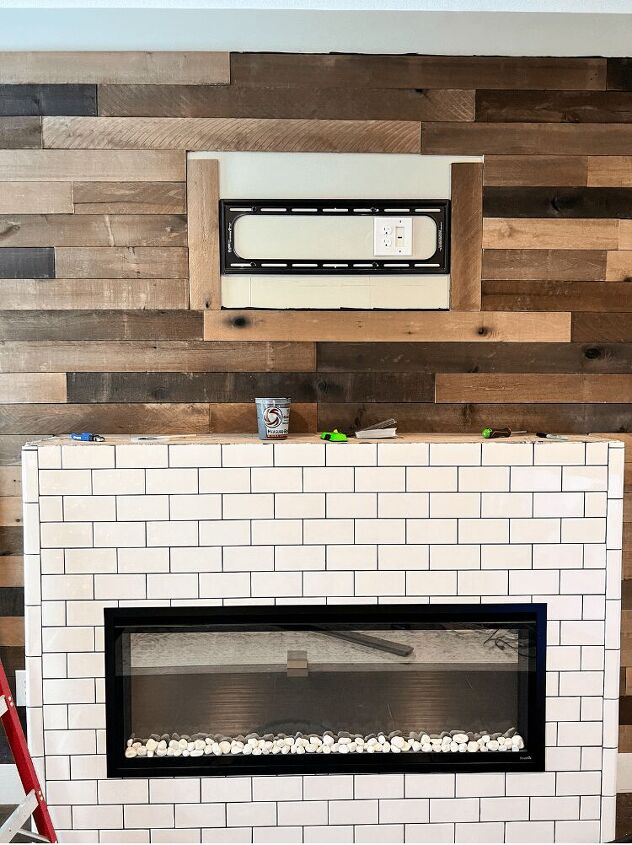
If you remember, I shared all about how we did our own DIY shiplap wall a few weeks ago in this same downstairs area. I won’t go into too much detail here since I shared more about the process there. But, we were able to shiplap this entire wall in one day and we used the exact same shiplap as the other wall. I am so glad we decided to do the shiplap here as well because it really makes the subway tile against the fireplace pop!
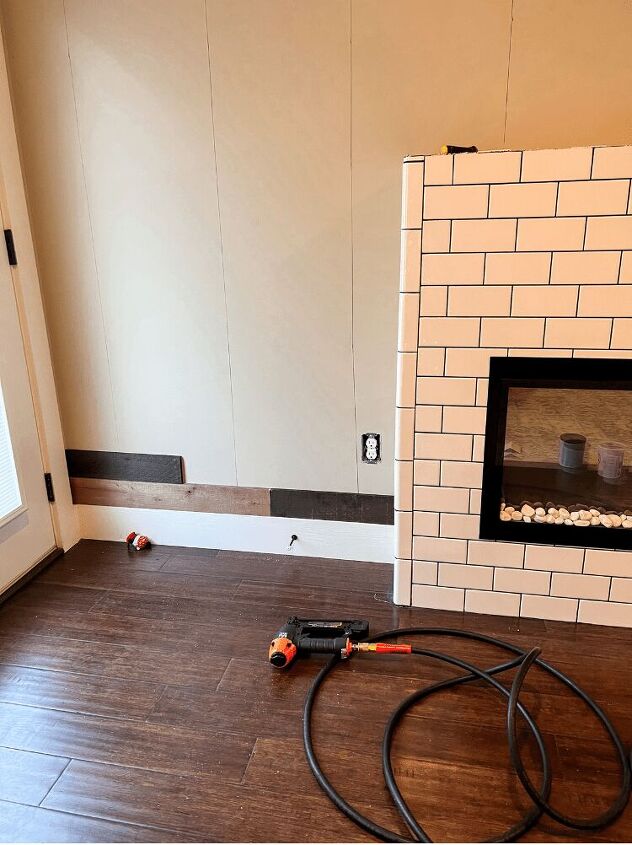
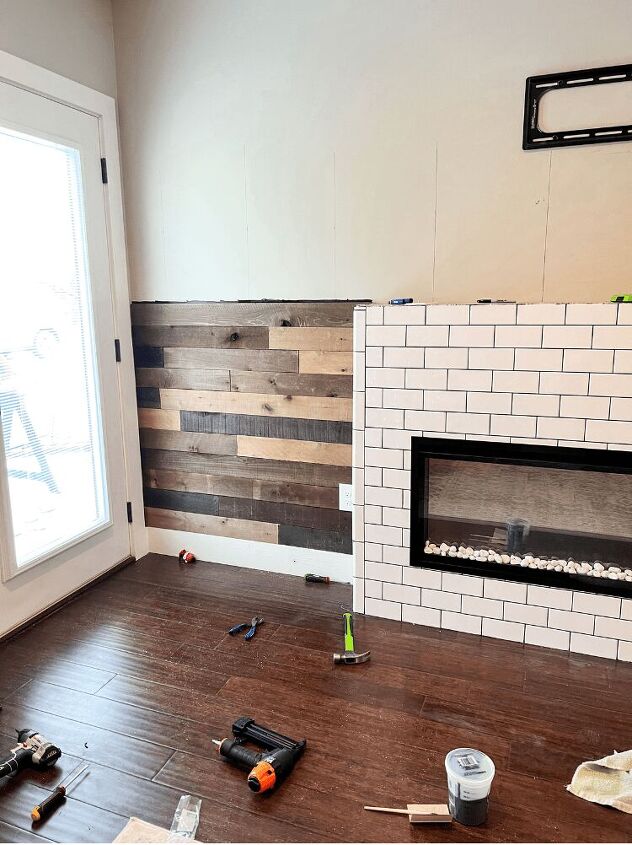
We left the TV mount on the wall because we were planning on hanging the exact same TV up there. We decided not to take it down and re-attach it. So we simply just shiplapped around the area since the TV would be hung back in the same spot once we were done.
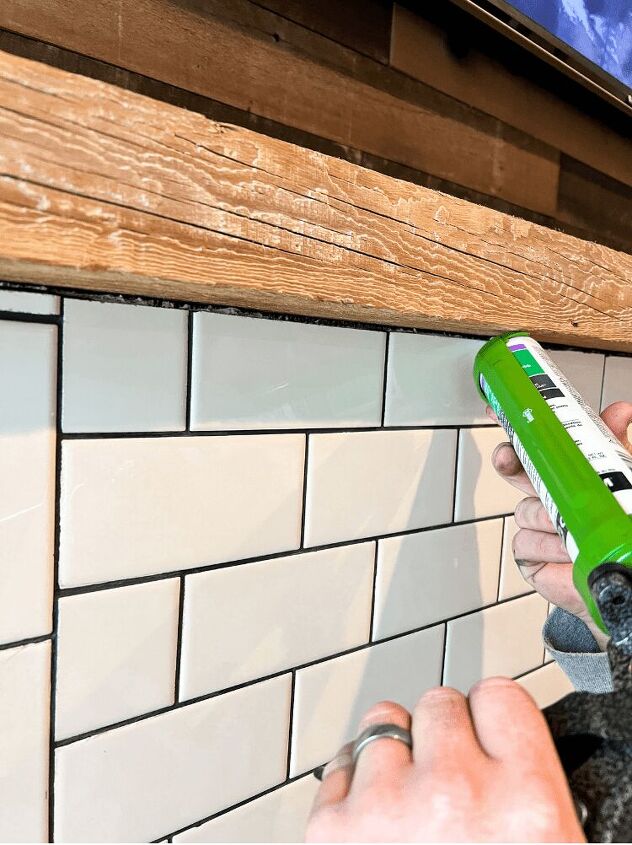
Now for the final steps of this DIY fireplace! We just need to install the mantel and we are all set! The first thing we did was to place the mantel on top so we could get a good visual on it. We made sure it was centered and looked perfect. Then, we drew lines underneath it against the tile so we could see exactly where it is supposed to sit on top to where it is nice and centered. My husband then applied wood glue on top of the fireplace and then we just placed the mantel down right on top of it!
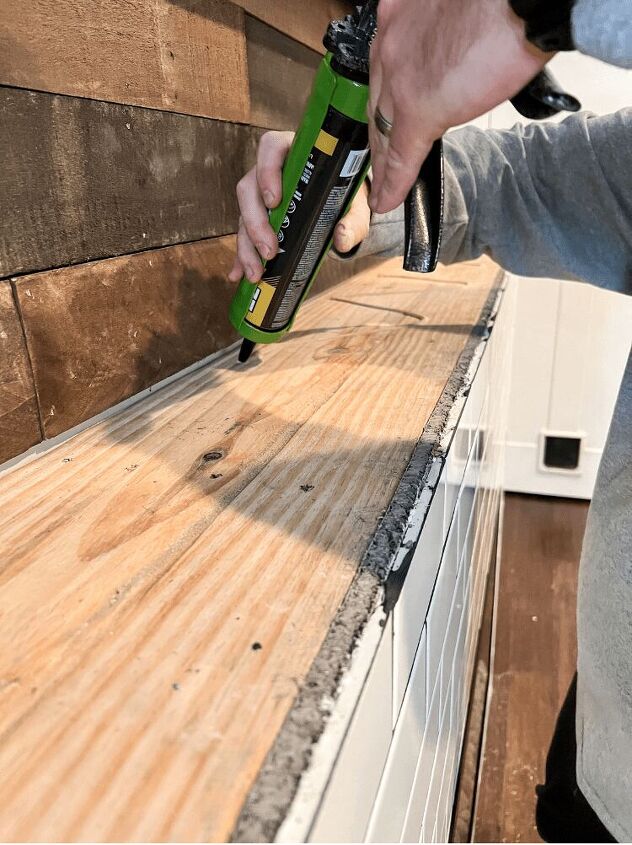
He then went back in and added in some grout underneath the mantel. That way it filled in any spaces that were present. The mantel is made from reclaimed barn wood and we were able to custom order it to the exact size and finish we needed. We got it from Modern Timber Craft and I love the fact that it is reclaimed barn wood. It definitely fits in with our whole vintage game room kind of vibe we have going on in this room!
Well, I think that’s a wrap! I am so in love with how this space turned out. It may seem like a lot of steps, but in reality it was not bad at all since we broke it up into several days. And all in all, we were done with the whole project in about two weeks time. To finish it up and make it more festive, I just added in some Christmas garland and stockings.
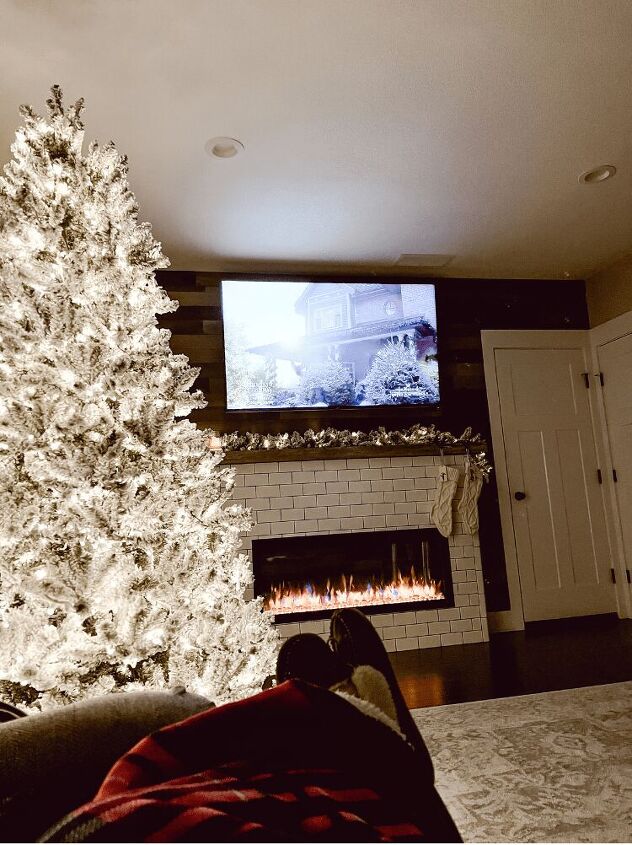
I was so excited to have a mantel to decorate for Christmas this year. I have never had one before so this was super exciting to me. We have definitely been enjoying the fireplace and love to relax by it every evening!
A post shared by Modern Farmhouse Decor|Charity (@mornings_on_macedonia)
So if you’re looking for a great fireplace too, then check out SimpliFire. And don’t forget to use my code “MACEDONIA10” for 10% off from now until December 31st, 2021. What do you think of how it turned out?! I honestly don’t think it could get much better than this!

Comments
Join the conversation
-
WOW. You created such a beautiful focal point in the room. The wall & fireplace turned out amazing. Your instructions were spot on. Thank you for sharing 💗


Frequently asked questions
Have a question about this project?
It’s really nice. We purchased an entire tv console cabinet with glass doors and shelves and the fireplace already set in. We just had to plug it in and start playing with the fire remote, lol. I was wondering that when you put down the rocks it seemed like you were lining them up on the OUTside of the glass?