New Face for an Old Fireplace

C
by C
4 Materials
Rehabbing novice experiments with an ugly fireplace for great results. You can learn to do anything on the internet!
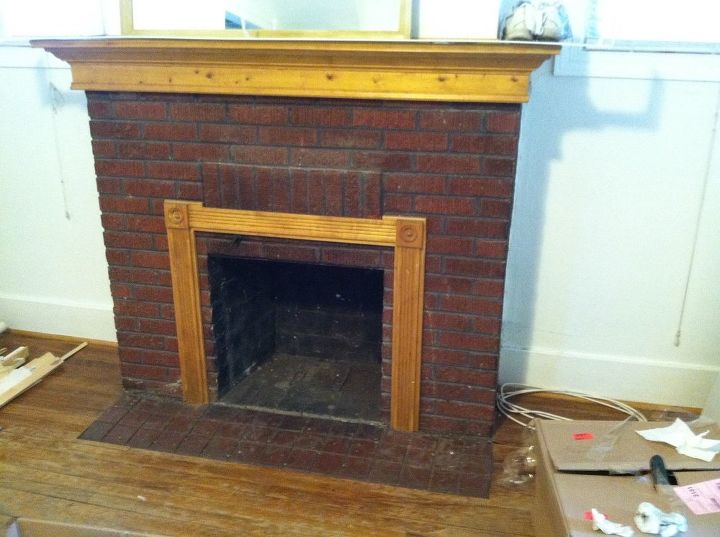
Ugly, with a capital U!
I had this ugly wood-burning, neglected fireplace in a rental property I was renovating. I decided this would be my own personal "art project," and it would be a focal point in the living room. I googled how to tile over brick, and chose one of two methods.


* I removed the pine framing around the fire-box and chiselled out the ugly floor tiles. The upper mantle was ok, and just needed a cleaning and clear lacquer sealer.


* Using white mortar mix, I literally "frosted over" the existing bricks, two coats, letting it dry thoroughly for a couple days in between each coat. The idea was to get a smooth surface to tile on. The fireplace had a raised area on the front, and I kept it to use for a design element on the facade.
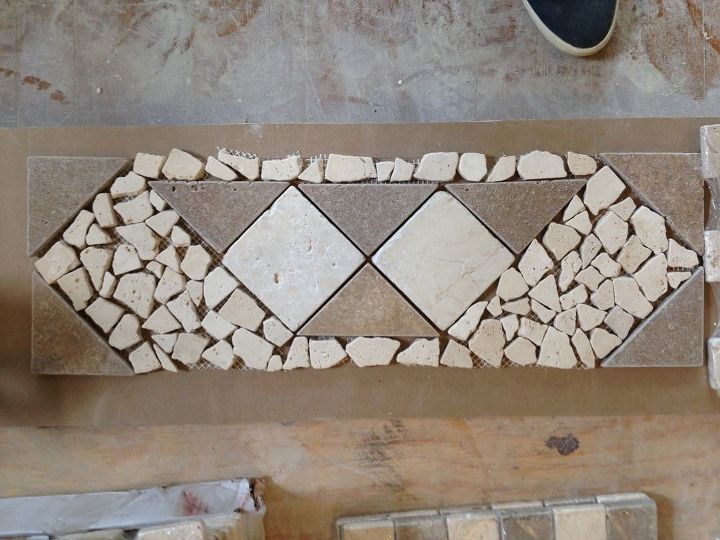
Designed my own mosaic for focal point
* I used marble tiles and mosaic pieces to create a design that would fit the raised area, laying it out on the floor for fit and scale. I photographed it to make sure I put everything in exactly this way so it would fit the space.
Work in progress, from the ground up.
* I started by laying the tile out on the floor, and was careful to measure and space the tiles to avoid as much cutting as possible. It's like a jigsaw puzzle. Measure your area, and fill it in with tiles. Even so, I did have to cut some pieces, but not many.


* I had the face laid out on the floor in completion, and started working from the bottom up. The tumbled marble bricks were on mesh backings, in 12 X 12 sheets of 5 rows per, so it made spacing fairly easy. I used spacers to hold the heavy tiles in place while the mortar set.


* Patience is key here. You can't do the whole thing at once. The bottom has to set to hold the weight of the next layers. Two 12X12 layers a day was what I did to ensure the tiles were set before adding the next course.


* The tricky part was the row directly over the firebox -- it had nothing to rest on, so I had to nail in a board to hold it in place till it dried, at least a day.


*My mosaic design went in on the raised area. I was going for a rough contemporary look.


* The tiles on the front overlap about 1/4" on each side, so I could butt the sides in and get a good corner finish.
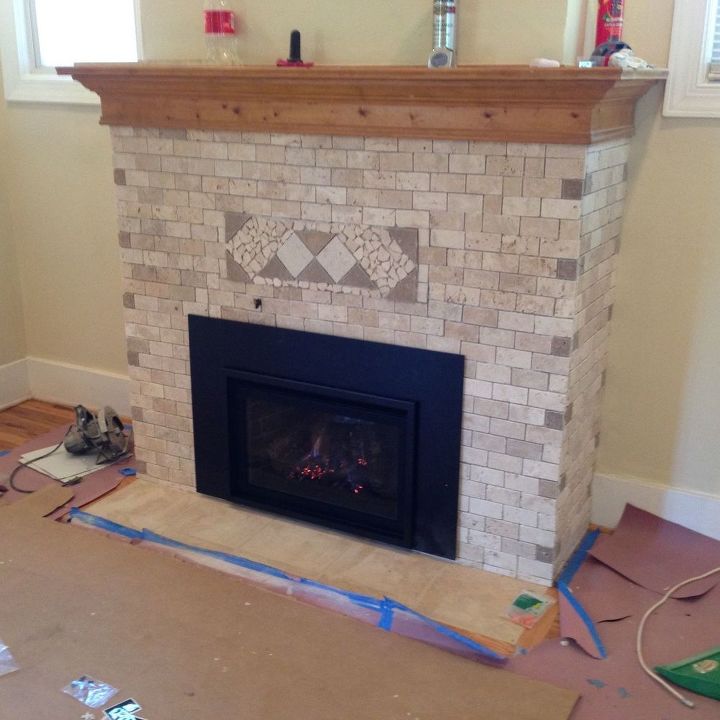
Gas Fireplace insert
* I grouted the tiles after everything had dried and set a few days.


* I had my contractor retrofit the fireplace for a gas insert, and it turns on with a remote control. It truly is the focal point in the room now!
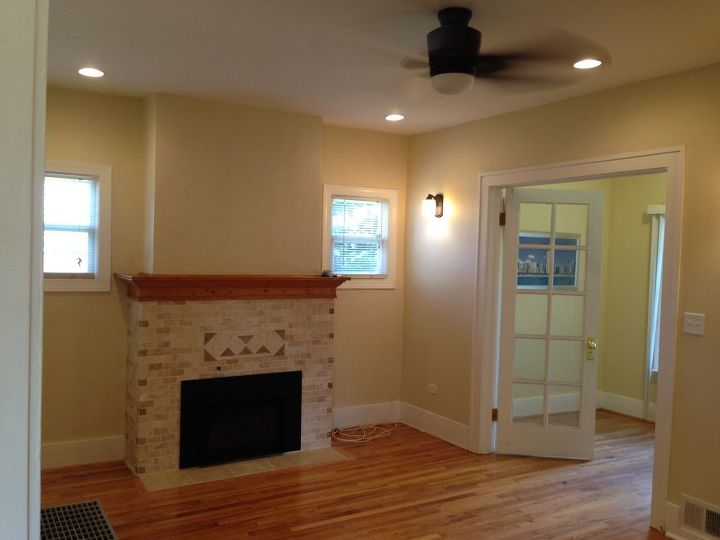
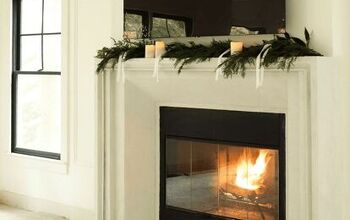
Finished fireplace is a focal point now
Last step was laying in 12X12 floor tiles on the floor in front of the hearth to complete the look.
Suggested materials:
  • White mortar mix   (Menards)
  • Tumbled Marble tiles and mosaic pieces   (Menards)
  • Tile Grout   (Menards)
See all materials
Frequently asked questions
Have a question about this project?
  2 questions
  • Gra10404078 Gra10404078 on Oct 17, 2016
    Is that mortar applied over the original bricks to give them that frosted look, or, did you apply new bricks?
  • Jo Ann Wegman Jo Ann Wegman on Apr 01, 2019

    Absolutely beautiful makeover. The frosting of white mortar allowed the contrasting colors of the red brick to come thru in gray tones as in one picture and gray tones in the enlarged picture. Did you have to paint over some of the bricks with a watered down gray paint?

    Thank you.

Comments
Join the conversation
2 of 80 comments
  • Carolyn Bounds Carolyn Bounds on Apr 05, 2017

    Gorgeous!

  • Annette Annette on Nov 02, 2019

    This is absolutely stunning I love this look! What a beautiful pattern and I absolutely love the softer look.......thank you for sharing if I ever can have a home with a fireplace I would pick this for my project!

Next