


How to Paint Flower Pots for the Porch

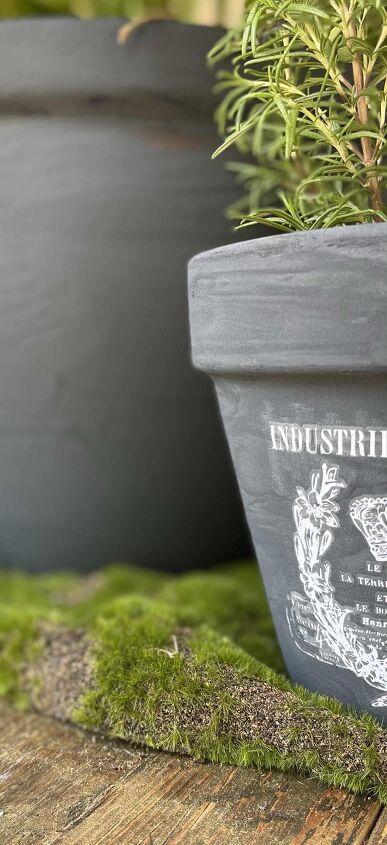
It is time for planting our pretty flowers and I want to show you how to paint flower pots for your porch! There are so many ways to paint your flower pots but I had some leftover product from my Roman Clay Faux Finish in Black so I used it to coat my terra cotta pots and it is stunning!
I will be able to use it outdoors and bring it in if I want or need to because it goes with my interior design and my backyard patio decor as well! Win Win!
My friends from the Thrifty Style Team are joining me with some really cool projects today too! I linked all of their thrifty ideas at the bottom of this post! You can start with Angie at Postcards from the Ridge and her Budget Decorating ideas Here! Angie always has beautiful ideas!

I feel like everyone has old flower pots lying around. I know I do. I keep thinking, I can do something with that one. I like the shape of that one, I can definitely paint that to look better. Do you do that too?
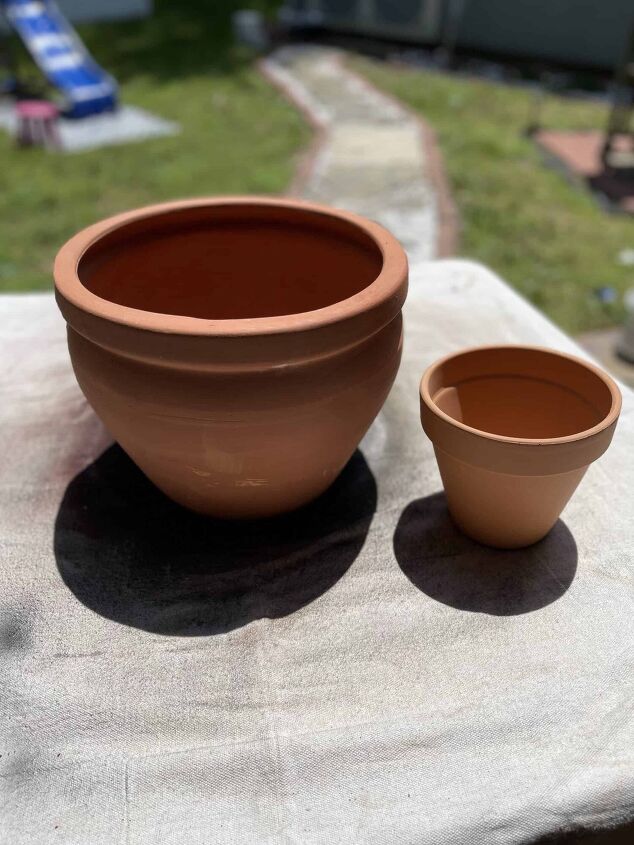
Well, I finally had a brilliant idea for a large clay flower pot that I had in my garage with the tags still on it from Tuesday Mornings. I loved the shape but it was the bright orange terra cotta and it just never “went” with anything I have.
Like I said above, I had some leftover clay from the Faux Roman Clay Finish I did in my entryway and it was perfect for this year’s back porch makeover that I am getting ready to do. So here are the steps I took to paint these adorable flower pots!
Supply List
- Pots of any shape and size! Whatever you like or have laying around!
- Joint Compound (All-Purpose)
- Paint
- I used Magnolia in the color Blackboard
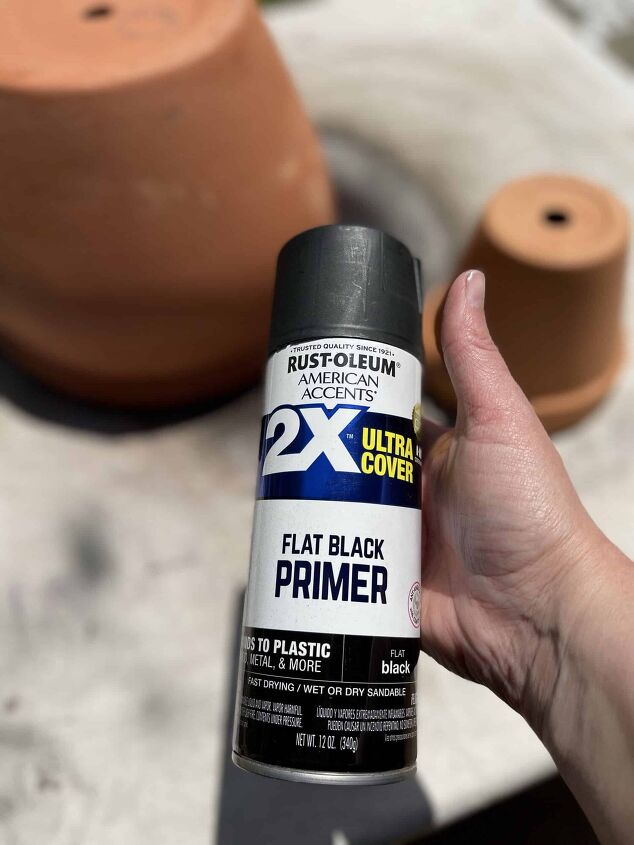
- Rustoleum Flat Black Primer spray paint
- Amy Howard at Home Liming wax
- Amy Howard at Home Dark Antiquing Wax
- Sunshine!
Painting Terra Cotta Pots
- Pick your potsBoth of mine happen to be terra cotta, but you can choose plastic flower pots, resin flower pots, or just about any type of surface with this method.
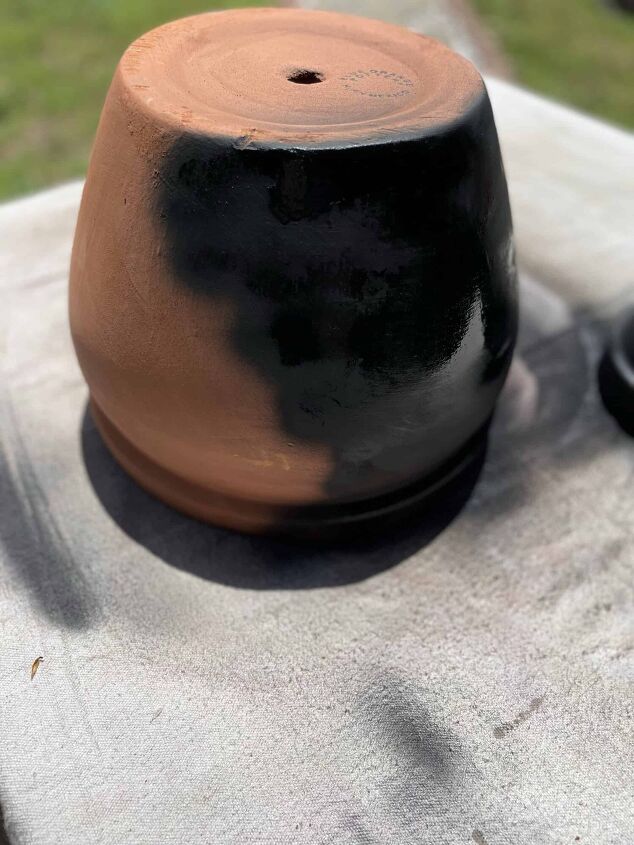
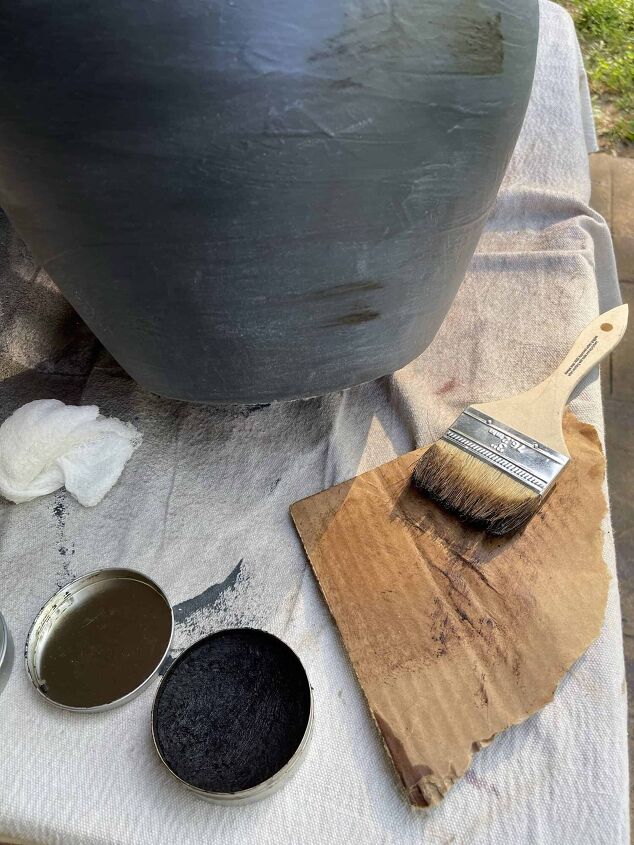
PrimeI used one coat of Rustoleum Flat Black Primer to prep both of these clay pots and get them ready for my Roman Clay Mix ( Find Recipe here)
This is the one coat halfway done
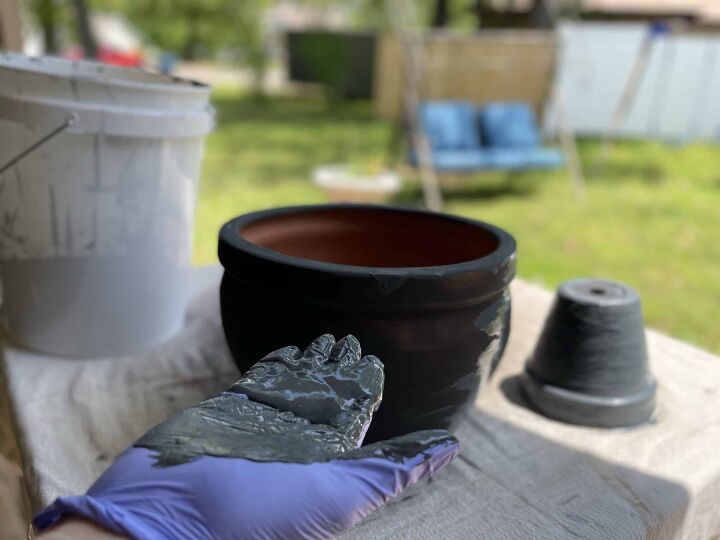
Stir Roman Clay MixtureThis is joint compound and black paint (Joanna Gaines, Blackboard) about 50/50.
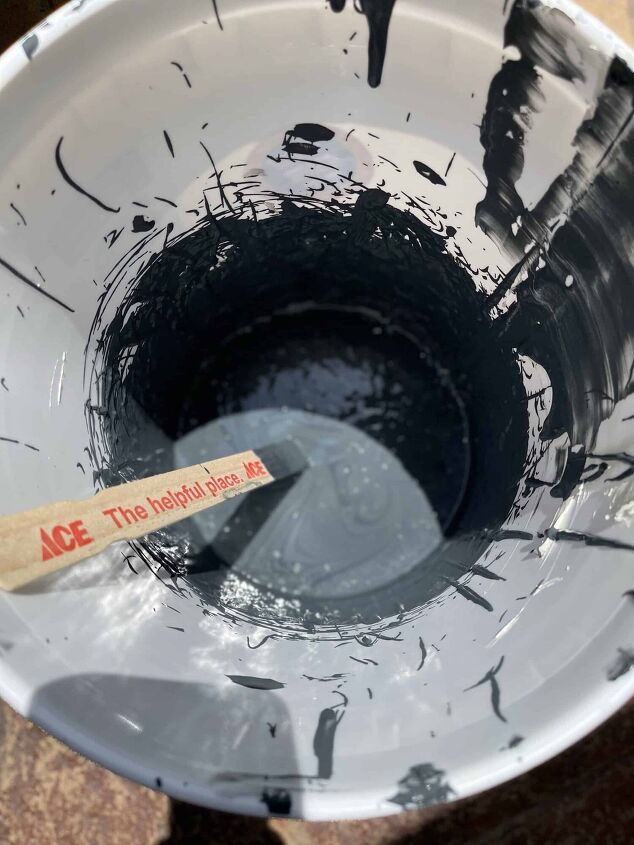
Spread mix I used my gloved hands to generously spread the mixture onto the primed pots. I just went around and spread it evenly.
Allow to DryThis mix dries fast and it was a warm sunny day. It took about 30 minutes to dry in the sun.
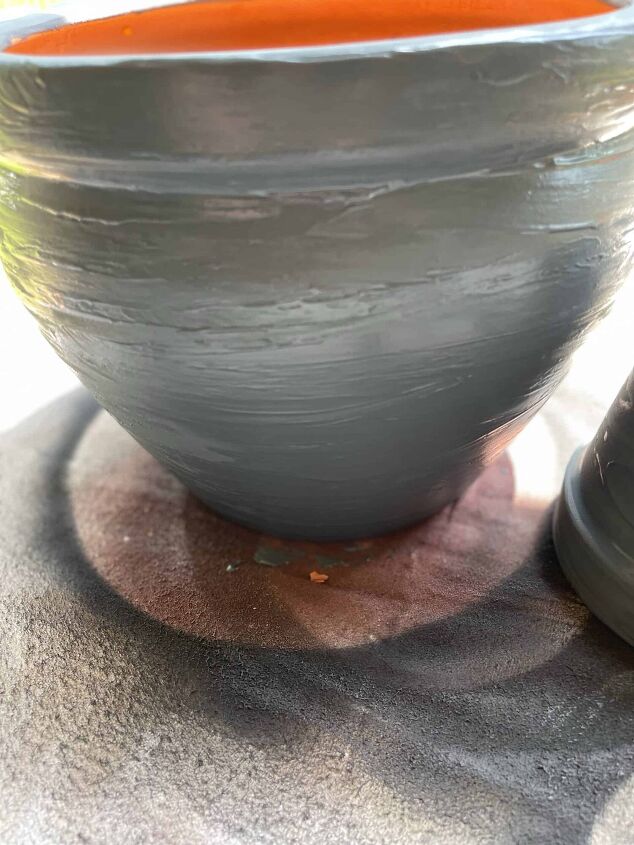
Decide about a second coatIf you feel you need more coverage or if you want more texture add a second coat and allow it to dry as well. I only did one coat of the Faux Roman Clay Mix.
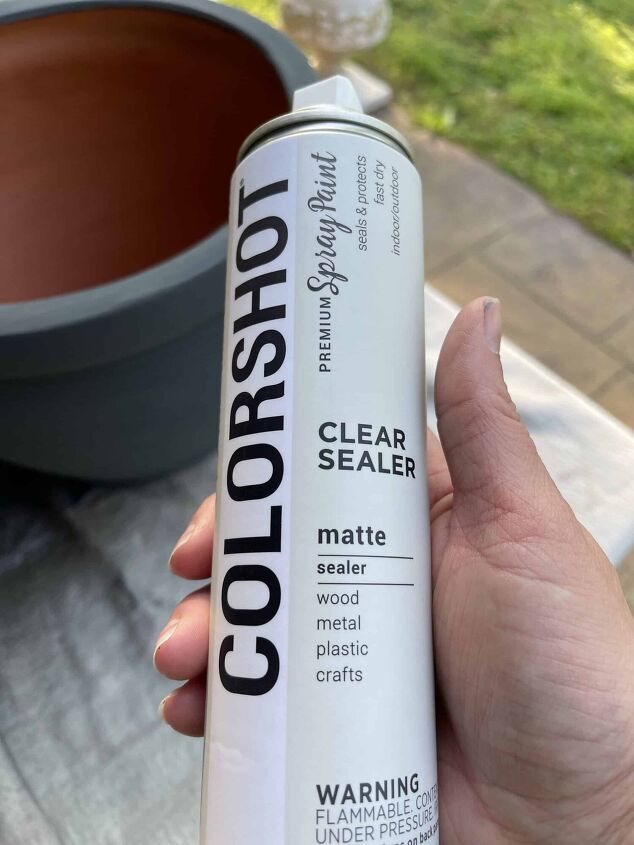
SealFor longevity, you should add a sealer. I chose a matte clear spray finish from ColorShot. You can find this brand at most Walmart Stores. I sprayed three coats to be safe. I talk about why I seal before I add wax further down in this post.
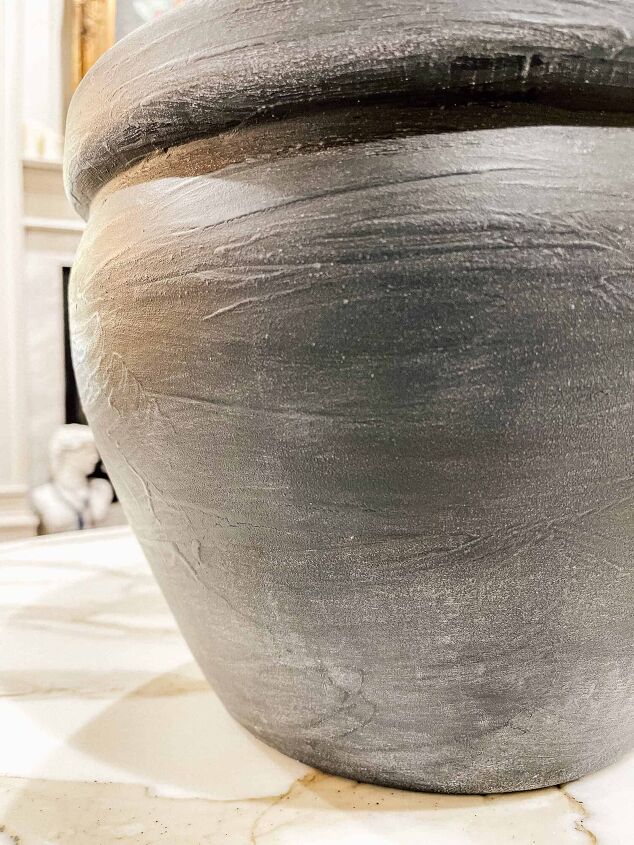
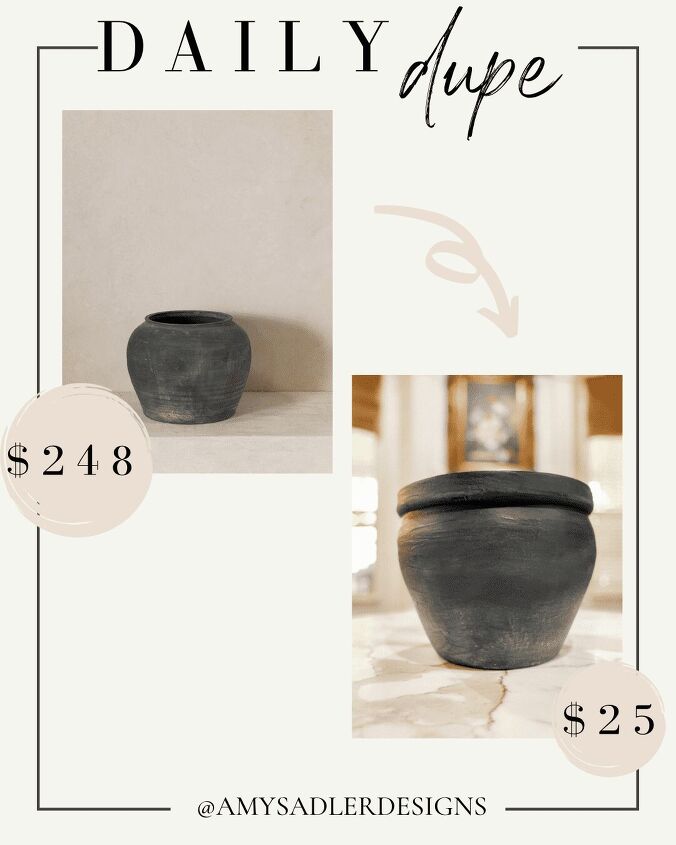
Age your potI wanted my pot to look like the vintage pot from Studio McGee, so after the sealer, I added a small amount of Amy Howard at Home Liming wax and dark wax.
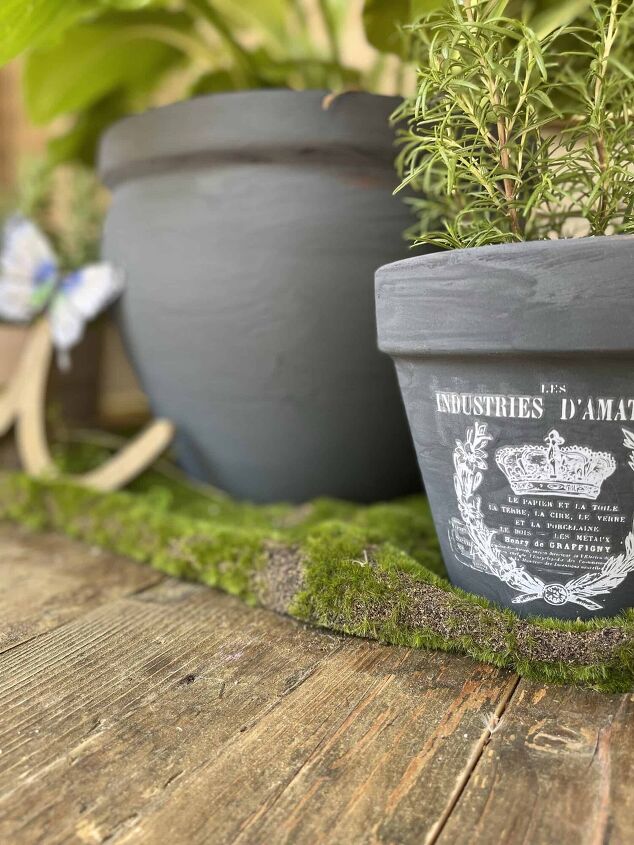
DisplayHere is the pot outdoors on my patio table!
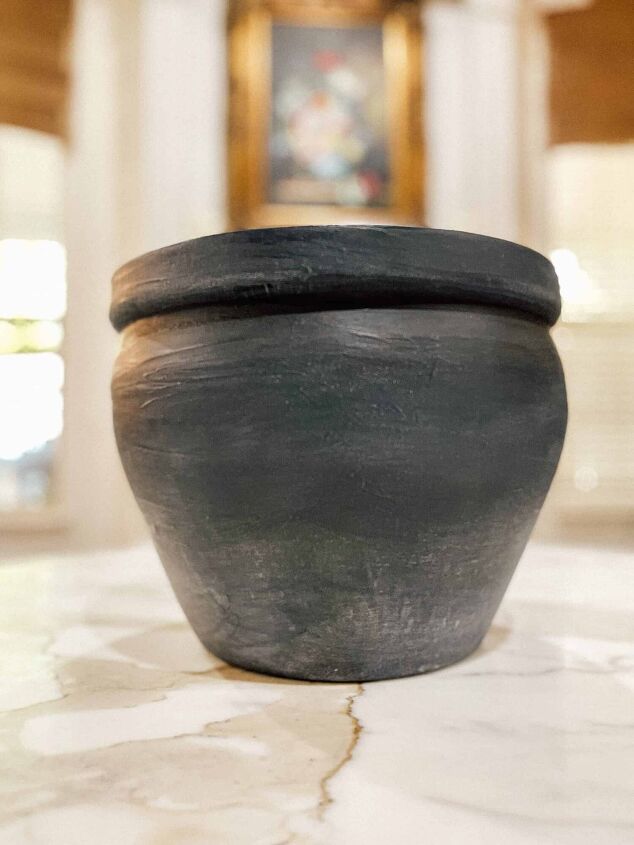
What do you think about this Studio McGee Dupe Comparison? Am I close?
What kind of paint do you use on outdoor pots?
It’s important that you properly prep your pots so that they are ready to take paint. The Rustoleum primer that I used on these flower pots is great for clay pots, plastic, resin, or almost any surface. It comes in white as well. After your pot is cleaned and primed, you can use another can of spray paint, or chalk paint or make your own textured paint like we did here and if your painted flower pots will be outside I suggest sealing them with a clear sealer. You can choose from matte, satin, and gloss sealers. Some would say wax would work as well but I prefer the convenience of a spray can.
If I am going to wax for the effect or the aging process, I will most likely always give my painted surface a spray of clear sealer. It is so forgiving with wax and it allows me to wipe back more wax if I have gotten heavy-handed. It acts as a barrier coat between my wax and paint layer.
Paint will absorb the wax and it can be too much, so I add the barrier of clear to make it easier on myself. Also, it’s usually more cost-effective this way as well.
I hope this post was helpful and I hope you go into the garage and paint all of the flower pots you have laying around!!! Be sure to email me a picture if you do!
Also, here is a fun way to decoupage a flower pot from my friend at The How To Home!
And the rest of my Thrifty friend’s links are below!
Redhead Can Decorate – Milk Glass Fruit & Cheese Appetizer Tower
Our Crafty Mom – Bicycle Tire Sunflower Wreath
I Should Be Mopping the Floor – DIY Bulletin Board with Nailhead Trim
The How to Home – Shabby Chic Decoupage Plant Pot
DIY Beautify – Update Older Exterior Windows with Spray Paint
2 Bees in a Pod – Antique French Hat Boxes
Postcards From the Ridge – How to Decorate on a Budget
The Tattered Pew – How to Create a Simple Hat Wall with Hooks
Cottage on Bunker Hill – How to Press Flowers in the Microwave
Vinyet Etc. – Transform a Vintage Frame into an Antique Mirror
Amy Sadler Designs – How to Paint Flower Pots for the Porch
Songbird – How to Make Lace Napkin Rings Tutorial
Resources for this project:
See all materials


Comments
Join the conversation
-
Nicely done! I can’t even tell the difference between the two!!!!!
-
Joint compound and paint...makes it look like "hand thrown" pottery. Maybe this would work on even a cheap plastic pot if you sanded to rough it up then coated it outside and to a few inches below the soil line inside. Coat with a sealant like matte outdoor Mod Podge if using outdoors.


Frequently asked questions
Have a question about this project?