


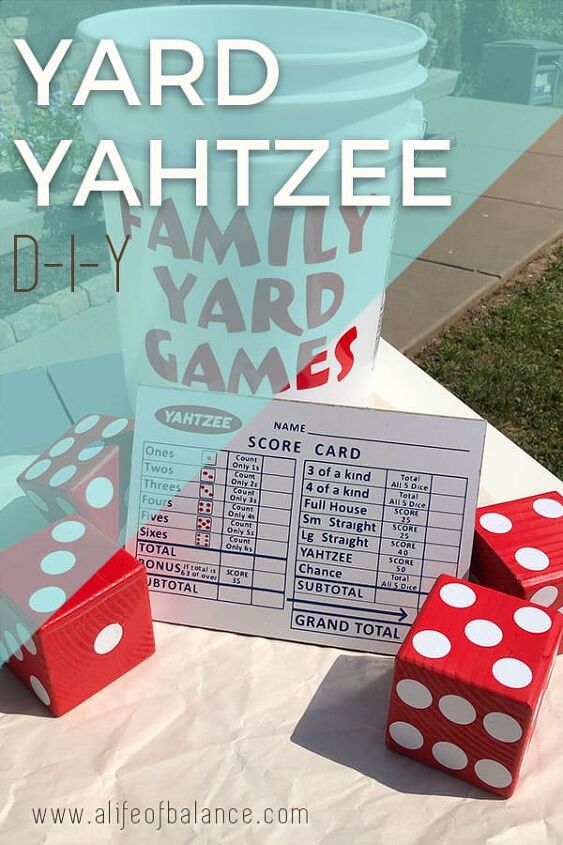
Yard Yahtzee DIY
Our family’s favorite game is Yahtzee, so we wanted an easy way to take it with us to outdoor events during the nice weather of spring, summer, and fall. We’ve been taking the regular version with us in a plastic bag, but it can be hard to manage if it’s windy or damp out. This new version solves those problems.
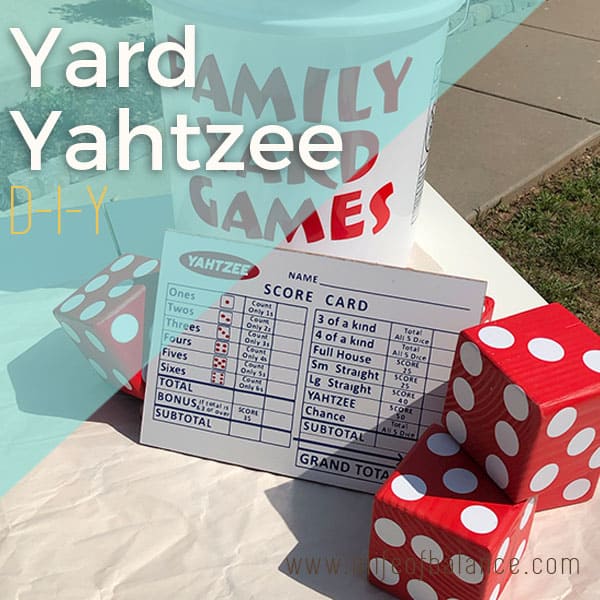
Follow along to make your own yard Yahtzee set.
Wood – 17.5” long 4×4 (remember a 4×4 is really 3.5” x 3.5”)
Spray Paint – we used red, but you can use any color you want
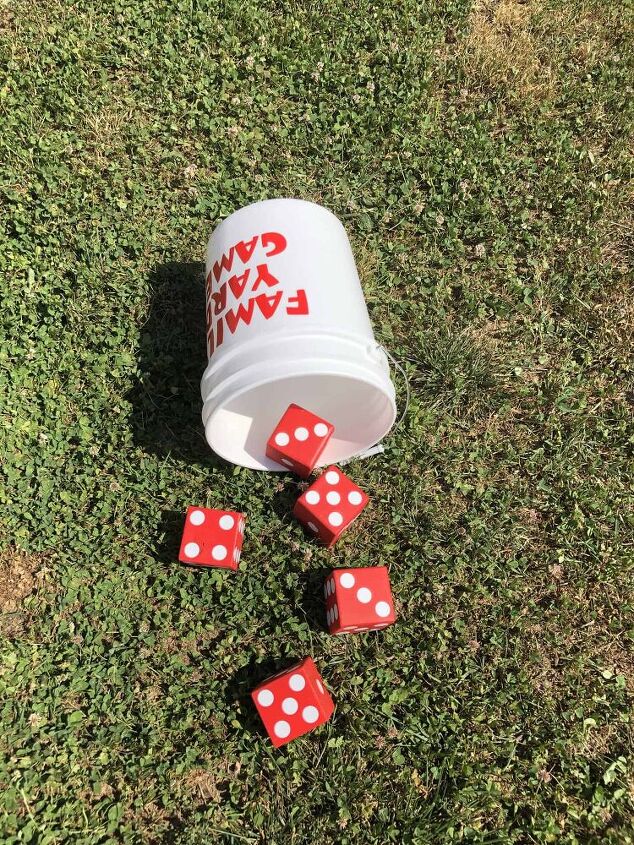
5-Gallon Bucket – for dice pail
“Write-On-Wipe-Off” Board –
Red & Blue Heat-Transfer-Vinyl (HTV)
Mod Podge
Miter Saw
Router
Cricut or similar cutting machine
Heat press or good iron
NOTE: If you don’t want to make the write-on-wipe-off scoring boards you can download scoring sheets from here and put them on a clipboard.
Cut your 4×4 into 3.5” squares. Use a router to round the edges and corners. If you don’t have a router, you can use sandpaper, but it will take a while. Sand all sides smooth.
Once the wood “dice” are made, spray paint them.
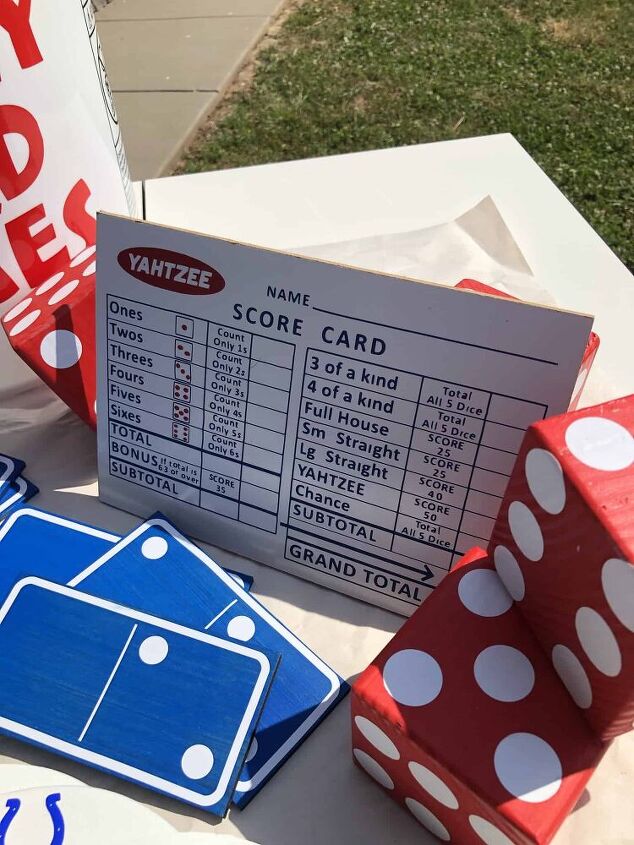
Cut the “write-on-wipe-off” board into 5” x 7” individual boards. We used a board that was “write-on-wipe-off” on one side and chalk board on the other. Until writing this I didn’t think of I t but you could also do the HTV in white and put it on the chalkboard side. We made 6 scoring boards, but you can make as many as you like.
For the dots on the dice, create a circle shape in your cutting software that is .09” x .09”. Duplicate the shape so that you have a total of 105 circles. Cut the circles out of white vinyl. NOTE: I tried laying them out in the appropriate “grid” for each side of the dice and then using transfer tape to move them to the dice but found that each side wasn’t perfectly sized, so it didn’t always fit the best. Placing them individually was easy enough.
I made PNG files for my scoring boards because I don’t yet know how to make SVG files. That’s something I’ll be learning in the future but for now loading the PNG files works great for simple files like these.
Load this PNG file into your cutting software for the grid of your scoring boards. Cut one of these for each scoring board you are making. Remember, this is HTV so you need to mirror it before cutting. I chose to do this in navy blue, but you can use whatever color you want.
Use these 2 PNG files ( dice, Yahtzee logo) for the “red” parts of the scoring boards. Again, you don’t have to use red. I did these in separate files to save vinyl. You can easily cut all of the Yahtzee logos and dice out of one sheet, just duplicate the pieces as many times as needed. Again, remember that this is HTV so you need to mirror it.
Weed all vinyl to prepare for assembly.
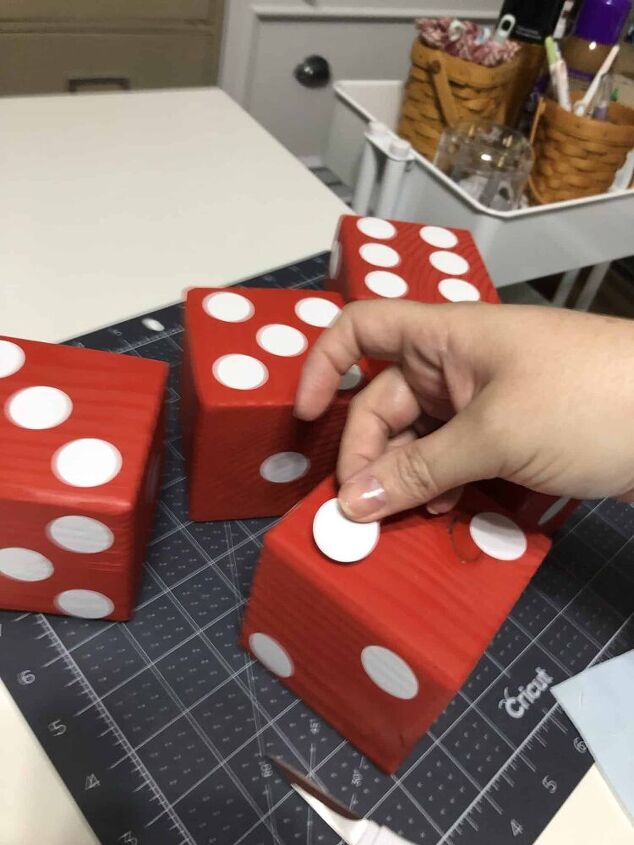
For the dice, just place the dots in the appropriate pattern on the painted blocks. I got a dice from our regular Yahtzee game to make sure that I did them in the right order. Once the dots were on the dice, I coated the entire dice with Mod Podge to help keep them from showing too much wear and tear.
Start by warming up your boards by putting them in your press for a few seconds.
Place the grid on the board as close to centered and straight as possible. Place in heat press according to instructions from HTV vendor. Remember, wood takes longer than cloth or canvas. For me, 350¡ for 30 seconds was about perfect. Depending on vinyl, either pull backing sheet immediately or let cool and then pull backing sheet.
Add both of the red pieces (Yahtzee and dice dots) to your board. Place a piece of parchment paper over the board. Place in heat press for the same amount of time as the scoring grid being careful not to “slide” the press. It is important to add the parchment paper as this is what helps keep things from sliding if you do move the press slightly. I couldn’t believe how much of a difference it made.
I even reverse weeded the small lettering on one set and really like the way it turned out. It was easy to do without a different PNG file, just remove the letters in the how-to-score blocks rather than removing the blue around the letters.
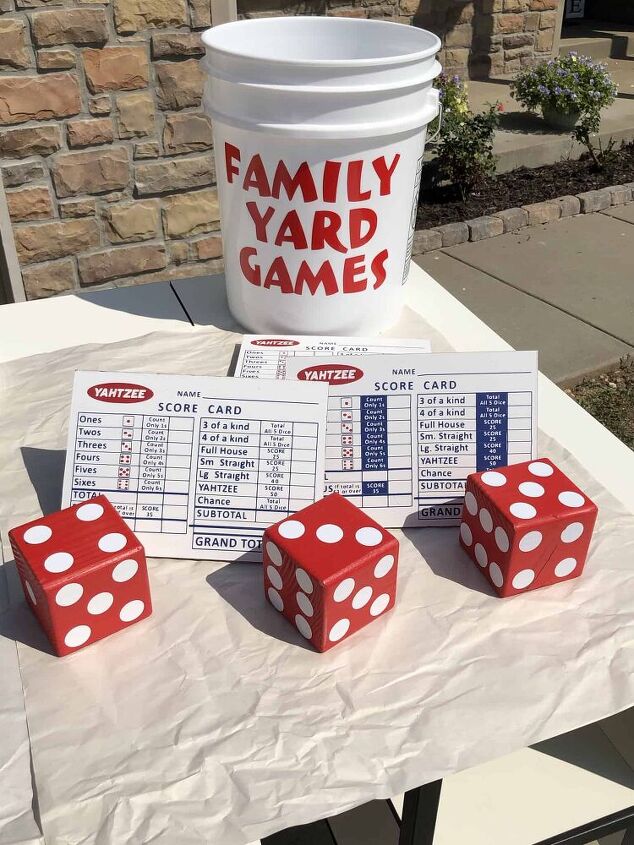
Put all five dice and your scoring boards in your 5-gallon bucket. If you want, you can add something to the outside of your bucket. We have multiple 5-gallon buckets in our garage, so this was important to make sure we were grabbing the right bucket when headed out for some fun. Don’t forget to throw in some dry erase markers or chalk depending on which side of the board you decided to use.
Post photos of your completed yard Yahtzee games in the comments below so we can all celebrate your accomplishment.
This is only one of the yard games we have made recently. Check out this post for information on the others: DIY Yard Games for Great Family Fun


Frequently asked questions
Have a question about this project?