


Garden Seating Area

I have wanted a fire pit in our garden for a long time and a few years ago we found some inexpensive Adirondack chairs which I love but we haven’t really had anywhere to put them. Finally this year we were able to get to work on getting a seating area constructed. We decided to go with gravel, partly because I liked the look of it but also due to ease of construction and to fit our budget!
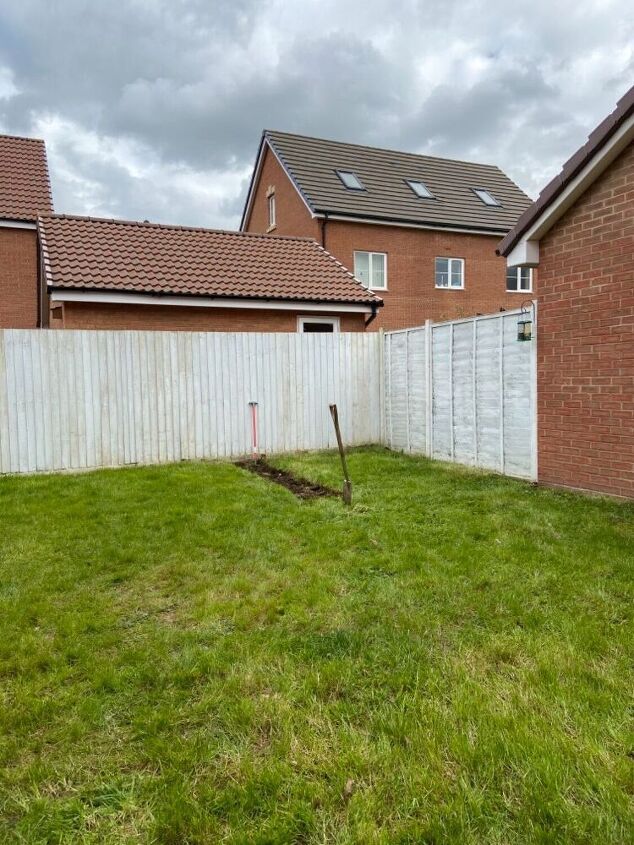
This is the before photo of this area of our garden; very much untouched from when we moved in. The soil on our land is clay which has been an issue with maintaining the lawn, this area being particularly badly affected. Therefore, digging this part up was going to be a great solution to this!
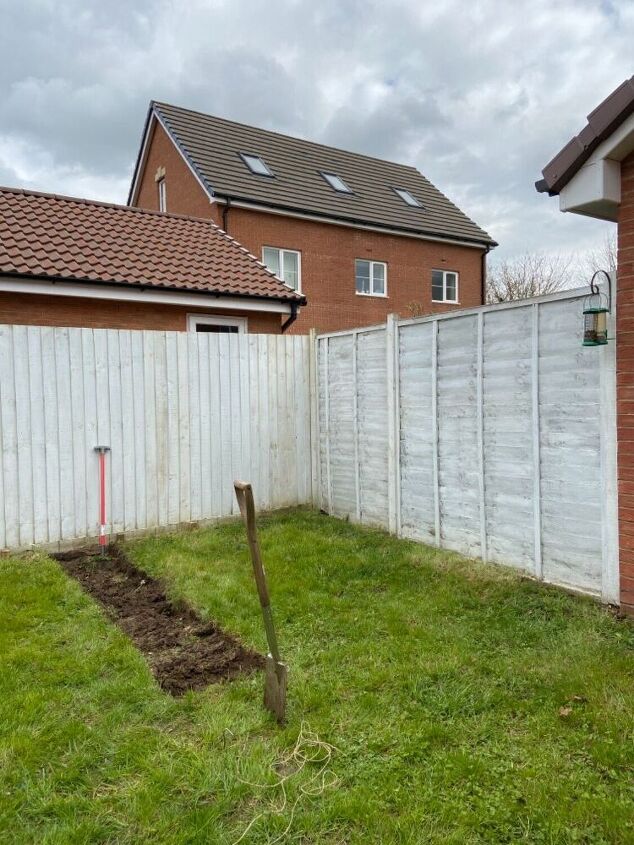
Using a lawn edger we cut down into the soil and used a spade to dig out 1 square of turf and soil at a time. We dug to approximately 10cm deep.
This is the digging completed. The two stakes seen in the photo are to hold the lower part of the fence as it was bowing outwards into our garden.
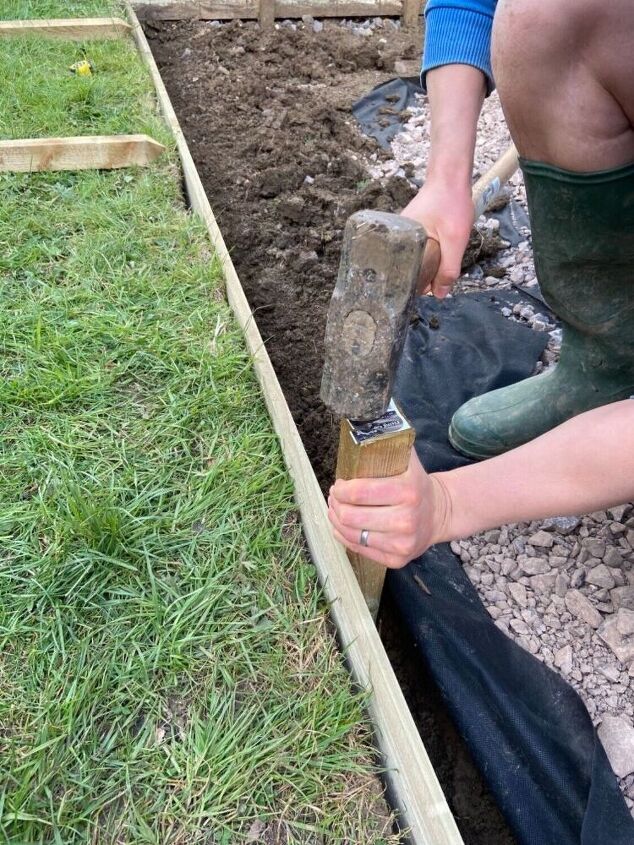
We placed gravel boards along the edge of the lawn and drove in 30cm wooden stakes in at 1.2m intervals. Where necessary this was 60cm from one end, another stake 1.2m along and so on. We then drilled a pilot hole through each stake and into the gravel board. Then we fixed the stake to the gravel board using external grade wood screws.
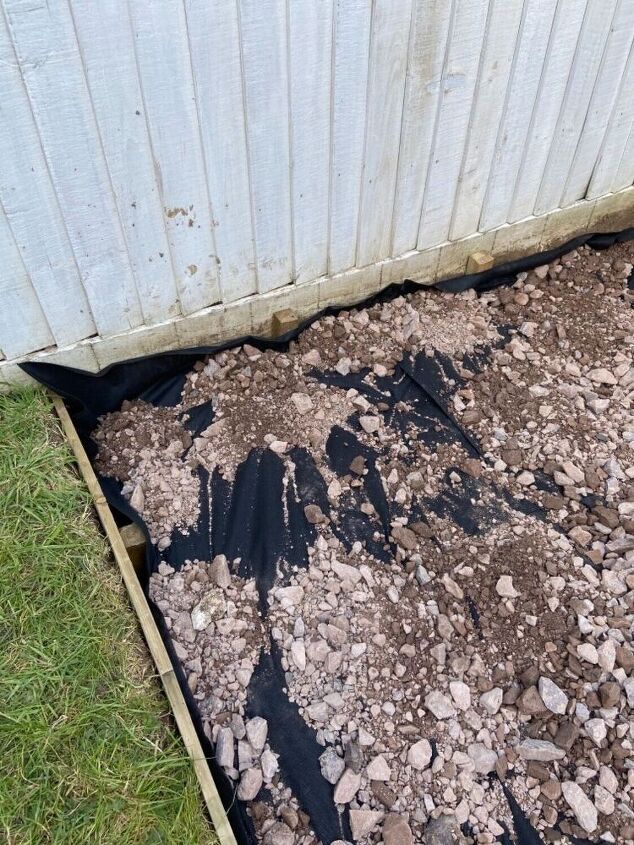
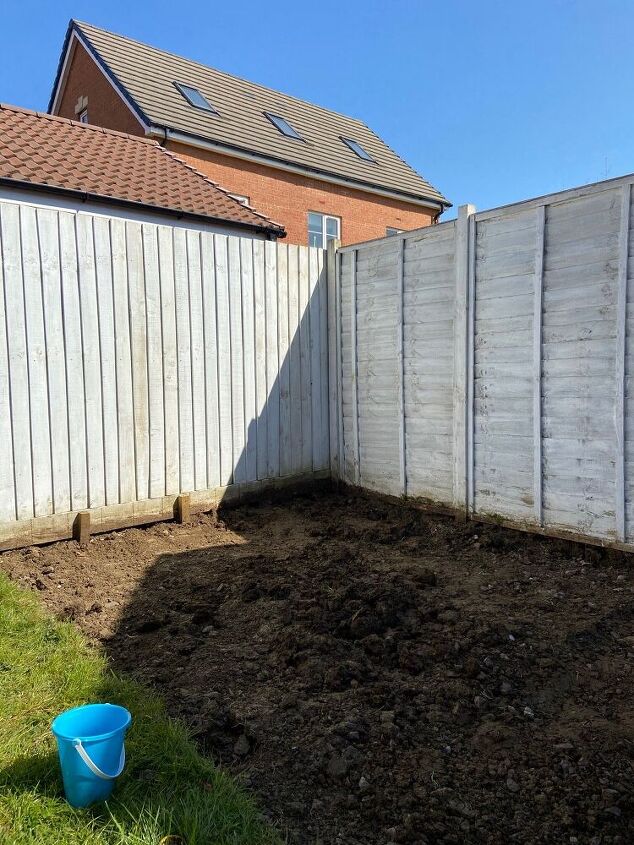
Once the gravel boards were secure we laid down weed control fabric. On top of this we put down hardcore (MOT type 1 sub base in the UK) to a depth of approx 5cm. This was compacted down with the edge of an old paving slab although hiring a compacter
might have been easier!
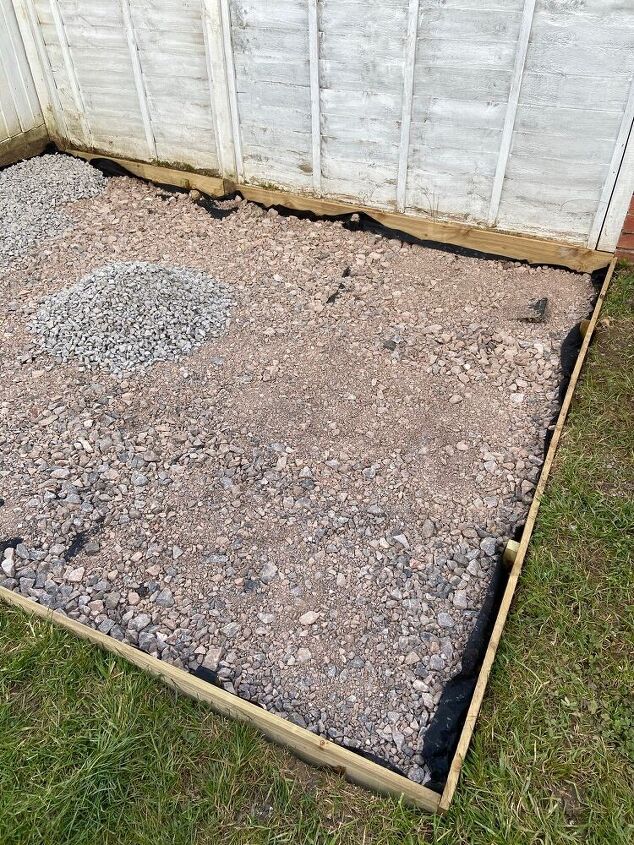
Once the hardcore was down we put down the decorative gravel on top at a depth of approx 5cm. Again compacted down with an old paving slab.
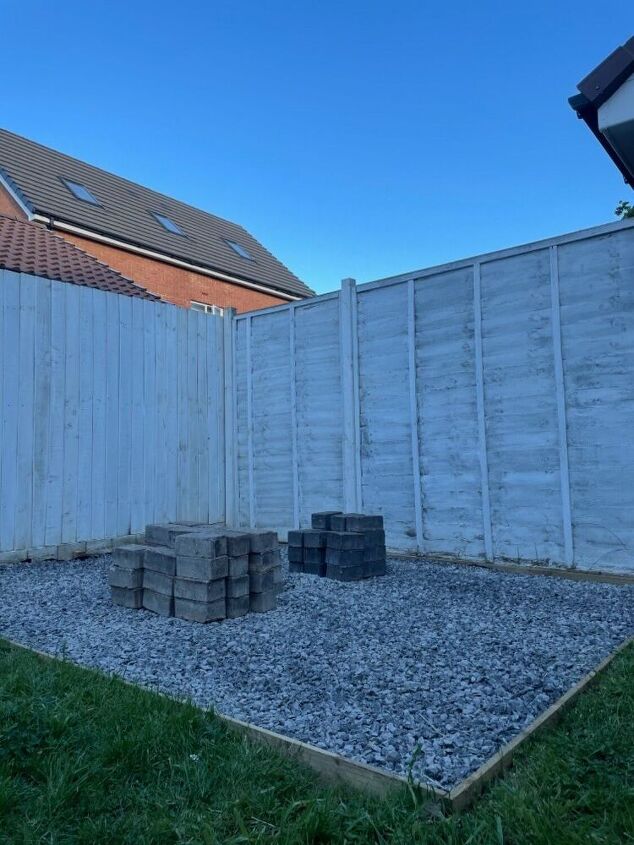
Here is a picture of the finished gravel area. Next it was time to accessorise!
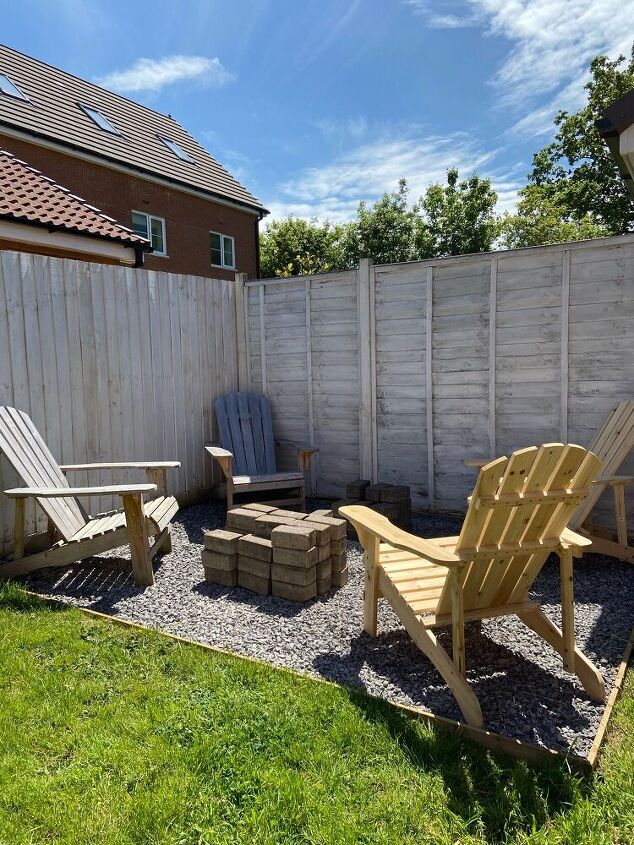
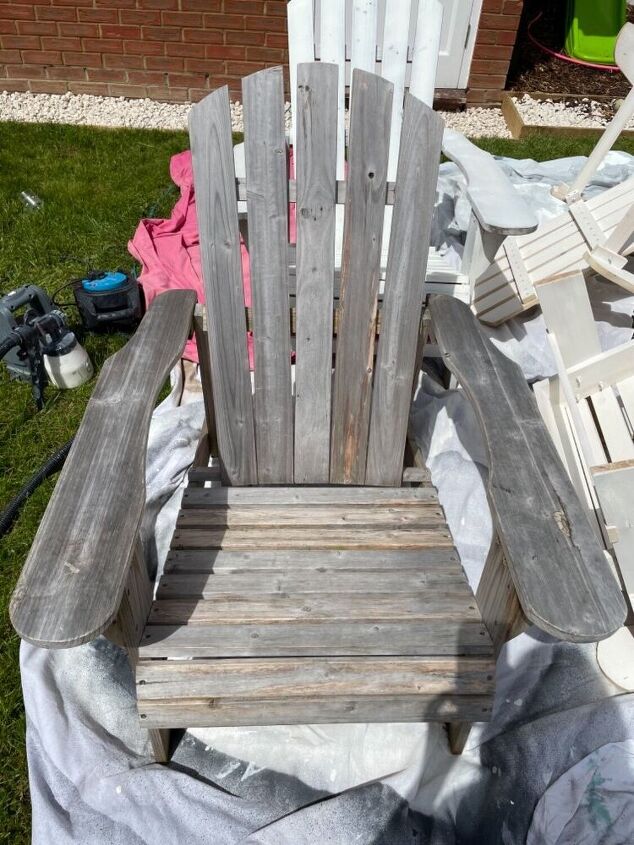
We had these Adirondack chairs for two years which have now become weathered. I also had another set in the garage which my husband put together and it was time to paint them to match.
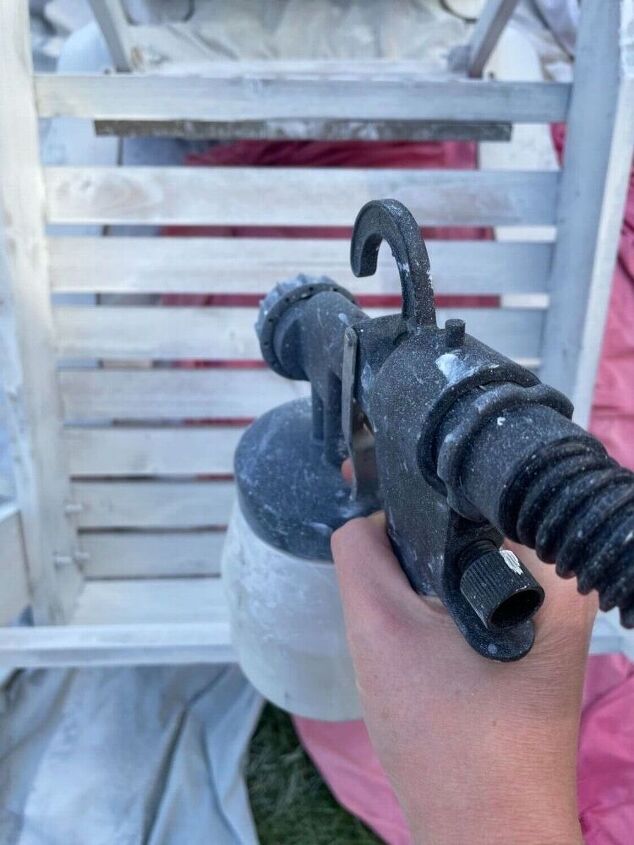
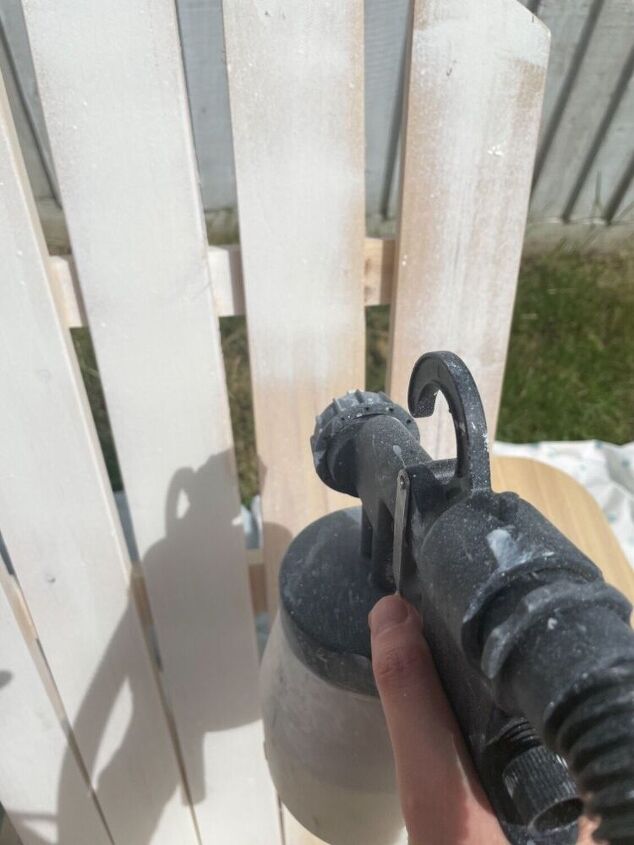
I used my sprayer and sprayed two coats of white outdoor paint.
There was a slight shade difference between the two sets of chairs due to the colour of wood underneath. But they look so much better now that they match and this is barely noticeable.
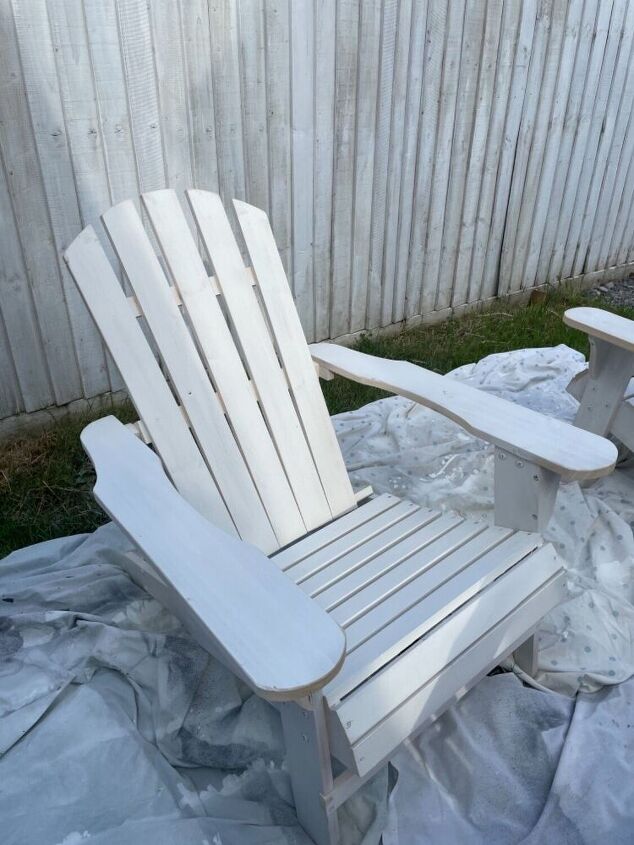
Once they were sprayed I finished off painting with a brush (because of overspray with the sprayer I didn’t want to use it for the edges). So with a brush I painted any areas the sprayer didn’t cover and also flipped them over to check for any missed patches.
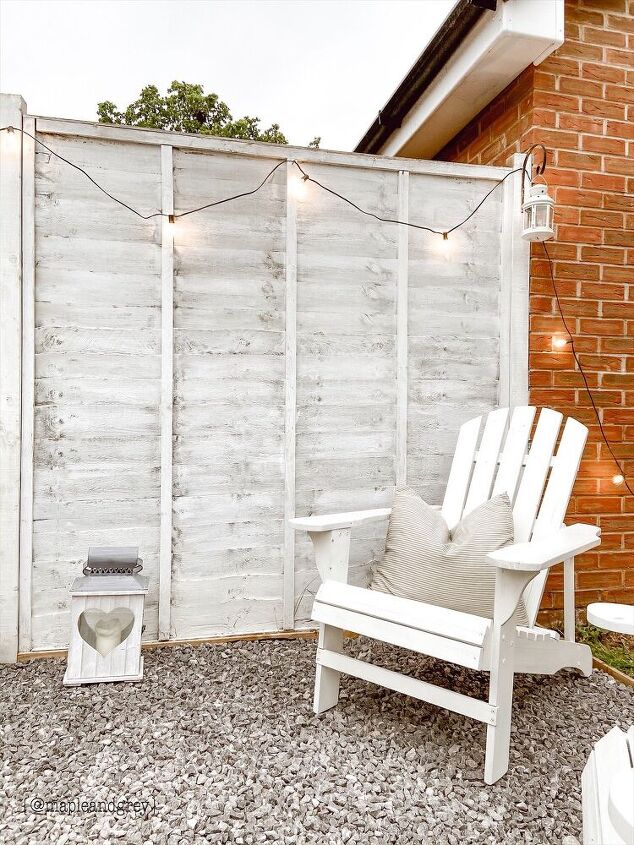
Once the chairs were finished I added some festoon lights. I went around in circles with these in deciding how to hang them. Finally I decided to just go along the fence and take them further into the garden than just this area. Other options would have involved a pole to extend them to which would have looked good but there were practical issues with each of these ideas. I may adjust them again later but I love the coziness that they add to the space. Currently we just used outdoor screws on the fence to hang them.
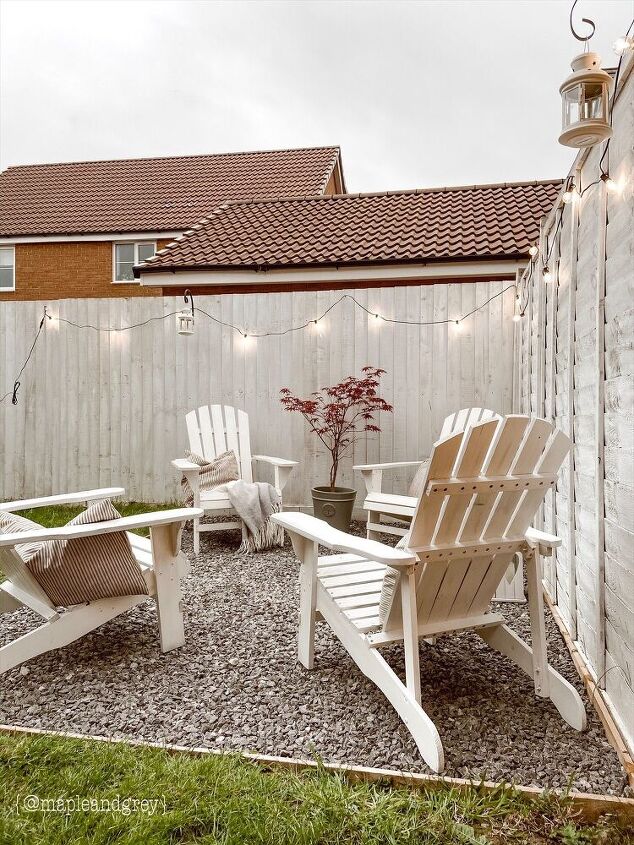
I also added some ticking stripe pillows which were thrifted from a house clearance. This was perfect timing because I had been looking out for some ticking stripe outdoor cushions and they work perfectly!
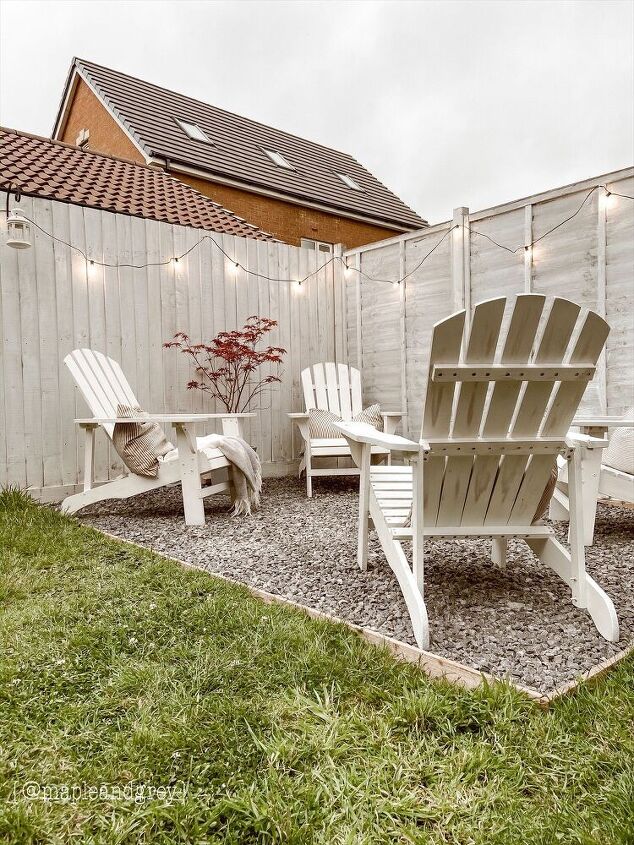
We also moved a plant here and added some lanterns.
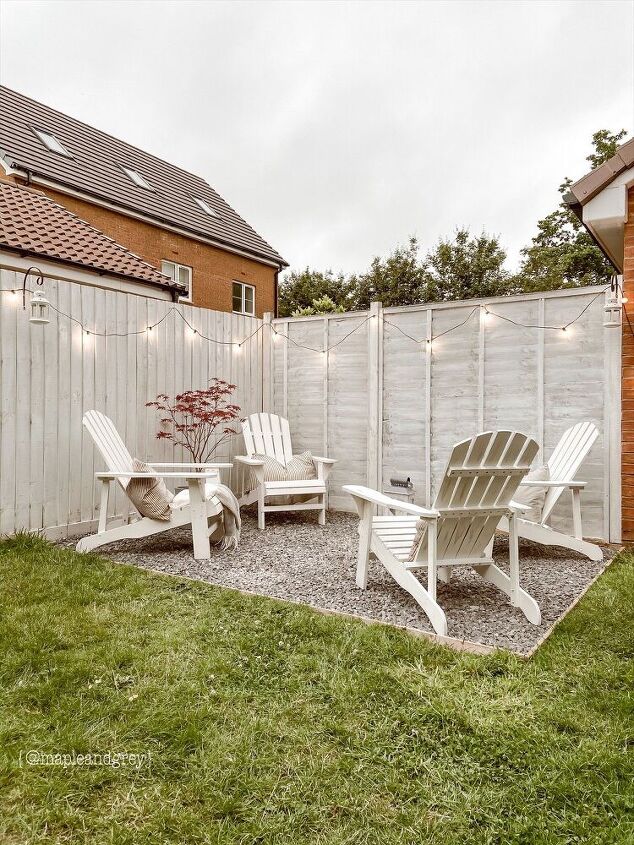
I’m so happy with the finished space. I can’t wait to sit out here on warm evenings and also in cooler weather once we build the fire pit. That will come in a later post, but for now I’ll enjoy this space as it is! This project took a while and we spread the work over small windows of time but it was so worth it. I’m so happy with the space that we created within our budget to fit our needs! I hope this post inspires you that you can transform even the smallest of spaces to work for you.
To see more of this and other projects follow along on Instagram!
~ Rachel ♡
Resources for this project:
See all materials


Comments
Join the conversation
-
Add about a ton more greenery, it'll look a thousand times more inviting.
-
Great idea


Frequently asked questions
Have a question about this project?
What is the potted tree
Maybe, they will only use the fire pit in cooler weather, eh?
I too have a fence hiding the Utilitarian side my house. I found a guy who collects old iron things-shovels, plow points, well buckets, etc. He also collects gears and cogs of all kinds and most are in primary colors tho rusted. I have a collection of about 20 in random patterns on this fence and it is decorative without being cutesy and it is a conversation point. Just a thought.