


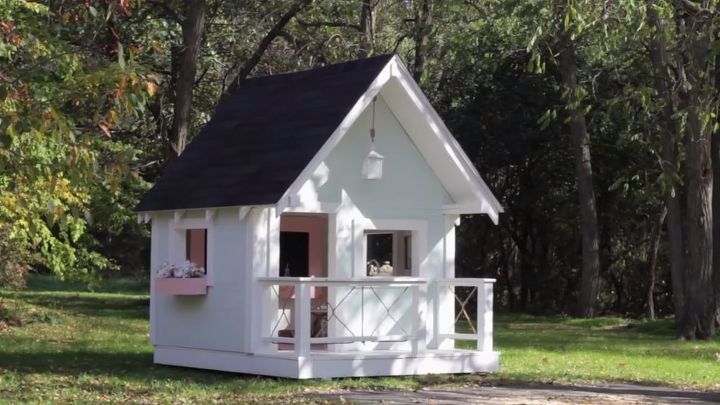
Kid's Playhouse

11 Materials
$300
1 Day
Advanced
Every little girl should have the playhouse of her dreams. When our daughter turned 3, we wanted to build her just that! Now she has somewhere to make memories that will last a lifetime. You can get the full set of plans, complete with a cut list and detailed instructions, to build your little one something she will never forget.
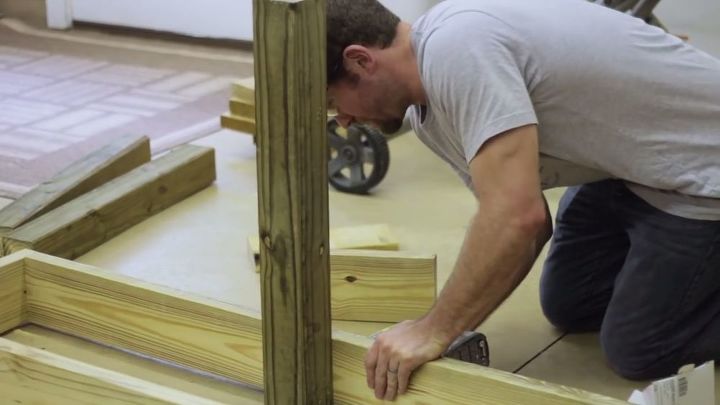
Step 1: assemble structure: Assemble with two 3" exterior wood screws at each connection. Install handrail posts with four screws ( 2 in each connecting side)
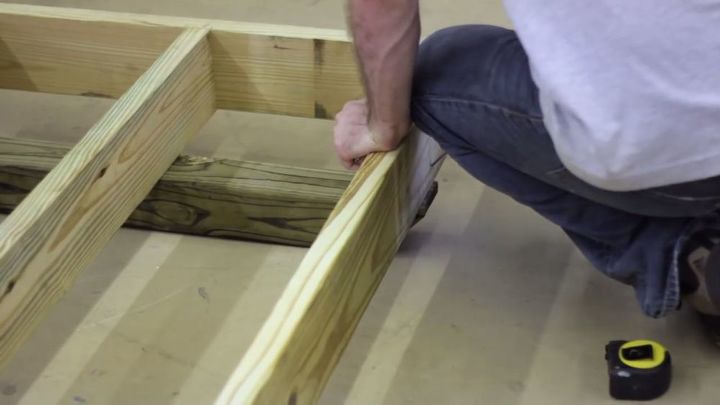
Step 2: Install Deck: install decking using 2-1/2" exterior wood screws or nails. Note: use a jigsaw to notch boards as required for posts.
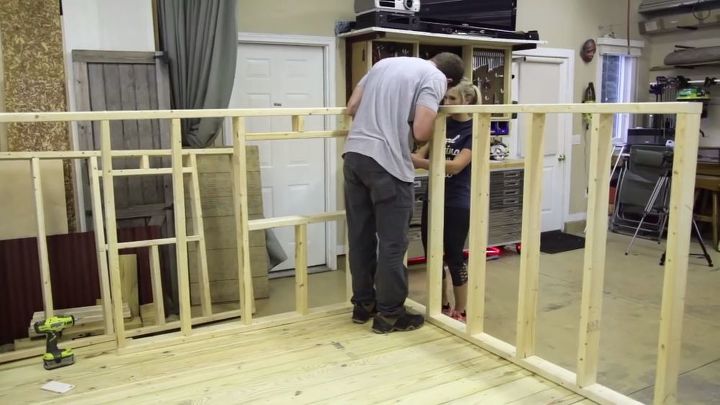
Step 3: Assemble sides: Assemble 2 sides using 3" wood screws or nails. The sides are made out of untreated lumbar.
step 4: assemble back: assemble back using 3" wood screws or nails.
step 5: Assemble front: Assemble the front using 3" wood screws or nails
Step 6: Install walls: Install walls to deck and one another using 3" wood screws or nails.
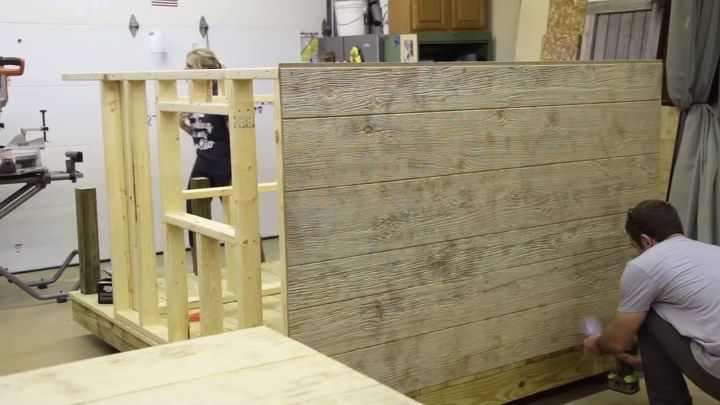
Step 7: Install siding: Cut and install siding using 1-1/3" exterior wood screws.

Step 8: Then cut out windows and door.
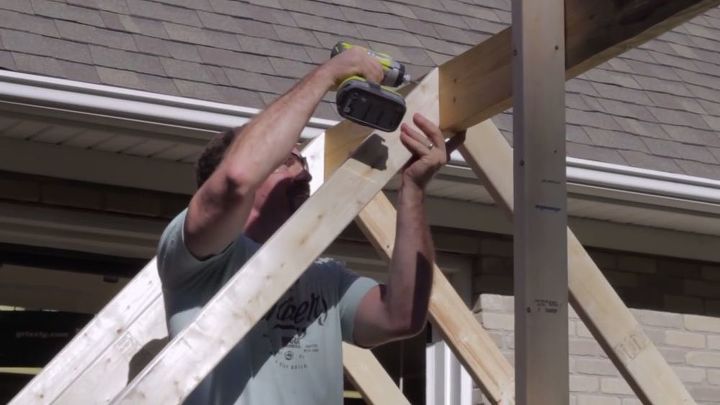
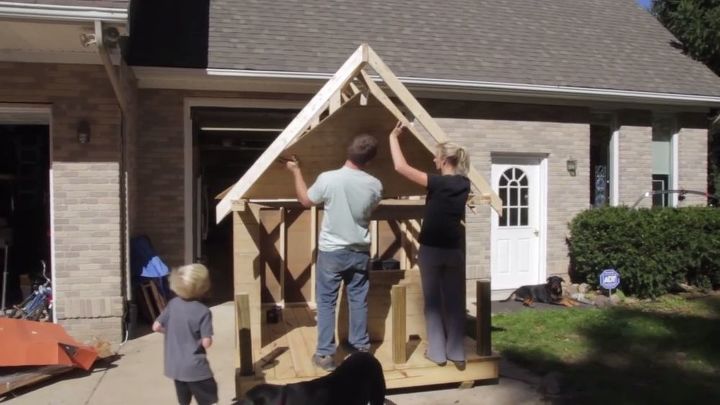
Step 9: Ridge and wall plates: Install temporary supports, ridge plate and wall plates using 3" wood screws.
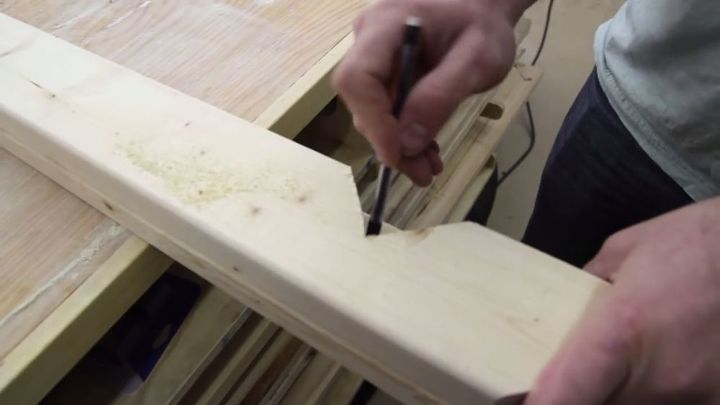
Step 10: Cut and install rafters: Cut rafters and use a speed square to layout birds mouth ( see video for details) Install rafters using 3" wood screws or nails.
The first and last rafters are set back 1" from end of wall and ridge.
Step 11: Install wall supports: cut and install wall supports.
Option 1: frill pocket holes and attach with 2-1/2" pocket screws.
Option 2: toe nail/ screw with 3" wood screws
Step 12: Install siding: Cut and install siding using 1-1/4" exterior wood screws
Step 13: Install sheathing: Cut remaining sheathing to size. Cut and install sheathing using 1-1/4" exterior wood screws. Note: To square up the roof you may need to secure one side and pull the other side into place before installing the remaining screws.
Step 14: trim rail and roof: Drip cap and roof: First install 1/2" drip cap around the edge of the plywood with roofing nails. Then, install roof as desired, I chose 3- tab shingles stapling tar paper down first, then nailing shingles in place with roofing nails.
Window and door casing: Rip down 1x5 to appropriate width inside windows and door ( 3-1/2" + siding thickness). Trim out exterior with stock 1x4s. Cut all trim to size and install with wood glue and finishing nails.
Railing: Add railing as desired. Cut scrap 2x4 to ehight equal to 4x4 posts and secrue wo wall with 3" wood screws. Cut horizontal 2x4s to size and attach with pocket holes and screws. Then cap railing with 5/4" decking board. Cut to size and round all sharp corners.
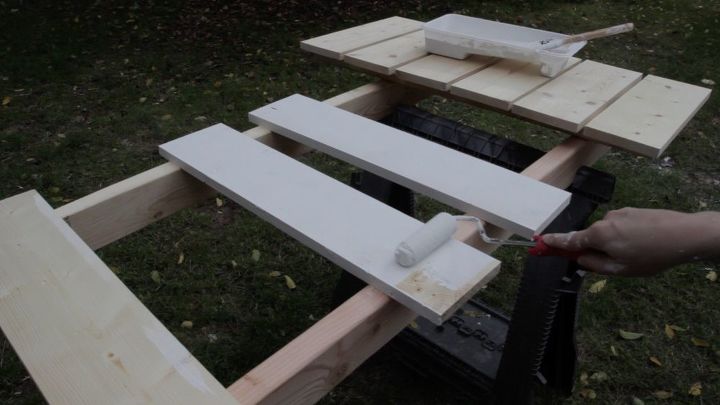
step 15: Paint and transform! With all that building out of the way now we can paint and transform this dull structure into an amazing playhouse for our kids! With the paint colors picked out it was time to get started painting. We started with the interior and floor paint first in which we painted with the
{
"id": "4690069",
"alt": "",
"title": "",
"video_link": "https://www.youtube.com/embed/1odKlfrfoCw",
"youtube_video_id": "1odKlfrfoCw"
}
{
"width": 634,
"height": 357,
"showRelated": true
}


Frequently asked questions
Have a question about this project?
How can I get the building plan you reference in your first paragraph?