


How to Repair Trim and Details on Furniture

Fixing the wood trim on old pieces of furniture is easier than you may expect! And I’m sure you have most of these tools in your own home already!
Find the Twin of the Broken Piece
First you need to find a matching piece of trim. Most pieces of furniture have at least two pieces of matching trim. One on either side of the piece of furniture. So look to the opposite side of the furniture and see if that same detailed wood is still intact on the other side.
Basically the goal is to use the twin of the broken trim to make a new piece that looks exactly like the broken one.
You can also use this method to recreate broken feet, corners, detailed grooves, etc.
You can even take a detail from a different piece of furniture and put it on a completely different piece of furniture. Once you have the mold, the sky is the limit.
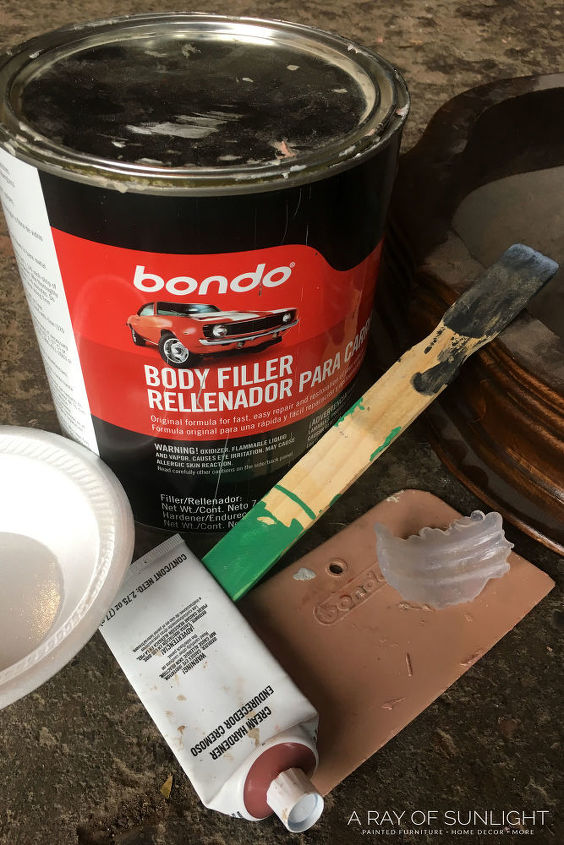
Supplies
- Piece of Trim to Duplicate
- Pam / Vaseline
- Hot Glue Gun & Glue Sticks
- Bondo
- Utility Knife
- Sandpaper
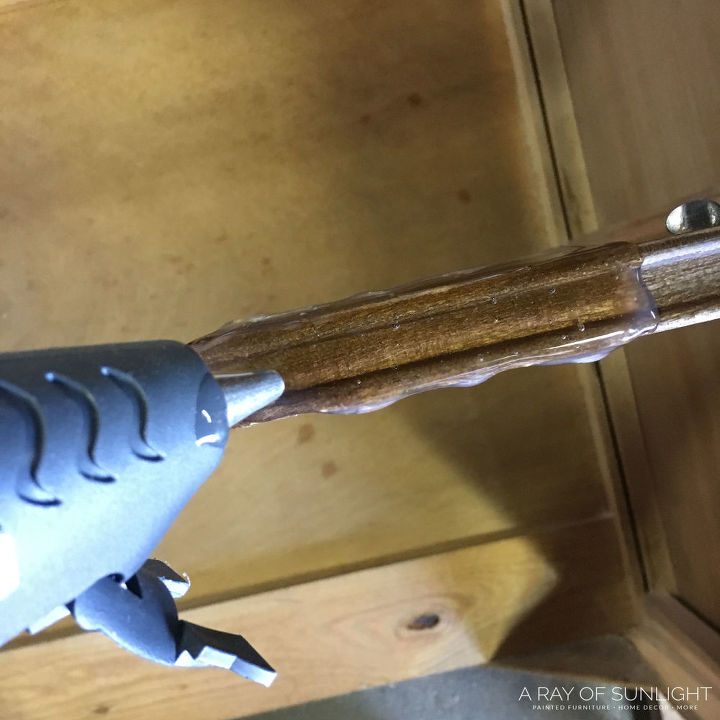
- Grease the area or trim piece that you are duplicating. I’ve used Vaseline or Pam cooking spray. The goal is to grease that area so you can get the glue off. If you skip this step, you might have a hard time removing the glue. This will make it easy to get the hot glue off of the trim work.
- With a hot glue gun, completely cover the trim / detail with hot glue. The hot glue needs to get into the details, and completely cover the area you want to duplicate.
- Let the glue cool completely and dry. This will create a mold of the detail.
- Carefully take off the glue mold.
- Now you can use the mold to create more trim, or to fix areas of damaged trim.
- Be sure to grease the mold before putting any type of product in it.
- Once the new trim piece is created out of Bondo, use a utility knife to shave off the excess bondo before it dries hard. Then sand the edges and details to form the trim better.
We choose to use Bondo because of how strong it dries. This stuff dries super hard and is very strong. If you’re only wanting to create some pretty details, I’m sure you could use a clay of some sort instead.
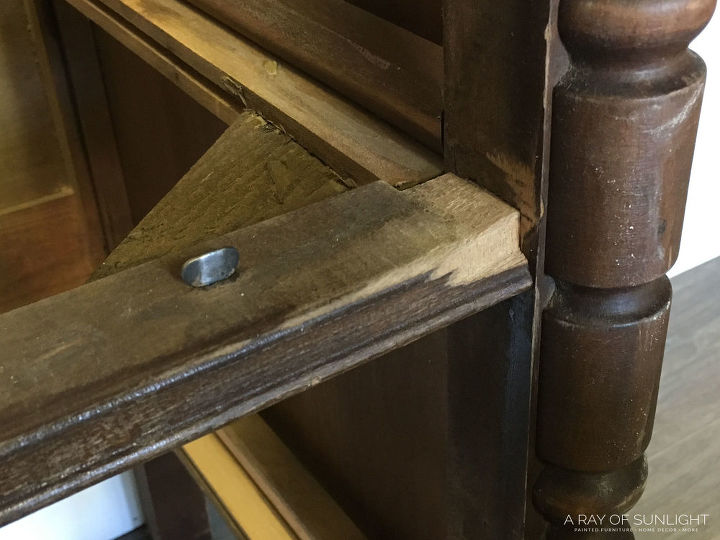
On this dresser, a small amount of trim was chipped off of the structural frame below the drawer.
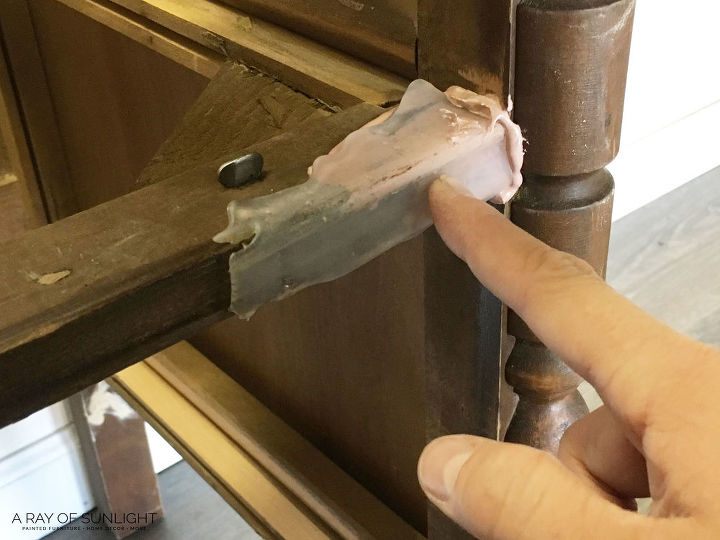
• Make a mold of the same trim
• Use a sharp utility knife to cut a straight edge on the mold (so it can sit right next to the edge of the leg)
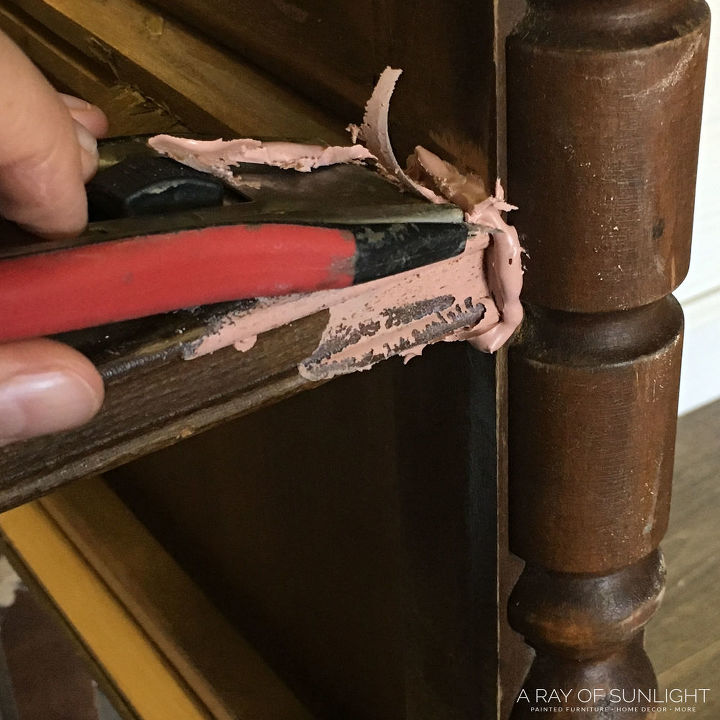
• Smother bondo onto the damaged trim
• Placed the greased mold over the bondo
• Press the mold into place until the bondo starts to harden.
**Don’t let the bondo sit too long or it will get too hard to shape
• Use the utility knife to shave off excess bondo
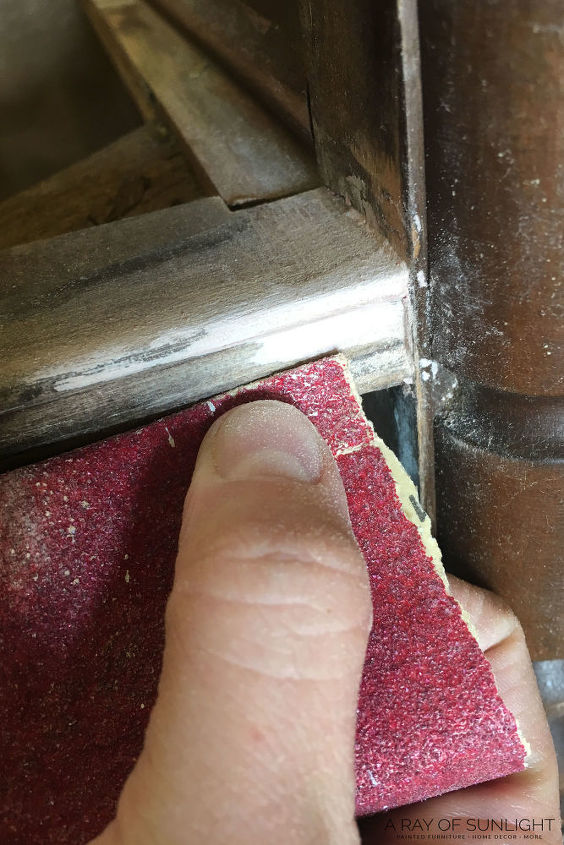
• Let the Bondo dry completely
• Sand the Bondo and surrounding areas down until completely smooth
This method works with so many different variations too!!
Once the bondo is dry and shaped, it’s ready for paint!
Note: If there isn’t another piece of trim that matches what
you’re wanting to fix, there are a couple of things you can do. Either take off the trim completely to make a cohesive look, or find another piece of detail on the furniture that you like, and use that as a guide.
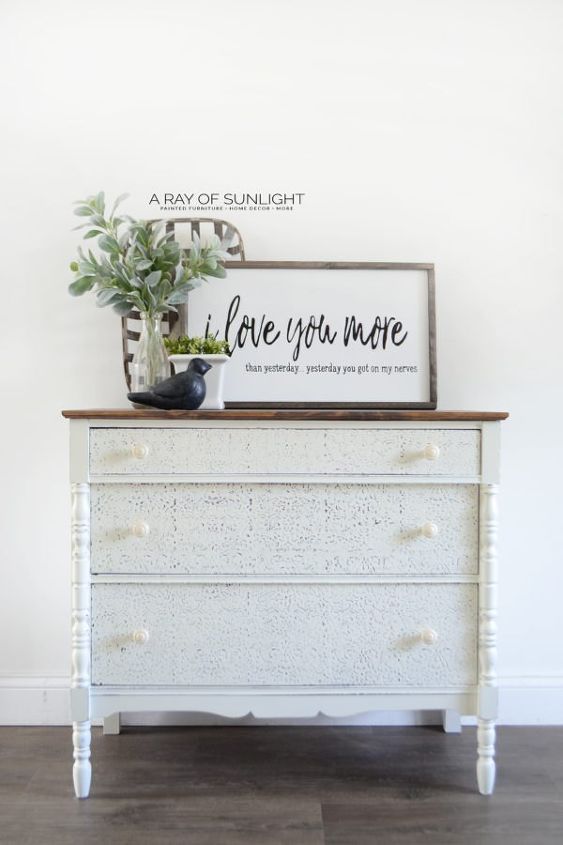
We finished up this dresser with textured drawers, a new wood top, and creamy white paint!
Looking at it now, you can't even tell that the trim was damaged! (Originally, it was the trim under the 2nd drawer, and to the right side of the dresser that was damaged.)
*Note: Bondo can technically be stained, but DOES NOT TAKE STAIN like wood does.
It is best to use bondo only with paint.
If you're great with paint and brushes, you can create a stained look with paint to blend the damaged area with the existing wood finish.
See more pieces that we've fixed with this technique on our blog (click the button below to head over!)
Comments
Join the conversation
-
Really cool! I didn't know that you could use Bondo on furniture! Looks fantastic!
-
Well done tutorial.
I use Bondo for furniture repair a lot. It is possible to tint if you want to try and match a natural finish. (https://www.hometalk.com/diy/build/using-and-tinting-auto-body-filler-for-wood-repair-34340531).
Thanks for posting.


Frequently asked questions
Have a question about this project?
On old dressers, the drawers are not moving in and out properly. How can I fix them so I can pull them in and out without difficulty?
Doesn't the mold come out in the reverse from the other side of the dresser? How do you take, say, a curved piece of trim going to the right, and switch it to the left without the mold automatically being face up?
I have a 5draw wooden dresser I would like to strip it and give it a new look