


Easily Add Details to Stair Risers

by
Joy
8 Materials
$150
3 Days
Medium
Today the majority of staircases gracing homes are nothing beyond their utilitarian use. Back in the day, that little riser offered the grand opportunity to be something more, yes a Pygmalion if you will. This character is mostly missing in newer homes but, never fear! I can show you how to add architectural details to stairs by using Overlays product in just a few short days!
I HAVE A SOFT PLACE IN MY HEART FOR BEAUTIFUL STAIRS.
Maybe, it is because I grew up in a one-story house and dreamed via movies of what it would be like to gracefully descend the stairs in a most opulent gown, head held high and basically floating down. Yes, I watch way too many old movies because the reality is, I would start out strong but would end up taking a comical tumble all the way down.
NOW, THAT I AM ALL GROWN UP (I USE THAT TERM LOOSELY), I have A HOME WITH STAIRS.

O’verlays have been around for a little while and have a claim to fame upgrading plain Jane Ikea pieces. When I was dreaming up ideas for my stairs during the Fall 2017 One Room Challenge, my thoughts were all over the place trying to come up with the best way to create character.
Then I remembered this product, but I had NEVER seen stair risers embellished with it.
Could it work? Do I dare?
Only one way to find out… order it and see.
I am happy to say that it was the very best decision and my stairs now have beautiful character! It’s been six months and the stairs still look amazing and everyone who comes over comments on them.
SUPPLIES
- Overlay Product of Your Choice
- Tape Measure
- Pencil
- Tin Snips
- Liquid Nails Clear 100% Silicone Adhesive
- Scrap wood – to create a jig to keep your Overlay in the exact place time after time, riser after riser.
STEP 1:
Measure your riser width of each stair riser. Calculate the footage you will need and add 10% overage (for the oops moments). Place your order.
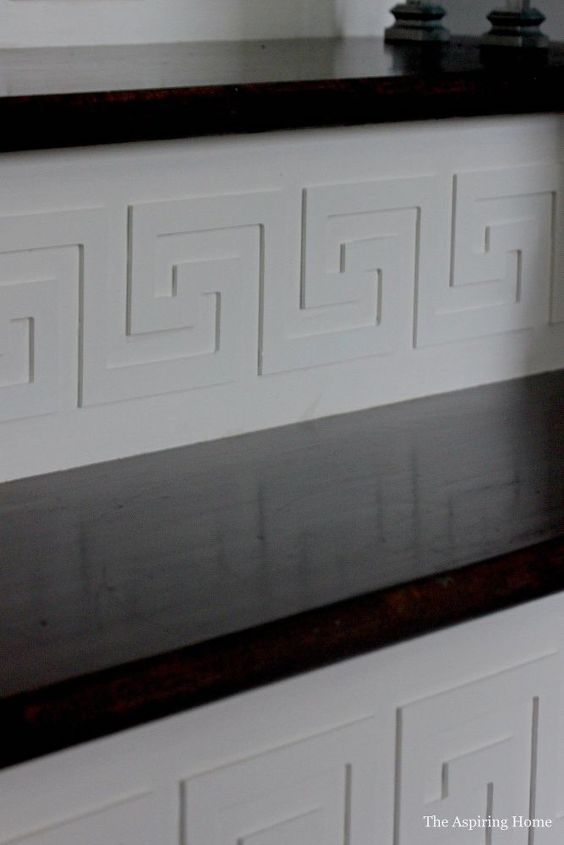
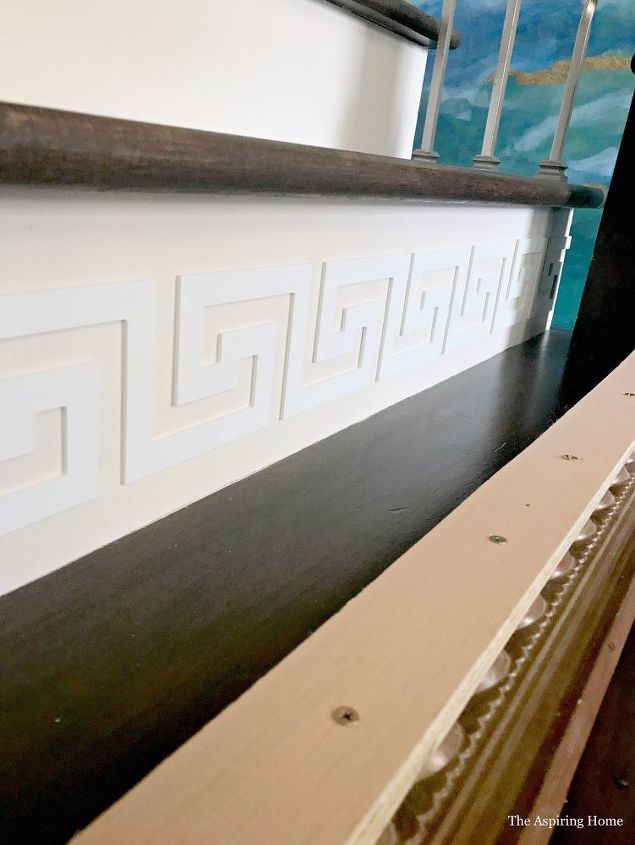
Tip: When shopping for the right design, pay careful attention to the size of the Overlay. Make sure the size will work for your riser. I wanted mine to jump up and say “Hello, friends” in of course the most elegant of ways. My perfect size was 4 inches.
STEP 2:
Lay out your chosen overlay. Decide how you would like the design to run, you really want to decide beforehand where your cuts will take place in the design. This is kind of important if you are like me and can’t sleep at night if something is not balanced correctly. I chose to flip my design on every other riser, let me show you what I mean.
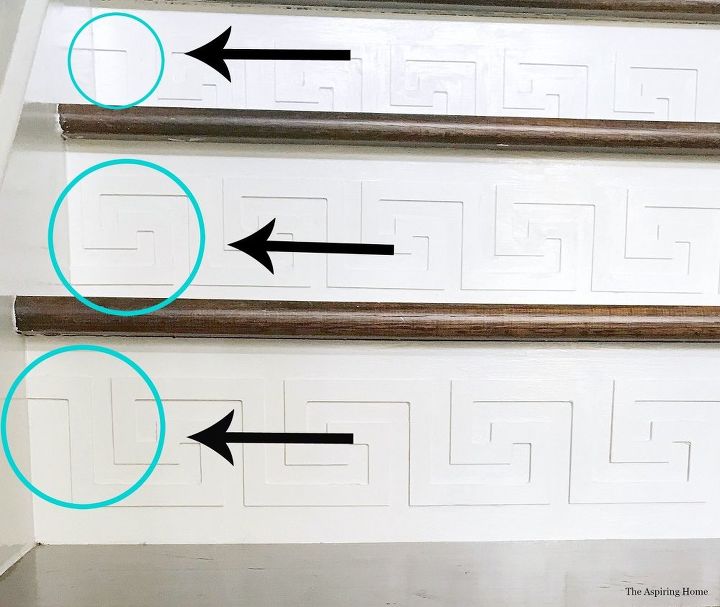
Make sense? Forgive the sloppy paint residue – it will get cleaned up!
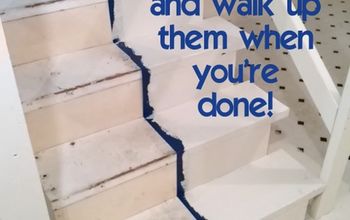
Now measure and cut your first piece. I used a pencil to make the mark and I cut on the outside of the mark. Make sure your cut is straight before pressing down with the tin snips. If your cut is a little wonky- it is OK. A fingernail file will help shape it up.
STEP 3:
Create a jig. A jig by the dictionary’s definition is:
Open frame for holding work and for guiding a machine tool to the work, used especially for locating and spacing drilled holes; fixture.
A rapid, lively, springy, irregular dance for one or more persons, usually in triple meter.
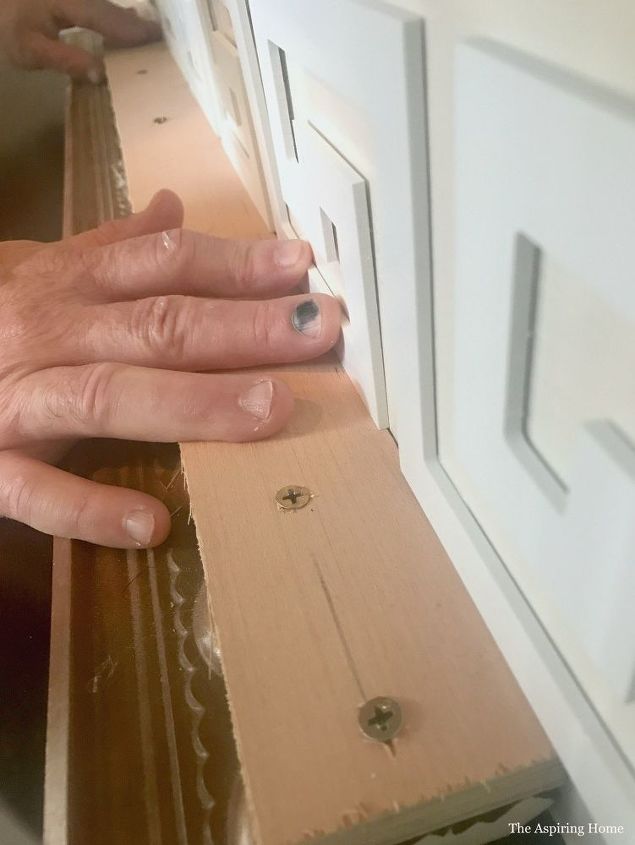
Creating a jig saved our sanity. We used old scraps of molding and LuAnn board because we could build the jig to the exact height needed. I wanted the greek key pattern in the middle of the riser and having the jig allowed us to keep the piece in place perfectly and prevent it from sliding down.
Ask me how I know this tidbit of info… yep, moved the jig too soon and my greek key started to slide down ever so slowly that I really didn’t notice it until the piece was almost dry. Talk about a massive panic to get it back in place! We did get it back, whew.
So creating a jig will allow you to do a jig when you finish this project!
STEP 4:
We have our first piece cut and we have our jig made. Now we want to do a “dry fit”. This will allow us to put our piece in place and verify that the height and placement is to our liking. Once you are super happy – run a bead of silicone down the middle of the piece.
TIP: For good adhesion do not dab a bit here and there, take the time to trace each section with a small bead of silicone. You will want a solid seal in this high traffic area.
Make sure your jig is up against the riser before adding your overlay. Add your Overlay to the riser. Gently and consistently press the piece onto the riser.
You will probably have silicone ooze out in places and this is ok. Once the silicone dries, it is super easy to peel it off using a fingernail or carefully using tweezers.
Allow the piece to sit for 30 minutes with the jig under it to help prevent sliding. Pay attention as you move on to the next riser and readjust the previous ones as needed by placing the jig back under the piece and gently slide back into place if needed and press piece back into riser.
I did try painters tape to help keep it in place while we moved to the next riser but it ended up being a mess. It was easier just to step back after every piece and check.
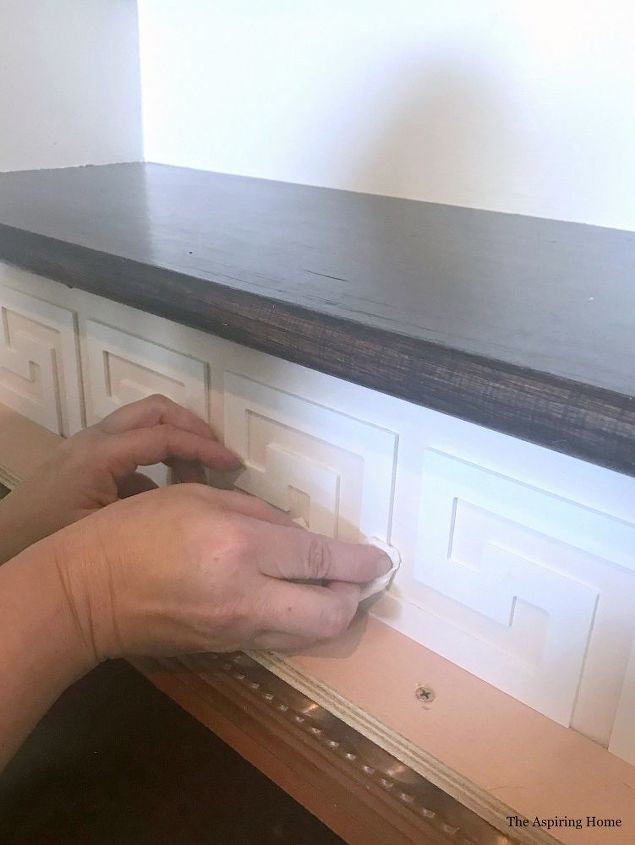
Wait 24 hours before peeling off excess silicone. I took an old credit card at a slight angle to catch any silicone left on the surface area.
STEP 5:
Once the O’verlay pieces are dry and excess silicone is removed, we can paint. You will need two coats of paint at least. The darker color may require more. Use a paint that does well in higher traffic areas, talk to your local paint department. I chose a Purdy 2 inch angle brush for mine but use what you are comfortable with…you will be painting A LOT!
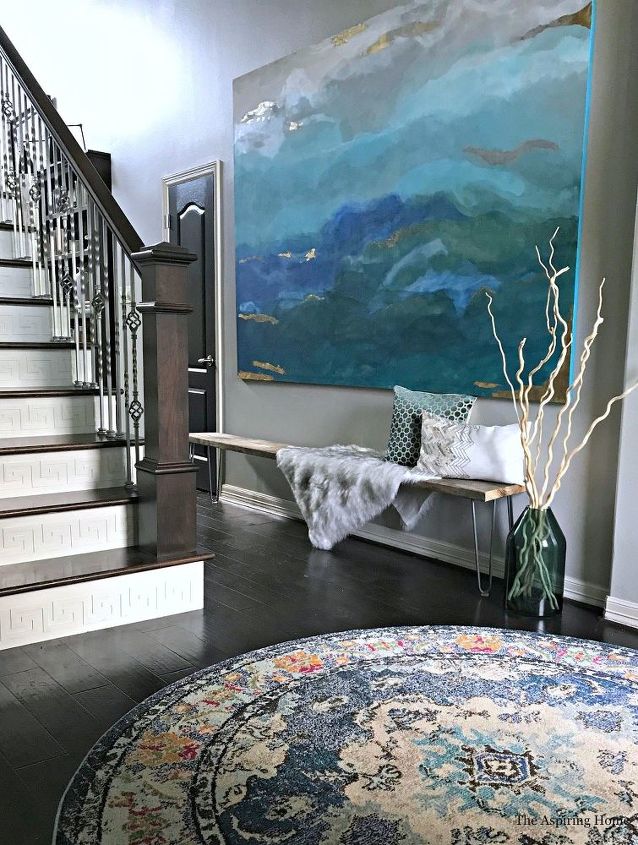
Adding the Overlays really glammed up the small foyer! Now, where’s my ballgown? Momma needs to attempt to glide down these Gretta Garbo worthy stairs.
For more DIY's, ideas and inspiration visit my blog, The Aspiring Home
Till Later friends,
Joy
Resources for this project:
See all materials


Any price and availability information displayed on [relevant Amazon Site(s), as applicable] at the time of purchase will apply to the purchase of this product.
Hometalk may collect a small share of sales from the links on this page.More info
Want more details about this and other DIY projects? Check out my blog post!
Comments
Join the conversation
2 of 55 comments
-
What an eye catcher it’s absolutely stunning!!!!!!!!
-
What a Great idea!! As soon as the master bathroom remodel is complete. (I'm hoping this weekend.....) We'll see...on many occasions it has taken 3 to 5 years for my husband to finish a project. I know....I know!!, but if I nag or bit*% it takes even longer.
Anywho!, We had just been talking about ripping the carpet up on the stairs. When he starts to "Hem & Haw" I know it will take him forever. I like the fact I can do it all myself. :)
Thank you for the idea it will be done to our stairs!
Caprice
P.S. I Love Your Sense Of Humor!!


Frequently asked questions
Have a question about this project?
what is the pattern that you bought for your stair product, I like that style but now sure how you found it on that site, can you advise please?
Please could you tell me the source of your Greek key overlays? Thank you.
Where did you purchase the 4” tall Greek key overlay??