


DIY Mini Barn Doors
Are you one of those weird (oh, I mean, "perfectly normal") people who haunts the aisles at your local hardware store imagining all the wonderful ways you could reinvent some of the seemingly basic stuff?
Well, don't feel alone because I too am one of those perfectly normal people. And it's thanks to my perfect normality (LOL!) that these super affordable, and totally do-able, DIY mini barn doors came into existence.
Absolutely anyone can have a go at this project!
I've summarised the tutorial slightly for Home Talk however you can find the complete how-to here on my blog.
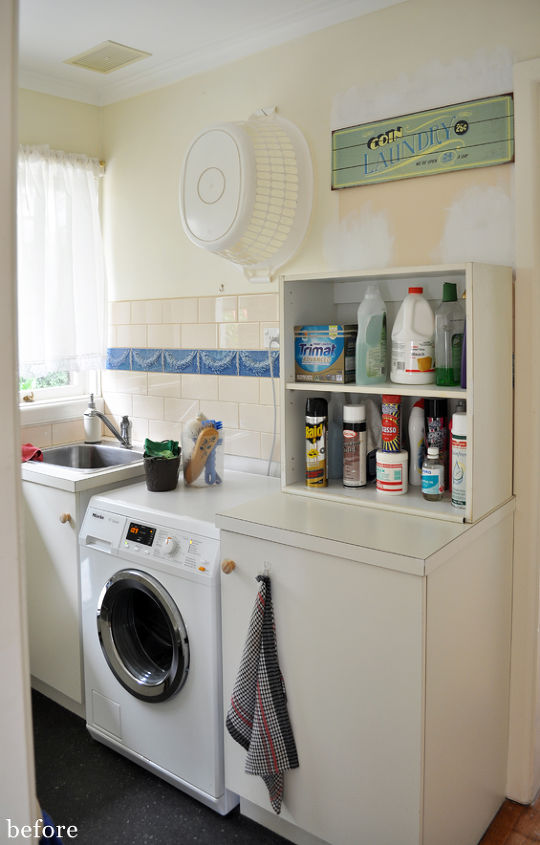
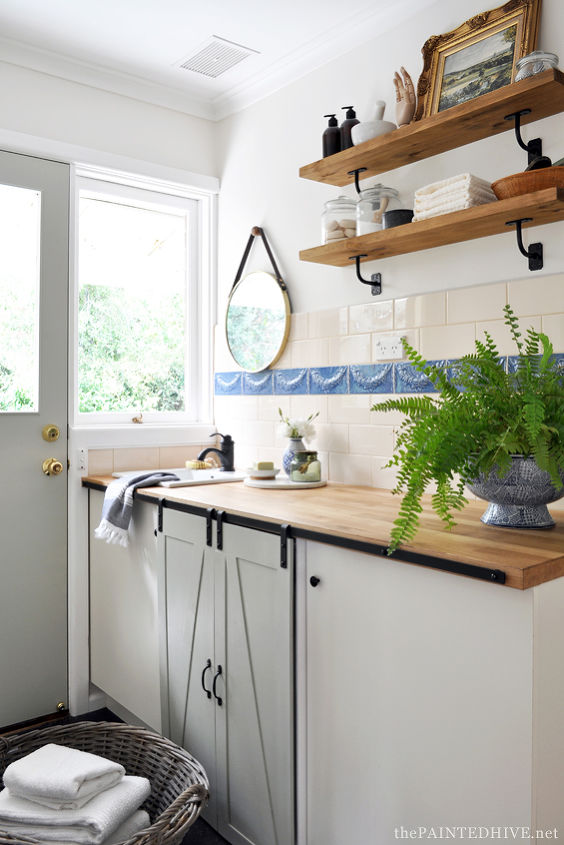
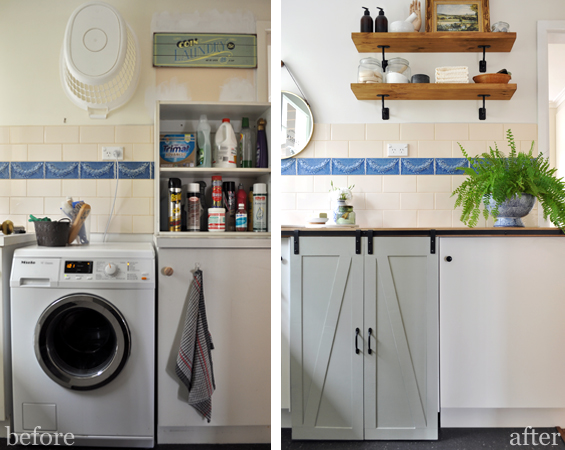
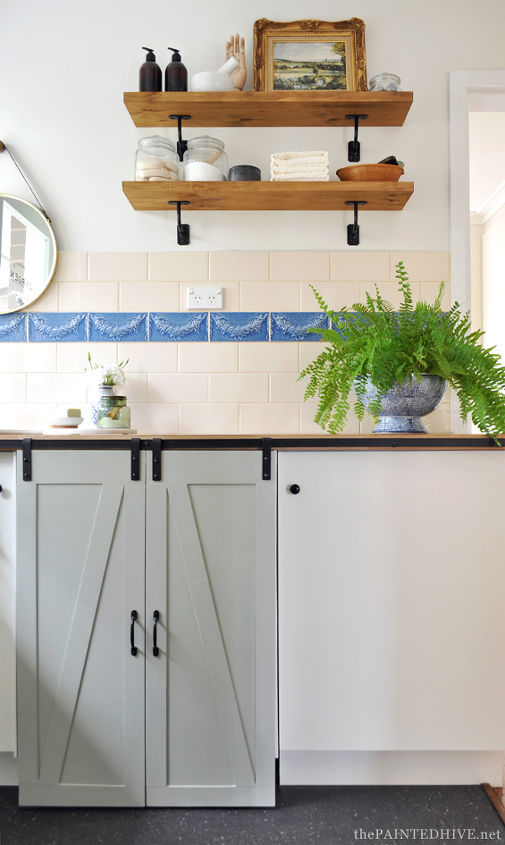
This project came about because my parents were sorely in need of a laundry room refresh.
You see, aside from the fact their laundry room wasn't the most attractive space on earth, it's also a completely open room off a main hallway in their house which is often seen and used by guests.
Yep, something pretty yet practical was certainly called for!
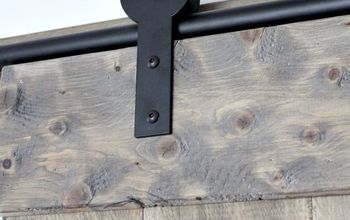
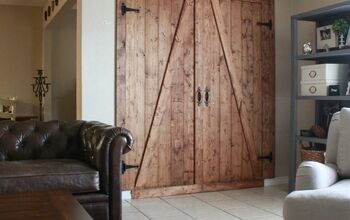
Once the doors were finished and painted I attached the edging pegs using dome head bolts fastened at the rear with nuts.
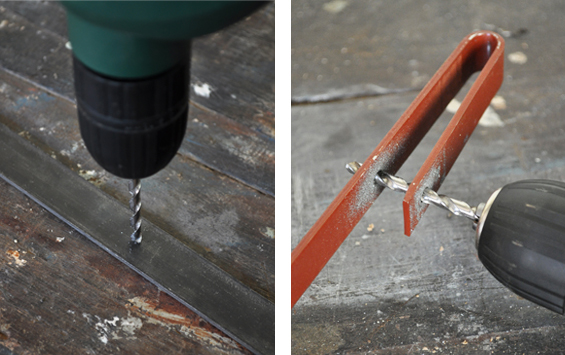
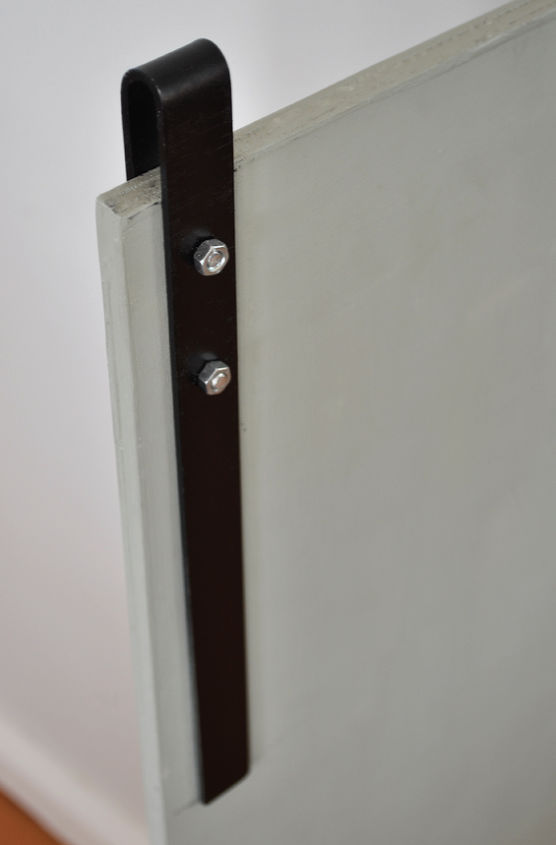
The first thing I did was drill some holes in a length of steel flat bar and some metal garden edging pegs.
Yes, you read right, my barn door sliders are actually $1 garden edging pegs!
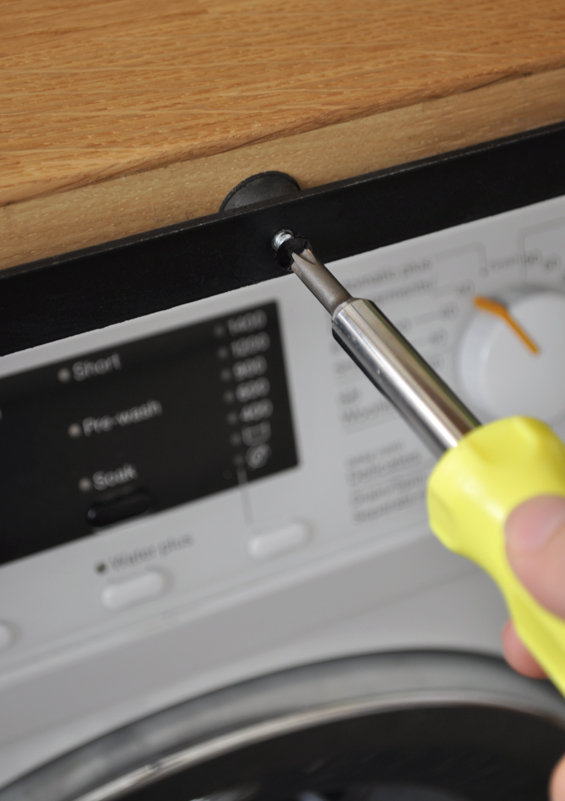
Next I sprayed all of my hardware black then attached the bar to my counter, using rubber chair leg stoppers as spacers.
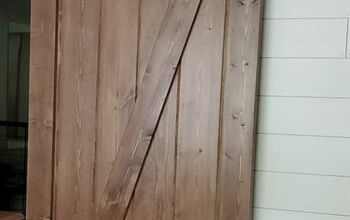
With the bar in place, I worked out the dimensions for my doors then created them from basic plywood sheet. I added a decorated inverted "v" for a farmhouse look.
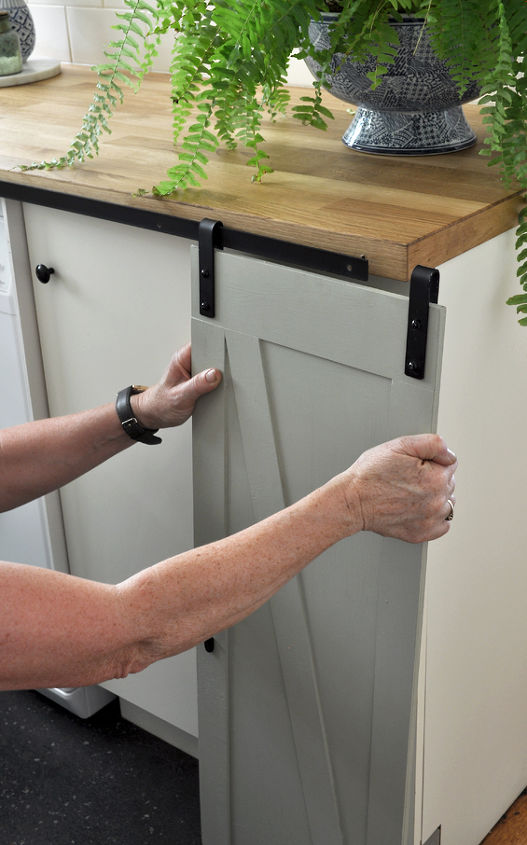
To get the doors on the bar, I removed a few of the screws then simply slid the doors into place before reattaching the screws.
Voila!
I am so in love with the way my crazy (I mean "perfectly normal") repurposing came together.
I hope you like it and that it helps inspire!
Visit my blog post here for further photos, the full tutorial - which covers each stage in detail - and all of the product source info.
Ta da!
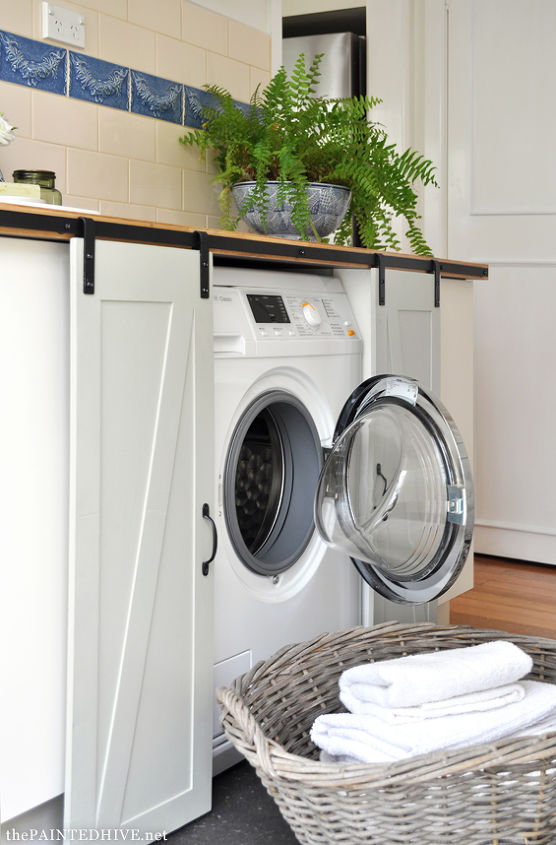
Obviously I made a few more changes than the barn doors alone, though this entire space was refreshed for just $500. And the barn doors cost less than $40!
Although I've used these mini barn doors to conceal a washing machine, they could be used in heaps of situations; as a TV cover, on a built-in bookcase, for a dining room buffet, as a window treatment. The possibilities are almost endless.
Voila!
I am so in love with the way my crazy (I mean "perfectly normal") repurposing came together.
I hope you like it and that it helps inspire!
Visit my blog post here for further photos, the full tutorial - which covers each stage in detail - and all of the product source info.

Comments
Join the conversation
-
Nice idea. Doors so nice.


Frequently asked questions
Have a question about this project?
I love it....going to use the ideas of the barn doors for my new sewing room! I love the shelving above the washer! Where did you get the brackets...I want to do something like this for above my tub in my masterbath! Just love it. Also, did you make the barn doors or were there pre-made? Thanks for sharing.
What s the colour of this barn door? Thx
Where did you get the garden pegs from? The ones linked aren't the same as what's in your picture. I really love you design and want to duplicate it