How to
Clean
Silver
Gutters
Windows
Bathroom
House
Floors
Carpet
Paint
Cabinets
Furniture
Wood
Walls
Repair
Furniture
Electric
Drywall
Appliances
Air Conditioning
Plumbing
Windows
Decorate
Easter Eggs
Rooms
Walls
Tablescapes
Mirror
Pillows & Throws
Build
Decks
Doors & Windows
Fire Pits
Furniture
Planters
Raised Garden Beds
Sheds
Shelves
Walls
Craft
Candles
Centerpieces
Ornaments
Party Decor
Wreaths
Other
Grow
Upcycle
Organize
Tile
In-depth Guides
Product Reviews
Rooms & Spaces
Living Room
Curtains
Furniture
Lighting
Fireplaces & Mantels
Chairs
Outdoor
Garden
Kitchen
Walkways & Paths
Fireplace
Decor
Lights
Porches
Pools & Ponds
Patios
Bedroom
Bench
Closets
Dressers
Furniture
Organizing
Vanities
More
Kitchen & Dining
Bathroom
Craft Room
Laundry Room
Home Office
Entryway
Basement
Outdoor
Windows & Doors
Floors & Ceilings
Staircases
Home Tours
Explore Projects
How to
Clean
Silver
Gutters
Windows
Bathroom
House
Floors
Carpet
Paint
Cabinets
Furniture
Wood
Walls
Repair
Furniture
Electric
Drywall
Appliances
Air Conditioning
Plumbing
Windows
Decorate
Easter Eggs
Rooms
Walls
Tablescapes
Mirror
Pillows & Throws
Build
Decks
Doors & Windows
Fire Pits
Furniture
Planters
Raised Garden Beds
Sheds
Shelves
Walls
Craft
Candles
Centerpieces
Ornaments
Party Decor
Wreaths
Other
Grow
Upcycle
Organize
Tile
In-depth Guides
Product Reviews
Rooms & Spaces
Living Room
Curtains
Furniture
Lighting
Fireplaces & Mantels
Chairs
Outdoor
Garden
Kitchen
Walkways & Paths
Fireplace
Decor
Lights
Porches
Pools & Ponds
Patios
Bedroom
Bench
Closets
Dressers
Furniture
Organizing
Vanities
More
Kitchen & Dining
Bathroom
Craft Room
Laundry Room
Home Office
Entryway
Basement
Outdoor
Windows & Doors
Floors & Ceilings
Staircases
Home Tours
Ask DIY Question
+ Post Project
Ask DIY Question
Join Now
My History
+ Post a new Project
Saved Projects
Notifications
Account Settings
Log out
Support
•
Privacy
DIY Projects
Rooms & Spaces
Outdoor
Browse Outdoor Projects
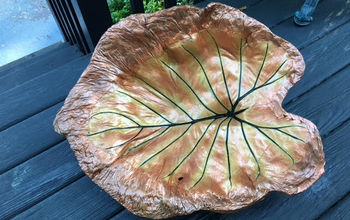
Elephant Ear Bird Bath
Sumetha
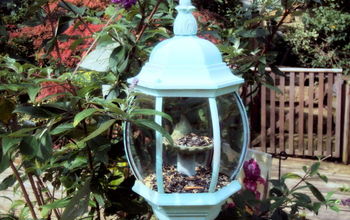
Repurpose an Old Light Fixture
Lorrie B
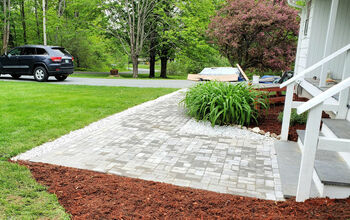
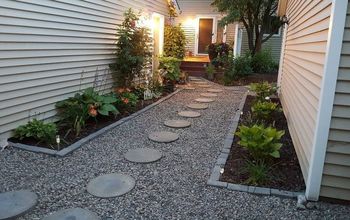
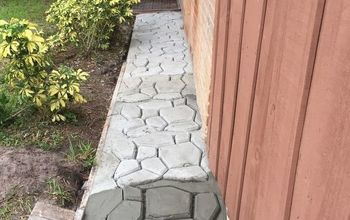
DIY Paver Walkway
ScrappyGeek.com
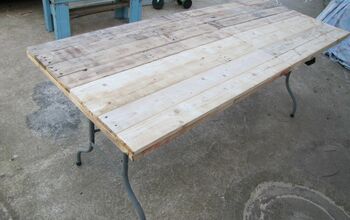
Upcycle Plastic Folding Table
KultaKala Design Studio
How to Use Dollar Tree Solar Lights to Make Cute Fall Decor
Meredith - Arts & Classy
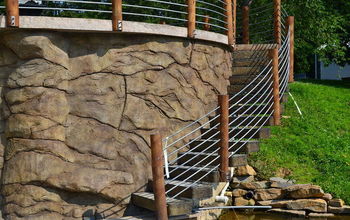
Carved Vertical Concrete Retaining Wall
The Chirping Frog
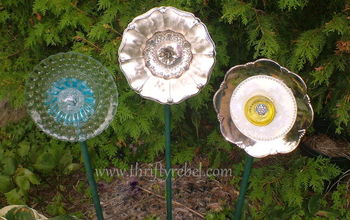
Setting the Garden With Plate Flowers
Tuula - Color Me Thrifty
Garden Globes
Vickie G
Easy DIY Solar Pool Heater
Dan Berg
DIY Wine Barrel Market Light Posts (with ABS Pipe)
Ana Ochoa - Sunrise Valley Farm Co.
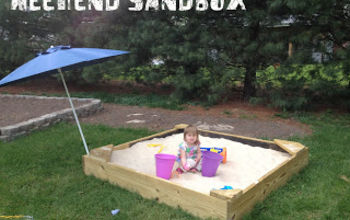
DIY Weekend Sandbox
Kimberly
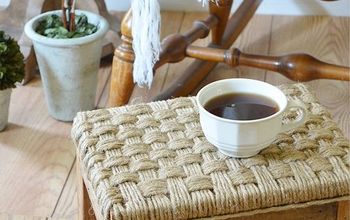
How to Create a Rustic Wood Footstool With Jute Twine
Jamie
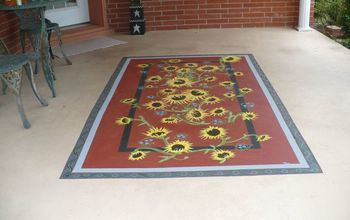
Painted Porch Rug
Pam Edwards
Pallet Shed Using Pallets, Old Windows & Tin Cans
Andrea Fogleman
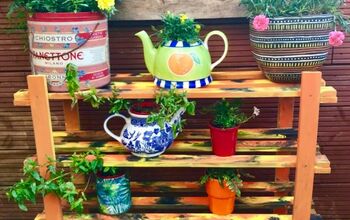
How to Turn Your Old Shoe Rack Into Garden Plant Display Unit
Susan Goode
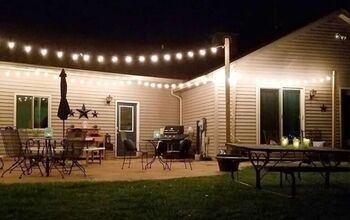
How to Make DIY String Light Metal Posts
Becky | Boxwood Design Co
QUESTION
First raised vegetable bed- Need a liner?
Julie
21
Ideas for that Narrow Space in Between Suburban Homes
Three Dogs in a Garden
A Great Way To Get Rid Of Scrap Wood ~ DIY Rustic Wood Lanterns
The Stonybrook House
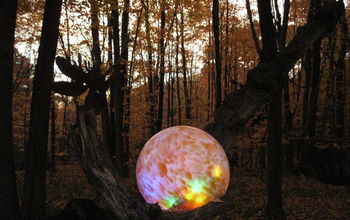
Lighted gazing ball
Julee S
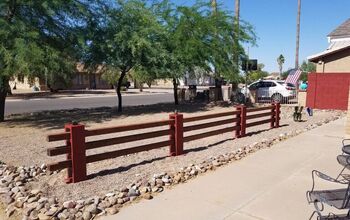
Cinder Block Fence With 4x4's
Kini
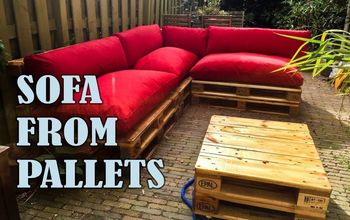
Build A Sturdy Sofa/Couch From Pallets (Outdoor) DIY
Grayfish Design
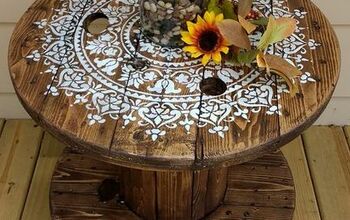
DIY Cable Spool Table for Ummmm...Wherever!
Elizabeth Fencl
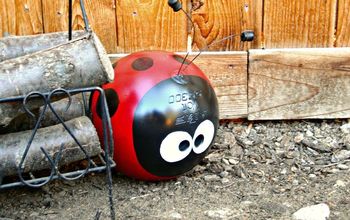
Upcycled Bowling Ball Yard Art
Tania Pelletier
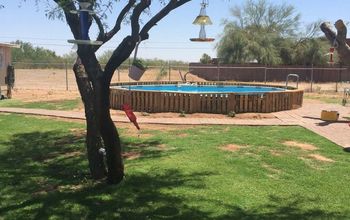
Can't Commit to an Inground Pool so We Improvised
Misty Gaines-Johnson
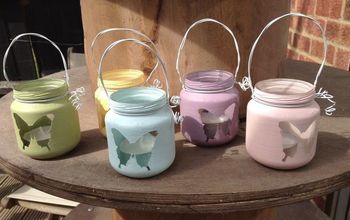
How to Make Mini Lanterns Using Baby Food Jars
Monica - The Pallet House
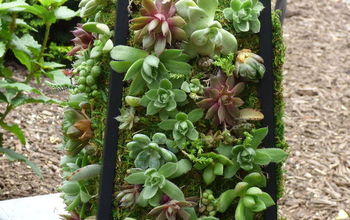
Succulent Lantern
Patty http://funfamliving.com
Hose Extender
Alicia W
Turn a Glass Top Table Into a Wood Top Like Magic!
All Within the Home
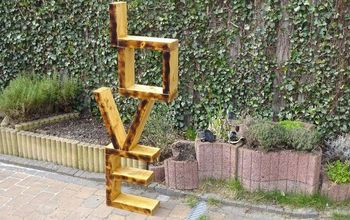
How to Create Your DIY Love Shelf + Free Plan
Mr ATC
How to Use Logs as Edging For Plants & Make a Wall Trellis
Kelly-n-Tony
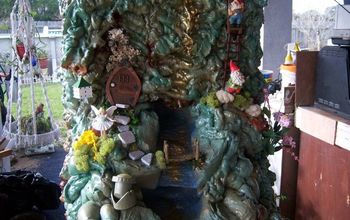
How to Build a Fairy Garden Waterfall With Foam In A Can
Janet Arceneaux
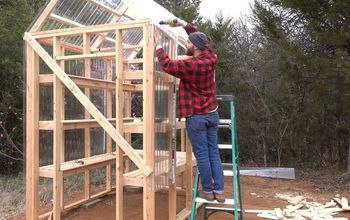
HOW TO BUILD A GREENHOUSE
Mike Montgomery
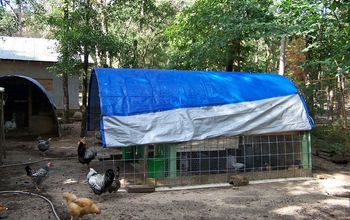
Build Your Own Chicken Coop!
Patty Anderson
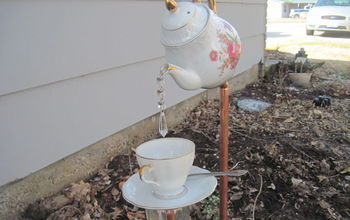
English Tea Pot, Tea Cup and Saucer Garden Stakes
Sarah M
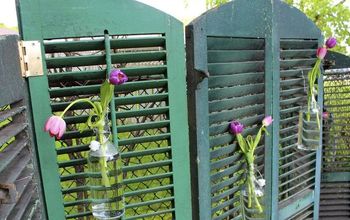
Using Old Shutters in the Garden
Heather (New House New Home)
How to Easily Make DIY Pool Chairs For Sitting & Paddling
Alicia W
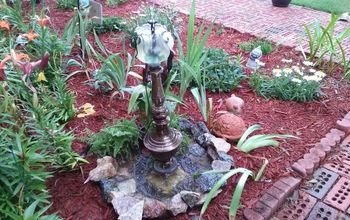
Old Lamps to Classic Fountain
Bec1311224
Townhouse Muddy Mess to Secret Garden
Rachelle D
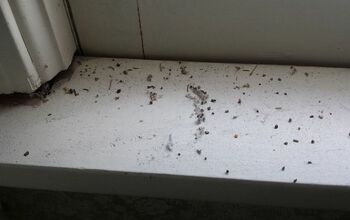
QUESTION
Can you identify what left this?
Paula Englert
8
QUESTION
Adding flagstones to edge of pond
Kalsti
11
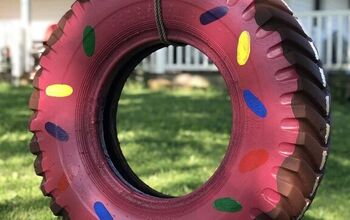
Donut Tire Swing
Jennifer Cline
The Perfect Border for Your Beds: Defining a Garden's Edge With Stone
Jenna Burger Design
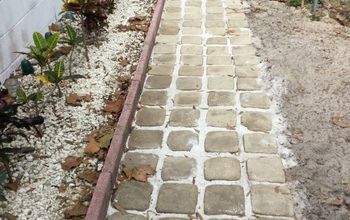
Garden Cobblestone Design Walk-path
Elegant and cozy
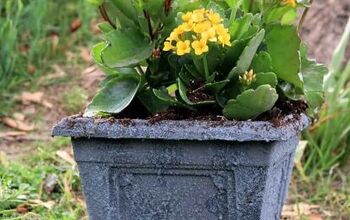
How To Make A Plastic Planter Look Like Aged Concrete
Kathy Owen | Petticoat Junktion
QUESTION
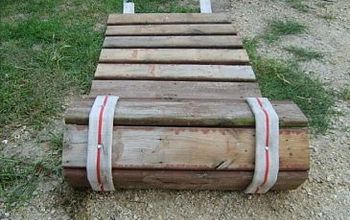
Looking for the DIY/How to for the Roll-up Sidewalk made from palletts
Teresa A
18
How We Made Stepping Stone Walkway From Ice Cream Buckets.
Shirley
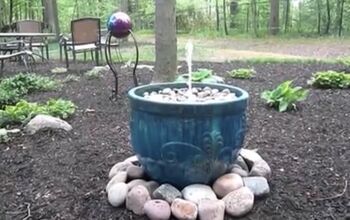
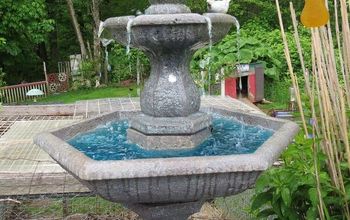
How to Make a Fountain for Under $50
HowToLou
Say Goodbye to Gnats and Fruit Flies
Danya @avintageflarefarmhouse
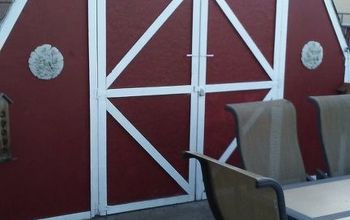
Turn Your Shed Into a Mini Barn
Lydia S.
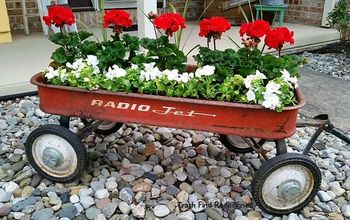
VINTAGE WAGON Repurposed All Over Again
Trash Find Redesigned
Make Your Water Fountain Flow With Silicone. Trick You Will Want to Do
Teri
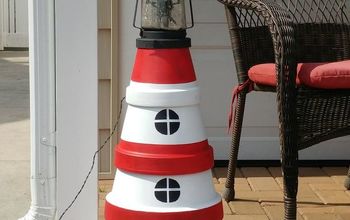
Terra Cotta Pot Lighthouse With Solar Light
Diane S
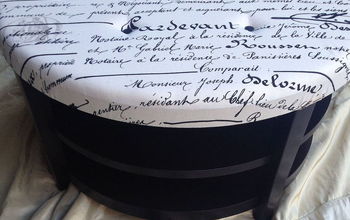
Round Coffee Table Turns Into Tufted Ottoman
Tammy Ward Boone
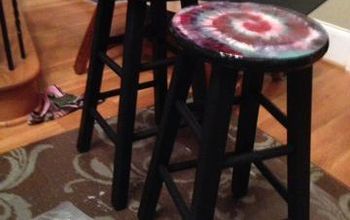
A "Tie-Dye for" Set of Barstools!
Abbie Lummus
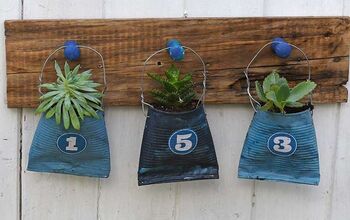
Tin Can Number Planters for the Front Door
Claire at Pillarboxblue
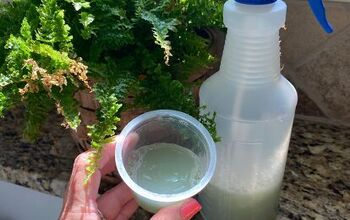
Repelling Deer Using Irish Spring Soap - A Test
White Oak Studio Designs
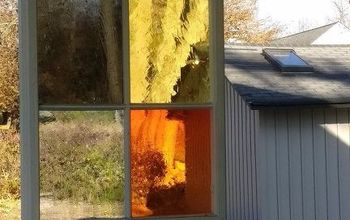
Stained Glass Privacy Panel for Porch
Stephanie Ann Derreth-Beverungen
DIY String Light Planters Tutorial
Alicia Rose | designofyourlife
Garden Sign Made From Scrap Wood
Patricia
2
3
4
5
6
7
8
9
10