


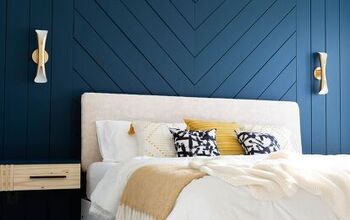
Simple DIY Upholstered Bedframe & Headboard
f you have read our blog in the past several months, then you probably have been tracking the progress of my oldest son’s Vintage Airplane themed room. But what you didn’t know; is that I have simultaneously been working on my younger son’s Vintage Car themed bedroom. Today I will be sharing the first of many posts for this room, a DIY Upholstered Bed Fame.
Well, let’s get right down to it.
Bed Frame Supplies
Drill
Screws
Tape Measure
Circular Saw
3 ½ yards of quilt batting from the roll – cut in half width wise to have a total of 7 yard total.
3 ½ yards of fabric – cut in half width wise and sewed together to make a long strip
Plywood – cut to 38″x74″
Rectangular frame – (2) plywood cut to 38″x14″, (2) plywood cut to 74×14″
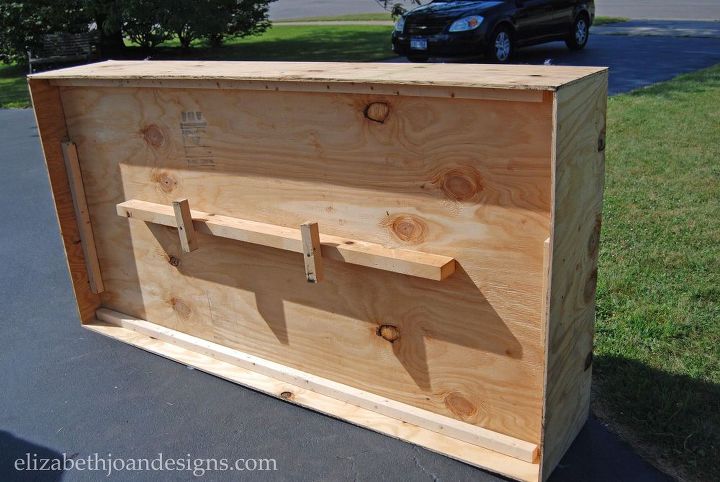
Support board- (1) 2×4 cut to 4’3″, (2) 2×2 cut to 7″- attached 2x2s to 2×4 with screws (see picture 6)
Box Spring support rails – (2) 2x2s cut to 6′, (2) 2x2s cut to 1′
Supplies for Headboard
Plywood measured to the width of bed frame
(2) 1x4s measuring 4′ each
Quilt Batting
Fabric
Staple gun with lots of staples
Drill and screws
(4) L-shaped brackets
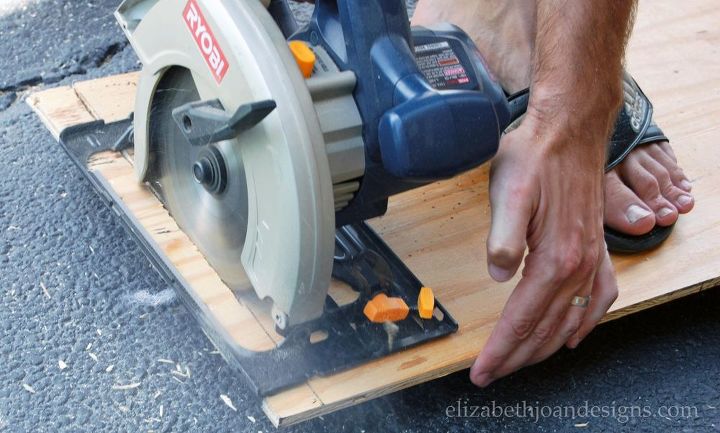
First, my handy husband used a circular saw to cut each wood piece indicated in the supplies section. This frame is for a standard twin size bed measuring 38×74.
Well, let’s get right down to it.
Bed Frame Supplies
Drill
Screws
Tape Measure
Circular Saw
3 ½ yards of quilt batting from the roll – cut in half width wise to have a total of 7 yard total.
3 ½ yards of fabric – cut in half width wise and sewed together to make a long strip
Plywood – cut to 38″x74″
Rectangular frame – (2) plywood cut to 38″x14″, (2) plywood cut to 74×14″
Support board- (1) 2×4 cut to 4’3″, (2) 2×2 cut to 7″- attached 2x2s to 2×4 with screws (see picture 6)
Box Spring support rails – (2) 2x2s cut to 6′, (2) 2x2s cut to 1′
Supplies for Headboard
Plywood measured to the width of bed frame
(2) 1x4s measuring 4′ each
Quilt Batting
Fabric
Staple gun with lots of staples
Drill and screws
(4) L-shaped brackets
First, my handy husband used a circular saw to cut each wood piece indicated in the supplies section. This frame is for a standard twin size bed measuring 38×74.
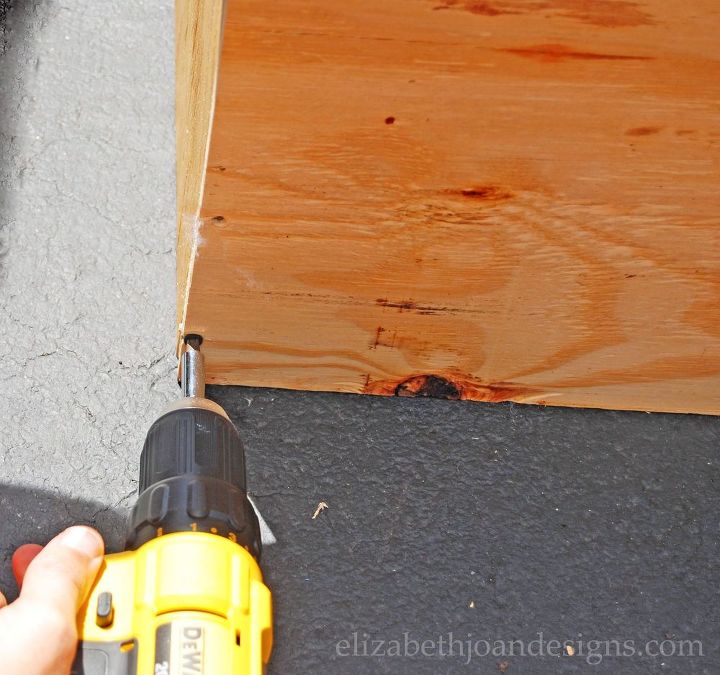
Next, he built the outside of the bed frame by lining the frame boards up in a rectangular shape and drilling screws in for attachment.
Then, the rails were added to the inner part of the frame 6″ from the bottom. We used a level to make sure our son wouldn’t be sleeping on a slope. These will hold up the main plywood piece that the box spring fits on.
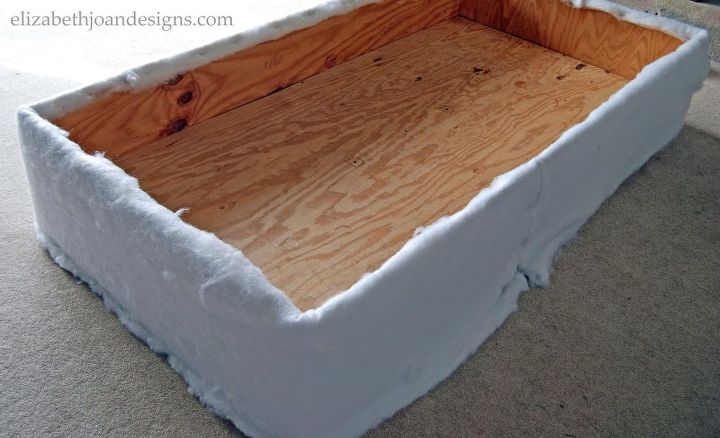
To give this fame a little softness, we wrapped the entire outer portion of the rectangle with quilt batting and used the staple gun to secure it. First we tucked and stapled the batting to the top. Then we did the same to the bottom.
Finally to finish off the look of this bed, we used the same method as we did for the quilt batting to add the fabric. I picked up my fabric at Walmart for $1 per yard. Score!
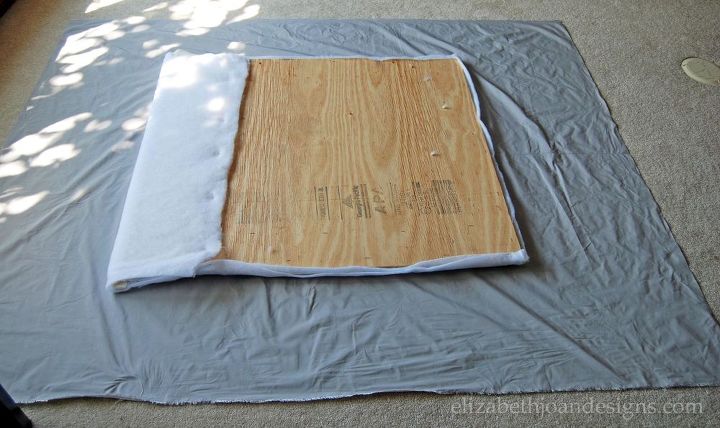
Next, I stretched the fabric tightly over the padded plywood and stapled around the edges of the back to secure.
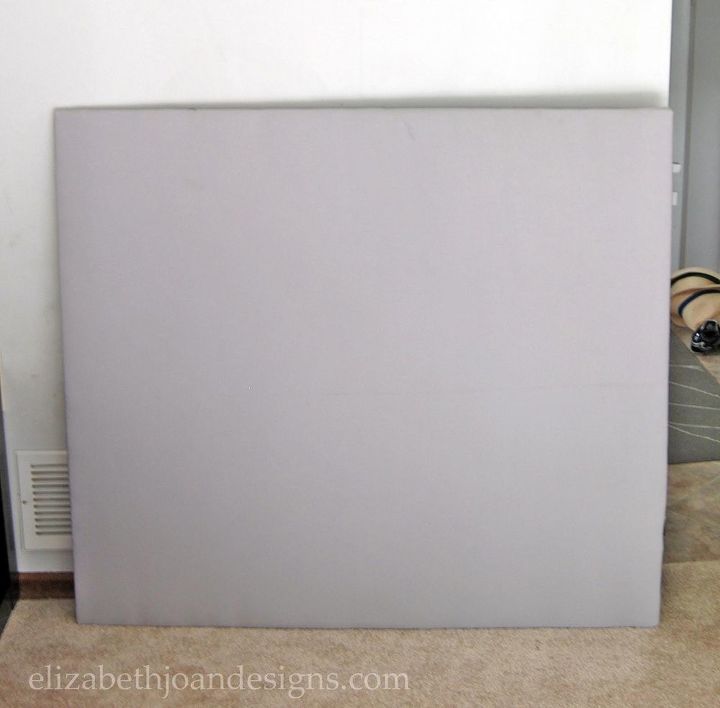
Then, two L-shaped brackets were attached to each of the 1x4s and the non-fabric side of the plywood near the top and bottom of the plywood. This created legs for the headboard.
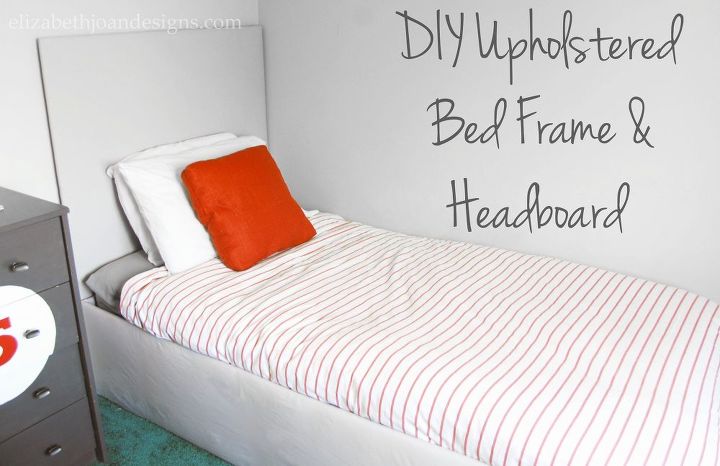
We are so happy with how this turned out. It was a big project, but totally worth all the effort.

Want more details about this and other DIY projects? Check out my blog post!
Comments
Join the conversation
1 comment
-
Fantastic! Thanks for the tutorial!


Frequently asked questions
Have a question about this project?