


DIY - Updating Our Porch to 2015 (Stage 1)
$150.00
Easy
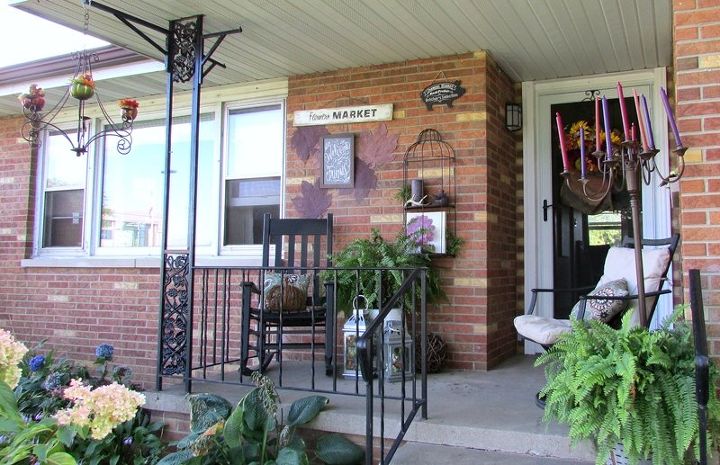
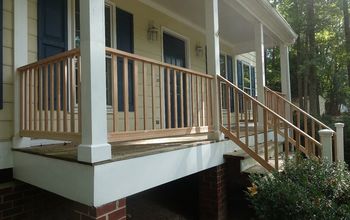
Our old porch was so small that it was hard to have 2 chairs or rockers on. The wrought iron railing we had, used to go along the front and leave a 3 foot opening for a walkway. The concrete stairs were poured when the house was built, so they were in need of an update as well. They had start to sink, crumble and just look really dated.
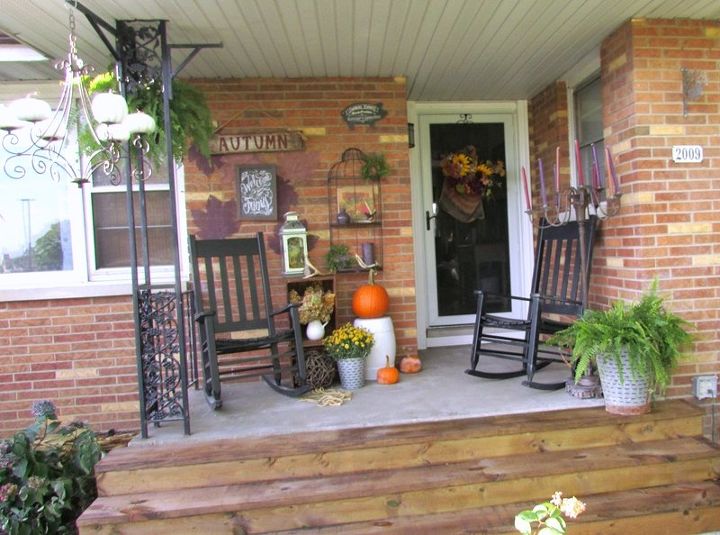
I decided to update this porch in stages. Two stages to be exact. This DIY is stage 1. Update the stairs and we cut the front rail off so that we could have much wider stairs. The transformation to me is just amazing. The porch now looks so much bigger and the pathway to the door can now be in the middle of the porch, thus allowing me to have 2 large rockers on a small porch.
This is a before shot of what the porch used to look like. My husband used a grinder to cut off the front iron rail and the handrails that bordered the concrete stair. Next he addressed the sinking and crumbling concrete stair. While I dug out the plants that were in front of this porch.
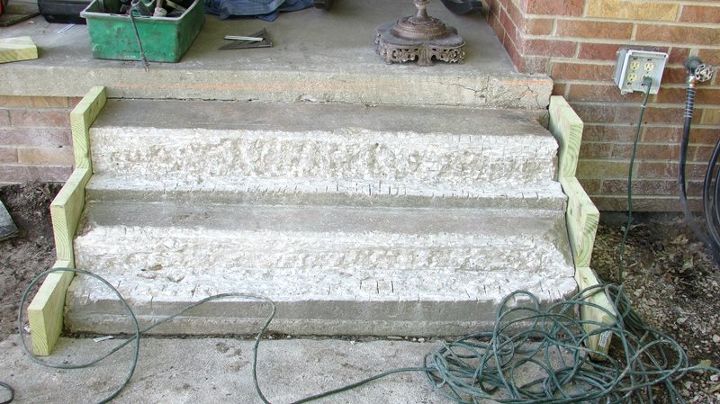
Using his grinder again and the pressured treated treads as a guide, he ground out enough old concrete to accommodate the new stair. I tried to talk him into taking the entire stair out but he argued that it wasn't going anywhere and would be a great mounting spot for the right side of the NEW stair treads and risers. Since he was the one hauling off the concrete.....I relented.
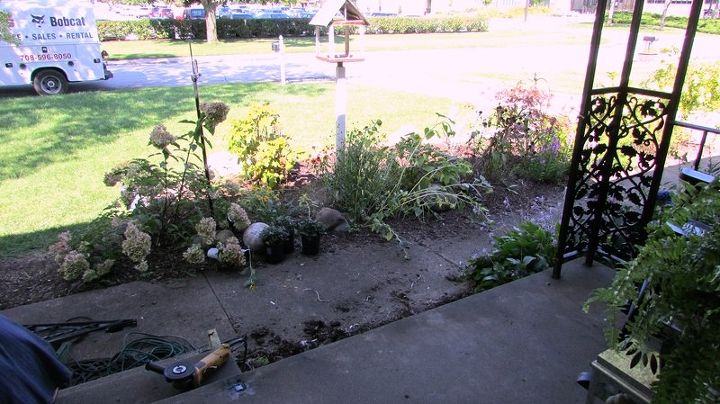
The view from house looking out into the yard. It already feels bigger!
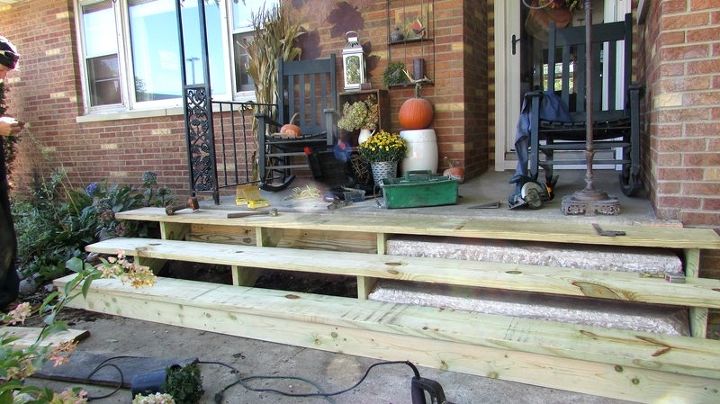
Every piece of lumber we used was pressured treated.

Stage 2 for this porch will happen in 2016. We will replace the dated columns with more rustic ones and add new handrails as well. The cost for the first stage of this project was only $150.00. To cut off the old front rail and handrails took about 40 minutes. To cut/grind the old concrete stair away and clean the area up took approximately 4 to 5 hours. To install the new stair took 3 to 4 hours.

Want more details about this and other DIY projects? Check out my blog post!
Comments
Join the conversation
2 comments
-
WOW! What an amazing upgrade!


Frequently asked questions
Have a question about this project?