How to Tile a Backsplash - Part 1: Tile Setting #TileIdeas #WallCandy

The backsplash and tiling truly makes my kitchen feel luxurious. In addition to the cork flooring, it was one of the things I REALLY wanted to have in our kitchen. And this is definitely a project that anyone can take on (with a good tutorial.)
There are loads of extra tips, tools required, materials list and full instructions on my blog.


Ready to get messy? Let's tile that backsplash!
Cover EVERYTHING with plastic tarps or drop cloths. You might also want to use some big pieces of cardboard on your countertops to protect them from any falling tools or tiles.


There are tips for tiling around cabinetry, electrical outlets and more on the blog, link below.
This is the tutorial that I've been anxious to share with you! How to Tile a Backsplash! The reason I've been anxious to share is for two reasons!


1) The backsplash and tiling truly makes my kitchen feel luxurious. In addition to the cork flooring, it was one of the things I REALLY wanted to have in our kitchen. And this is definitely a project that anyone can take on (with a good tutorial.)


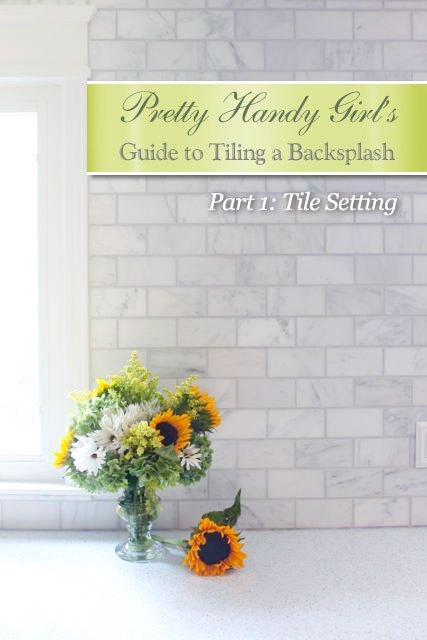
PrettyHandyGirl's Guide to Tiling a Backsplash - Part 1: Tile Setting


2) The source of my tiles is a best kept secret! I found the supplier online after researching and searching for affordable marble subway tiles. TheBuilderDepot.com was a site I stumbled across in my search. After contacting them and discussing my project, a response came immediately with ideas for my backsplash. My contact, David, was there for me throughout the process and gave me lots of ideas and tips along the way! He even sent me a photo of my tiles before shipping them.


Venato Marble Subway Tiles from TheBuilderDepot.com


But, here's the best part, in one of our email conversations I learned a little more about TheBuilderDepot and their company's history. I want to share his email with you because I think it's wonderful how they run their business:


"We started our business in 2008 with $12K in sales and because of the financial meltdown and housing collapse banks told us we were crazy starting an "ecommerce" marble business. None of them would loan any money, not even $1K.


Last year we grew to a $2.4m company (this year we are on target to double), employing locals and making an impact in the way consumers buy luxury natural stone. Our vision was to offer a quality that is second to none, buy direct from Italy and quarries around the world, pay cash for everything buying 30,000 to 40,000 sq.ft. of product at a time from the quarries to keep costs low and quality high.


We have no debt as a business (that was not a plan but has worked out well) and avoid traditional marketing channels that are heavy on costs. Basically a no frills marketing strategy.


People think we are crazy when, if we cannot supply something or another supplier offers a better more affordable solution we refer them to a competitor. We do not need the sales as we never anticipated growing this big, we are just interested in people creating pretty rooms with natural stone.


Part of the success is we ask what people are planning, then come up with some ideas of our own. We are really passionate about Carrara. The only company that separates into two collections."


A company that has good business practice is worth supporting!


As mentioned in previous posts, when choosing companies to work with, I make sure to select brands and companies that I can stand behind. I have always maintained strict criteria when selecting companies to work with, and The Builder Depot goes above and beyond my criteria:


Great Customer Service


Beautiful Tile Selection


Quality Tiles


Affordable prices!!!


Before you source your next tile job, check out TheBuilderDepot.com. I think you'll be pleasantly surprised ;-). And, because you know I love y'all, I asked The Builder Depot if they'd offer my readers a discount.


Ready to get messy? Let's tile that backsplash!


Prep-Work:


Cover EVERYTHING with plastic tarps or drop cloths. You might also want to use some big pieces of cardboard on your countertops to protect them from any falling tools or tiles.


How to Install a Tile Backsplash (Tile setting) | Pretty Handy Girl


You may also choose to tape off the edges of your cabinets, walls or window trim (anywhere that you don't want to get mortar or grout onto.)


How to Install a Tile Backsplash (Tile setting) | Pretty Handy Girl


If your walls are previously primed or painted, you'll need to rough them up with a fine grit sanding block. Then wipe the walls down with a damp cloth to remove any dirt or dust.


How to Install a Tile Backsplash (Tile setting) | Pretty Handy Girl


It's also a great idea to install your outlet extenders ahead of time so you know they'll fit after the tiles are installed. The plastic extenders are a better choice, as the metal extenders could become live with electricity of it comes in contact with loose wires.


How to Install a Tile Backsplash (Tile setting) | Pretty Handy Girl


To get a professional installation look around windows, cut out a section of moulding so you can slip your tile behind the moulding. Simply hold a tile up next to the trim...


How to Install a Tile Backsplash (Tile setting) | Pretty Handy Girl


...and use a multi-tool or Japanese hand saw to cut out the trim piece. Knock out the piece with a flat screwdriver or chisel.


How to Install a Tile Backsplash (Tile setting) | Pretty Handy Girl


If you have any sections of missing countertop, where you want to stop the tile from sliding below a set line (like behind your stove), attach a scrap piece of wood with finish nails.


Attach support board to wall with Ryobi Finish Nailer


Bring several boxes of tile into the kitchen and mix tiles from all the boxes. Lay out your first row on your countertop and start your second row. Determine any cuts you need to make. I used a running bond (subway or brickwork pattern.) This results in a half tile that starts every other row.
Use the spatula to spread mortar on the "un-notched" side of the notched trowel. Apply pressure and spread the mortar on to the wall. Flip the notched trowel over and scrape through the applied thin set with the notched side.


I made a video on the blog for how to spread the thinset mortar and tile the backsplash, link below the photos.
Set the first tile in place. Set spacers underneath the tile. Wiggle the tile back and forth to set it into the mortar.
Check the level of your tiles frequently and make adjustments with toothpicks or scraps of shim as necessary.
While working, clean off your tools periodically to prevent the mortar from drying on them. Also wipe off any excess mortar that may have settled on the tiles.
Hang in there, you're almost done. Learn how to grout and seal a backsplash here: http://www.prettyhandygirl.com/2013/09/tile-backsplash-part-2-grouting-sealing-backsplash.html
What do you think? Have you tiled a backsplash before? Any tips you care to share? I have many more tips on my blog. Hope to see you there!
Brittany aka Pretty Handy Girl
Want more details about this and other DIY projects? Check out my blog post!
Go
Frequently asked questions
Have a question about this project?
Comments
Join the conversation
Next