


French Country Chair Makeover
I'd had these chairs forever, okay, forever in my book is like 15 years and I'd done little with them because they didn't inspire me till now.
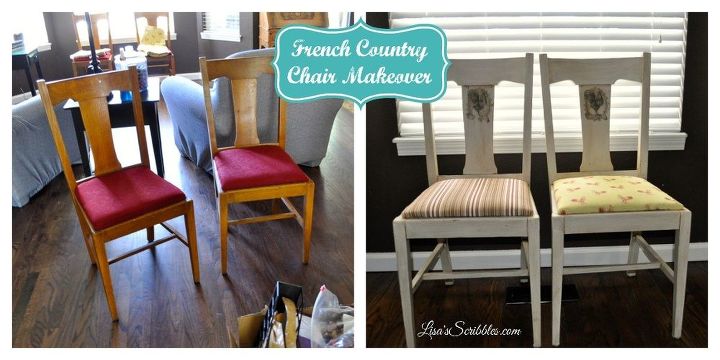
I'd had these chairs forever, okay, forever in my book is like 15 years and I'd done little with them because they didn't inspire me till now. They were supposed to be a temporary solution to us not having any chairs for the dining room table, a temporary fix that lasted 15 years. Do I have chairs for my formal dining room table after 15 years? Uh, no...but that's a story for another time.
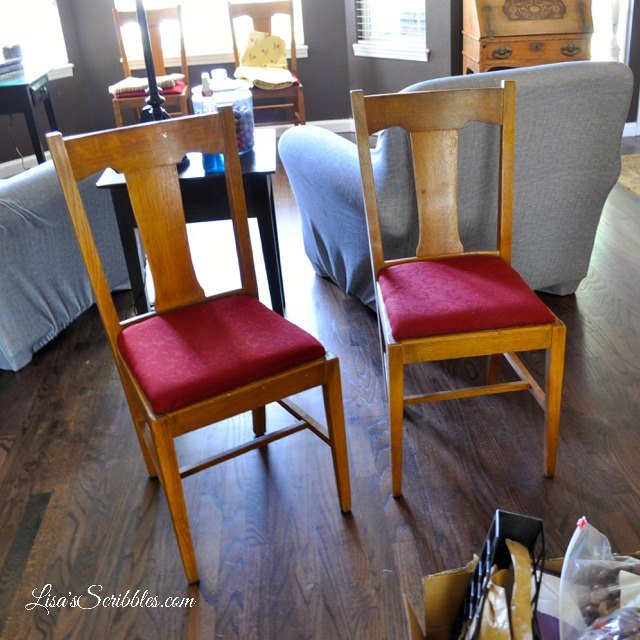
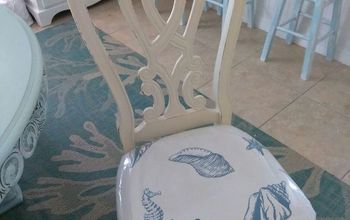
This is a close up of what they looked like before, nothing too exciting, kinda plain jane. Years ago I changed out the fabric on the seats, but it was never my favorite, I was just using up leftover materials from a previous project.
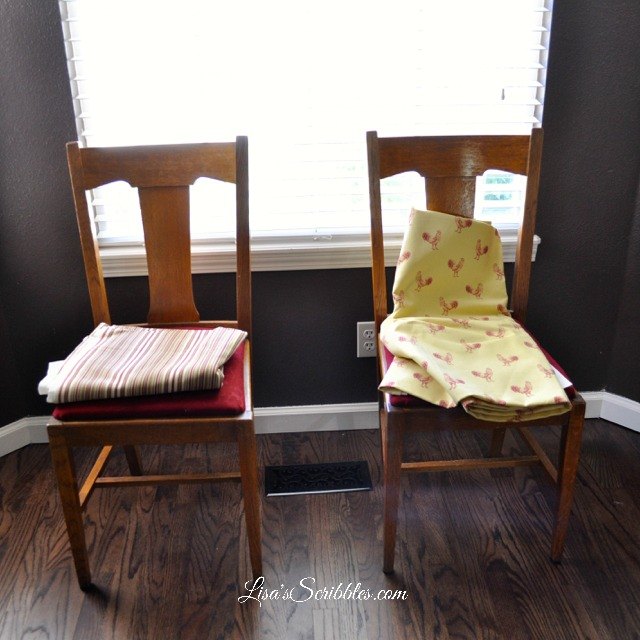
It really wasn't different this time in me using up fabric I already had on hand. The material was originally purchased to be used on a roman shade for the kitchen, but I never got around to it and then changed my mind...funny how that happens.

The next step was to paint the chairs. I used chalk paint that I made myself. It was pretty easy as I got the recipe from my good friend, Judy, at Vintage Street Designs. It calls for 1/4 c plaster of paris, 1/4 c warm water, and 1 c flat paint. We both prefer Valspar or Behr, but whatever you have lying around will usually work. For this project, I actually used a satin finish paint because that's what I had. So after painting the chairs, I added the design from Graphics Fairy, she has a large assortment of graphics that can be used for just about any project. Special note, if you're printing it to go onto a project like say a chair, cabinet, and the sort, then you want to use the "reverse print" file so it will come out properly on the piece.
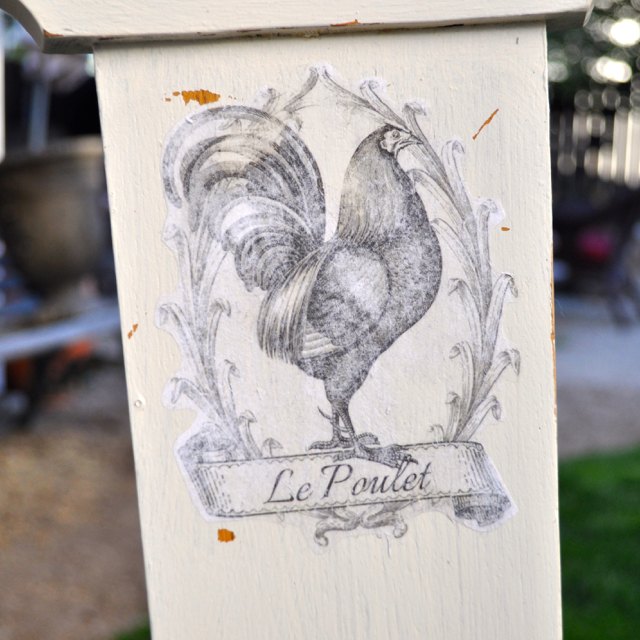
I applied the graphic using modge podge on the print side and then let it dry. I then used a damp towel to rub off the paper. It's a timely task to remove the paper, and one should take care that you don't rub too hard or you'll remove the image along with paint, like I did. It was an easy enough fix, though, as I just touched up the paint in the small areas.
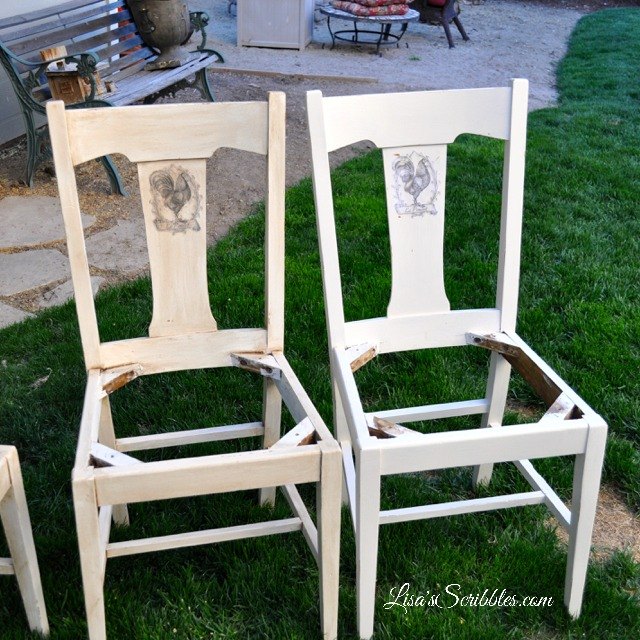
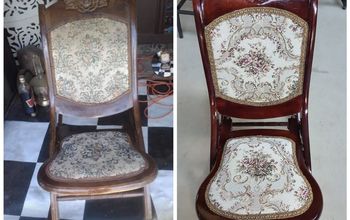
I then applied antiquing wax because I wanted to give it more of a vintage French Country look. You can see the chair on the right doesn't have the antiquing wax on it and the one on the left does.
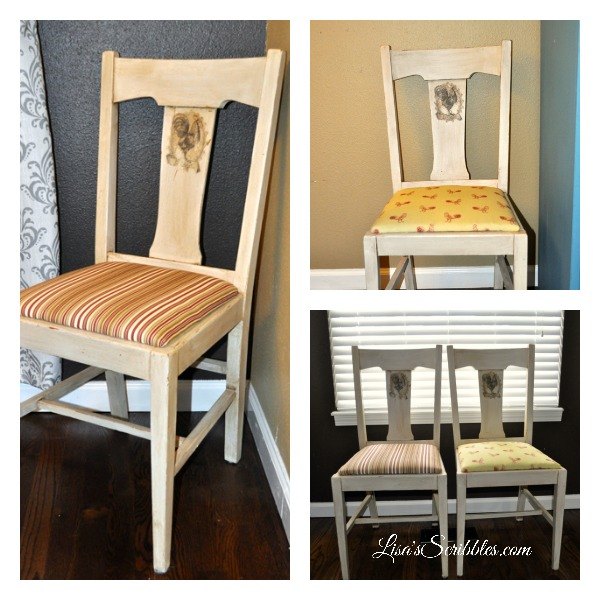
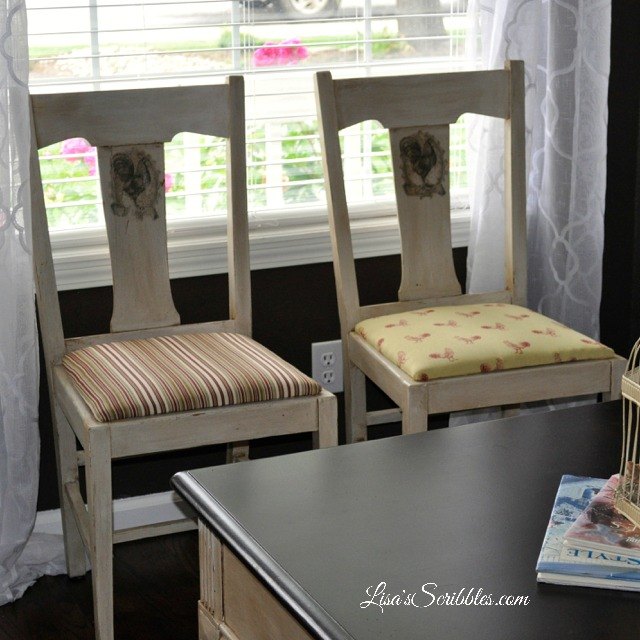
I then attached the fabric using my hand dandy pneumatic stapler, and put them out for display. Pretty cute right?

Want more details about this and other DIY projects? Check out my blog post!
Comments
Join the conversation
2 comments
-
They turned out great!
-
Thanks for the great idea. So clever.


Frequently asked questions
Have a question about this project?