


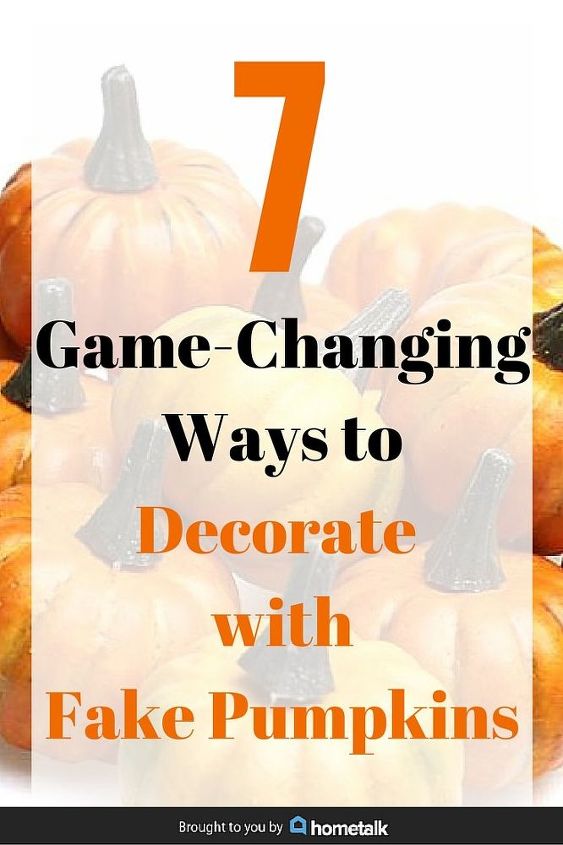
Project Guide: Decorating With Fake Pumpkins
While freshly carved pumpkins will always be a traditional Halloween decoration, more and more people are choosing to skip the muss and fuss of real pumpkins and are instead choosing fake pumpkins for their porches and homes. Some fake pumpkins look just like the real thing, but they're easier to work with and they can last from year to year. There are different types of fake pumpkins and tons of ways to decorate them, so before you get started, take a look at these important tips.
Decorating with Fake Pumpkins:

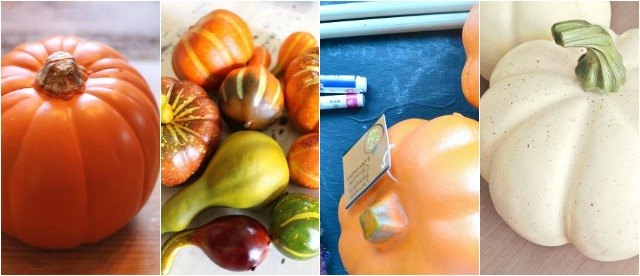
1. Buy the right medium for your project
Depending on the project you've got in mind, different pumpkins might work better than others. If you're planning on making a jack-o-lantern or pumpkin carving, you'll want a hollow plastic pumpkin as opposed to a dense foam one. Additionally, make sure any adhesives or glues you use will stick on plastic or foam,
2. Prepare Your Work Space
Whether you're working with plastic or foam, cutting or painting, decorating pumpkins can get a little messy. Lay down a drop cloth or pieces of cardboard to make cleanup easier. Bits of foam or flecks of paint can be a pain to clean out of a carpet or furniture, so cover your surfaces up well.
If you're carving your foam or plastic pumpkin, don't do it outside, so that the material doesn't end up all over your yard.
3. Prepare Your Surface
Before doing anything with your pumpkin, clean it off using a cleaning wipe or a baby wipe, so that there's no residue or dirt to obscure your cutting plan or ruin your painting.
4. Plan Your Design
Whether you're painting, cutting, or embellishing with decoupage or studs, knowing your design in advance is key. Plan it out and mark it on your pumpkin using painter's tape or pencil.
5. Prepare Yourself for Working
Wear a protective mask, and, if you're planning on carving, protective gloves as well. Clothing may get covered in foam or plastic bits, or paint, so wear work clothes
Basic Tools Include:
- Drop Cloth
- Baby Wipes
- Ruler
- Pencil
- Paint Mask
- Painter's Tape
Optional Tools Include:
- Pumpkin Carving Tool Kit
- Large Bread Knife
- Smaller Serrated Knife
- Fine Grit Sandpaper
- Paint Brushes
- Foam Paint Brush
- Paint
- Mod Podge
- Spray Adhesive
- Decorative Paper Napkins
- Fabric
- Decorative Craft Paper
- Liquid Nails (or other strong adhesive)
- Styrofoam Block
- Urn
- Dowel
- Hammer
- Thumb Tacks
- Decorative Studs

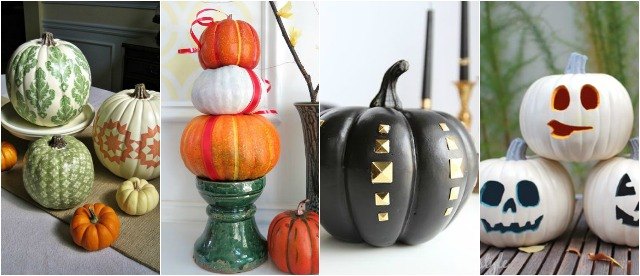
1. Metallic Pumpkins
Adding a metallic sheen is in vogue for this year's pumpkins. Choose whether you'd like an all over metallic coat, a dipped look, or simply a pattern of metallic paint, like polka dots or stripes. Craft paints like the Martha Stewart line should work well on both plastic and foam pumpkins.
- Clean your pumpkin
- Create your design or pattern (if you have one) using painter's tape
- Pour some metallic paint onto a plate or palette
- You can also use spray paint for full coverage
- Cover your pumpkin in multiple thin layers
- Stand your painted pumpkin on an empty toilet paper roll to dry fully
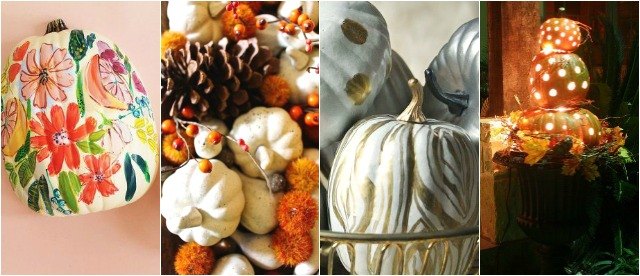
2. Topiaries
If you're looking for an interesting way to make an impact on your porch or mantel, a towering topiary of pumpkins is certainly effective. For this project, you have the option of creating your topiary in an urn or making it free standing. If your pumpkins are larger, using an urn as a base is advisable. You'll need a dowel or some other central pole to keep the pumpkins in place, and (unless your bottom pumpkin is made of dense foam) a block of styrofoam to keep your decoration in place.
- Choose three pumpkins of varying sizes
- If you're using a foam pumpkin for your base, cut your dowel a little shorter than the size of your three stacked pumpkins
- If you're using a plastic pumpkin for your base, cut your dowel to the length of your stacked pumpkins plus your block of styrofoam
- Plan to stack your pumpkins up from largest (at the base) to smallest
- Cut a hole in the bottom of your top pumpkin
- Next, remove the stem and cut a hole in it's place in the top of your middle pumpkin, and then add another hole in bottom directly below your first
- If your bottom pumpkin is plastic, cut a hole in the top and bottom of this one too
- If your bottom pumpkin is foam, only cut a hole in the top
- Slide your pumpkins, starting with your bottom one, onto your dowel to plan an arrangement you like
- As you work, take breaks to make sure that your topiary is aligned and straight
- Decorate your pumpkins at this stage if you'd like. You can even add holes for some creative lighting
- Before re-stacking your pumpkins, weigh down your urn or bowl so that it can't tip easily
- Once your base is ready (if you're using one), slide your bottom pumpkin down the dowel and add glue around the stem area.
- Stack your middle pumpkin, pressing it down into the glue and twisting it slightly, and then add a ring of glue to the top of this one as well
- Finally, add your last pumpkin on top of the topiary, twisting and pressing it into place carefully
3. Painted
Choose whether you'd like an all over color coat, a dipped look, or simply a pretty pattern, like polka dots or stripes. Craft paints like the Martha Stewart line should work well on both plastic and foam pumpkins, as well as different brands of chalkboard paint, in case you're interested in that look.
- Clean your pumpkin
- Create your design or pattern (if you have one) using painter's tape
- Pour some paint onto a plate or palette
- You can also use spray paint for full coverage
- Cover your pumpkin in multiple thin layers
- Stand your painted pumpkin on an empty toilet paper roll to dry fully
4. Decoupaged
You have a variety of options to use when decoupaging your pumpkins. Popular cover choices include cut pieces of decorative paper, thin fabric, or paper napkins. Whichever you choose, have your Mod Podge and paint brush ready.
- Because the material you're using to cover your pumpkin is likely very thin, add a base coat to your pumpkin if you don't want the foam or plastic color to shine through
- Rip the edges or your paper or paper napkins so that they blend together better as you stick them
- If you're using paper napkins, unfold them completely so that you have the thinnest layer possible
- Decide how you would like your pattern laid out on your pumpkin
- Apply your Mod Podge to the pumpkin using a foam paint brush
- Place one torn piece of paper on your pumpkin at a time, smoothing it out carefully with your brush or fingers as you work
- If your fingers seem too rough to smooth the finish, take a large piece of plastic wrap, lay it over your decoupaged pumpkin, and press the paper smooth starting from the center of the plastic and working your way out. Then, remove the plastic wrap
- If, as you work, you find that your material is too thin to smooth out after you lay it on your pumpkin, try brushing the Mod Podge on your paper instead of your pumpkin
- After you're finished, let your pumpkin dry fully
- After everything is dried in place, add a second coat of Mod Podge over your work to seal and protect it
5. Studded
Unlike with a real pumpkin, adding thumb tacks and studs to a fake pumpkin won't cause it to spoil faster, and it's a quick and easy way to add character, a quick design, or a word or picture.
- Choose your studs or thumb tacks
- Draw your design on the surface of your pumpkin
- Be aware of the size of the head on your thumb tack or stud so that you can factor any overlap into your design
- Once your blueprint is complete, begin pressing in your thumb tacks or studs one at a time
- If you're using a plastic pumpkin and you're having difficulty pressing your pieces in, use a hammer or other blunt surface to lightly tap them in until they're flush with your pumpkin
- If some studs feel loose, feel free to secure them in place with a drop of glue underneath the head
6. Embellished
For an instant pumpkin makeover, many DIYers opt for adding embellishments to their pumpkins like beans, glitter, feathers, or sequins. These steps depend on the embellishment you choose to add, but with all decorations, make sure that your pumpkin is completely clean before starting and use a strong adhesive to hold everything in place. You may even prefer to paint on a base coat before you begin adding your embellishments.
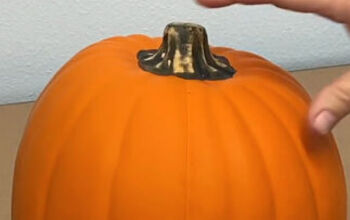
7. Carved
Foam Pumpkins
Soft foam pumpkins won't work well for creating a jack-o-lantern, but you can hollow out some space and create a container or vase. To do this, use a small serrated knife or pumpkin carving tool and cut out the area around the stem (including the stem) at an angle, so that a circular wedge is removed. You can widen that space by scraping the sides with a carving tool.
Plastic (Hollow) Pumpkins
You can carve a hollow plastic or thin foam pumpkin just like you would a real pumpkin (minus the mess).
- Draw your design on the pumpkin using a pencil
- Cut a hole around the stem at the top of the pumpkin
- If you wish to replace the top after carving, cut your hole at an angle (angling away from the stem) so that the top will have a ledge to rest on when you replace it
- Using your thin carving tool, carefully carve the features along your pencil lines
- Use your fine grit sandpaper to light sand the edges of your cuts and clean up and raised or messy edges
- Dump all the plastic or foam shavings out of your pumpkin and replace the top

Clean-up
Use a vacuum cleaner to gather any bits of plastic or foam so that you don't shake them off anywhere harmful. Make sure to wash brushes immediately, especially brushes that worked with Mod Podge or other adhesives.

Comments
Join the conversation
-
All useful information, thank you


Frequently asked questions
Have a question about this project?