


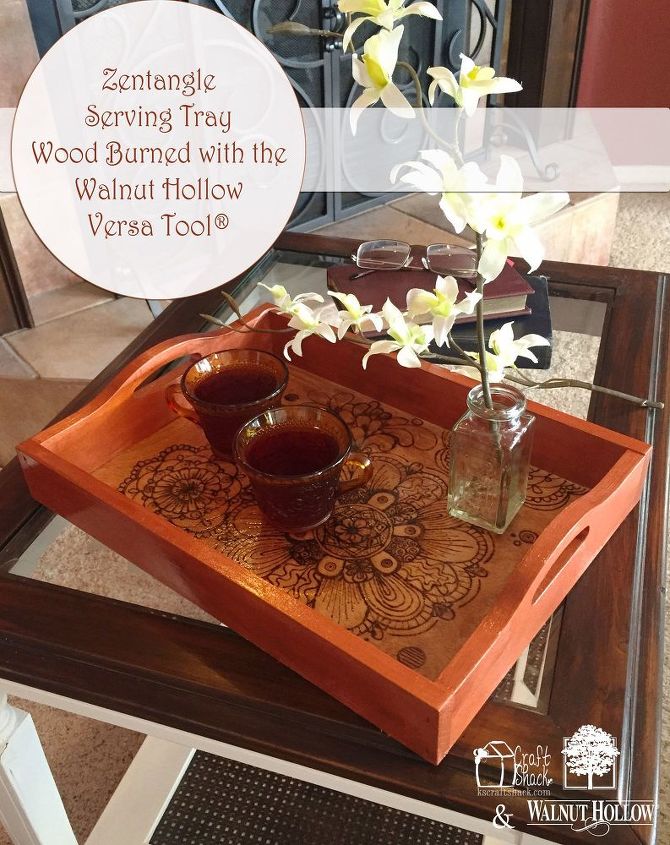
Zentangle Serving Tray
What do you do when you're given a blank wood serving tray and a wood burner? You zentangle of course! I've been looking for a decorative serving tray for awhile, but the price always deters me. I decided to make my own and it was so much easier than I thought!
I used this raw wood serving tray from Walnut Hollow, and their wood burning tool plus a little stain, paint and varnish.

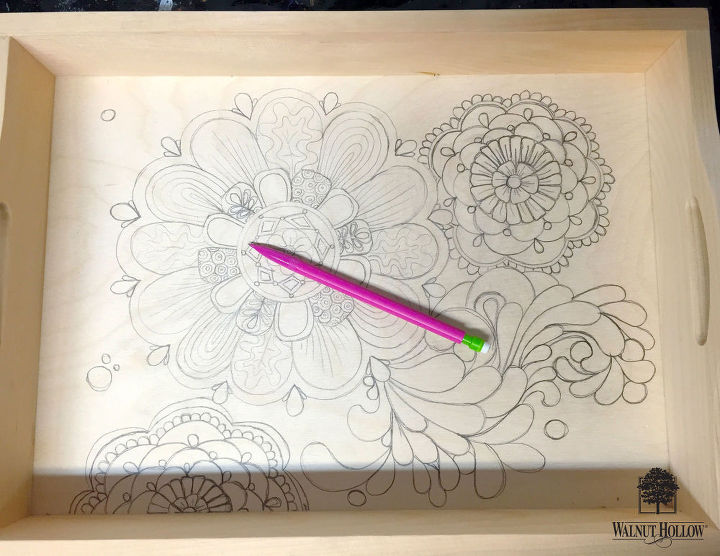
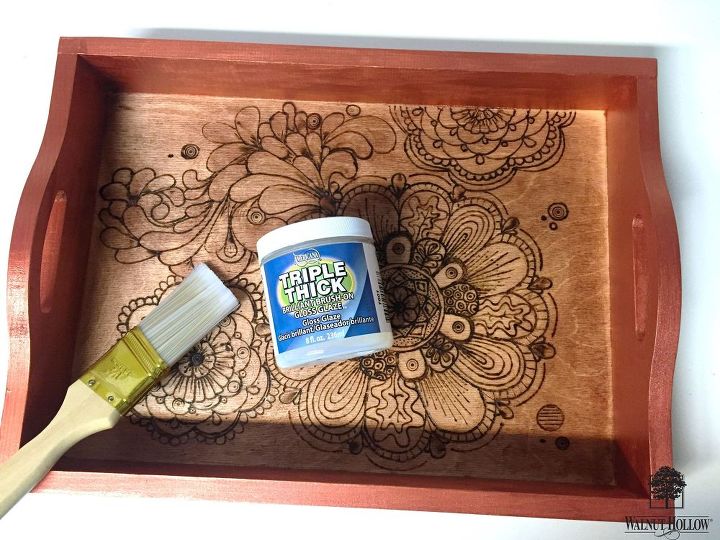
Before you burn the wood in any wood burning project you should draw the design on first with a pencil. You can erase the pencil, but not burned wood. I had fun filling the tray with doodles!
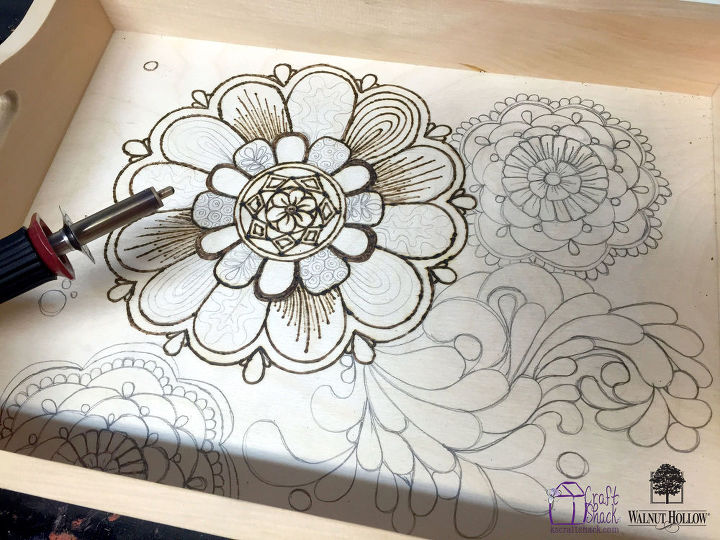
Then you can burn the wood. Using a wood burner is actually really easy. Almost just like drawing with a marker. Trace your pencil lines with the wood burning tip. Just keep in mind the tip is obviously very very hot, never touch it and always make sure to set it down on it's stand and unplug it when you are finished.
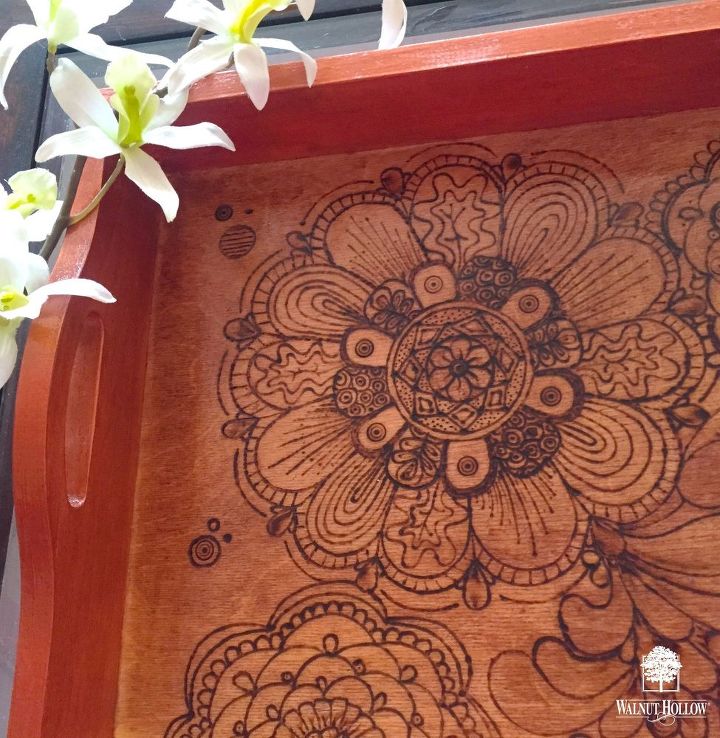
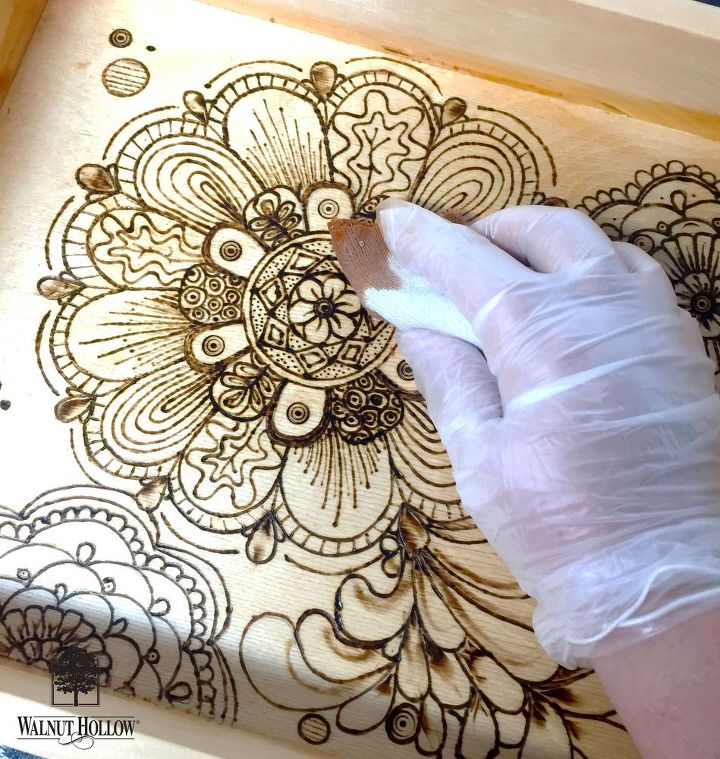
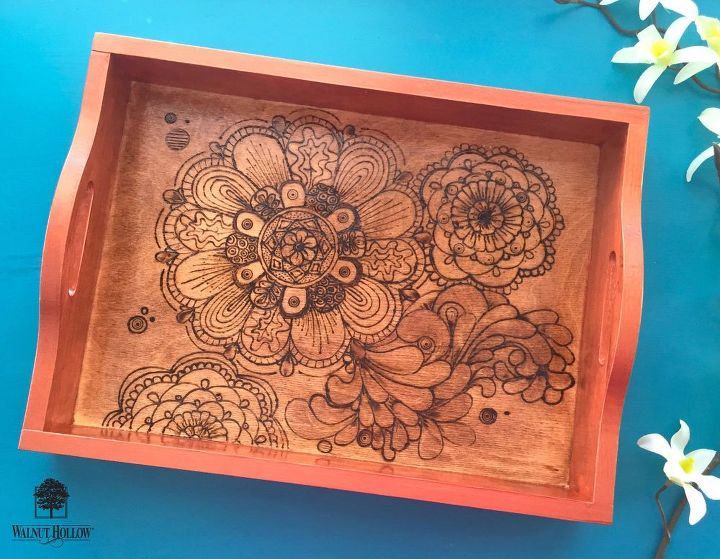
After I was done tracing the pencil lines with the burner, I stained the bottom of the tray, right over my wood burning design. I love how the stain brings out the design more. I used a mix of light honey oak, and just a little mahogany stain. I did not want it to be too dark.
After I stained the bottom of the tray, I taped it off and painted the sides of the tray with Decoart metallic copper paint, and sealed the whole tray with Triple thick glaze gloss. That really made it shine.
I love how it turned out. I think the stain compliments the copper metallic paint very well, and the gloss glaze sealer makes the copper almost look real, instead of the wood it actually is.
If you've never tried zentangle, or wood burning this is the perfect beginner project.
You can see more details through the blog link below.

Comments
Join the conversation
-
Well done!
-
Love it! Love your "doodles"! You are very talented!


Frequently asked questions
Have a question about this project?