


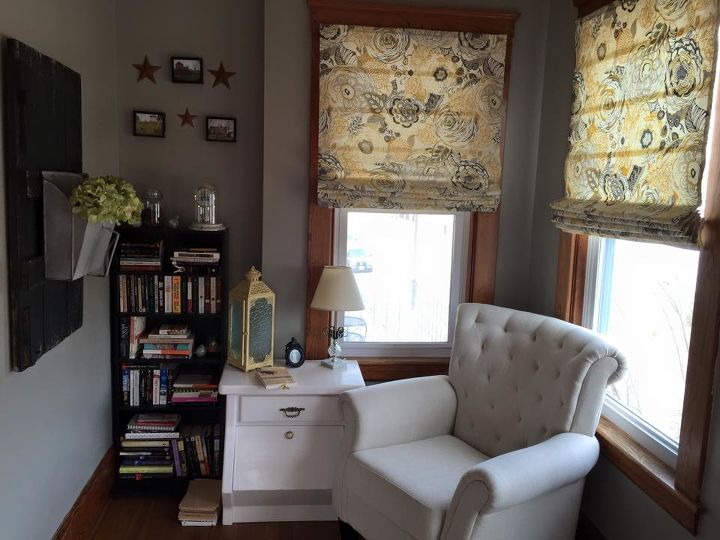
DIY Roman Shades

Supplies Needed:
Cheap mini blinds: $2.99 Walmary
Fabric
Lining fabric ( I used Muslin)
Fabric Glue (I used Fabri-Tac Permanent Adhesive)
A sewing machine & thread to match your top fabric (or iron-on hem tape)
Scissors
Pins
Iron & ironing board
Step 1: Measure your windows. That way you know what size shade to buy and how wide and long to cut your fabric. Cut your top (main) fabric to be 2″ wider than your window and 6″ longer too. Use the first cut as your pattern if doing multiple windows.
Step 2: Cut out your lining fabric to the exact size of your window
Flip your top fabric over so it is face down and lay your lining fabric on the back. Adjust the lining fabric so that there is approximately 1″ of space on each side and 3″ on top and bottom. Use the first cut again as a your pattern to cut the rest of the lining. I had 5 windows so I just used the first one as a pattern. Double check measurement before cutting.
Step 3: Fold the top fabric over the lining 1″ and pin.
Step 4: Iron your folds well.
Step 5: Sew your layers together and set fabric aside.
Step 6: Get the blind your using and extend out all the way and lay on a flat surface.
Step 7: Cut the string that controls the angle of the blinds. It looks like a ladder. It is VERY important NOT to cut the thicker cord that actually lifts the blinds up and down.
Step 8: Pop off the plugs on the bottom weighted bar of your blinds. A butter knife or screwdriver will help you do this. Pull the string out the bottom and untie (or cut) the knot that keeps the cord from coming out of the bar.
Step 9: Decide how many folds you would like your blind to have. You will need one slat for every fold; your weighted bar will also create a fold, so take that into account (my window was 45″ tall, so I kept 6 slats + the bottom weighted bar equaling 7 folds that were 6″ apart). Take out the extra slats and throw away. Re-thread your string through the bottom weighted bar and make a temporary knot to keep it in place.
Step 10: Mark your spacing on the back side of your fabric ( Mine were 6" apart)
Step 11: Lay your blind on top of your fabric and align the middle of each slat with your markings.
Step 12: Grab your glue and carefully begin to glue down your pieces beginning at the top. Because my blinds slide into a bracket with a small plastic piece that holds it in, I didn’t glue all the way to the edge of my top piece. I glued it later after installation.Glue on the curved side of your slat. I did a zig-zag pattern with my glue to cover as much area as possible without having to spread it with a brush. DO NOT GET GLUE ON THE PULL CORD.Flip over and firmly press down your slats, making sure that they are centered on your markings.
Step 13: When you get to your bottom piece, glue the front narrow side to the fabric and press firmly to set. Let it dry for a moment and then tie a knot in your strings. Don’t pull the strings too tight, but be sure they are not very loose. Replace the plugs and continue gluing the fabric to each side of the weighted bar.
When you get to the top of the weighted bar, snip a slit in your fabric to go around the pull cords. This is also a great time to trim any excess fabric off of what you have left. Just be sure to leave enough to cover the top of the weighted bar (I cut about 1/2″ excess)
Step 14: Let your finished blind sit for a few hours at least (overnight if you can) to let the glue really set up.
Take your time and be patient. Its worth the work and do use a sewing machine. I found quite a few instructions saying no sew. Go the extra mile and sew even if you have to ask someone to help. ITs worth it and looks professionally done.
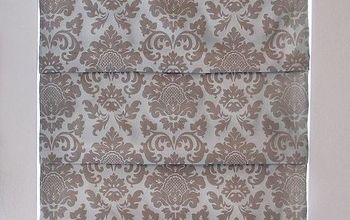
Also if you pattern has a design, make sure your panels are matching that deigns. That way the curtains all look the same and the patters all go the same way.
Cheap mini blinds: $2.99 Walmary
Fabric
Lining fabric ( I used Muslin)
Fabric Glue (I used Fabri-Tac Permanent Adhesive)
A sewing machine & thread to match your top fabric (or iron-on hem tape)
Scissors
Pins
Iron & ironing board
Step 1: Measure your windows. That way you know what size shade to buy and how wide and long to cut your fabric. Cut your top (main) fabric to be 2″ wider than your window and 6″ longer too. Use the first cut as your pattern if doing multiple windows.
Step 2: Cut out your lining fabric to the exact size of your window
Flip your top fabric over so it is face down and lay your lining fabric on the back. Adjust the lining fabric so that there is approximately 1″ of space on each side and 3″ on top and bottom. Use the first cut again as a your pattern to cut the rest of the lining. I had 5 windows so I just used the first one as a pattern. Double check measurement before cutting.
Step 3: Fold the top fabric over the lining 1″ and pin.
Step 4: Iron your folds well.
Step 5: Sew your layers together and set fabric aside.
Step 6: Get the blind your using and extend out all the way and lay on a flat surface.
Step 7: Cut the string that controls the angle of the blinds. It looks like a ladder. It is VERY important NOT to cut the thicker cord that actually lifts the blinds up and down.
Step 8: Pop off the plugs on the bottom weighted bar of your blinds. A butter knife or screwdriver will help you do this. Pull the string out the bottom and untie (or cut) the knot that keeps the cord from coming out of the bar.
Step 9: Decide how many folds you would like your blind to have. You will need one slat for every fold; your weighted bar will also create a fold, so take that into account (my window was 45″ tall, so I kept 6 slats + the bottom weighted bar equaling 7 folds that were 6″ apart). Take out the extra slats and throw away. Re-thread your string through the bottom weighted bar and make a temporary knot to keep it in place.
Step 10: Mark your spacing on the back side of your fabric ( Mine were 6" apart)
Step 11: Lay your blind on top of your fabric and align the middle of each slat with your markings.
Step 12: Grab your glue and carefully begin to glue down your pieces beginning at the top. Because my blinds slide into a bracket with a small plastic piece that holds it in, I didn’t glue all the way to the edge of my top piece. I glued it later after installation.Glue on the curved side of your slat. I did a zig-zag pattern with my glue to cover as much area as possible without having to spread it with a brush. DO NOT GET GLUE ON THE PULL CORD.Flip over and firmly press down your slats, making sure that they are centered on your markings.
Step 13: When you get to your bottom piece, glue the front narrow side to the fabric and press firmly to set. Let it dry for a moment and then tie a knot in your strings. Don’t pull the strings too tight, but be sure they are not very loose. Replace the plugs and continue gluing the fabric to each side of the weighted bar.
When you get to the top of the weighted bar, snip a slit in your fabric to go around the pull cords. This is also a great time to trim any excess fabric off of what you have left. Just be sure to leave enough to cover the top of the weighted bar (I cut about 1/2″ excess)
Step 14: Let your finished blind sit for a few hours at least (overnight if you can) to let the glue really set up.
Take your time and be patient. Its worth the work and do use a sewing machine. I found quite a few instructions saying no sew. Go the extra mile and sew even if you have to ask someone to help. ITs worth it and looks professionally done.
Also if you pattern has a design, make sure your panels are matching that deigns. That way the curtains all look the same and the patters all go the same way.
Comments
Join the conversation
2 comments
-
Thanks for the great step by step description!
-
 Thank you wish you have pictures


Frequently asked questions
Have a question about this project?