


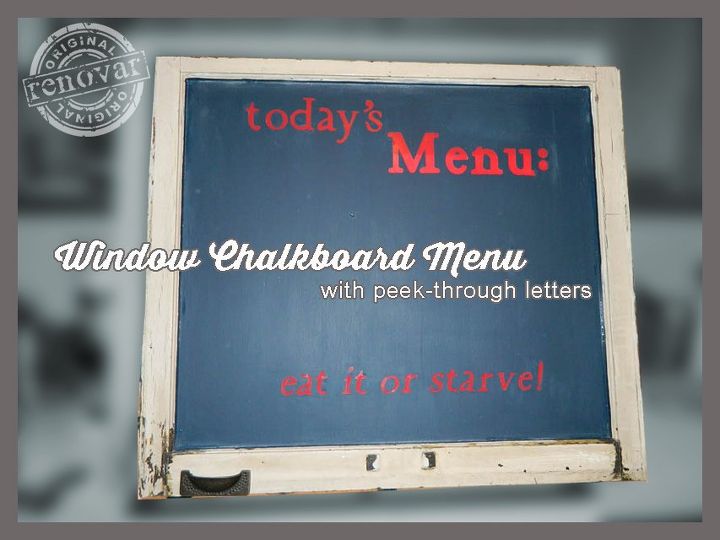
How I Turned an Old Window Into a Menu Board
$15
3 Hours
Easy
This is a neat little project where I took an old but gorgeous window frame with glass and made a sweet little menu board with peek-through text. Here's how I did it.
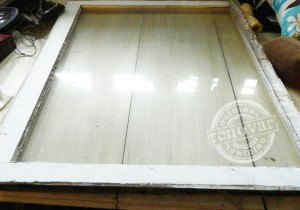
To do this project, I simply took a discarded old window that I saved from some garbage pile at some point in my life.
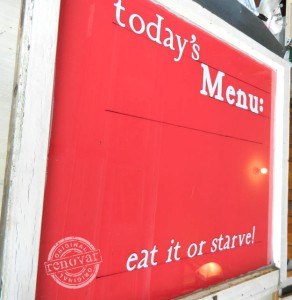
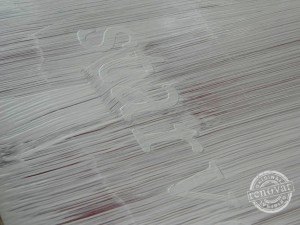
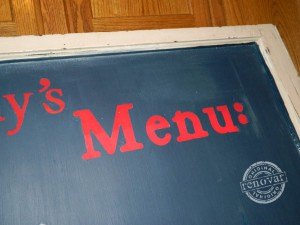
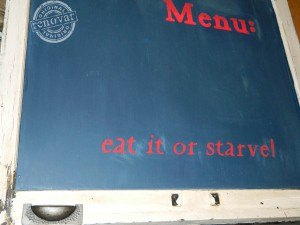
I wanted a peek-a-boo affect on the front of the window. So I began by painting the back of the window in red. I used my Cricut to cut out the wording: "Today's MENU: Eat it or Starve!" and carefully applied the letters onto the front of the window.
I then used Zinnser primer and applied it over the letters first to form a seal around them.
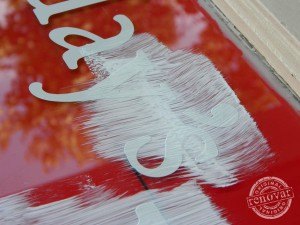
After the primer dried, I applied two coats of chalkboard paint in the navy blue color, (sorry, I forgot to take pictures, but I painted over the whole window, being careful around the lettering.) I then used tweezers and a utility knife and carefully removed the letters. That reveals the pretty red from behind the window and gives that peek through affect.
Around the chippy white part of the frame of the window, I painted on two coats of poly-acryclic; to seal it and to really help prevent any further chipping or peeling of the old paint.
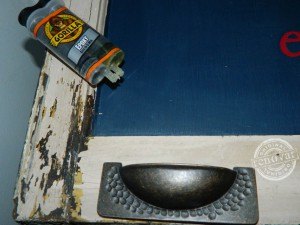
Next, I drilled holes to fit the drawer pull (flipped upside down) to hold chalk. I was originally going to put it in the center where they had the original hardware for the window - but I decided I really liked that character in the center and didn't want to cover that up. It adds to the chippy charm of the whole piece. Gorilla Glue epoxy was used to set it in place.

Next, take your chalk and prime the board. Done by rubbing the side of a piece of chalk over the entire surface (again, using care around the letters) and then erasing it.
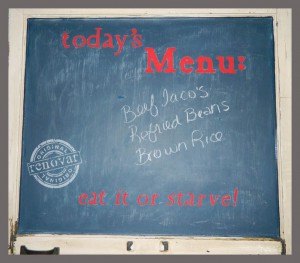
Then all you have to do is write out your menu so your guests or family is aware and you don't have to hear "what's for dinner?" If you haven't turned something into a chalkboard yet - it is a super easy project that you should try & can be used on most any surface! If you every have any questions, feel free to ask, I would be happy to help!

One last note. In order to hang this, I did add a nice thick twine rope to the back with the proper bracket. It sold before I could photograph that part.

Want more details about this and other DIY projects? Check out my blog post!
Comments
Join the conversation
2 comments
-
That is brilliant!
-
Cute idea!


Frequently asked questions
Have a question about this project?