


Not Your Average Barn Wood Table - It's a BARBLE!
$20
Advanced
I had a vision in my head that I needed to transfer to the heads of the handy men in my life (Hubby and Dad). It was not easy. At least for the electrical engineer!! It included tearing down half a wall in the kitchen to make a breakfast bar/kitchen table on. We really weren't sure what to call this new "eating spot" so the name "BARBLE" (bar/table) was born and has stuck. The journey starts here, in a dilapidated back corner of our huge barn....
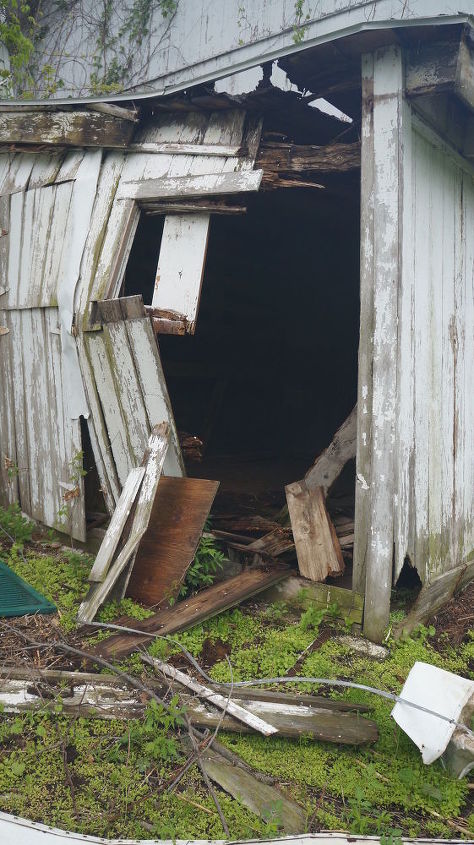
I'm thankful I have lots of buildings on our property - and even thankful that there are a few spots they are not in great shape because then I don't feel guilty about stealing old boards from them!
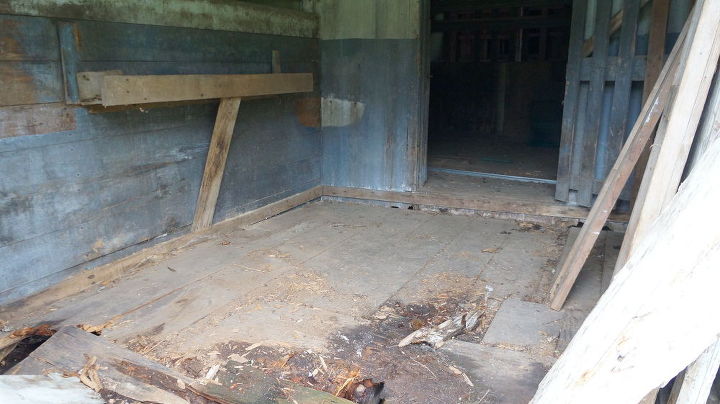
Here's a peek inside. We took up some floor boards from in here, and a few from a an old work bench, and some more from here and there around the property. Yes, there had at one time been animals pooping on that floor and yes, it is now what we eat off as you'll see in a bit! Just don't lick the table when you spill. Kidding! :)
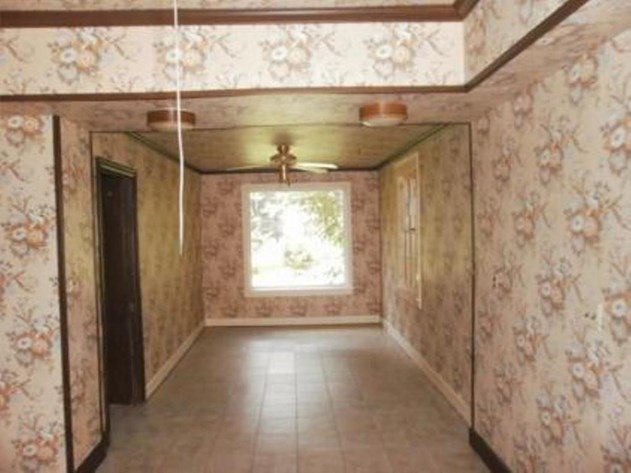
Let's switch over now to the house, where this magnificent "barble" is going to be located. This was the eat-in area last year, when we bought the house. Yes, that's even wallpaper you see on the ceiling! And not just one layer, either!
We made it livable.... but I still felt like I was eating in a corner and couldn't see out to the front of the house. So if you look at the wall on the left in the picture above... it is about to become one big dusty mess.
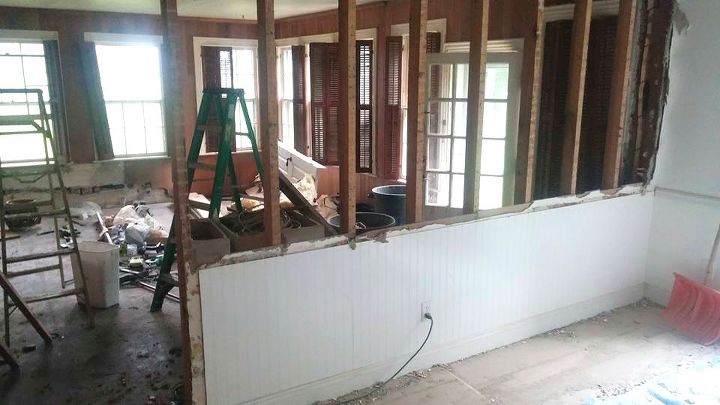
We took the wall down between the eating area and the sunroom. But only halfway! I wanted the bottom half of the wall to be the base for my table/bar/peninsula - BARBLE!
With all the century old manure and dirt scraped, sanded, and planed off... my Dad used wood glue and heavy duty screws to put the barble top together. Then rummaging around in the barn, used scrap piecies of wood cut to secure it on to the bottom half of the wall.
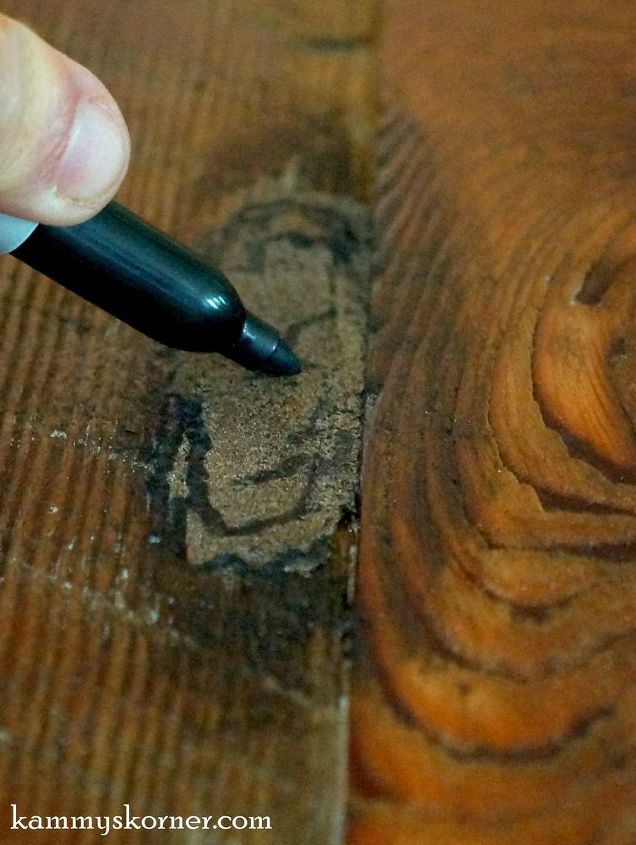
So since these are hundred-something year old boards, they had spots that needed some wood filler so when my kids dump their bowl of cereal it wouldn't be a nightmare to clean up. We filled all the holes and cracks with stainable wood filler (make SURE it's stainable!!) and then using a sharpie marker, drew lines on it to mimic natural wood grain and knots and then stained over it. The whole table top got about seven coats of polyurethane, sanding lightly between each coat.
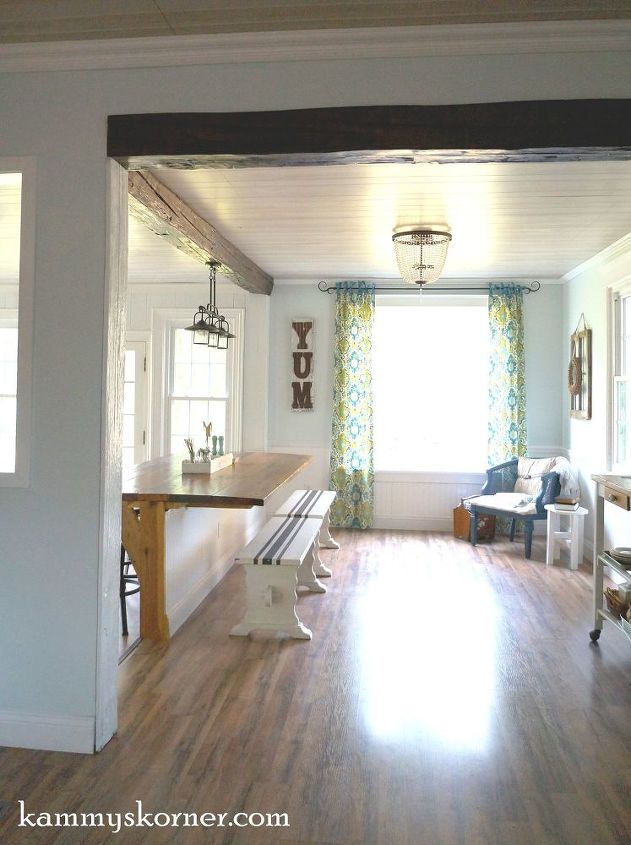
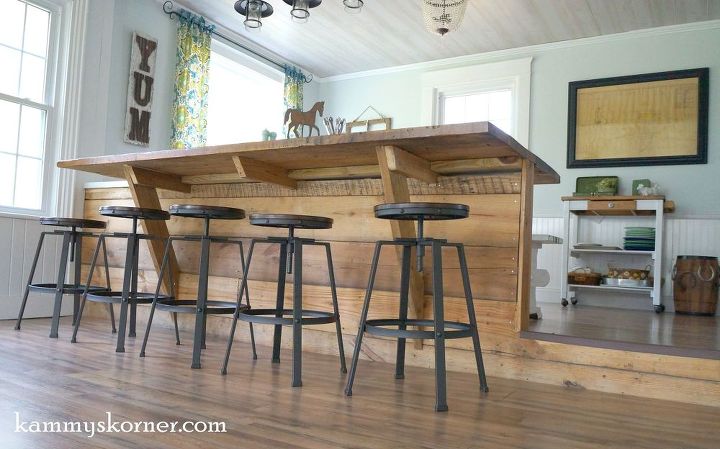
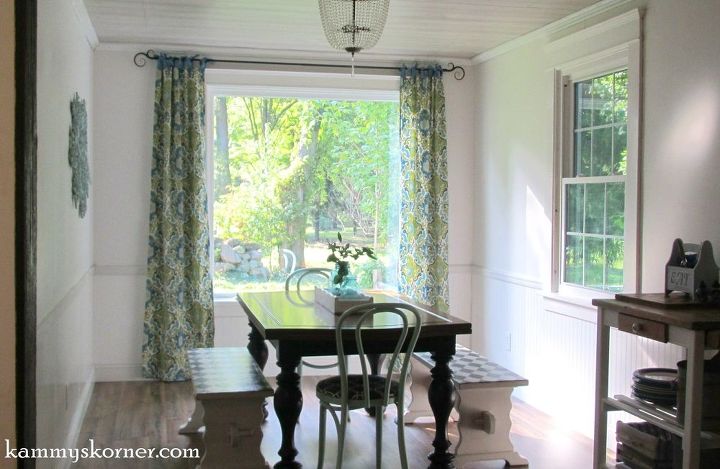
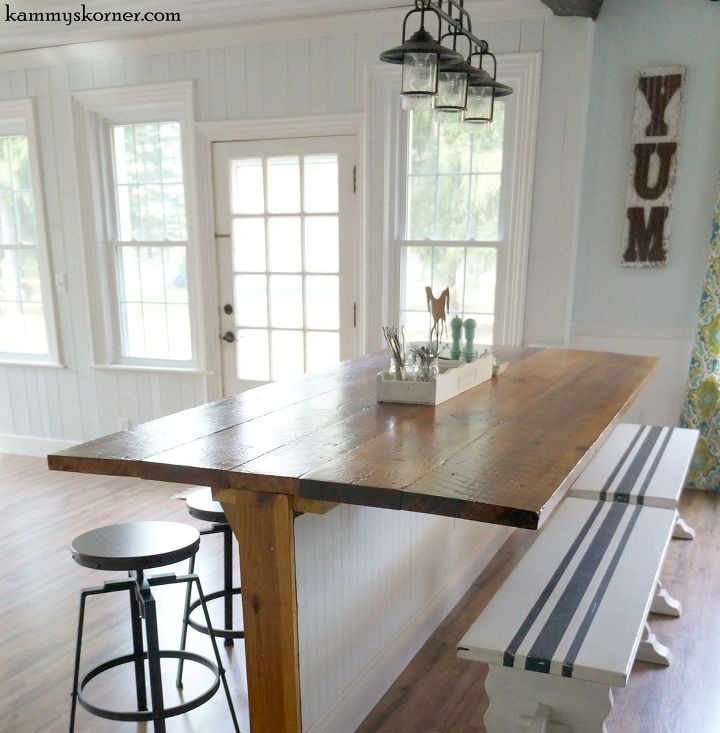
The ship lap looking boards on this side were the original wall, so we just left those "as is". I will probably eventually polyurethane those too. Since the sunroom is sunken, this side of the "barble" is bar height so we bought adjustable bar stools. Five fit easily on this side and another can be added when we have extra guests.
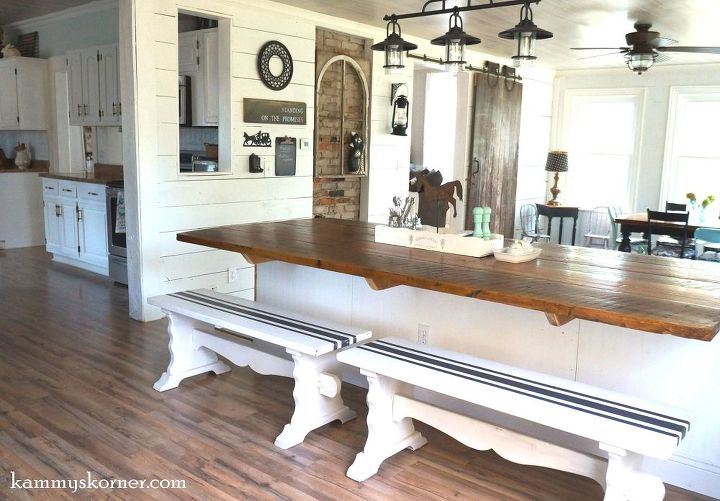
For now, I have kept my two long benches on the regular kitchen chair height side. Benches are great for squeezing in lots of kids! All the sunlight is wonderful and I love being able to see all the way out to the road when we are eating! Yay for natural light!! And even more "YAY" that we didn't spend hardly any money on this "Barble"!! I think the only thing we had to buy was the polyurethane!

Want more details about this and other DIY projects? Check out my blog post!
Comments
Join the conversation
2 of 138 comments
-
Wow, the transformation from a wall-papered old house to a new chic dining room is amazing. I have been wanting to renovate my kitchen like this for years. Your table ended up looking awesome as well. I might have to make a "barble" of my own when I redo my kitchen! http://www.intownrenovations.net/about-us
-
Beautiful! Brilliant idea. I love the beam too!


Frequently asked questions
Have a question about this project?