


Creative Way to Present a Gift Using A Bag and Tissue
With Halloween just a day away and the holidays approaching there will be many opportunities for goodies and gift giving. Today I have a tutorial that will show you a creative way to present a gift. It's a twist on using a gift bag and tissue.
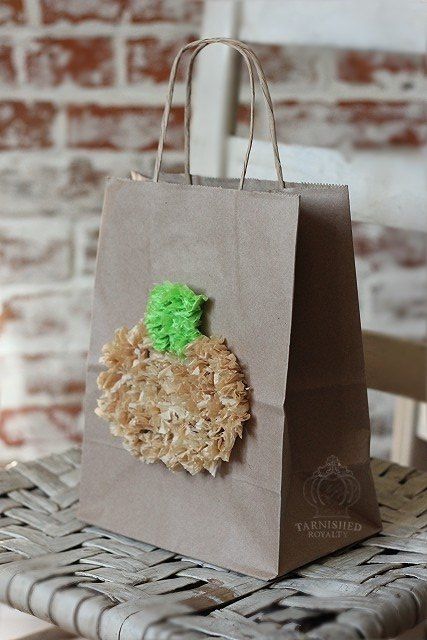
I chose plain brown paper bags but you could use any solid color. My love for baby boo pumpkins inspired me to use tissue in an aged beige color. The pumpkin would be very cute in orange too.
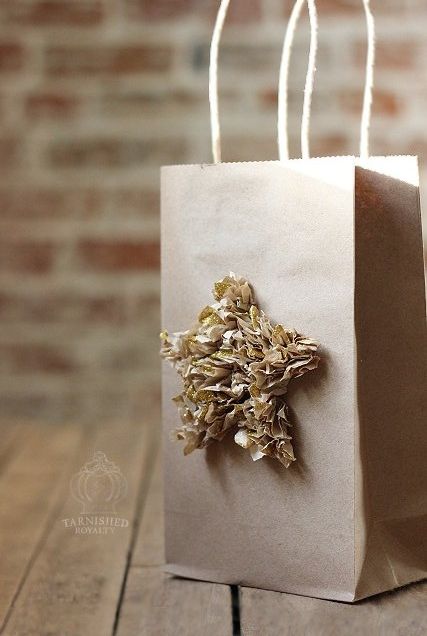
For the star I used a smaller bag. My plan was to use a matte gold tissue paper but the store I went to didn't have it. They did have this beige and gold glitter paper so I decided to give it a try.
Now for the very simple instructions and supply list.
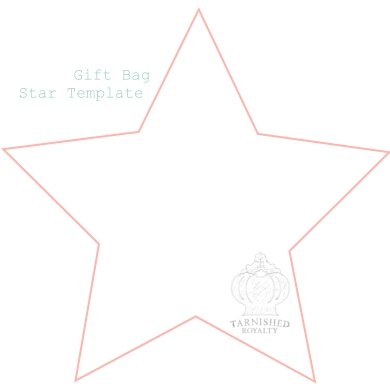
Right click to save the above template to your computer and print it in the desired size.
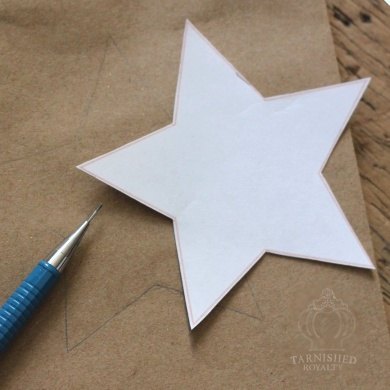
Trace around the star onto the bag.
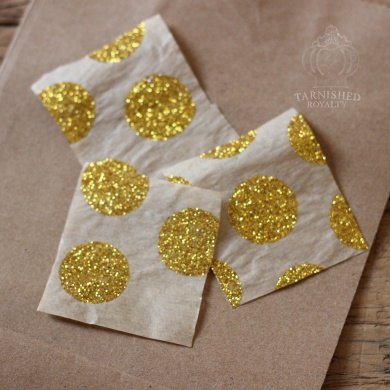
Cut tissue paper into 1 1/2 inch squares. You will need 35-50 depending on the size of your bag, etc.
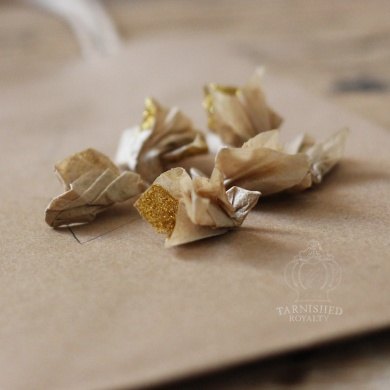
Crumple each square up into a ball and then open back up enough to pinch from the middle and create a sort of pointed blossom.
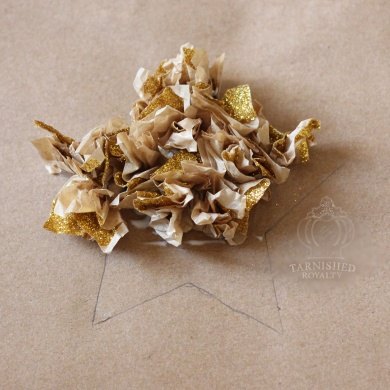
Begin gluing "blossoms" in the center of the star, dotting the pointed end with glue and pressing onto bag.
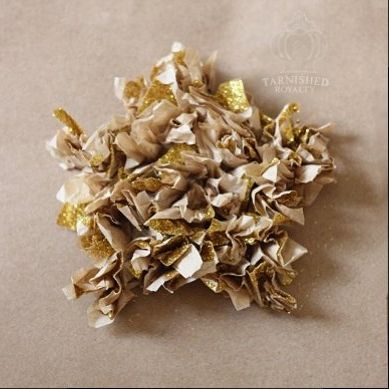
It won't have defined edges during this part of the process but keep the bottom (glued portion) of each blossom within and against the pencil border.
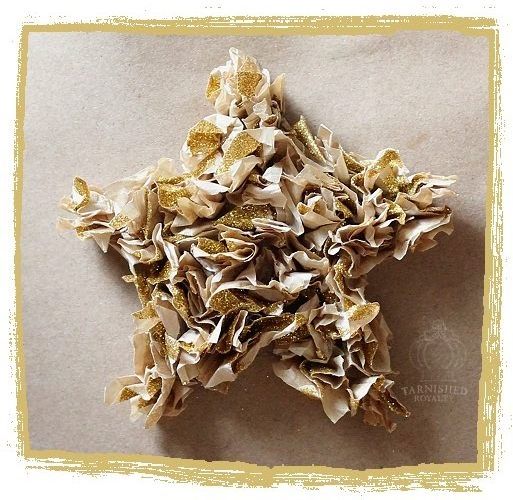
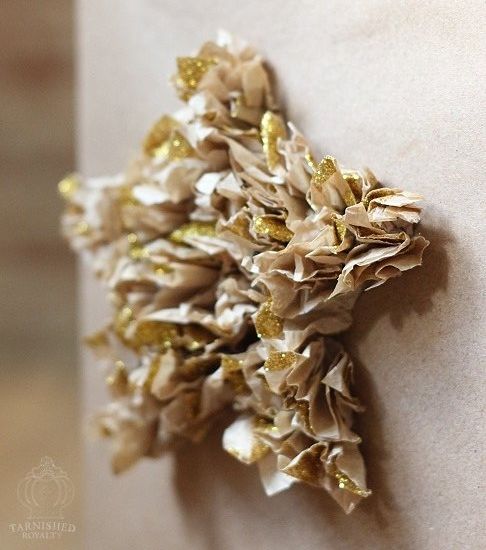
Once the glue has dried, define the star shape by pinching, pressing and scrunching the outer edges.
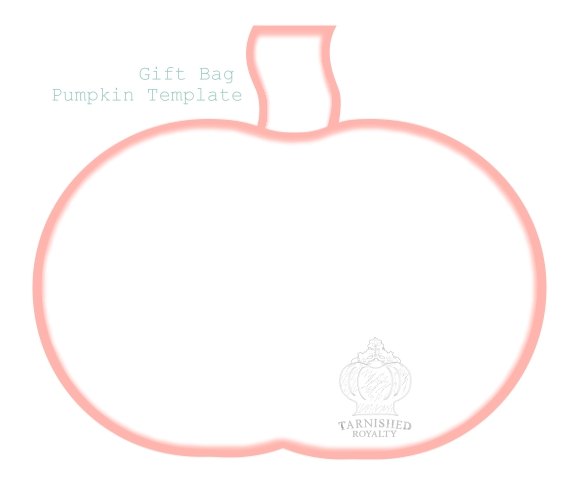
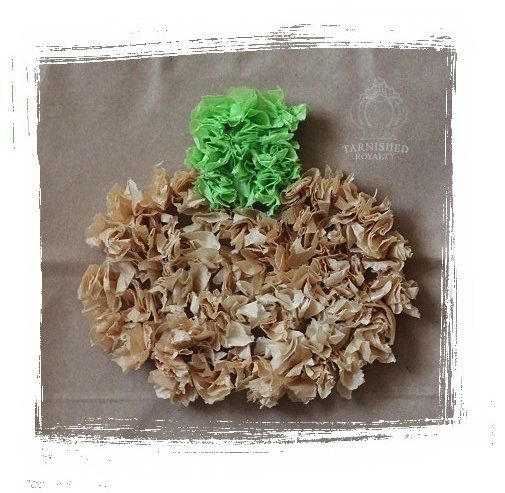
Here's the template I used to create the pumpkin bag.

Want more details about this and other DIY projects? Check out my blog post!
Comments
Join the conversation
2 of 11 comments
-
Such a neat idea ! Thanks for sharing .
-
Cute idea.


Frequently asked questions
Have a question about this project?