


Copycat Custom Cedar Headboard
2 Materials
$45.00
4 Hours
Medium
The last bedroom make-over for my niece was when she turned thirteen, this time around I had fun creating a headboard out of cedar fence planks.

So I visited my sister and niece last week and was put to work on designing my nieces new grown-up bedroom. It’s a privilege that she trusts me so much to get it done, and it isn’t the first time I’ve flown in to give her a new bedroom design. The last bedroom make-over was when she turned thirteen, and that included her bedroom and bath. It was a lot of fun, and also a lot of work! This time around I think I got off easy, just some painting and creating a headboard out of cedar fence planks. She already had an idea of her color pallet, and headboard design, so it was just up to me to pull it together. In the spring she’d visited a model home with her mom and fell in love with an aged wooden headboard. She texted me a picture and asked if I could make it happen, of course I said yes, but we’d have to work out the details with her mom. Here’s what we started with, a lovely tan-ish color on the walls, which I will point out would have worked just great with her new design, but an overly girly bed that screamed I’m still a teenager. Oh right, ignore the luggage on the bed, I had to put it someplace while I painted.
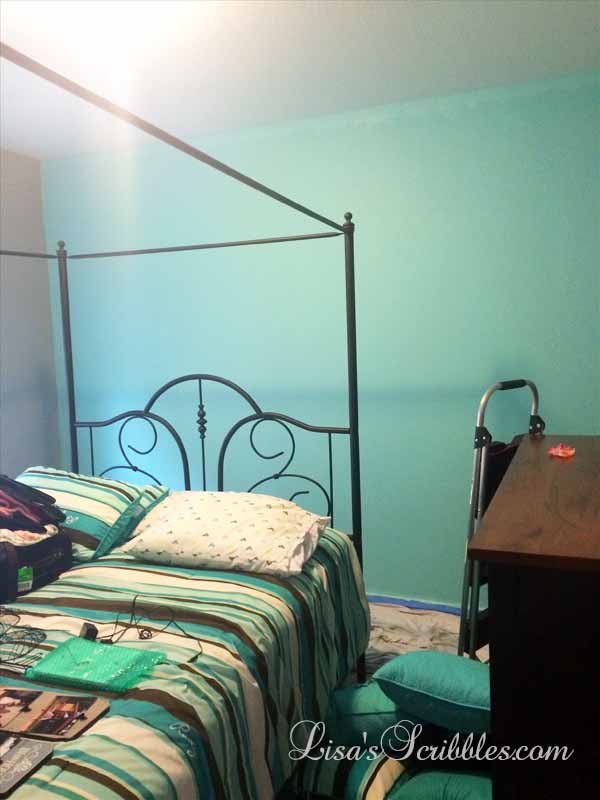
I’m loving the bright turquoise blue.
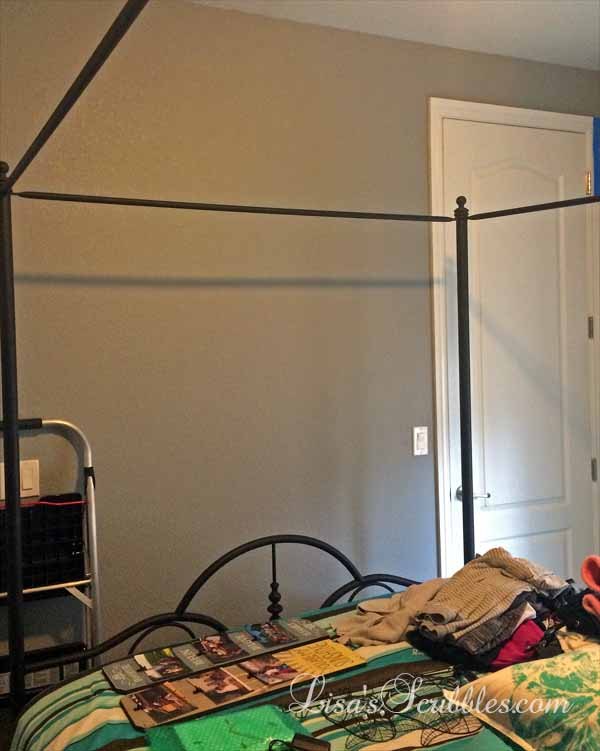
Since we had an accent wall, she went with a lovely grey on the other three.
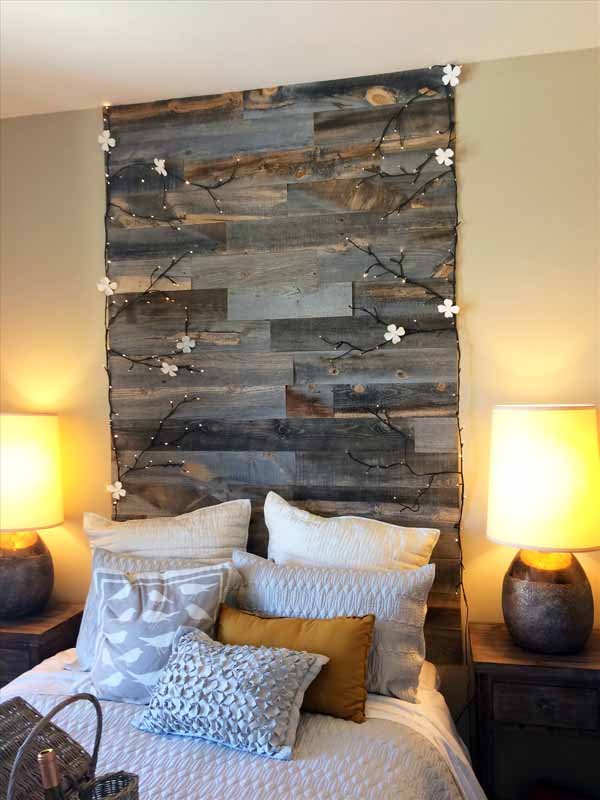
And here is the lovely model home headboard that my niece fell in love with and had to have, and wanted me to design it for her. Pretty, isn’t it? Well I’m not gonna lie, I had my work cut out for me in getting her this design. After taking a closer look at things, I only had a couple options. You see they used a quarter inch plywood, cut into strips, and then attached it to the walls. Easy…or at least it should have been.
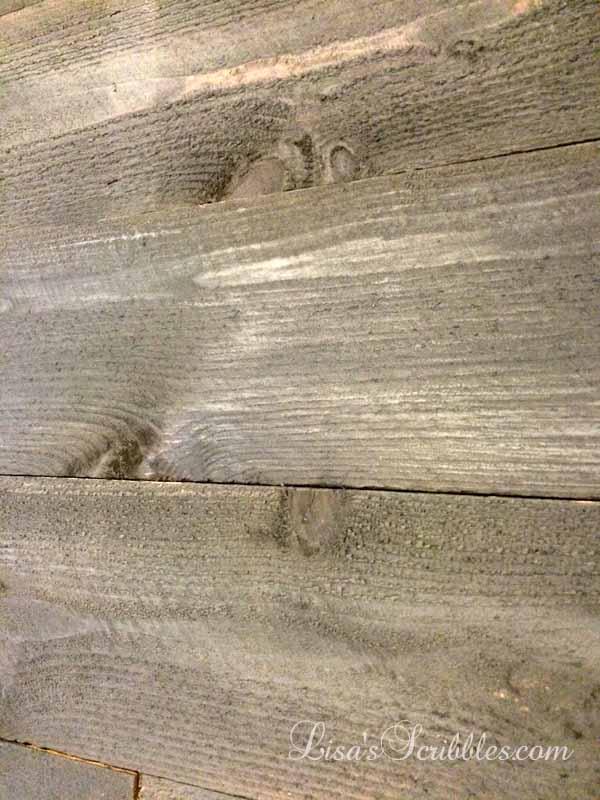
I ran into a few issues. First, and foremost, we purchased some sample wood pieces to see which would give me the best effect, and not be too spendy. We purchased a cedar fence plank, and a quarter inch thick sheet of plywood. I stained both and quickly found out the plywood just didn’t take the stain like the cedar did, it also didn’t look distressed and worn like the sample headboard my niece wanted. The cedar fence picket, however, turned out better than I imagined.
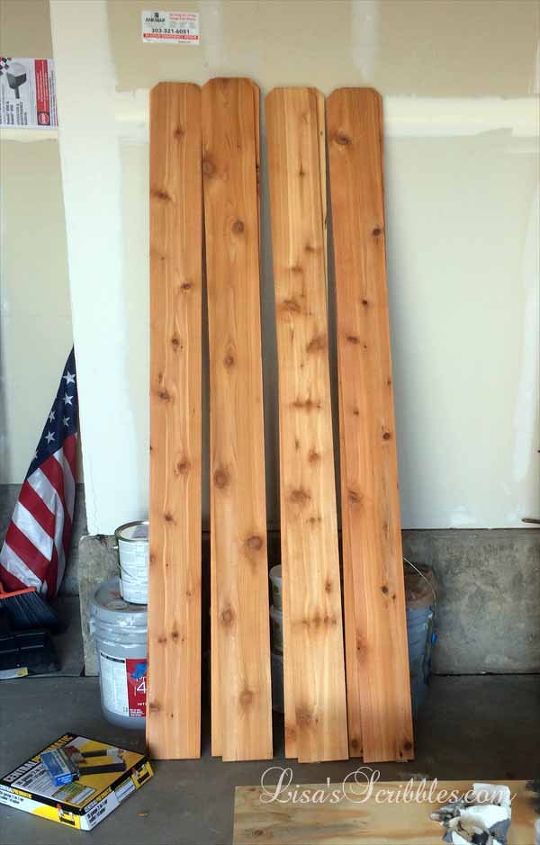
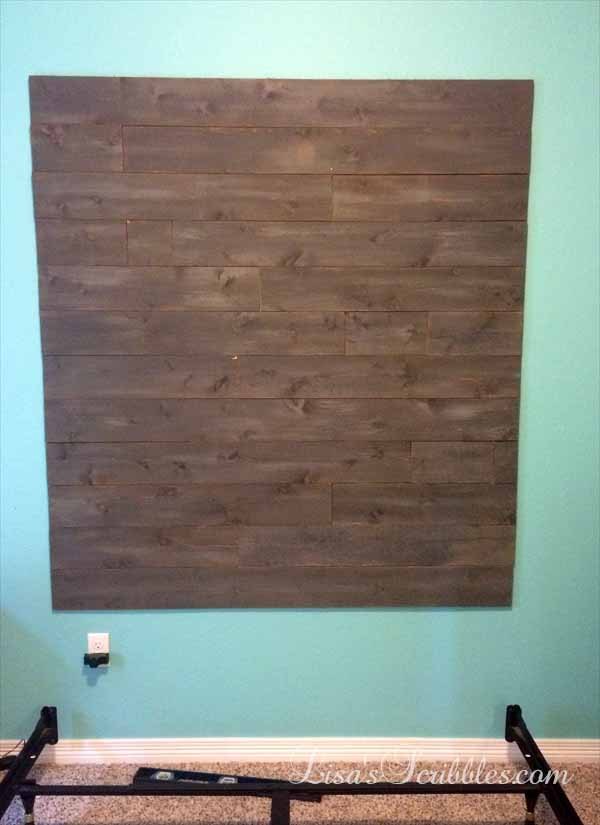
We purchased eleven pickets to get me a 5′ x 5′ headboard using 6′ pickets. I didn’t chose the smoothest cut pickets, I just made sure they were straight and not to saturated with water. I then cut off the dog-eared tops and took out a can of grey stain.
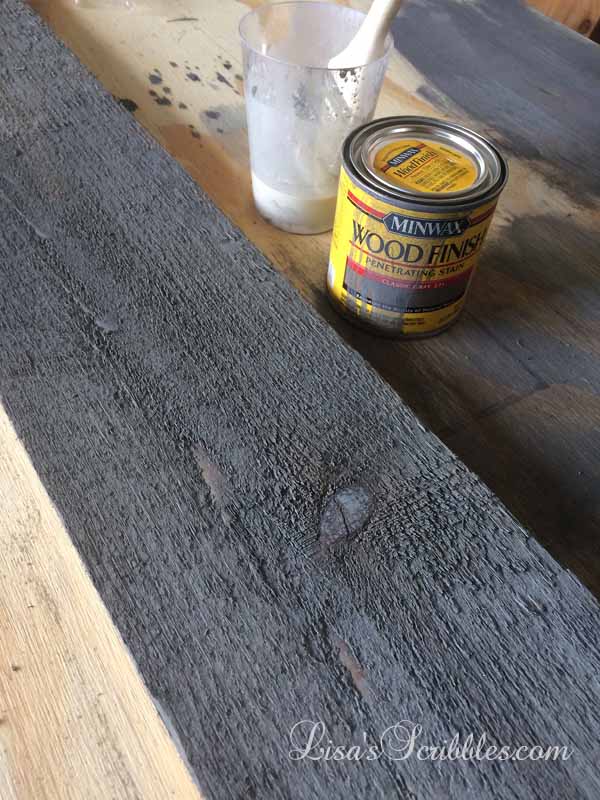
Already you can see that the cedar soaked up the stain leaving me with a lovely dark grey finish. Some might say it was good enough, but I wasn’t done yet. My niece wanted it to look aged, and since I couldn’t convince her to go pluck some random pickets off neighborhood fences, I had to come up with another step.
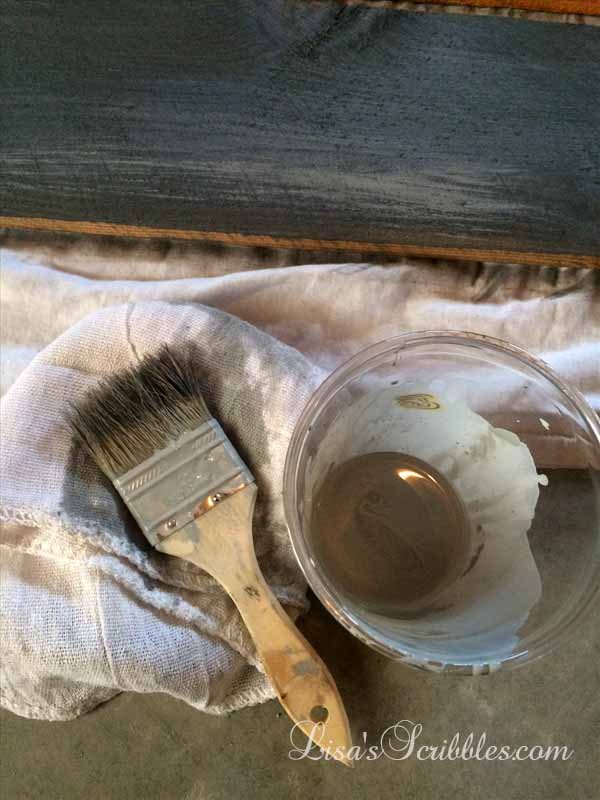
It’s called white-washing. It’s simple, you mix paint, in this case it was the leftover gray paint from her walls, and some water. I then used a chippy brush, because the rough surface of the cedar would have destroyed my Purdy brush, and dipped it into the watery mixture and slightly dabbed it off on a rag before dragging it across the cedar picket. If the strip of watered down paint was too much, I brushed it out or used my rag to tone it down.
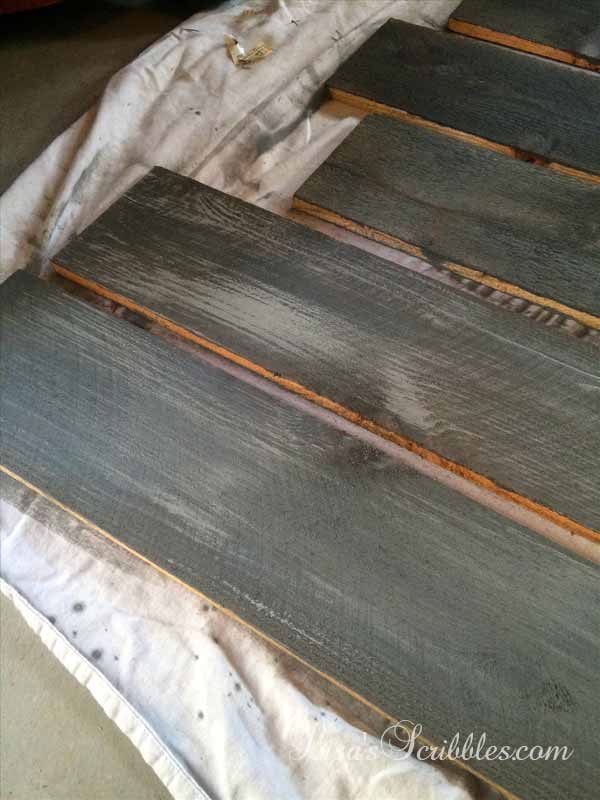
Looks like aged wood, right?

Next came the fun part, attaching it to the wall. My first step was to find the middle of the wall since I’d be attaching it directly to the drywall, and then used one cedar picket cut down to 5′. I leveled it off and used the pneumatic nailer to secure it to the wall. From there I laid out my remaining pieces making random cuts and pieced it together like a puzzle.
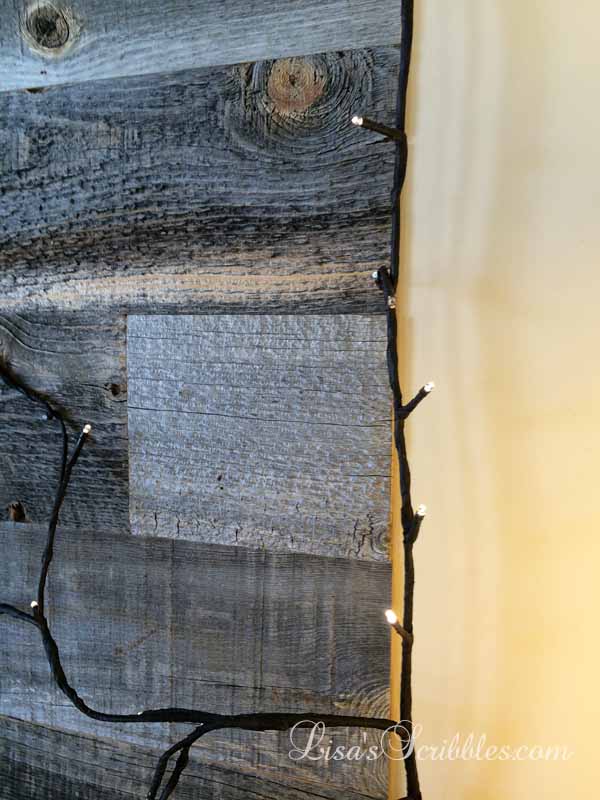
After it was done, I then added black upholstery tacks to give it that old world styling she wanted. You know, nails showing, flaws exposed. It was supposed to look old, worn and rustic, so that’s what I did.
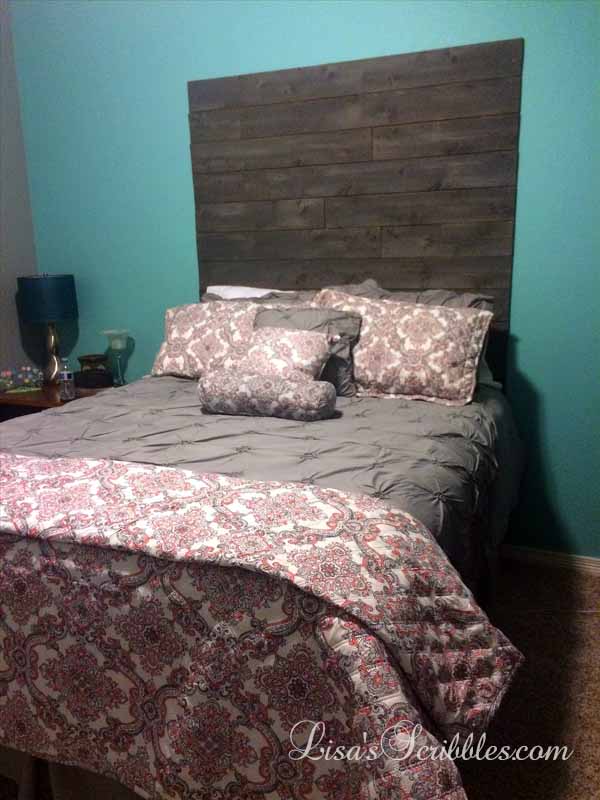
I think it turned out great, and since my niece thinks so too! I call this a successful project!

Now she’s just waiting on me to make her the vine lights for her headboard…hold on Jess, they’re on their way soon! And don’t worry, I’ll share the post on how I created them and update you on the finished room afterwards.

Want more details about this and other DIY projects? Check out my blog post!
Comments
Join the conversation
2 of 41 comments
-
This is what my son wants us to do in his room. Thank you for posting!!
-
Love this, I'm wanting to make out of old wooden pallets just haven't got staered yet!!


Frequently asked questions
Have a question about this project?
I have a garage wall I covered with cedar fence planks. I've tested a few gray stains, but they cover too thick and don't let the wood character and knots show through....which gray minwax stain did you use? Brush it on?