


DIY Wallpaper Hanging Tips
2 Materials
$75
3 Hours
Medium
All of our closets have been pretty much a disaster since we moved in and so I wanted to do a few things in tackling this closet:
1 // Make it functional. We need smarter storage in here. Baskets, shelves, etc, with a dedicated spot for everything. Right now, random stuff is just shoved into drawers and stuck up on the top shelf with no order.
2 // Make it pretty. I LOVE a gorgeous closet, I really do. I haven't ever had the opportunity to actually decorate the inside of one, so I want to have fun with this guy. I want Maya to love it, and have it be something that will grow with her.
3 // Test out my wallpapering skills.
Here is our closet makeover, along with some tips I learned as a beginner when DIYing wallpaper!
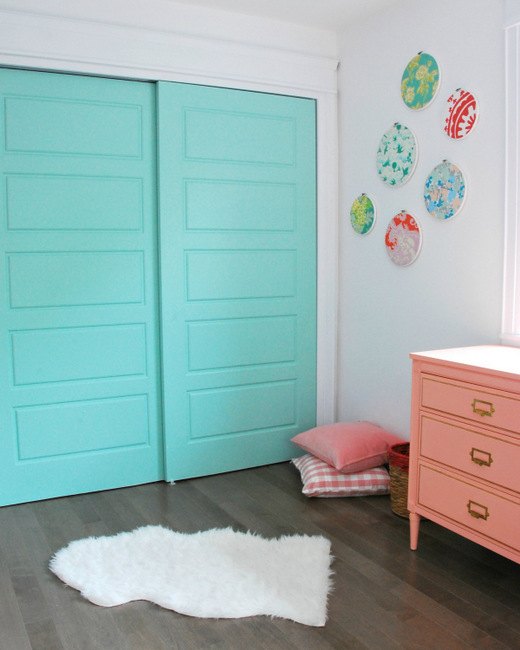
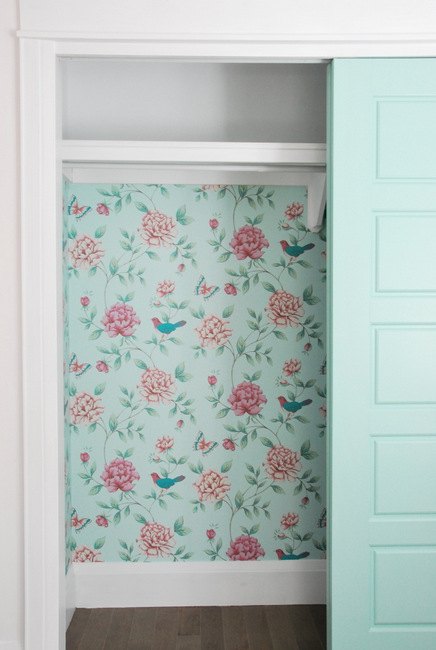
The outside was beautiful! But the inside was a whole different story.
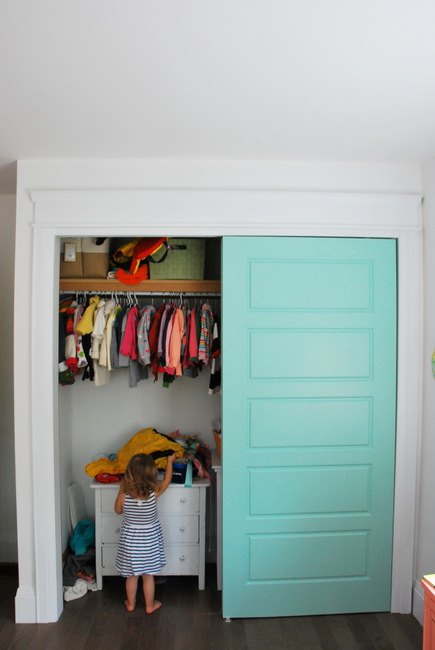
First step was to take everything out (you really don't want to see the state of our guest bedroom right now... it's straight out of an episode of hoarders!).

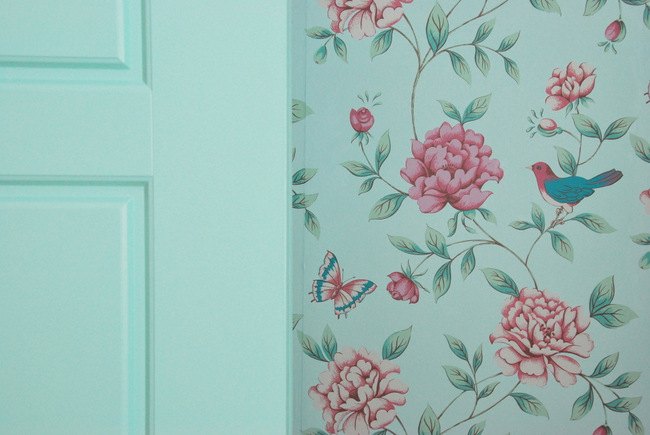
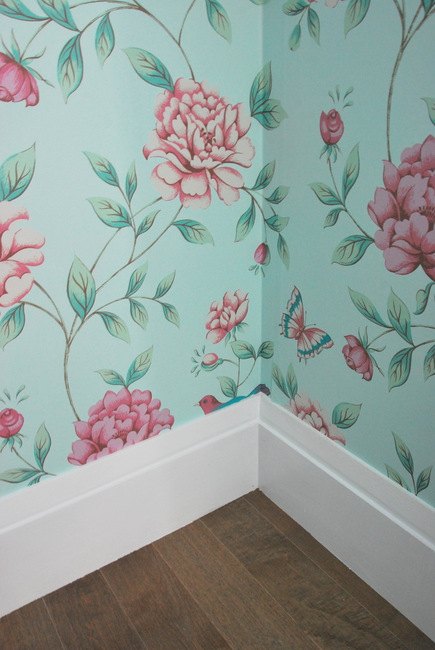
Once that was done, we gave the shelf and baseboard a coat of PARA paint's Whitewash White (the door & trim paint line). All of a sudden the closet already started to feel so much more fresh. Next up was the wallpaper. I chose the 'Isabelle Blue' paper after using it for the Latt table. It really is such a beautiful pattern, and the colours went beautifully with the mint accents in Maya's room.
My adventure in wallpapering actually went pretty well, all things considered. Here were the things I learned about wallpapering along the way:
// Start with a perfect line: The first step is REALLY important. You want to draw a vertical pencil line on the wall surface at your chosen starting point. You are going to line up your first sheet of paper along this line and all the rest will follow it, so if it isn't level, then everything is going to be off and potentially look crooked. Check that your line is perfectly level a few times before you get started. My first piece overlapped a corner (you always want to do that in corners, rather than having a seam there). It looks a little crooked in this photo for some reason, but it was actually a fairly good plumb line.
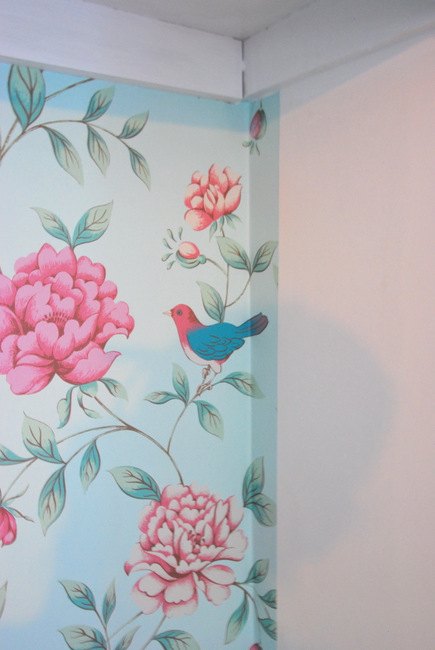
// Seams are important, and work with a partner: The seams of side-by-side strips of paper should butt against one another, not overlap. Particularly if you have any kind of pattern in the paper that has to match, you don't want to have overlap as the pattern will look off. You also don't want any kind of space between your two strips. Getting things lined up perfectly is what I struggled most with. If you can wallpaper with someone else, then I think that would make it a lot easier (one person holds the paper up top, while the other carefully lines it up down the seam). That was a lesson learned for me. Doing it on my own = not the best idea.
// Dealing with bubbles: Yes, the dreaded bubbles! Well, you'll need to click through to the full post to see my handy trick, as well as the final steps!

Want more details about this and other DIY projects? Check out my blog post!
Comments
Join the conversation
2 comments
-
I think it turned out gorgeously!! Great job, and very brave! The thought of wallpaper sends me into a panic, lol, but it's so pretty (= Blessings and I am sure she will appreciate the wallpaper you did for years!
-
Great tips- and Im just so in love with that print! <3


Frequently asked questions
Have a question about this project?