


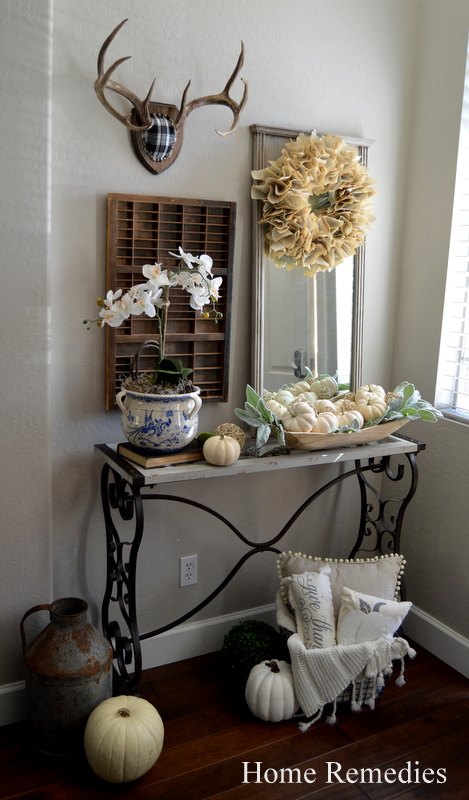
Fabric Covered Antler Mount

Antlers are a fairly hot trend right now but finding a way to incorporate them into your existing decor can be rather tricky. To avoid the "hunting lodge" look, and help my antlers blend in better with the rest of my decor, I decided to mount them onto a piece of stained craft-store wood, and use fabric to add a pop of interest to an otherwise plain-jane piece. Craft
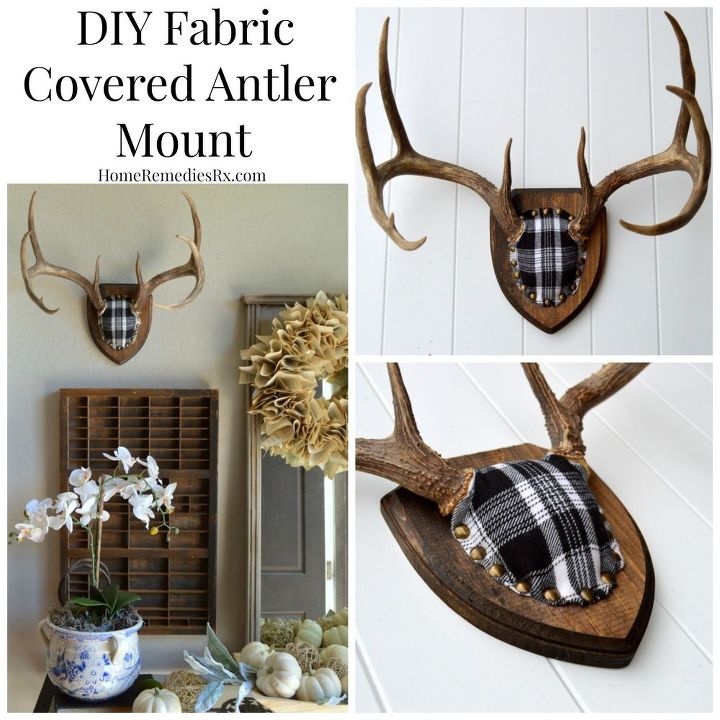
Keep in mind that these are not fancy, expensive trophy pieces, so inexpensive materials work fine for this particular project. Here's what you'll need to make your own:
Supplies
Antlers
Piece of unfinished wood to mount antlers onto (I found mine at Joanne's)
Wood stain in your choice of color (I used Rustoleum's Dark Walnut)
Pillow stuffing (you only need a small bit)
1/4 yard fabric in your choice of color/pattern (you'll have lots left)
Plain white copy paper
Marker
Scissors
Hammer
Upholstery tacks
Picture hanger
A couple of long screws to mount your antlers to your board

Directions:
1. Gather your supplies
2. Stain your wood piece and allow to dry. Once dry, install picture mounting hardware
3. Screw your antlers to the wood piece using 2 inch wood screws (my antlers already had holes screwed through the skull part, so I just used those holes but if your's doesn't have holes already, pre-drill first, then install using screws).
4. Make a template for your fabric using copy paper and a marker. I made mine roughly 1 inch smaller in diameter than my wood piece. I made sure to add 1/4 to the desired finished size so that I could fold my fabric under (see pic) so the unfinished hem wouldn't show. I also wanted to make sure the fabric covered the skull part completely and there was still enough fabric to nail to the wood piece. I realize that your antlers will be sized and shaped slightly different than mine, so you may have to play around a bit until you find what will work for you (it took me two tries to get this right)! Trace the template onto the fabric.
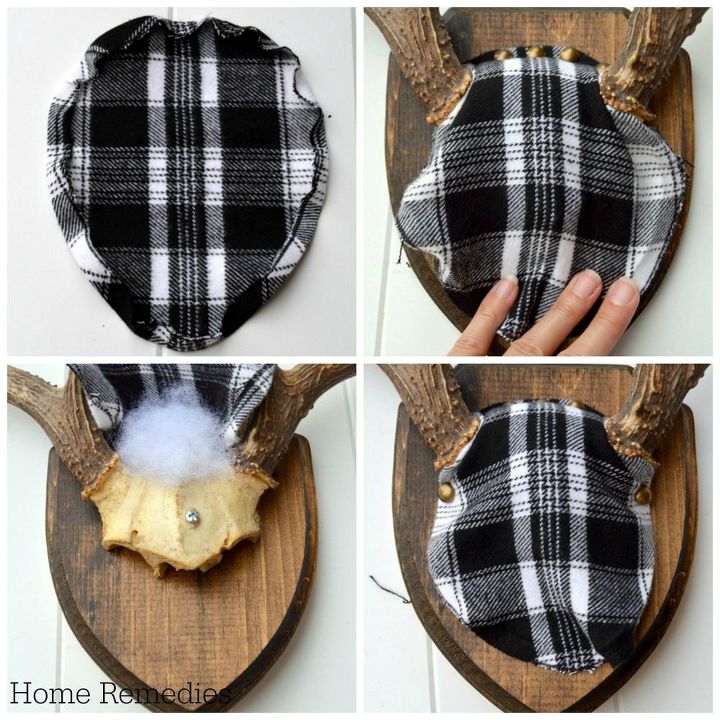
5. Fold the edges of your fabric under 1/4, and press with an iron to keep folds in place.
6. Lay the fabric on top of your antler and "rough fit" it around your antlers. Now use a few upholstery tacks and secure fabric in place at the top. Make sure you space your tacks evenly.
7. Lift up your fabric and add a little bit of pillow stuffing, then replace fabric. You'll have to play around with the stuffing to find the amount that adds padding, but doesn't stretch the fabric too much.
8. Begin tacking the rest of the fabric down. Tip: Only hammer the tacks in 1/2 way, in case you need to make adjustments. It's much easier to pull the tacks out this way. We'll hammer everything in at the end. Make sure that you do one tack on each side, then move down a space and repeat. This will help keep the fabric even and the tacks evenly spaced (see pic).
Add stuffing as you work your way to the bottom. Once you place that final tack and are happy with the over-all look and placement of the tacks, go ahead and hammer the tacks all the way in.
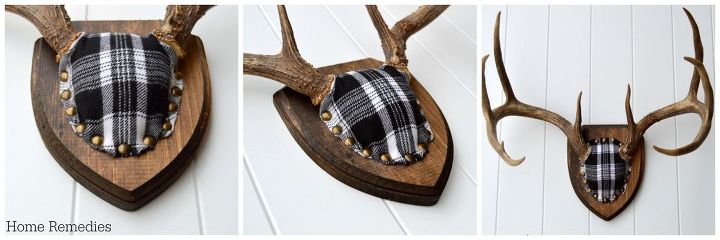
That's it! Your antlers are ready to hang!
I can't even begin to tell you how much I love these antlers now! And the great thing is, if I ever tire of the fabric, I can easily change it out.
What do you think of my fabric covered antler mount? Is this something you would ever try? I'd love to hear your thoughts about this project!
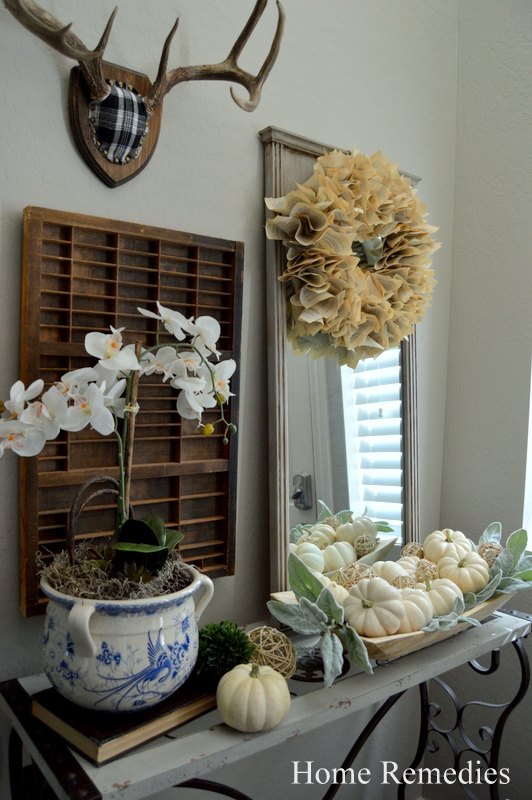
If you enjoyed this quick and easy DIY project, stop by my blog for more fun home decor post!
DIY home decor using fabric
Comments
Join the conversation
-
I have a barrel full of antlers and for years this idea is what I have been searching for! Can't wait to do it! Thanks so much!
-
Antlers make great plant hangers also


Frequently asked questions
Have a question about this project?
Hi there!
I love this! I am wanting to do something similar for my boys room. What is the height/width or the wood plaque? Joann fabrics no longer carries this exact plaque and I would like to find a similar size elsewhere.
thanks!