


Operation Beautify: The Master Bathroom Vanity
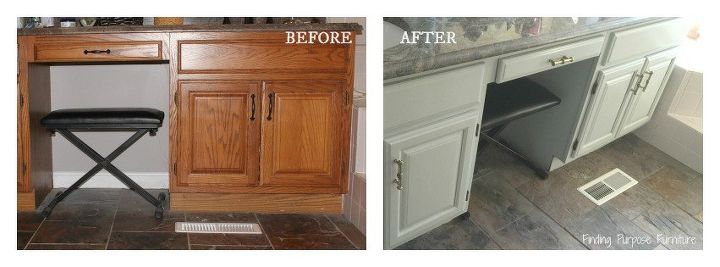
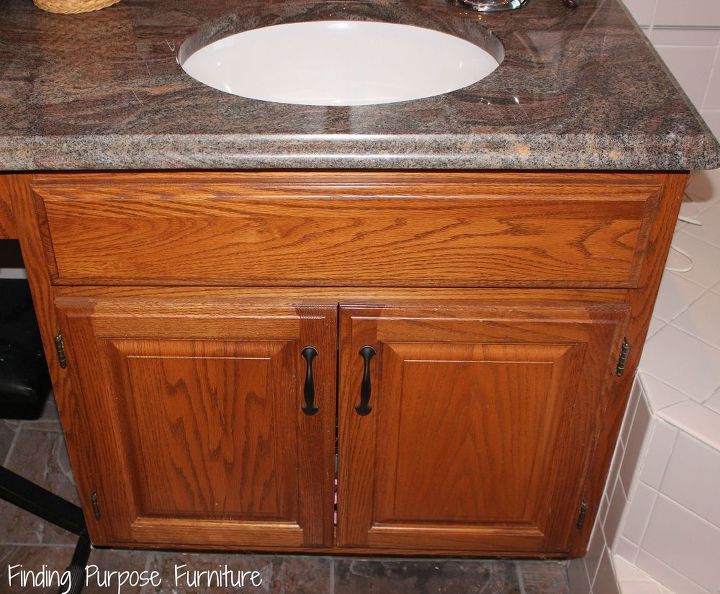
Our master bathroom was one area that I had no idea how to tackle. Here's the situation: it's a DREAM bathroom. It's huge and has every feature that I could ever imagine wanting. I actually often feel spoiled in here, and then feel guilty about not loving the cosmetic features in the room. The best way I know how to put it...this is the ultimate "1980's custom designed" style. I basically thought the countertops (which are granite) were the ugliest things on the planet, and the floors just aren't my style (I feel like they always look dirty).
I knew that there wasn't money in any budget to redo this bathroom...or even the true need to replace perfectly good floors or counters. One day, I decided that I could pretty the room up with paint...my favorite (cheap and easy) method.
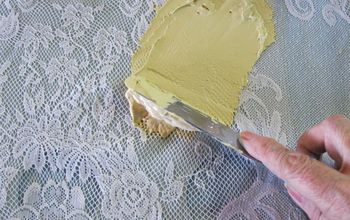
I completed this paint project in 3 evenings after I put the kiddos to bed and the hubby was watching various sports games. On night one, I lightly sanded the surfaces. Sometimes I use my orbital sander, but I opted to do this by hand on this project. I used a finer grit and just sanded enough to scratch the glossy surfaces. Then I cleaned everything well, removed the hardware, and gave it all one coat of my favorite Zinsser Bulls Eye 1-2-3 primer.
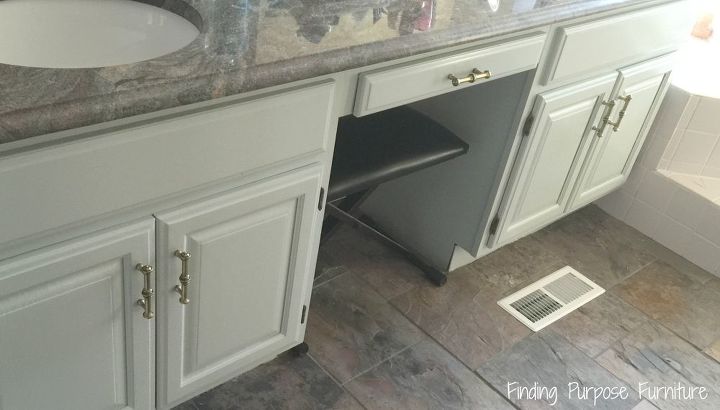
NIGHT AND DAY difference. Something magical happened when I softened the room with this dreamy green/blue/gray paint color...I suddenly didn't mind the floor as much, and I almost liked the countertops!! Isn't it just amazing what paint can do?
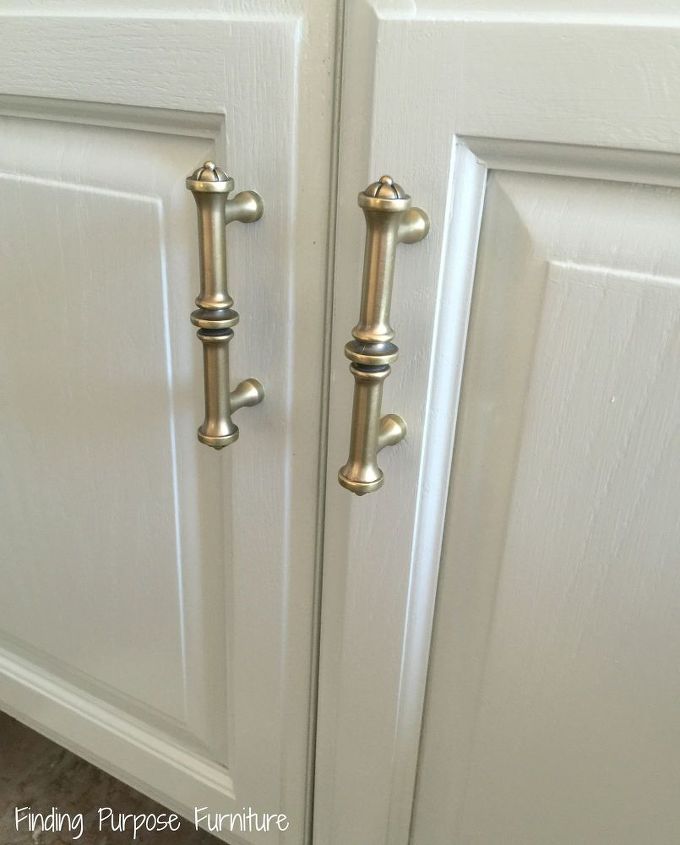
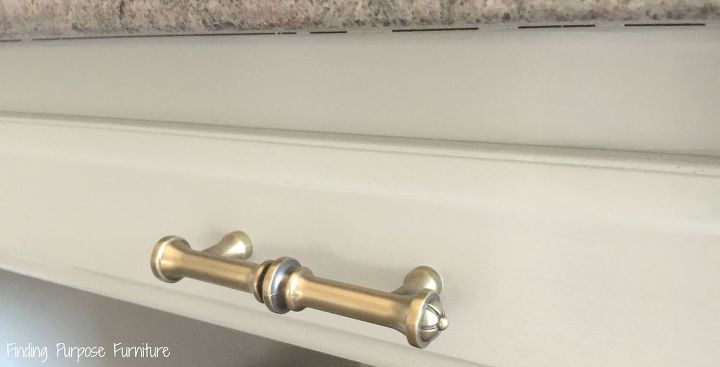
To finish off this fun makeover, I used antique brass pulls from D. Lawless hardware. This family-owned company has some really cool items, and they have started doing something called Free Hardware Fridays. They provided me with enough pulls to complete my bathroom vanity, and I think they are just the perfect finishing touch.
I will be painting the bathroom walls in the near future (they are currently LAVENDER...seriously...I told you it was 1980's in here!!) and can't wait to finish our complete master bathroom redo!

Want more details about this and other DIY projects? Check out my blog post!
Comments
Join the conversation
2 of 58 comments
-
Those cabinets just stuck out like a sore thumb! (I can't believe we used to love those cabinets!) Huge difference, and such a simple way to change the whole feel of the room. Great job!
-
you did an excellent job it looks so pretty really good matching color to the floor


Frequently asked questions
Have a question about this project?