


Holiday Burlap Lighted Garland
Do you want to decorate your home for the holidays, but often struggle with DIY projects you see online? Well, never fear, because today’s holiday burlap lighted garland project is so easy I just know you can do it. Can you use scissors? Can you tie a knot? That’s all it takes!
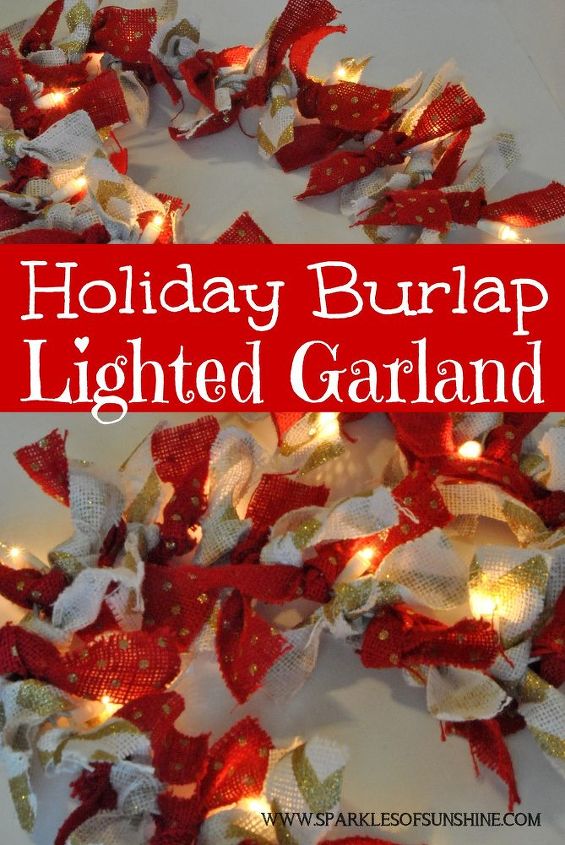
This year I decided to make a lighted garland for my home using everybody’s favorite these days…burlap.
Materials needed for this project:
Scissors
Burlap Ribbon
Strand of Mini Lights
I purchased this beautifully decorated burlap ribbon at my local Walmart. It measured 5.5 in x 10 ft per roll. I used slightly over 1.5 rolls for my short strand of lights. Choose whatever length of lights you want to use, just keep in mind you may need more ribbon.
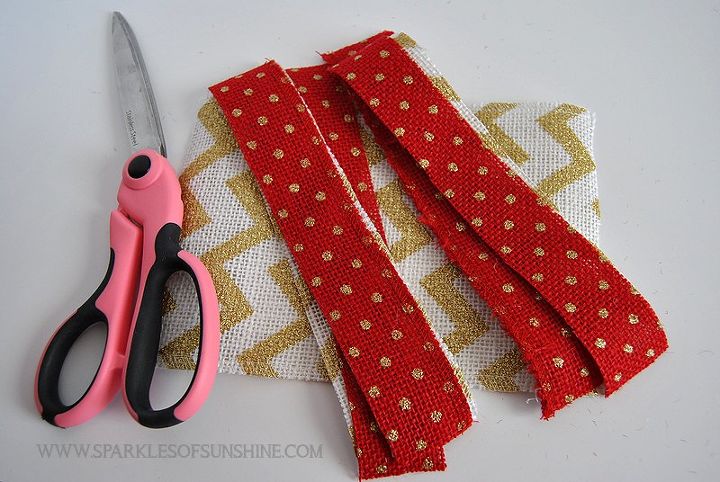
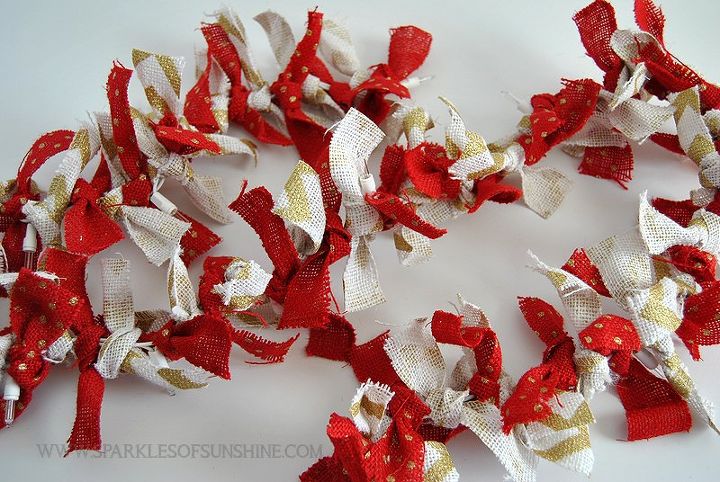
I started out by cutting my ribbon into 8 inch strips. I then cut each 8 inch strip longways into 4 strips of ribbon. I continued doing this until I had enough strips for my strand of lights, which was 76 (38 of each color). I then sat in front of the TV and started tying knots. I tied 4 knots, alternating colors, in between each light. I tied and tied and tied until I was done. Didn’t I tell you it was easy?
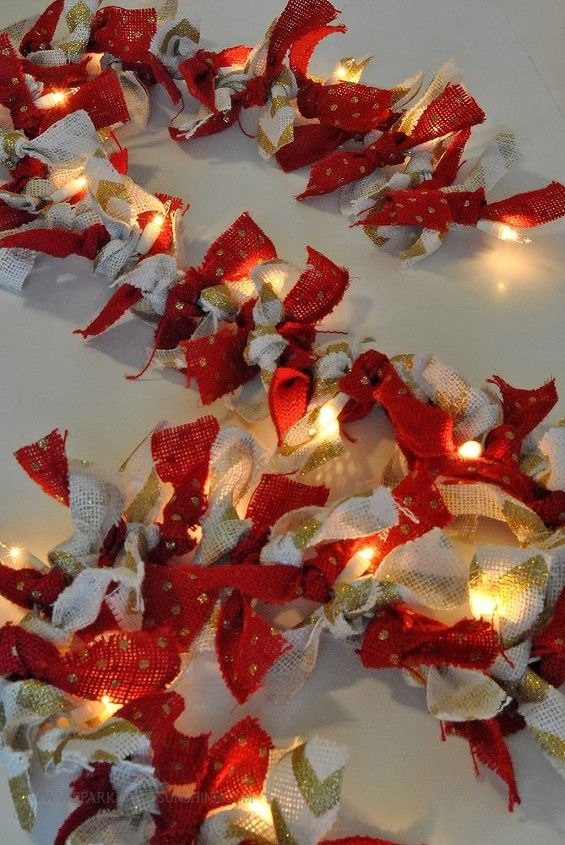
This holiday burlap lighted garland will look perfect hanging over your mantel or over a window during this holiday season. If you’re feeling ambitious, you could make longer strands to hang onto your Christmas tree.
Be sure to stop by Sparkles of Sunshine for more details, and see other fun projects!
DIY Christmas Decorations


Frequently asked questions
Have a question about this project?
Was you ribbon ‘wired’ or just plain?