


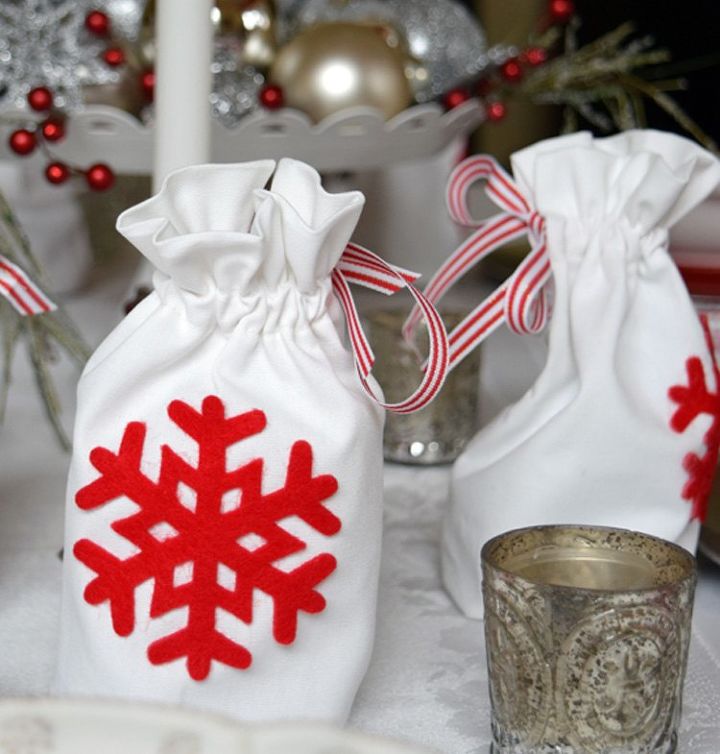
Ornament Gift Bags & Christmas Traditions
I’m not sure when this tradition started, but for many years my mom has placed a small wrapped gift on each of our Christmas Eve dinner plates. Inside each box is an ornament that chose because of its significance to the recipient. The opening of the gifts is a very methodical process, each of us watching as an ornament is unwrapped. The conversation then turns to why this ornament is perfect for the person who just received it. This past year I found the perfect ornaments for each family member. I think my giddiness over these ornaments this year is what prompted me to make these little bags to give them in, but they could also be used for any gift and can be made in any size.
What You Need to Make 6 Ornament Gift Bags with 4″ Base:
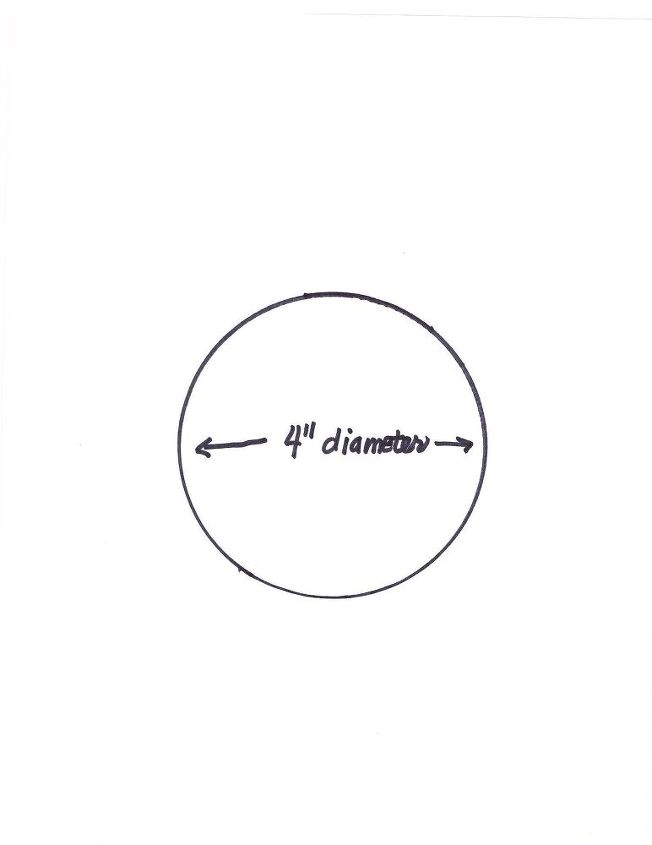
IUsing the following diagram as a guideline, cut your fabric for the sides of your bags. I didn’t have a piece of paper big enough nor a scanner that would accommodate a bigger piece of paper, so I just sketched out what I did on my fabric. But remember, it’s Not to Scale! However, the measurements indicated are the measurements I did use when I cut the material for my bags.

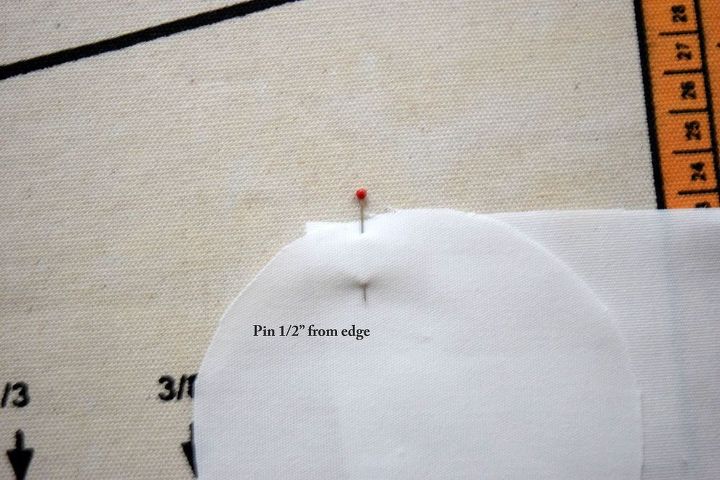
in the bag bottom/base 1/2″ in from the end of the widest end of your bag side.
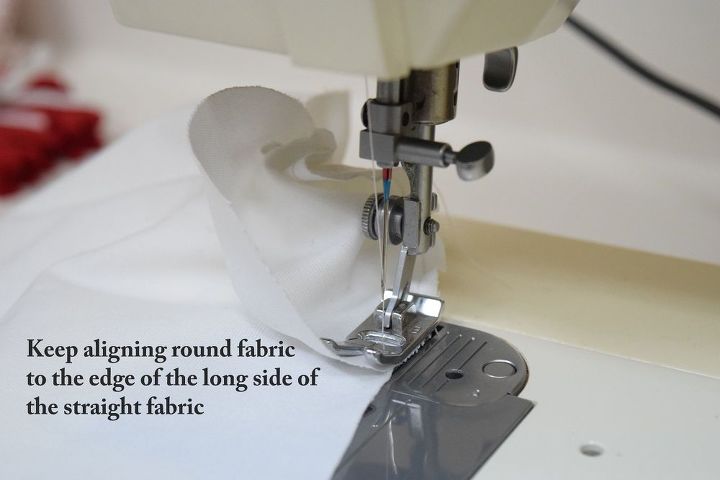
Sew the bottom/base of the bag to the side of the bag. Slowly stitch, moving the bottom circle to align as much as possible with the straight edge of your fabric. Because a picture is worth a thousand words, see the video below to better illustrate what you need to do.
{
"id": "3090627",
"alt": "",
"title": "",
"video_link": "https://www.youtube.com/embed/qeT6443aQ18",
"youtube_video_id": "qeT6443aQ18"
}
{
"width": 634,
"height": 357,
"showRelated": true
}
Starting at the seam that you just sewed which attached the bottom to the sides, mark 5 1/2 inches up from the bottom seam. Sew a seam, starting at seam you just sewed and stopping at mark you just made.

Following side seam, iron down sides of fabric above where your seam stopped. See illustration below. Then turn under and iron 1/4″ on the top, opening, of the bag.
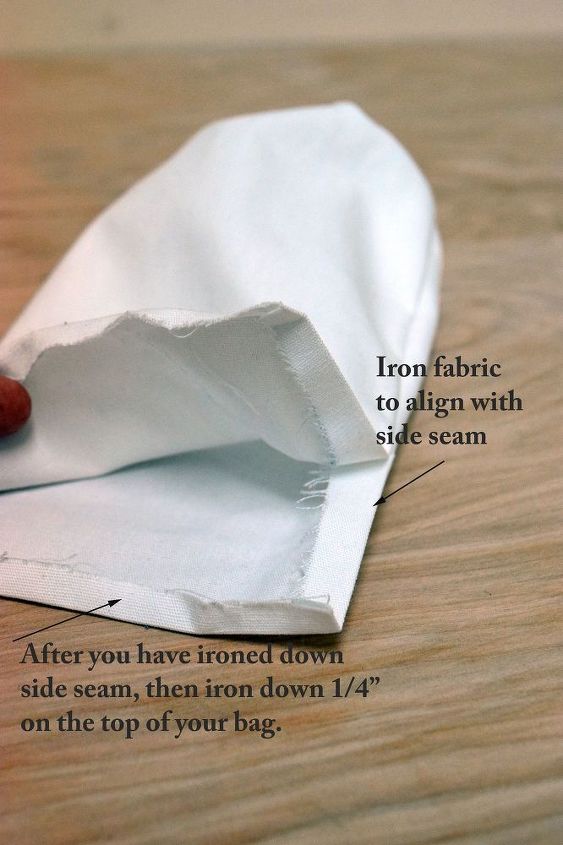
Fold top of bag in half, having the folded 1/4″ you just ironed meet with the seam you just sewed up the side.
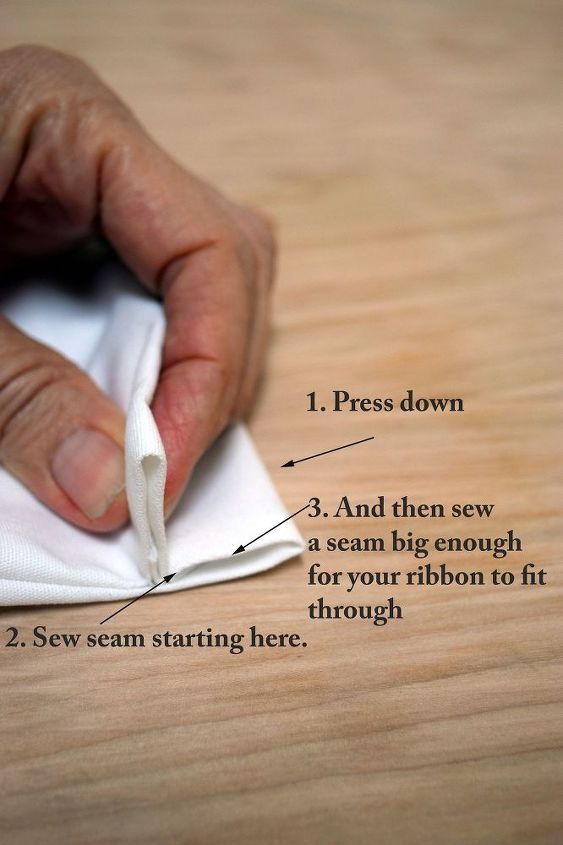
Sew a seam, as shown in picture above.
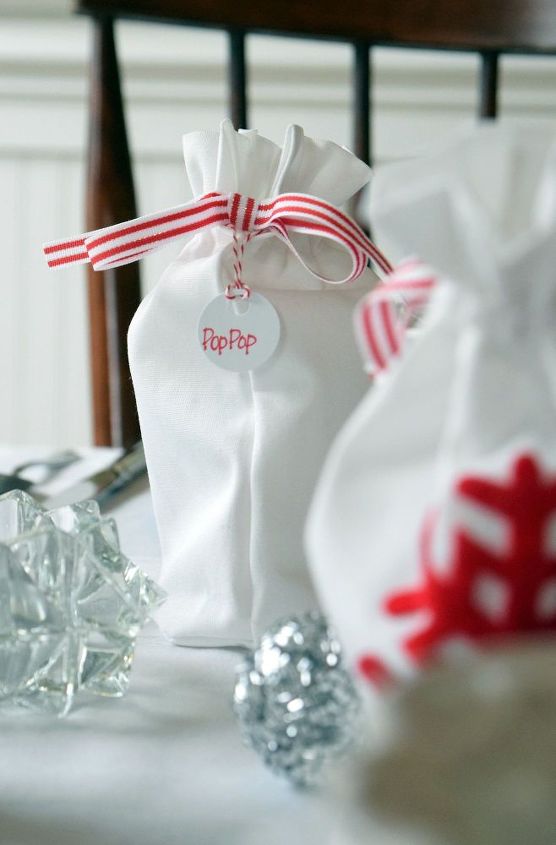
I love that when my children set up their homes, they will have a collection of ornaments that were picked out especially for them over the years.


Want more details about this and other DIY projects? Check out my blog post!
Comments
Join the conversation
2 of 5 comments
-
Thanks Hannah. It's a fun tradition.
-
This is so cool. Your red, silver & white display is lovely !!


Frequently asked questions
Have a question about this project?