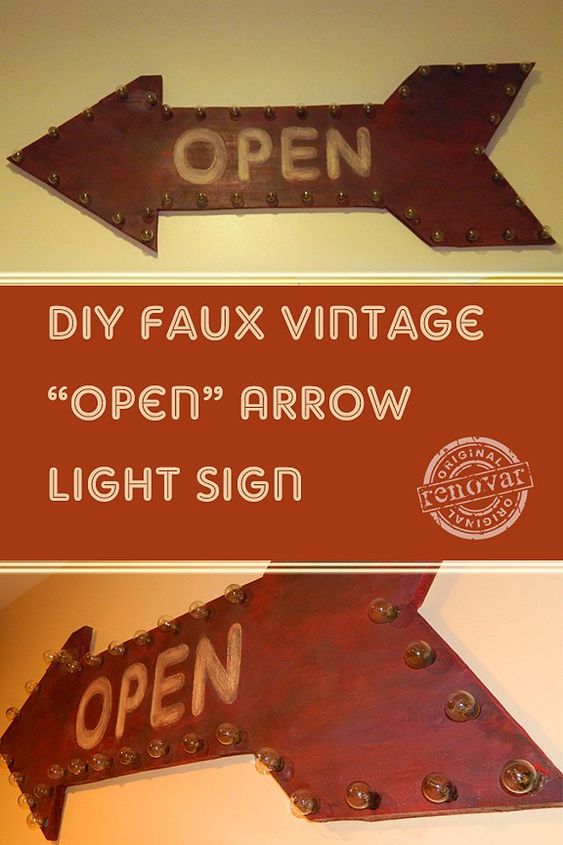
How to Make a Faux Vintage Arrow Light Sign

by
Renovar Design - A Wife, A Husband & A Hammer
(IC: blogger)
Here is a how-to post on how to make a vintage-looking ARROW for your home decor'.
It is time for another monthly themed furniture refresh! While my Faux Vintage Open Arrow Sign isn't exactly a piece of furniture. It is also not what was intended. No, I had actually been working on a kitchen table and chair set for several months. I had even hand painted the top of the table to coordinate with the fabric I had chosen.
I started with a premium piece of plywood. My husband and I created the arrow in photoshop and converted it to a jpeg file. Using a projector and level, I projected the arrow onto the wood which made tracing a breeze.
The next step involved teaching my 16 year old daughter to use the jigsaw for the first time. I enlisted the help of my husband, Marco, for photo-taking so I could make sure she was safe and also that the wood was stable. She handled the jigsaw like a pro. Certainly, she should've been wearing goggles, however, she could not see well and it made her nervous. So, we went without. New, clearer, teen - friendly safety glasses are on our shopping list. (It was raining when we started which was why we cut the piece indoors. In our living room to be exact! DIY BLOGGER PROBLEMS)
After the arrow was cut, I used the drill and cut out holes in the areas pre-marked. Unfortunately, in the corner area, the battery started to die and it cracked the piece. I cried a little bit at first out of frustration, not even going to lie. However, I am a strong willed and determined person who can make lemonade out of lemons! So, I wiped off my tears and rolled with it. Moving forward and knowing that I was going to need to see where I had the letters outlined I covered them in Vaseline. Why Vaseline? Paint won't stick to the Vaseline and it will keep the letters outlined for me without having to use vinyl. TIP: This is a great alternative for all of you crafters out there who don't have vinyl cutting machines such as a Cricut or Silhouette.
Then, I moved outside to start the painting process. First, black spray paint around the edges. Then red over the entire arrow.
Then, back inside for more painting. This process was more detailed and involved sanding, spackle, and several layers of multiple colors of acrylic craft paint and multiple layers of paint to give it that aged patina that I was trying to achieve. Now, this is the moment when I realized that my tears were silly and my sweet husband actually did make me lemonade. Crystal Light lemonade. Lol. Because the broken corner just added to the aged appearance of the arrow.
The final process was using old headlight bulbs that we found in my husband's grandfather's garage after he passed away a few years ago. It is a really neat collection and worked great for this project! My oldest daughter and I went through them and picked out the clear ones and hot glued them from the back of the board into place. If you want, you could use new lights and make this a functional piece that actually works and lights up. I wanted to re-purpose something old and make into something new with a memory of my husband's grandfather attached to it - so this is what worked for us.
After hanging on the wall in our entryway way, it points to the kitchen which, when it is remodeled, will be in a vintage diner style. The sign points the way to indicate that the kitchen is open & friends and family are always welcome!
Enjoyed the project?

Want more details about this and other DIY projects? Check out my blog post!
Published December 7th, 2015 12:18 PM
Comments
Join the conversation
3 comments
-
-
-
 Rachel Rae Prindle
on May 17, 2020
This is exactly my kind of art... love that you used those old lights ! That made it so special! TFS have a blessed day 💜🤗
-


Frequently asked questions
Have a question about this project?