


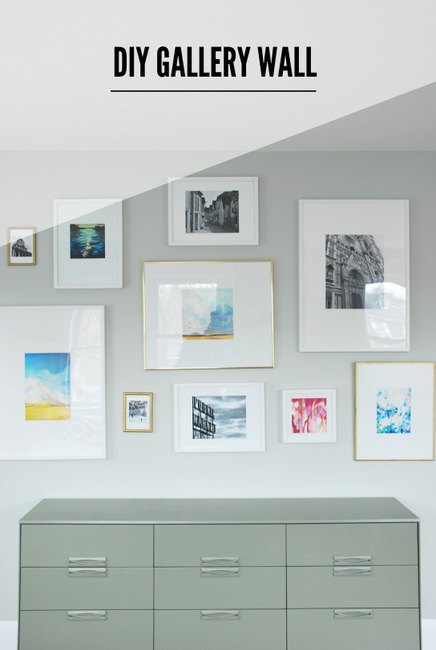
Gallery Wall + DIY Mattes for IKEA Ribba Frames
2 Materials
$100
2 Hours
Medium
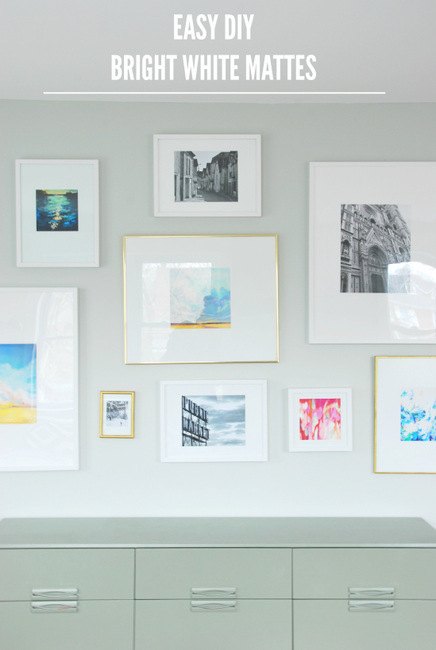
The latest project to get ticked off the list in our pad has been to finally get some art up on the walls in our master bedroom. And you guys? Not only do I have some tips for how to hang a gallery wall, but I also have THE BEST tip for getting perfect bright white mattes for IKEA and other frames (with no cutting or pricey materials). Keep reading, you don’t wanna miss this one.
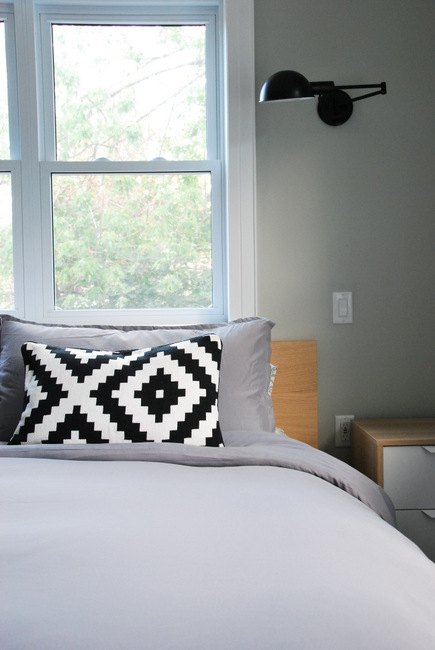
Just a reminder of how the room looked after we had painted it a soft green gray and added in bedding…
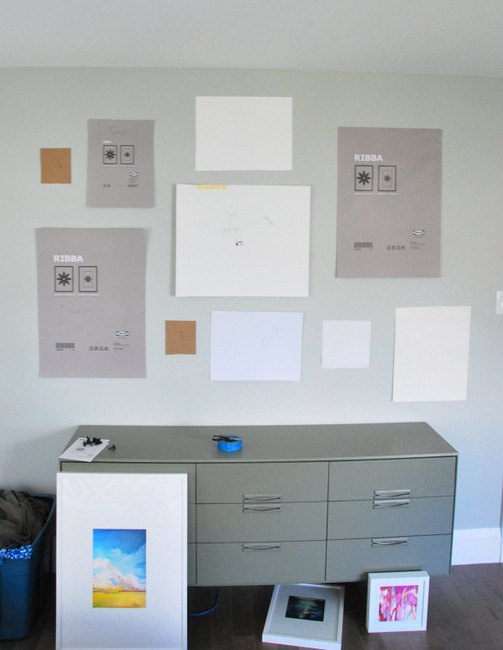
And the opposite wall, which had a whole lot of nothing going on.
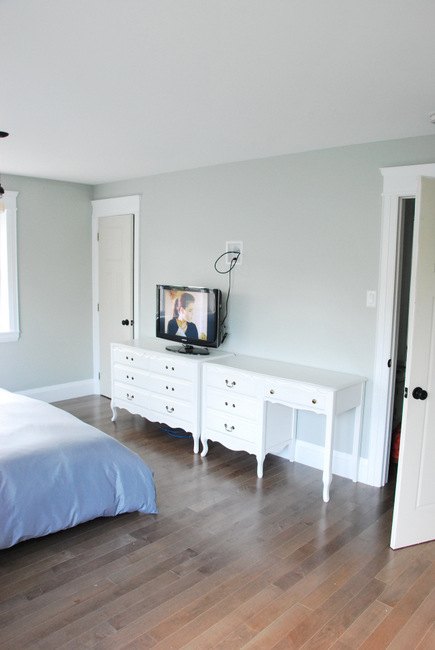
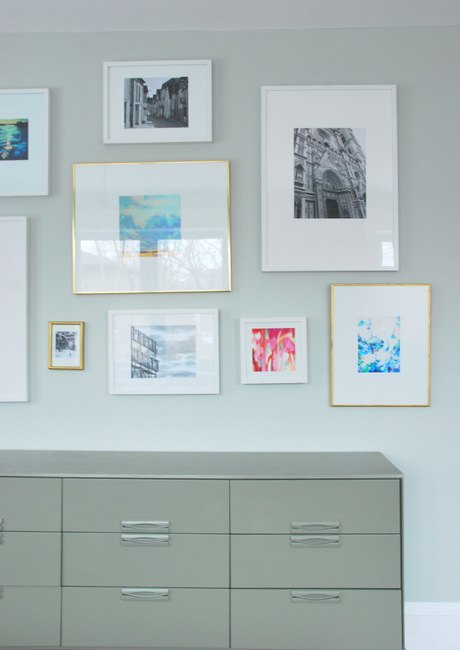
We had those old white dressers as a stand-in, but I found a Kijiji dresser that was a better fit and for the space and overall aesthetic. More info on that find in a future post! Back to the artwork. I had hummed and hawed about hanging either just a few really large statement art pieces here or doing a gallery wall. I chose gallery wall for a few reasons — 1) we had a bunch of frames already from the house pre-reno (a mix of white IKEA Ribba frames and some vintage ones I had sprayed gold), and 2) there are a few other spots just outside the bedroom where I plan on hanging some larger pieces, so I felt like it made sense to go gallery style in here.
My tried and true method for hanging a gallery wall:
1 // Cut out some sheets of wrapping paper to the size of each of your frames, or use the sheets from within the frames if you have them.
2 // If you already have the artwork you’re going to use, write down a quick description on each cut-out sheet of paper so that you make sure you don’t have too much of one thing too close together. For example – when doing a mixture of art prints and photos, you want to make sure that they are spread out appropriately and not all the photos on one side, or all the black and white things clumped together.
3 // Hang up each sheet with painter’s tape on the wall, continually stepping back and re-assessing and adjusting as you go, until you eventually get the layout you want.
4 // Once you have the layout, simply take down each sheet one at a time as you hang the frames up on the wall.
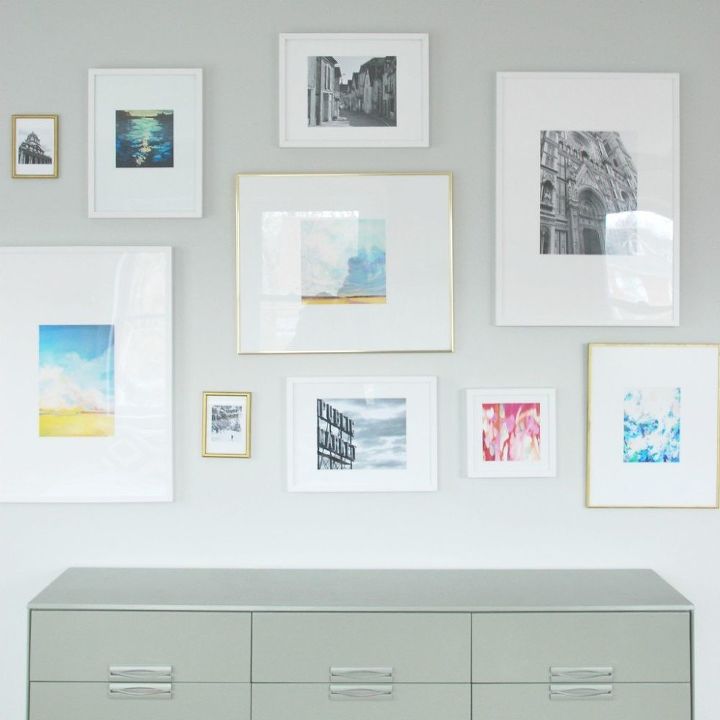
How to Choose Artwork: You can go in tons of different directions for a gallery wall. For this particular one, I wanted to do a mixture of art pieces and photographs. I have been swooning over so many of Minted‘s pieces lately and knew I wanted to incorporate some of them. Have you guys browsed Minted before? Warning – you will get lost in there for WAY too long. So much gorgeous work, it’s crazytown. I chose several pieces in a few different sizes — click here to see more on choosing artwork.
OK so are you ready for this mind-blowing matte trick? The hands-down BEST trick for budget-friendly, matching, bright white DIY photo mattes: Click through to the post and check it out!

Want more details about this and other DIY projects? Check out my blog post!
Comments
Join the conversation
2 of 7 comments
-
Arrangement of triplicate

-
Arranging and hanging of an asymetical group of artwork is one of the most challenging exercises in terms of aesthetics. You did a great job; if you go back to the pic where there were just the liners and paper rectangles taped on the wall, you can see what you are looking for: balance between the different sizes, shapes and spacing. If you aren't sure what you are trying to see, just gaze at this pic and notice how your eye naturally swims around from one rectangle to another, taking all of it in. You aren't drawn to look outside this "pool" of shapes, but rather are constantly refreshed by the next, and the next and the next. No single one is taking centre stage and dominating the group - doubly remarkable in this particular set-up, where there is a large picture very nearly dead centre of the whole arrangement. This is extra tricky to pull off, because there is a tendency for centred items to act as a "bulls-eye" and really command attention. For this reason, I recommend that 'junior designers' out there start with grouping a pleasing set of 3 when dealing with multiple items like this, and then try building a dynamic but balanced arrangement onto rhis 'base" ... very well executed!!!


Frequently asked questions
Have a question about this project?