


DIY Filing Chest

by
Build Basic
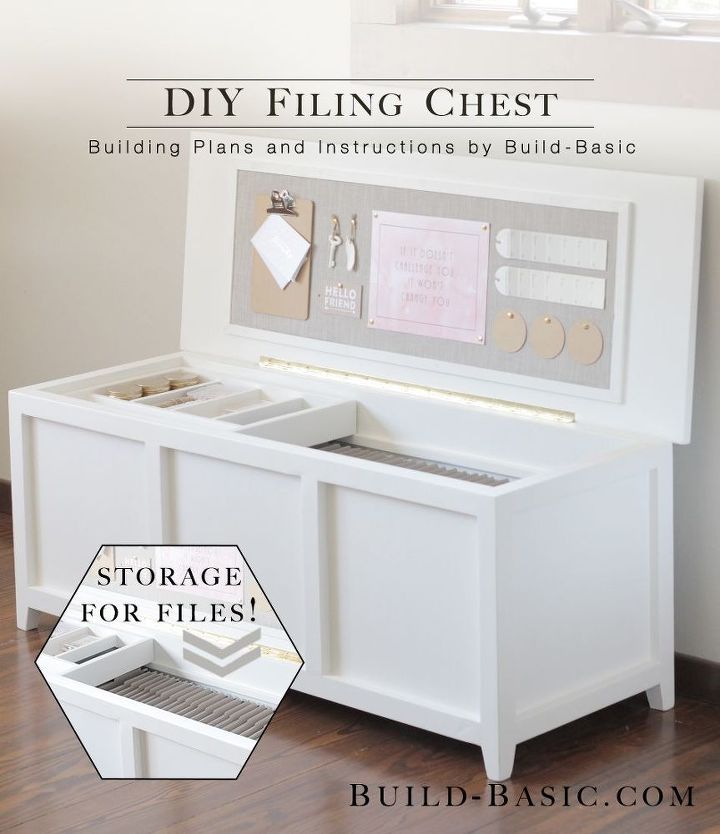
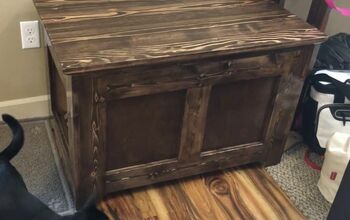
Our home office is a small space, and our tall, boxy filing cabinet always made it feel extra crowded. To create a solution that didn't sacrifice on storage, I built a long, low chest that doubles as a bench! Inside, there's room for nearly four feet of hanging files, a sliding tray for office supplies, and a bulletin board for reminders and notes.
Today I'm sharing a quick view of how the parts come together, but you can always hop over to my blog, Build Basic, using the link below to see each detailed step, and a full cut list for this project!
Today I'm sharing a quick view of how the parts come together, but you can always hop over to my blog, Build Basic, using the link below to see each detailed step, and a full cut list for this project!
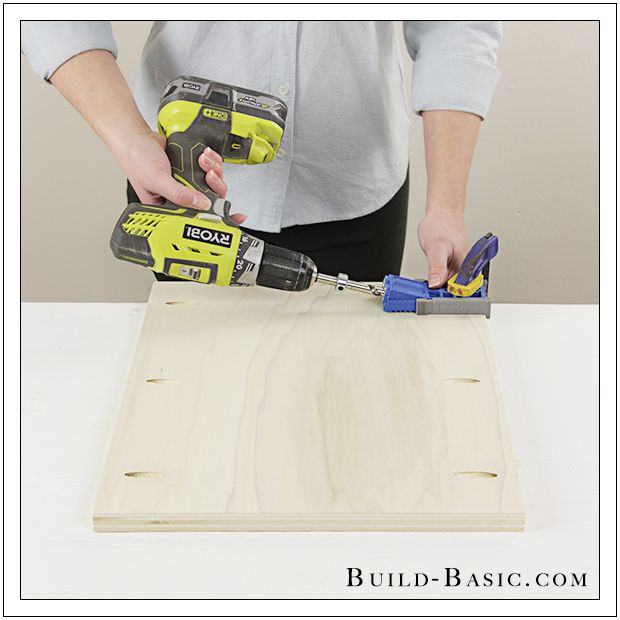
The first step is to cut all the parts. Next, drill pocket holes along the edges of the plywood and ends of the 1 x 2 pieces.
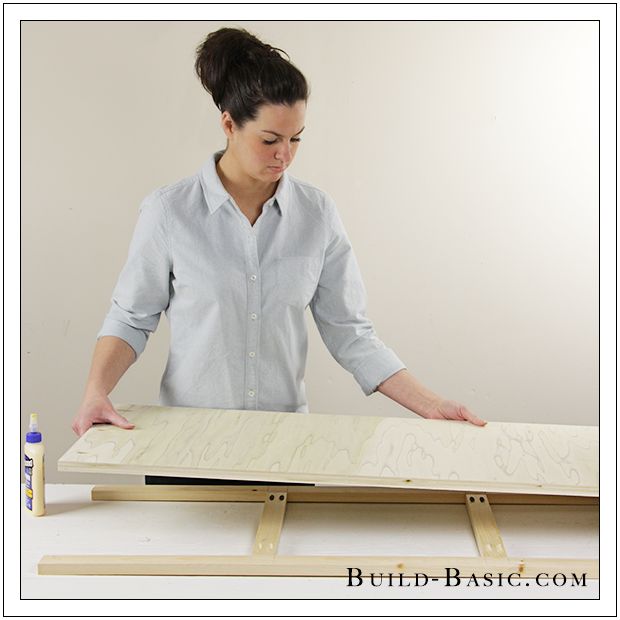
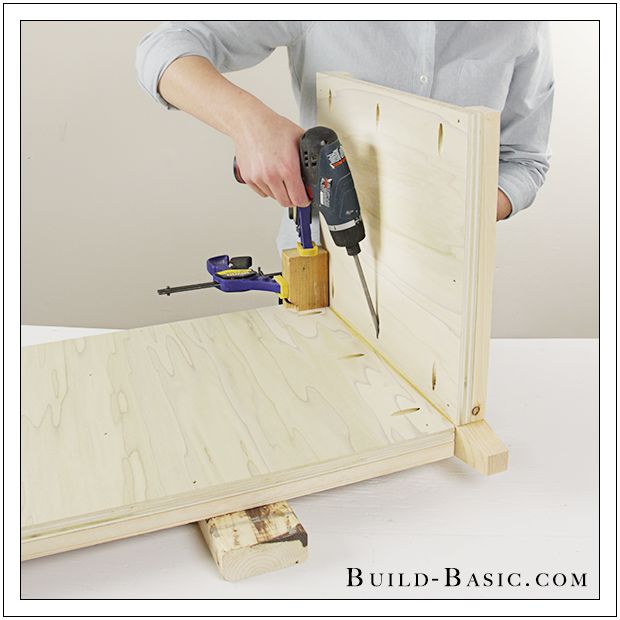
Assemble the 1 x 2 frames for each wall, and then attach a piece of plywood to each frame to complete the wall.
Once each wall is assembled, screw them to the 2 x 2 legs using the pocket holes drilled at the beginning of the tutorial. Install 1 x 2 cleats between the front and back walls to secure the box, and then insert the plywood bottom.
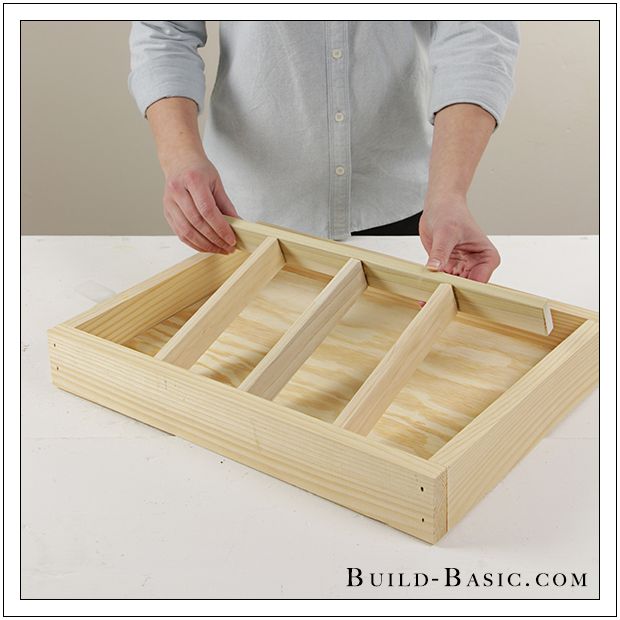
Assemble the office supply tray using 1 x 3 boards around the edges, and ½ x 2 "hobby boards" on the inside as dividers. Add a strip of molding to the inside of the box along the front and back wall to support the sliding tray.
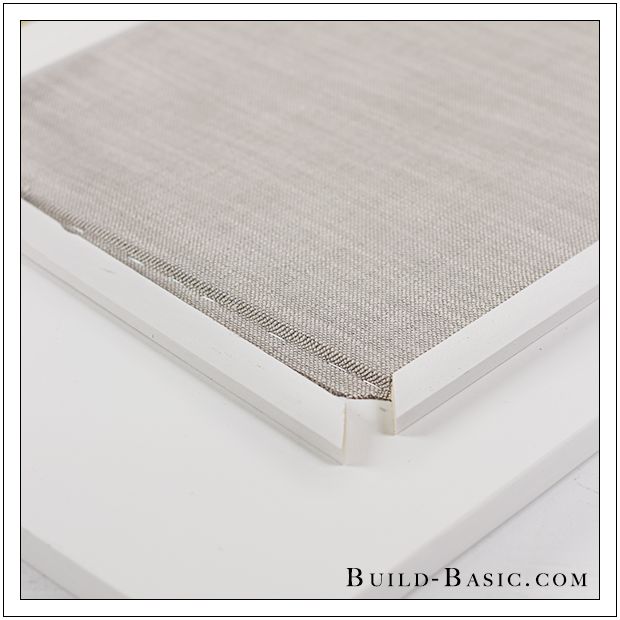
Now is a good time to prime and paint all the parts. I also applied a clear coat so the white paint wouldn't scuff. Once the pieces are dry, attach a piano hinge to the underside of the lid, centered along its back edge. Center a few squares of cork board on the underside of the lid. The cork board can either be left exposed, or covered with fabric.

If the cork board gets covered with fabric, I recommend finishing the edges with a piece of ½ x ¾ inch trim board.
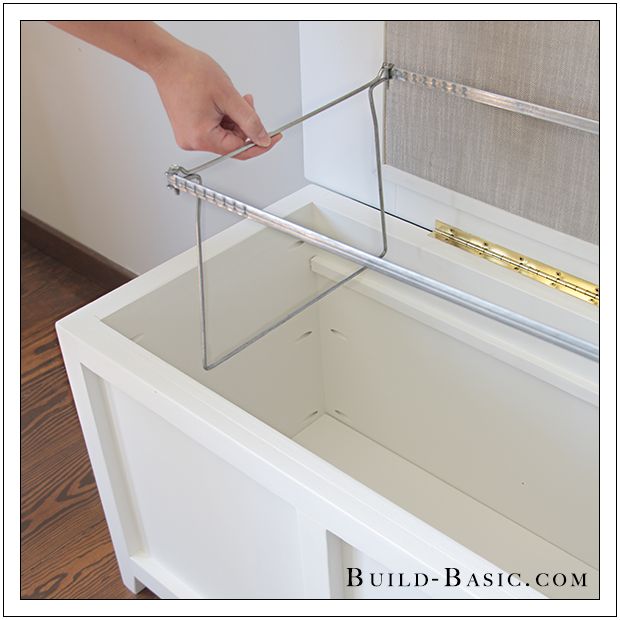
Attach the piano hinge to secure the lid. For safety, a lid support hinge can be added as well. Lastly, set a rack for hanging files and the office supply tray into the box!
I hope you enjoyed this project! To see each detailed step and a full cut list, click over to my site, Build Basic, using the link below! Thanks for reading!! --Jenn
Want more details about this and other DIY projects? Check out my blog post!
Comments
Join the conversation
4 of 33 comments
-
Great idea! I don't have the proper saws to cut that many pieces of wood but I wonder if I could upcycle an old chest or small low dresser, reattach the top to have a piano hinge...? Only need to find the right piece of furniture to find out! Thanks for the idea. I need this big time.
-
Well done, I remember keeping a Martha Stewart magazine that had a similar concept. This would work well, in a built-in banquette too.


Frequently asked questions
Have a question about this project?
Hello. I have a vintage chest i want to turn into a document storage, I have work portfolio and personal docs I am tired of keeping in plastic boxes....any ideas on how not to just "pile" them on this vintage peace? Its thw size of those old medium size travel chests and would look nice as a secor peace...its black with golden locks.... thanks
The question I have is about all the projects. I know I'm a dummy, but is there a way to navigate thru and find projects that you have discovered and the could not find the way back to a particular project. Is there a way to print out the directions on how to do the project?