


Vintage Book Wreaths - a Fun Decoration for AFTER Christmas
It's that awkward time of the decorating year where you want to take down your Christmas decor, but it's way too early for spring. What's a girl to do??? My glittered book wreath project is perfect for your front door or on your mantel! It's still winter looking without looking like the holidays!
A few of my girlfriends and I had a Girls Night Out to make glittered vintage book wreaths. Ok, so it was a Sunday afternoon out, but whose keeping track really? Lol
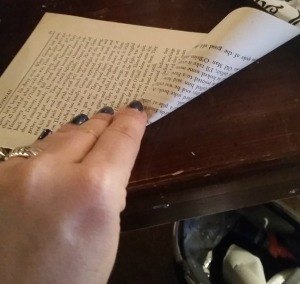
We started with an old book that my friend Samantha purchased at a thrift store. The pages weren’t white-white which is exactly what we were wanting! Another idea would be to use old sheet music or use one with white-white pages for a “snow” themed wreath. Love.
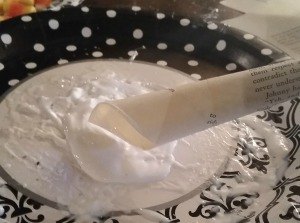
You probably SHOULD wait until that glue is all set and lovely and whatever, but again….the impatient crafter in me took over and I didn’t wait long before I was ITCHHHHHHHHING to glitter the tips. I dumped Mod Podge on a paper plate and dipped the edges of my rolls in the glue. The glue will go on thicker and thinner in spots and that’s ok. Remember perfection is for calculus, not for crafts.
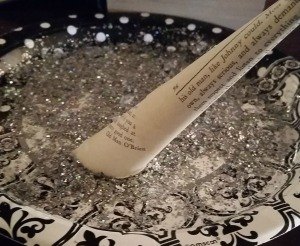
After glueing your tips, immediately dip the rolls in another plate with your glitter. I used silver glitter for my wreath because in addition to be an “impatient crafter” I am also a forgetful one and forgot my GOLD glitter. Ug. I borrowed Samantha’s silver glitter which turned out amazing, but my plan had been to use the gold and I think GOLD on VINTAGE pages would look dynamite. Food for thought.
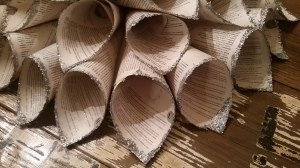
I wanted to show you a closeup of the glitter. See….perfectly imperfect. Just get it done =) No one will closely inspect it.
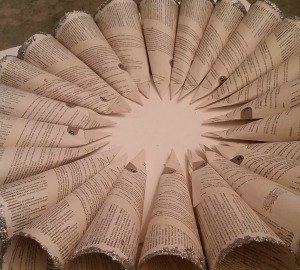
So after rolling, gluing them closed, tipping the ends with glue and glittering all 1,286,548 cones…..it’s time to lay out your wreath. We used a piece of white foamboard from Hobby Lobby. They come in like rectangle sheets approx. 8.5 x 11, already that size and 2 pieces in a pack.
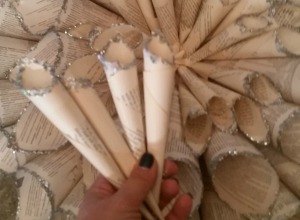
After the outer, bottom ring is done, start the inner circle and hot gluing those on to the top of the bottom ring. I got that 2nd layer done and saw that my friend Riki had used a SMALLER book for her inner, inner circle to make smaller cones and I loved
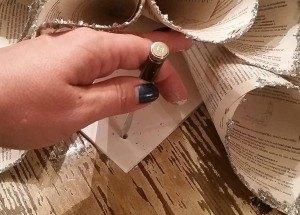
When all finished, I remembered that I should have put a hole in the foamboard to hang it from. Oopsy daisy. THIS is the reality of crafting! So, I used a letter opener to poke thru the foamboard and ran jute thru it so I can hang it on a wreath hanger.
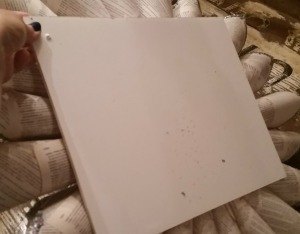
You can see the hole by my thumb that I ran the jute through to hang it.
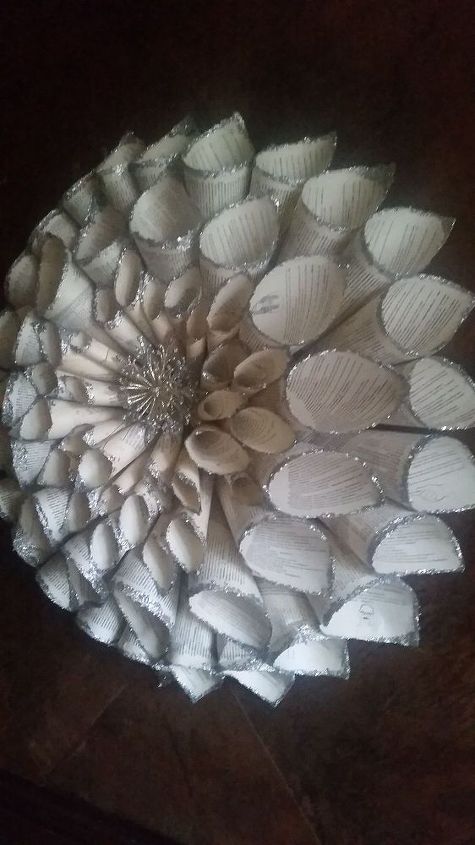
I hot glued a Hobby Lobby Christmas ornament to the middle and called that baby d-u-n…..done! The ornament is a snowflake, so it doesn't look too Christmas-y to me after the holidays.

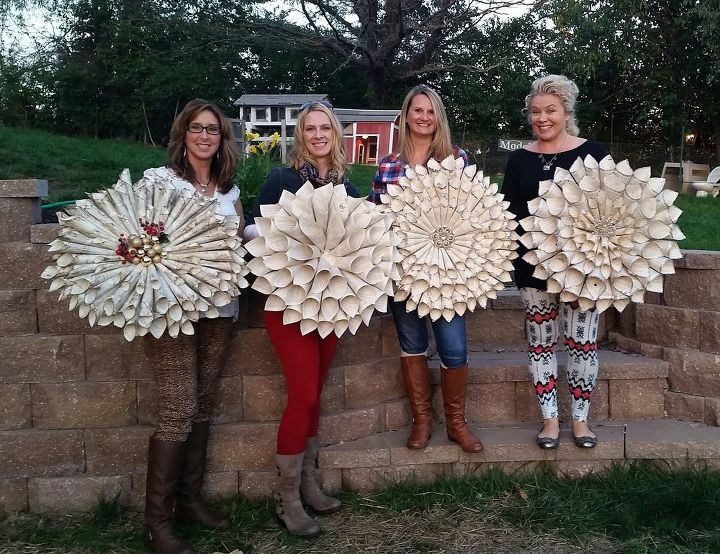
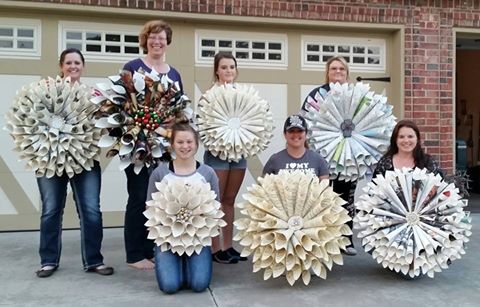
It was so fun to see how different each of ours turned out! You can see me on the end. Next to me is Riki who did her cones “tighter” so they look long and lean….every woman’s dream. Micayla didn’t put anything on the middle yet and she opted out of the glitter action. Consequently, we are no longer friends. Ha. JK. But seriously, how can one opt out on glitter???? And on the other end was our crafting host Samantha who wrapped her cones tighter yet and “inked” the edges of the cones
Then one of my FB fans named Wendy Nelson messaged me this pic of the crafting party they had based on my blog post. Seriousssssssssssss pretty stuff going on here too! Aren’t those amazing???

Want more details about this and other DIY projects? Check out my blog post!
Comments
Join the conversation
2 of 85 comments
-
OMGoodness!! Going to have a finger food, craft party and make these for all of my children's houses. I love this idea and it is beautiful!
-
Looks like a fun Sista Craft...if I can ever get her to come to my place!


Frequently asked questions
Have a question about this project?
Just too adorable! Absolutely beautiful! Thanks for sharing...
I think this amazing. What size books did you use? I love yours the most! Just a side note: If trying to make a perfect circle in the middle, I usually use a cup, saucer or plate as my guide. I just lightly pencil the edge like a stencil. Again I appreciate you sharing this.
Love the glitter! Did you just go with the size of the book pages, then go smaller with the ones in the middle? Also, have seen it done w/ round pizza box backing, rather than square foam core, but, hey, whatever works!!!:)