


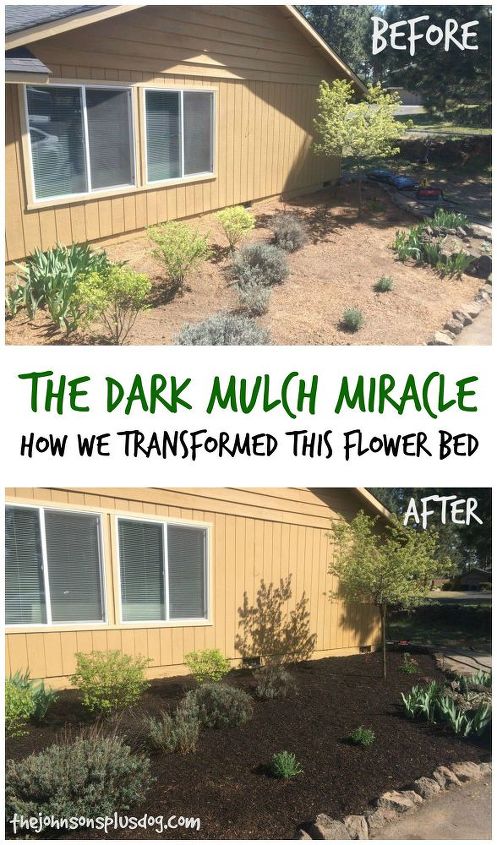
Dark Mulch Miracle: Flower Bed Transformation
If you love this project, grab your quick start DIY guide & subscribe to our blog!
We’ve been in our fixer upper since April 2015 and moving slowly through some major renovation projects on the interior. Today I’m going to share with you one of the first things we did on the house and tell you why I call it our “Dark Mulch Miracle”.
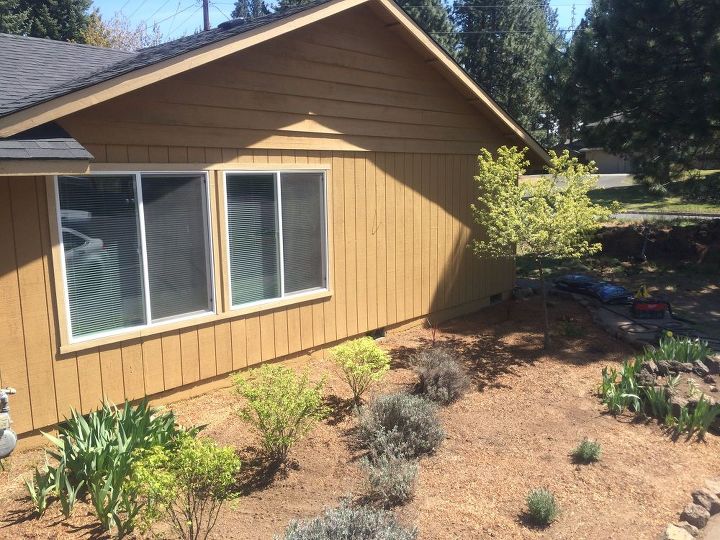
It had only been a few weeks since we moved, boxes were everywhere, we had loads to do on the interior (still do) but we felt like we HAD to take a weekend and work on the front yard. We were the obvious black sheep on our little cul-de-sac. Of course, we didn’t have a fence so the whole world could see this wonderful field of weeds.
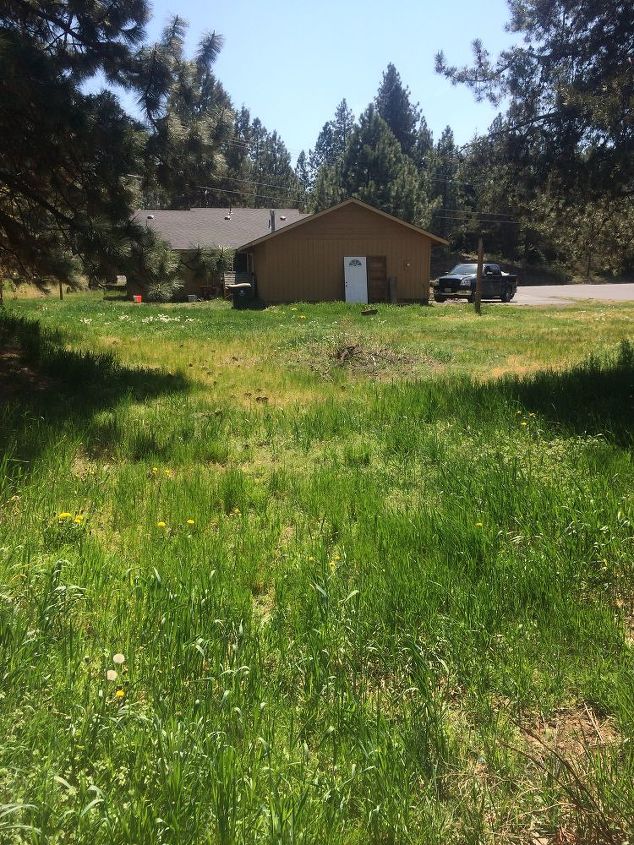
There was trash all around the house we had spent time cleaning up, but it still looked just horrible. So we took a much needed break from the inside and set our sights on trying to make this front flower bed look more presentable. We just wanted to spruce it up a bit without pouring tons of the time and money into it. We were looking to do a flower bed transformation.
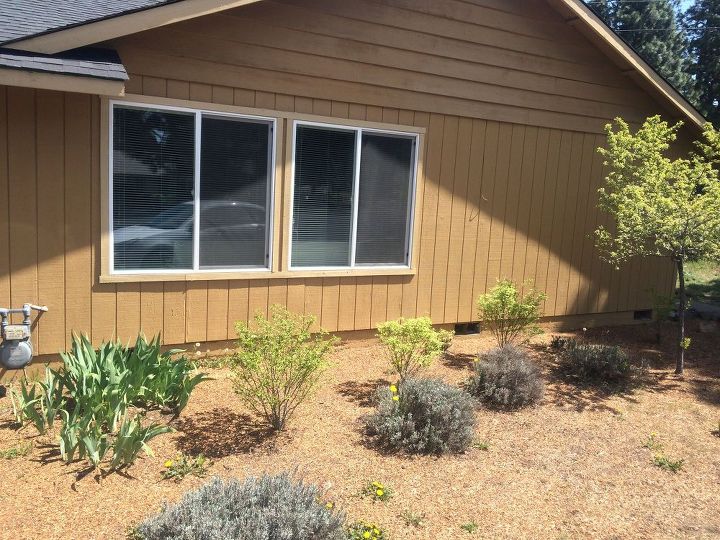
Now you know what we were dealing with. As if a backyard full of weeds wasn’t enough, we got lucky and had more weeds to deal with in the front yard. Now this was pretty much the only landscaped part of the entire lot and it’s not even pretty. The plants were planted in weird spots that didn’t look right. So we took a trip over to Home Depot and got some goods. Lots of fun new plants, some succulents, some tools (can you believe we didn’t even have a shovel?) and TONS of black mulch. We used Scotts Nature Scapes Classic Black Mulch. At the store I was drawn to it because I just thought it looked cool. I had seen it used in some of the newer neighborhoods around Bend and thought it looked good.
We started with removing all the weeds… now that was fun. After hours of that, we started planning out where the plants would go, knowing that some of the plants that were there were going to need to be moved or removed completely.
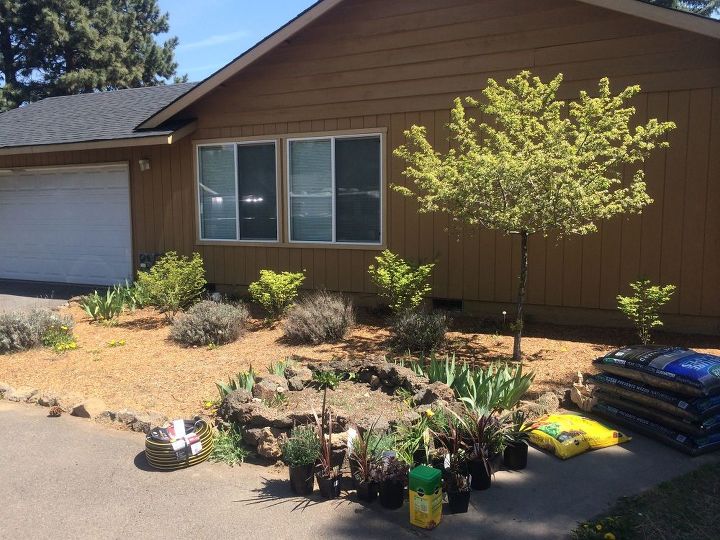
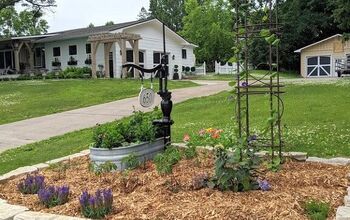
This is what it looked like after we moved plants and planted all the new ones. Those two new little guys in the front of the planter are lavender. We planted some cordyline in the back behind the tree. Over near the walkway we planted a day lily, 2 stonecrop sunsparkler cherry tart, and 1 sandwort ground cover Those ones are in the shade in this photo so you can’t see them until a later photo. The existing plants were (starting from the back and working your way to the front of the bed): Iris bulbs (Logan’s not a huge fan of these so we may end up ripping them up and giving them to someone else transplant eventually), 3 Burning Bushes, 4 established lavender plants (they don’t look like much here but these were oh so pretty this summer and I didn’t even think to snap some photos so have to wait til next year!) and a tree (still have NO idea what kind of tree this is, if you know please let me know!). It looked better, but not quite great. At this point we had all three sets of neighbors come over to either thank us for finally getting rid of some weeds or offer us their advice. The next day we woke up and started spreading the dark mulch and I was honestly SHOCKED with how the flower bed started transforming before our eyes.
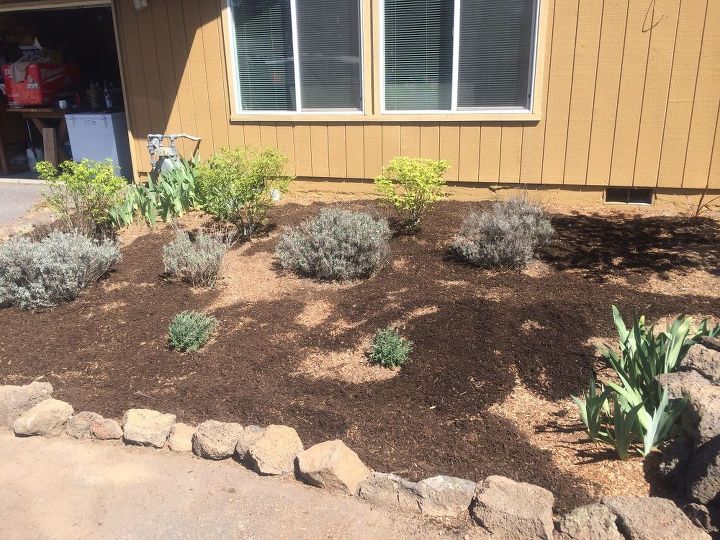
We went through 6 bags… we had to go back to the store for more because we started with only 4.
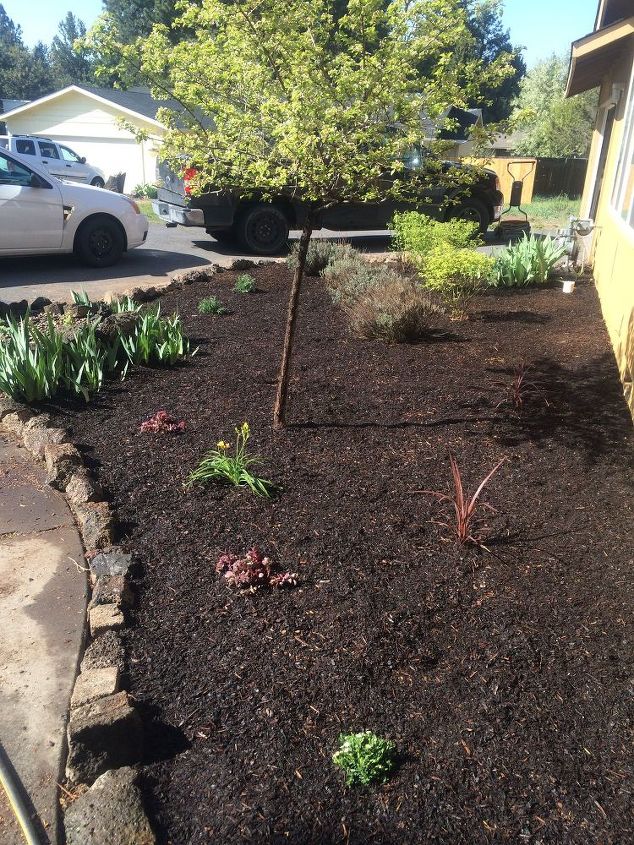
Wow, what a shock, right? The dark mulch did WONDERS on making the space look refreshed and upgraded. I think it really makes the plants “pop”, don’t you? I’m so sold on dark mulch that it will be all we are using in the future.
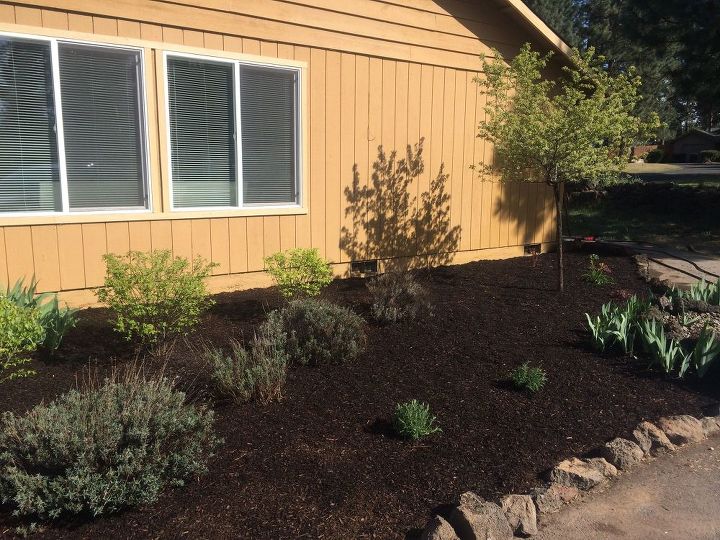
5 months later, this garden bed still looks great. We’re approaching the end of our season (it’s getting down to 36 degrees at night here, say WHAT?!) so not much sure how much longer it will stay looking as pretty but, I sure have enjoyed it so far this year.
Did you like this tutorial? Check our other landscaping and gardening posts in the archives here!

Comments
Join the conversation
-
Amazing ! Black Mulch is all I ever use as it gives a contrast to all the colors from plants and flowers without adding more colors. Our neighbors use red which is not a look I care for as it just lookes like dead leaves to me. Black does make colors pop. I also love white flowers againts it in a contrast garden. Just white flowers. Enjoyed this. Well done!
-
What about weed poppping up after a year or so? I live in FL and cannot figure out how to keep weeds out of flower beds.


Frequently asked questions
Have a question about this project?