


FROM STORAGE CLOSET TO A DREAM BUTLER'S PANTRY
Rarely do I start a post with a before picture, but then again, it's not every day I have such a transformative renovation. I've wanted a butler's pantry for the longest time and when we decided to move this past spring, it was high on my list of extras I'd love to find. While I didn't find a home that included an existing one, our home provided a golden opportunity - a space next to the dining room that I immediately envisioned renovating from storage closet to a dream butler's pantry.
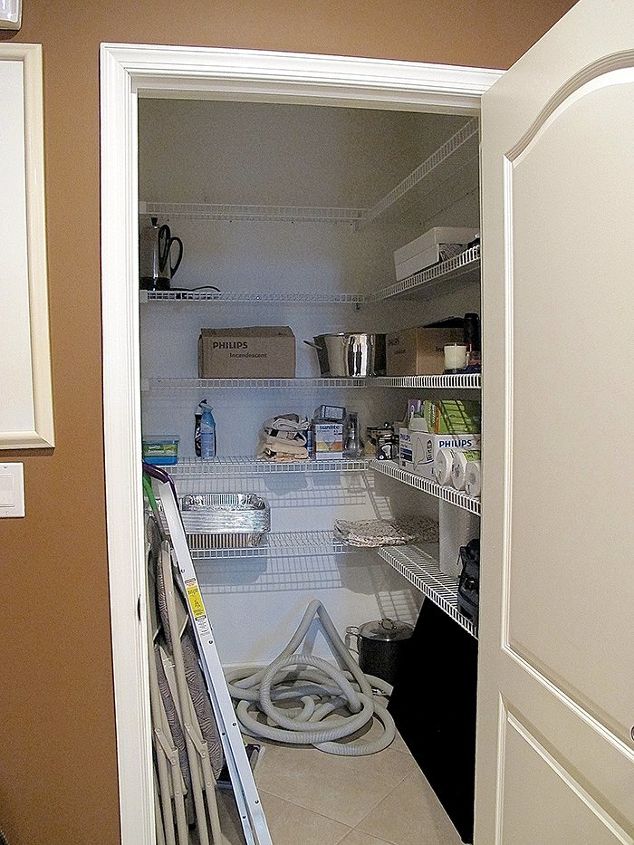
This is the closet as it looked before we moved into our home. Given that we already have a pantry closet in our kitchen and plenty of other storage space, I didn't think it was necessary to have a closet in such a prime spot to house lightbulbs and paper towels. It's proximity to the dining room also made it the perfect place to gather my many sets of dishes and other tabletop accessories. With my vision clear, I set about making it happen.
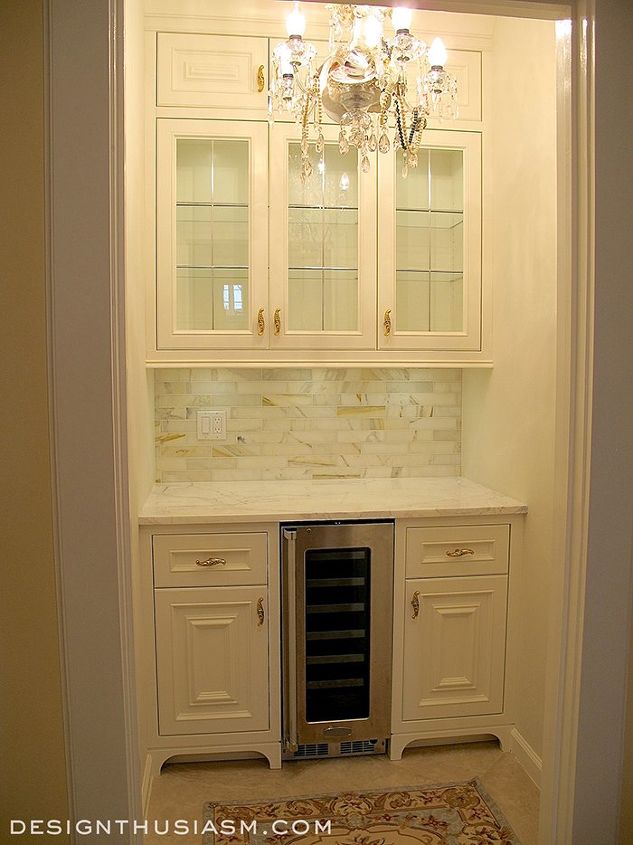
Here's a glimpse at the final product before it was styled and decorated. I might have saved this for the end of the post but I wanted to show the before and after right next to each other, so you could get a real feel for how much it was transformed. I've decided to do this reveal in two parts to avoid a very long post, so today I will cover the renovation and my next post will show what the room looks like now that it's completely done with the 'pretty' added in.
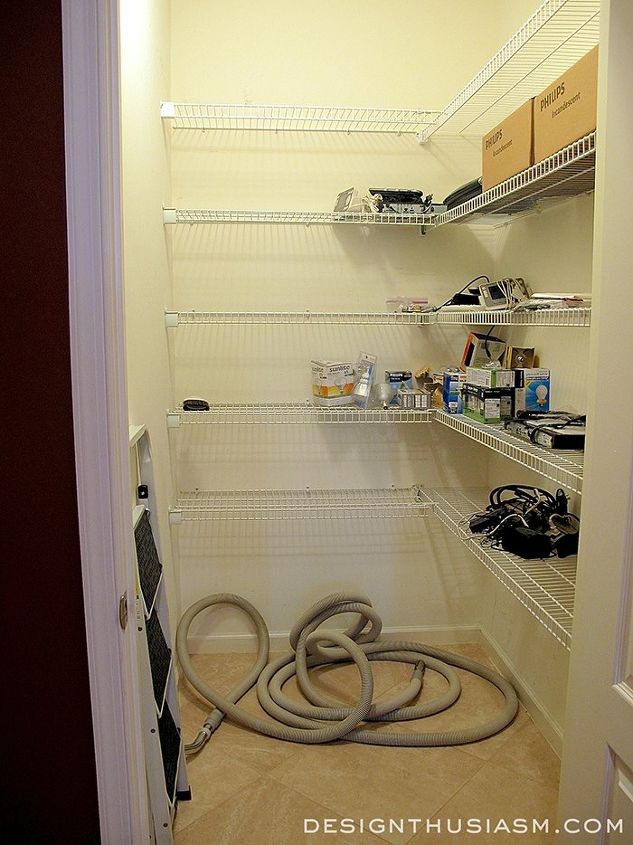
We started with this basic closet when we moved into the house. I saw it's potential right away and frankly never even looked at it as a closet that ever existed. To me it always was what it would ultimately become. I saw past the cheap shelving, the off center utilitarian light fixture and the builder's grade door. Communicating that vision to others, however, was where I needed to concentrate. I couldn't understand why people kept asking me why I wanted to put cabinets in the closet.
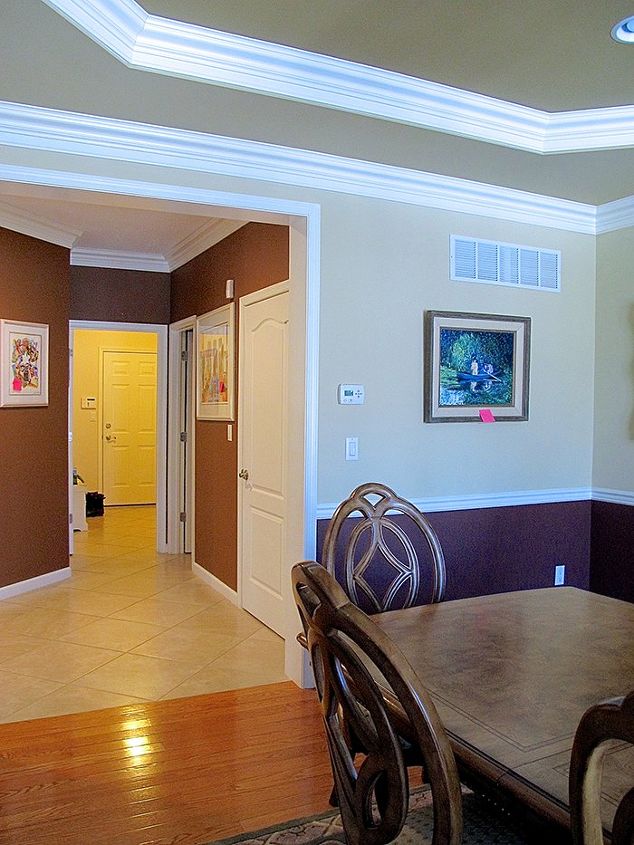
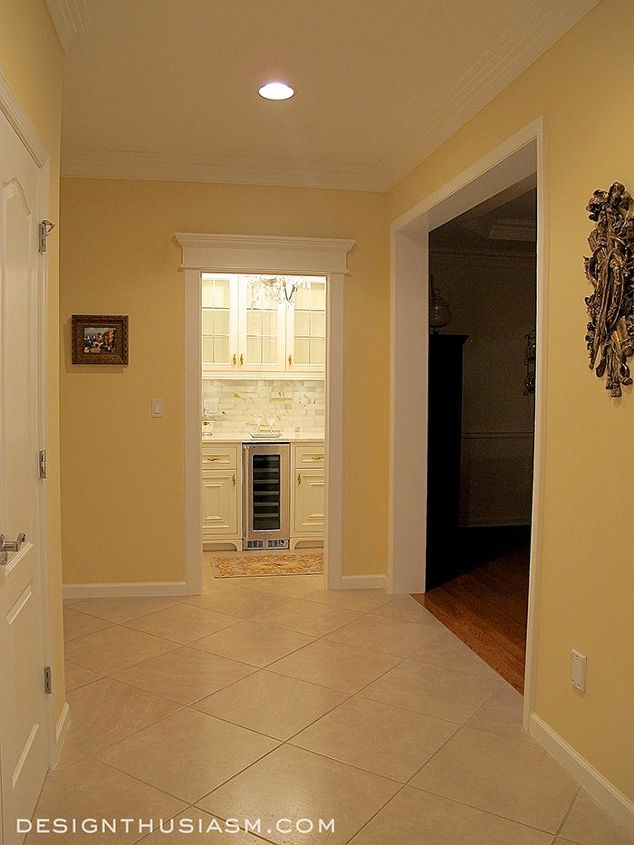
To give you a sense of context, here's a view towards the closet, as seen from the original dining room. (You can also see the dining room update here: A Rosy Dining Room ). The closet is the closed door that's right outside the dining room. It's very convenient in its location adjacent to the room where we entertain so often. It also can be seen when one enters the front door (not shown) and looks to the left down the long hallway. I loved the idea of looking down that hall and seeing a pretty serving space.
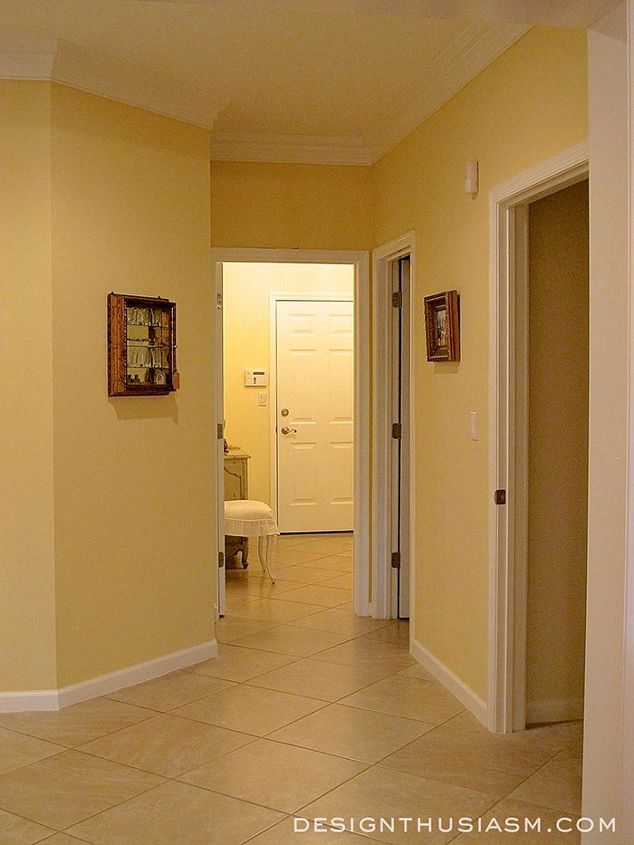
Once we moved in and painted the walls that same view changed to a lighter and cheerier look.
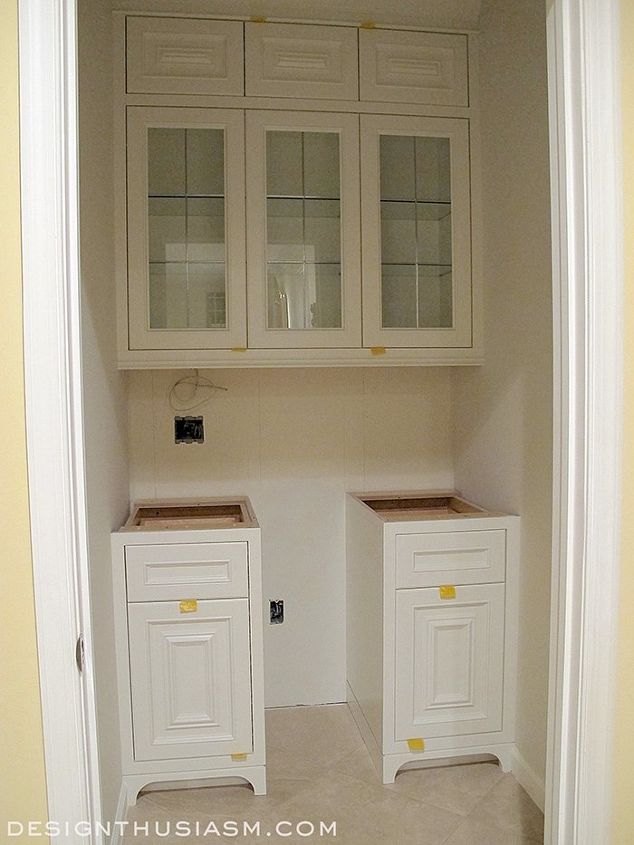
The first thing to go in was the cabinetry and the layout was as simple as could be. We ripped out the shelving and had cabinets made that would fit simply across the width of the former closet. The space is 51 wide, so I opted for three doors with glass panes above the counter and raised panel doors beneath it. We left the center open on the bottom to accommodate a small wine captain. For the finish on the maple cabinets I selected Benjamin Moore White Dove.
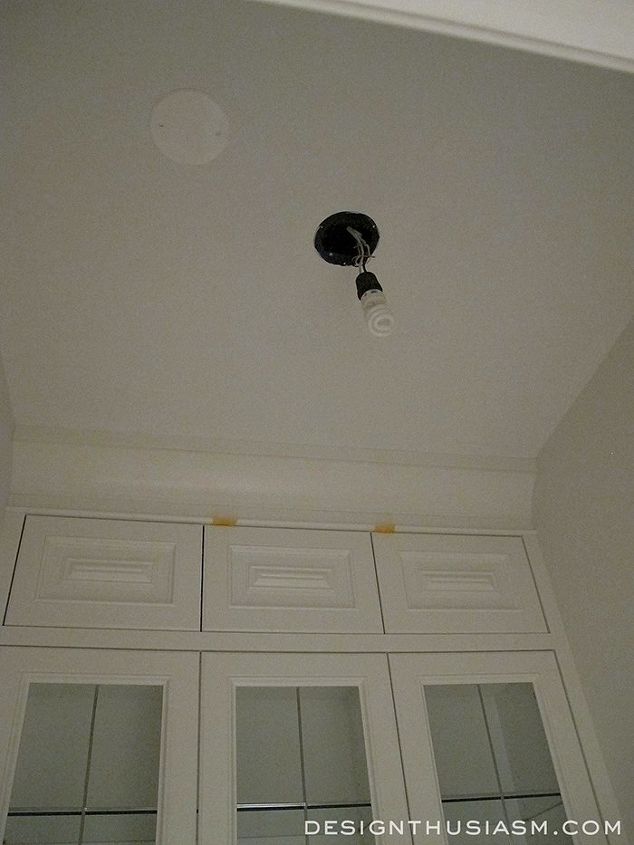
We needed to wire the space for the wine cooler and the cabinet lighting, as well as centering the curiously off center existing overhead. I knew exactly what fixture would go in here and it definitely needed to be centered.
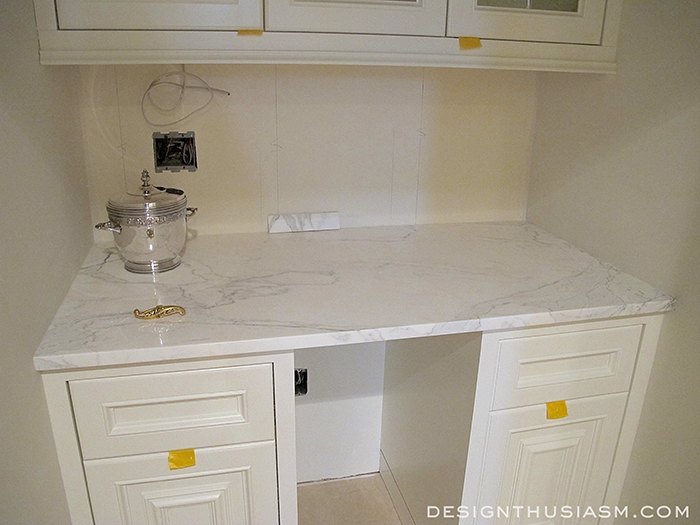
Next up was the counter and I knew precisely what I had in mind. I headed to a local marble yard where I found a 'remnant' of polished calacatta. I did think twice about the durability of white marble but I've been certain about this combination for so long that I decided not to sell out. The space is tiny and worth the risk to go for the material I had my heart set on. I do hope to re-do my kitchen soon in a very similar color palette, but perhaps in there I'll be more practical. For my tiny pantry however, I unabashedly followed my heart.
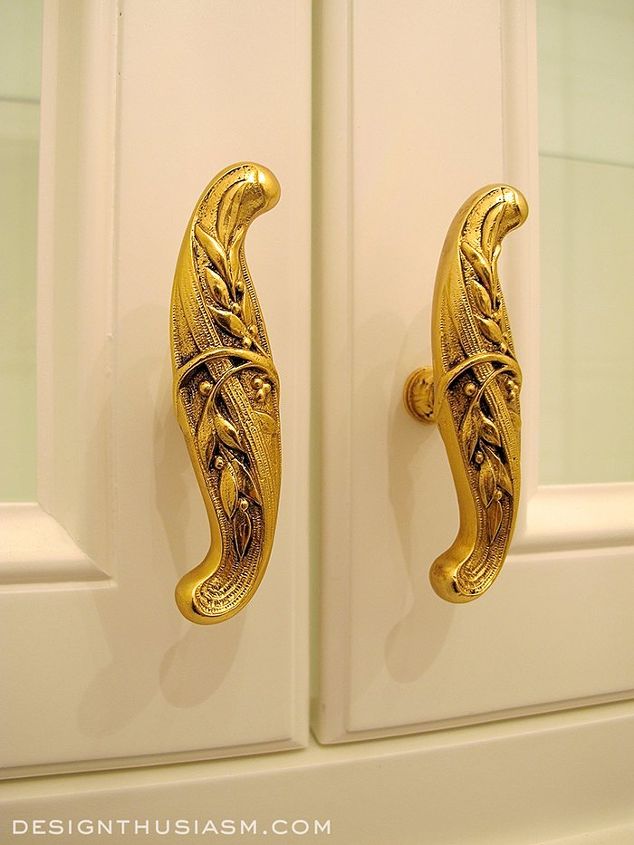
For cabinet pulls I went with a French design in a soft satin gold. The pulls are from the House of Antique Hardware, a company that was a pleasure to work with.
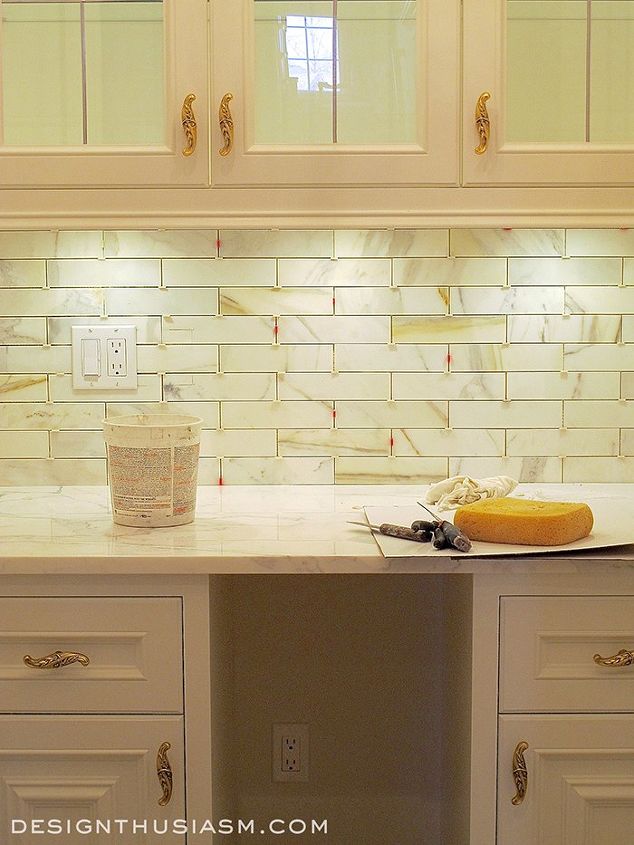
Delightfully, it was time to approach the backsplash, which again I knew unequivocally what I wanted (this was my favorite part). I chose an exaggerated subway tile pattern in calcatta gold marble. I love how the gold from the pulls brings out the warm undertones in the marble.
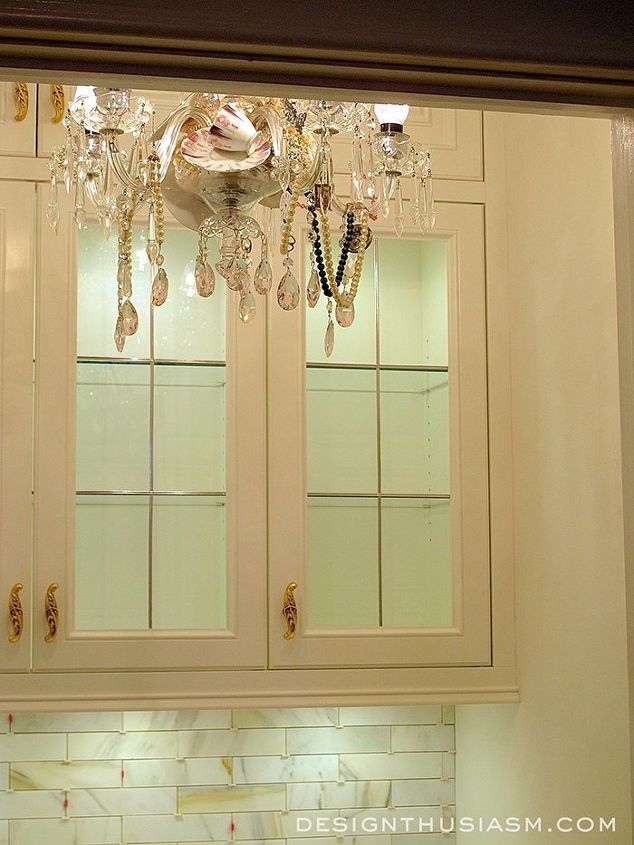
We put lighting inside the glass cabinets, as well as under cabinet lighting for the countertops. The cabinets have glass shelves and lead strips on the glass door panes.

Lastly, in went the wine refrigerator and it was almost time to toast our new butler's pantry!
The final touch was the moulding that was added around the door frame, to set the room apart from the surrounding doorways, add cohesion to the varying heights and emphasize that this new 'room' was no longer a closet. If you'd like to see the pretty things I used to style this little space and help it merge visually with the rest of my home, you can read that post here (or click the link below): 10 Gorgeous Elements for a French Styled Butler's Pantry. And someday this floor will be white marble, but that's for another day...

Want more details about this and other DIY projects? Check out my blog post!
Comments
Join the conversation
3 of 172 comments
-
Beautiful and well worth following uour heart on. Would love to see how the rest of your projects turned out, you have a lovely eye for design

-
I absolutely love what you did with the chandelier!


Frequently asked questions
Have a question about this project?